Diffuse Material
The OctaneRender® Diffuse material models the diffuse or scattered reflection of light from a surface that is scattered at many angles, as opposed to the OctaneRender specular material. If the surface is a smooth surface, the distribution of the reflected photons is hemispherical. When photons hit a rough surface, they are scattered randomly instead. The photons do not vary according to viewing angle, so these surfaces look almost the same regardless of the view. Such surfaces are called "Ideal diffuse (matte) surfaces" or "Lambertian surfaces." The directional semi-spherical reflection for the Lambert surfaces is often called "diffuse reflectance" or "albedo".
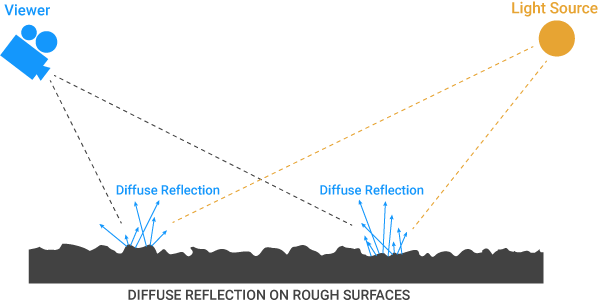
The above illustration is correct only when considering the diffuse channel. In reality there is no such thing as a 100% diffuse surface, of course. In general, all surfaces coexist with Diffuse, Reflectance and Transmission. Surfaces such as carpet, matte paper, asphalt, or fabric are balanced more toward diffuse properties than reflectance or transmission. Surfaces such as a piece of paper have both a reflectance and fresnel contribution, as well as sub-surface scattering (visible when held up to a light.)
|
|
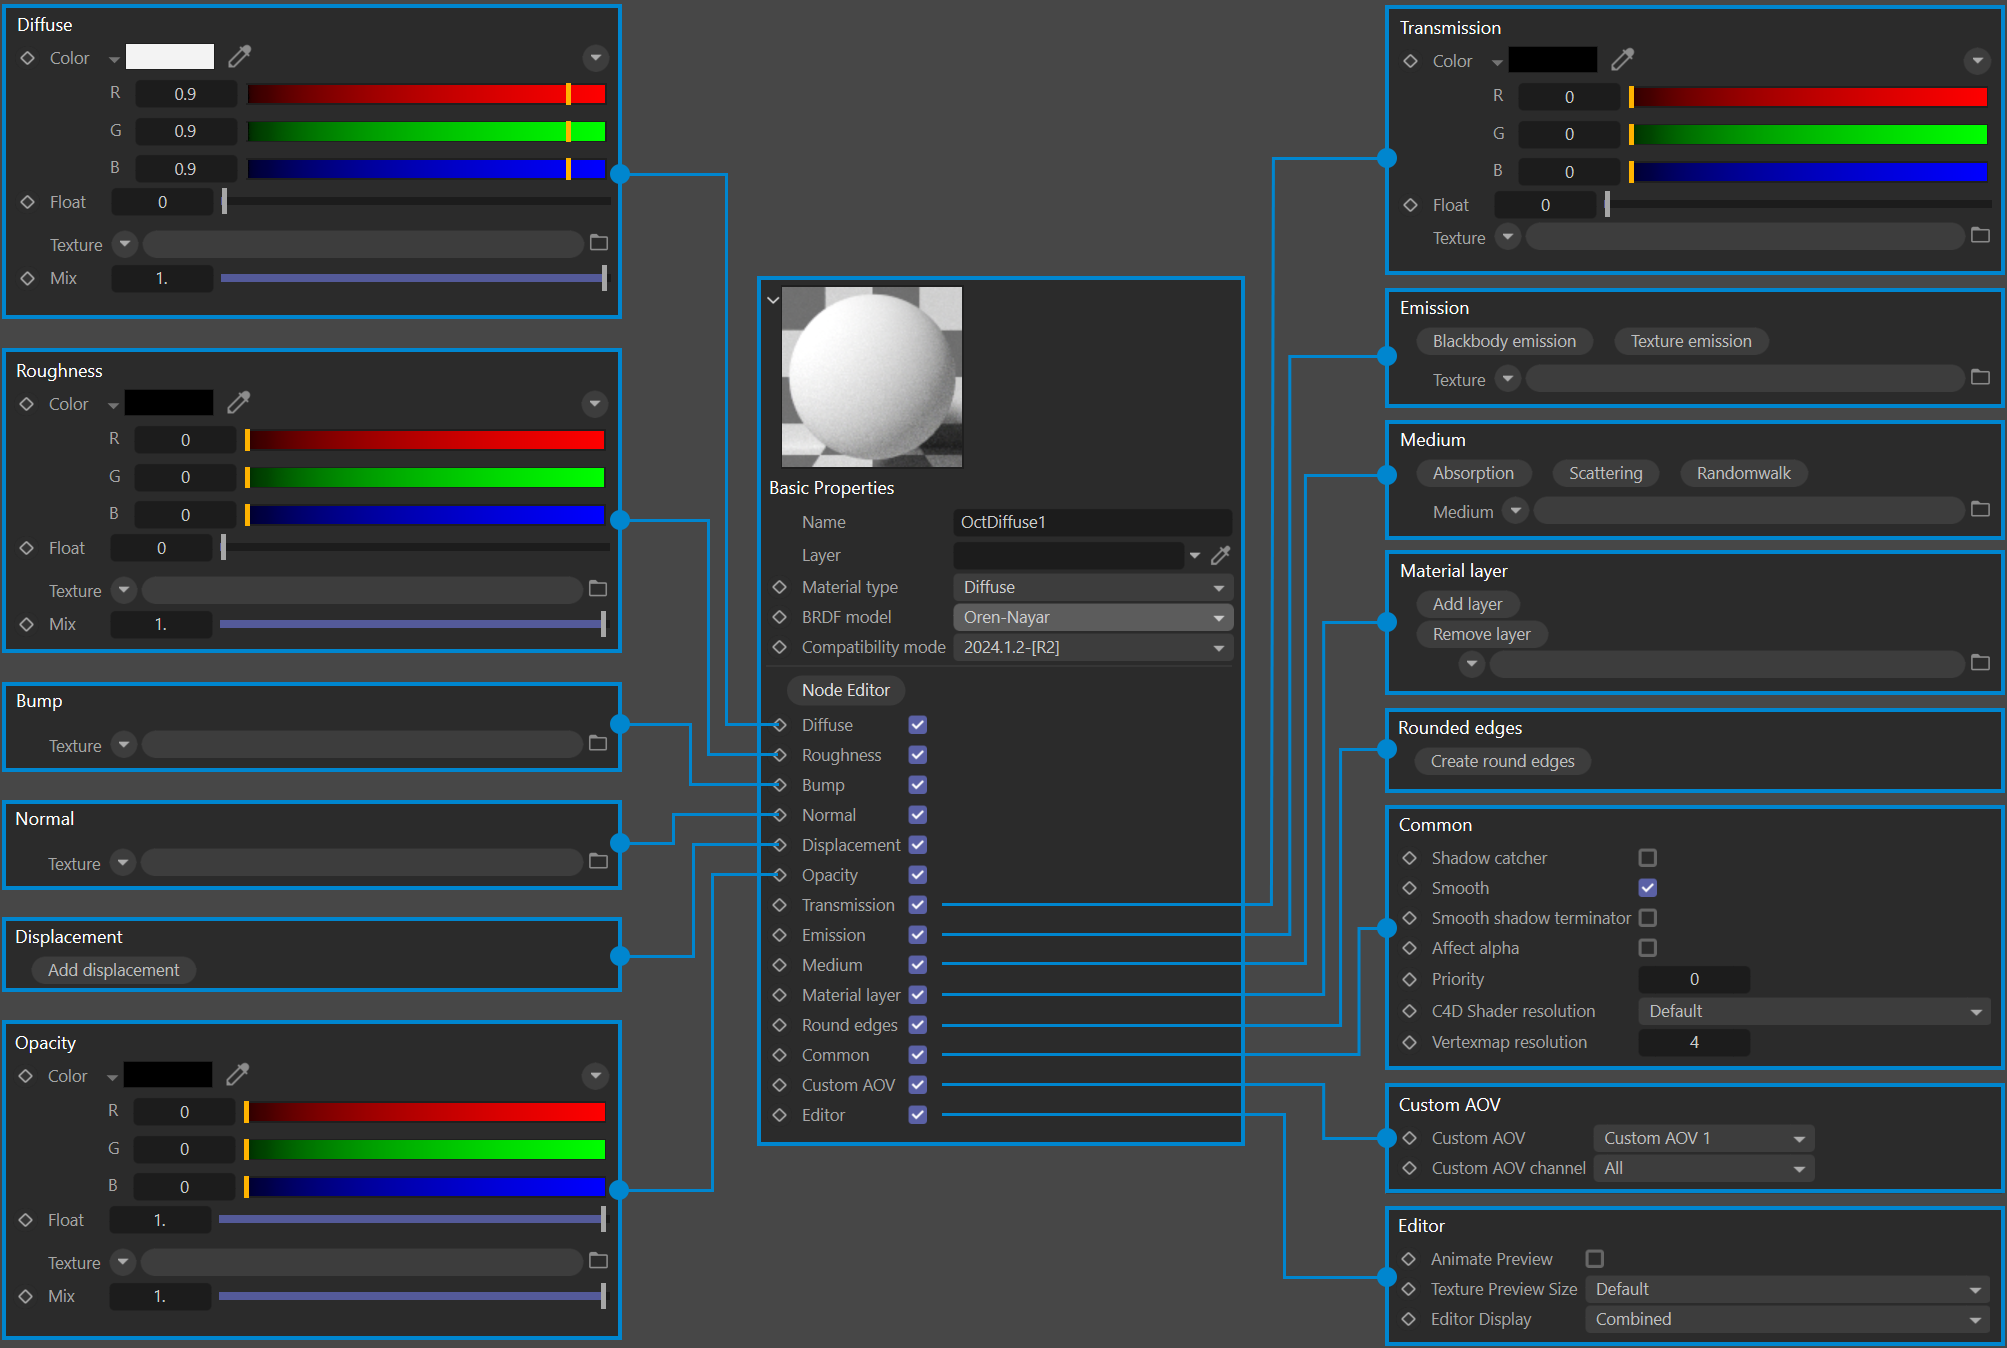
diffuse Material
|

DIFFUSE
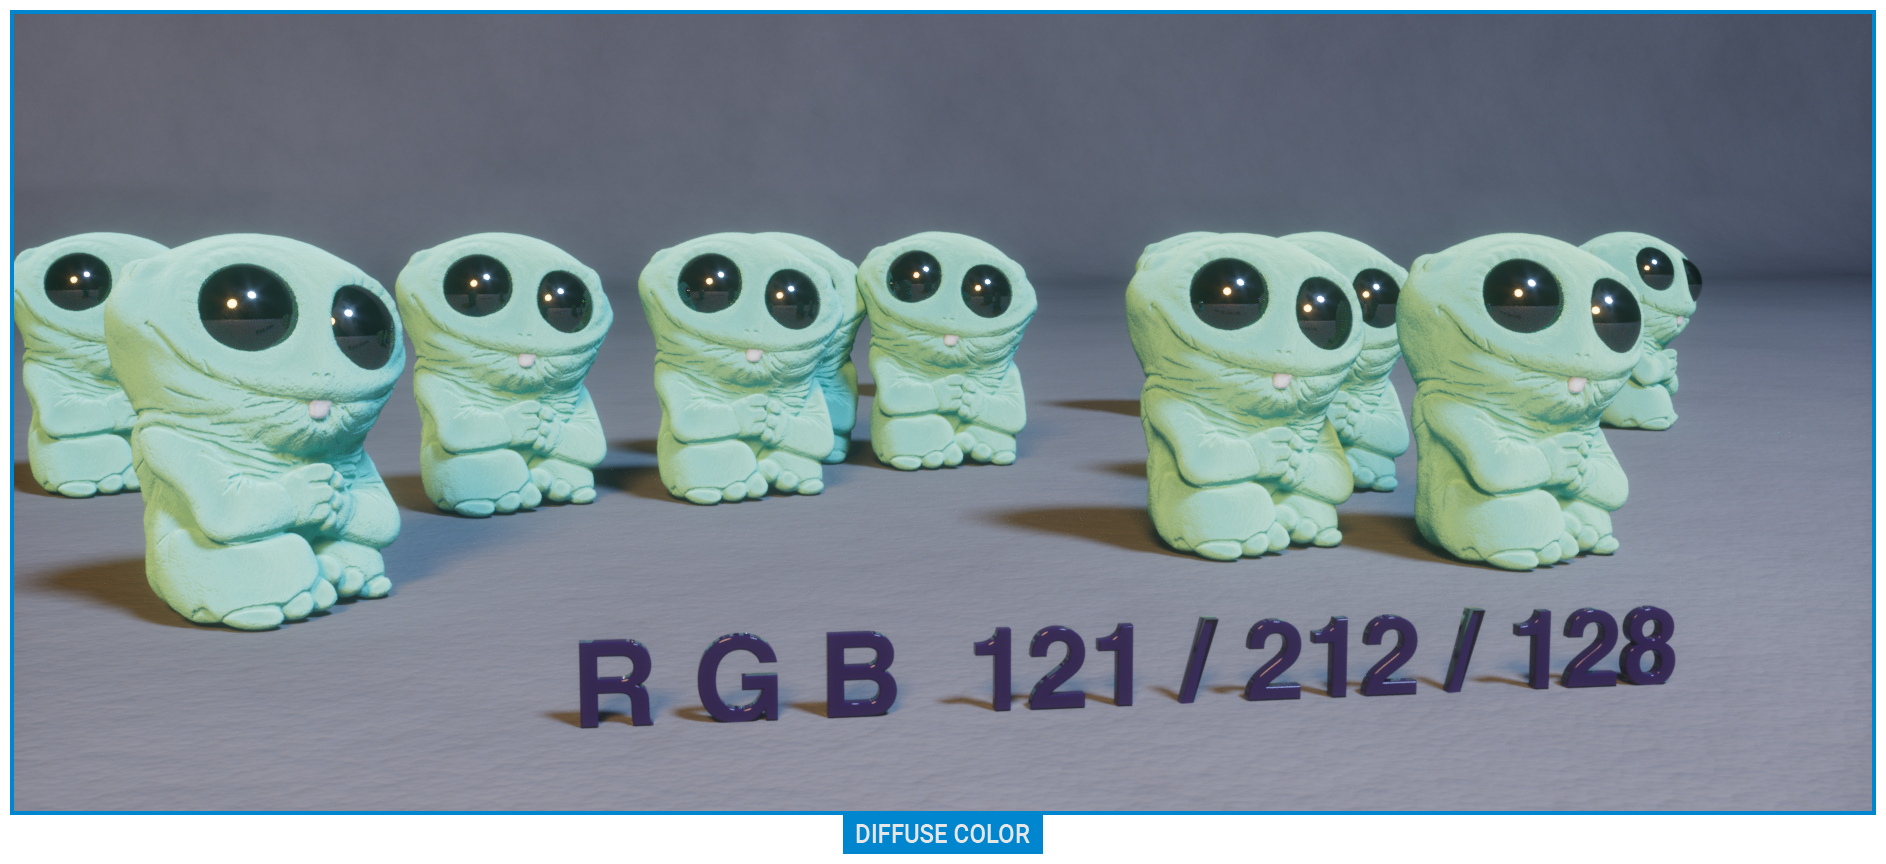
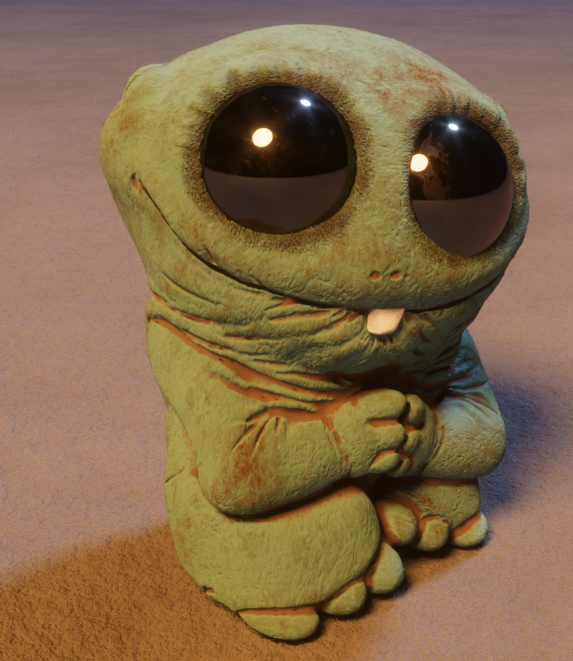
The Diffuse parameter gives the material its base color or albedo. Diffuse color can be set using an RGBSpectrum or Gaussian node or by using a procedural or image-based texture (as explained in the textures section here).
Color: The Diffuse/Albedo color. If a grayscale value is preferred instead of an RGB color value, use the Float option instead.
|
|
diffuse color
|
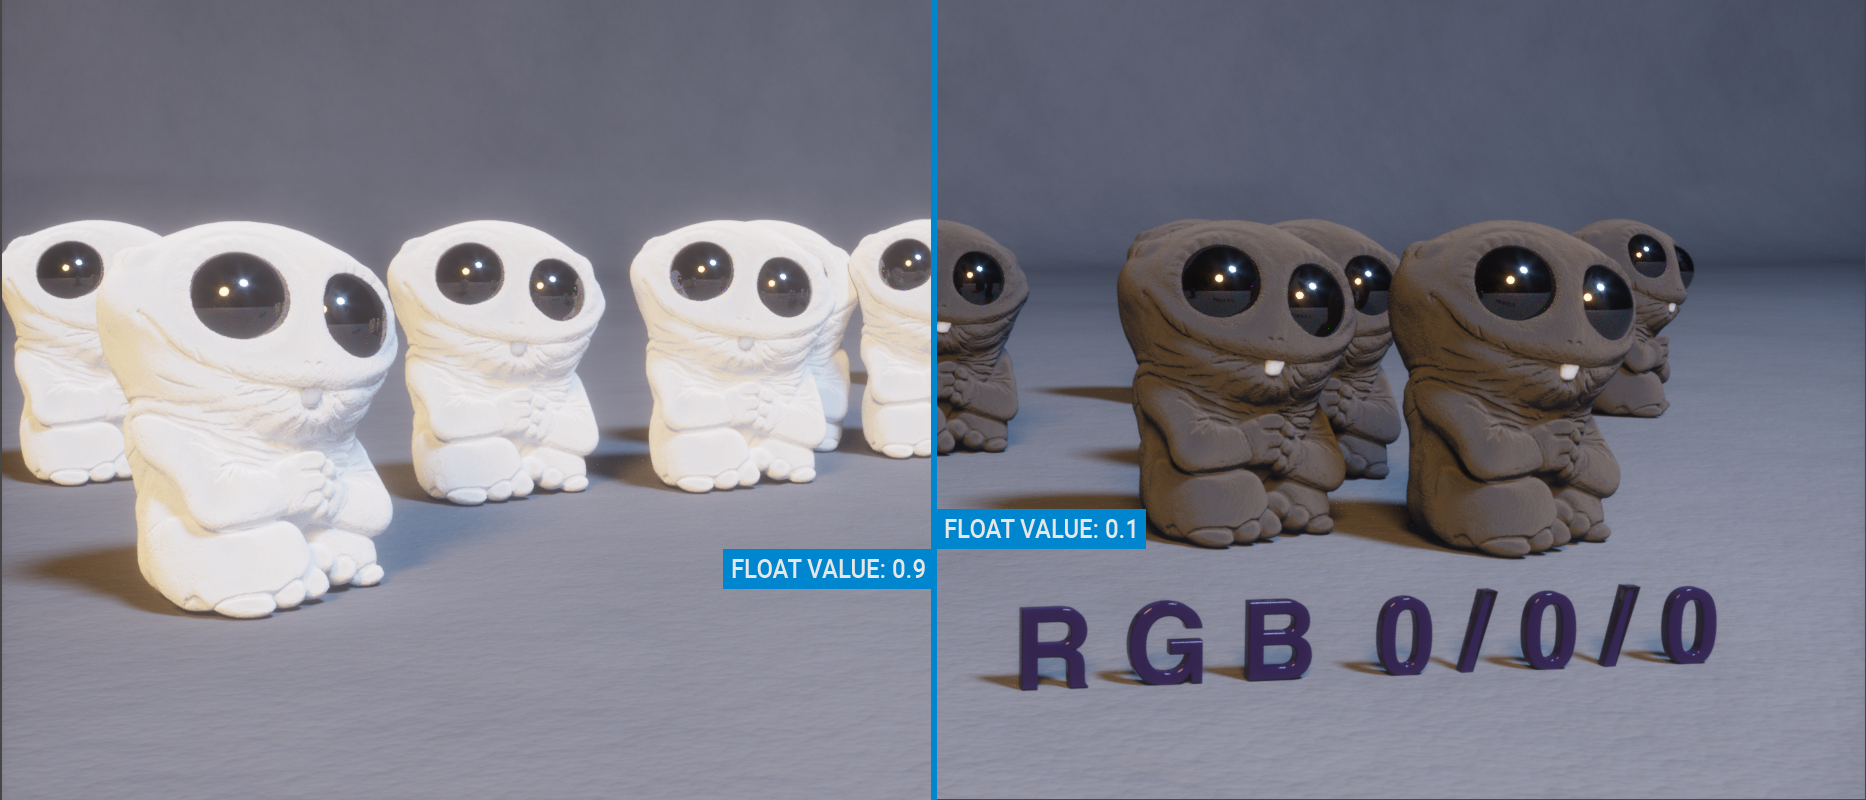
Float: This option creates a grayscale value. If the RGB color is zero, this float value creates black for 0 and white for 1. The float here also works the same in Roughness, Bump, Normal, Opacity and Transmission channels.
|
|
diffuse material — float value
|
Texture: This option will define a texture for the diffuse channel. These textures can be any of the image or procedural texture types. When textures are assigned here, both the RGB and Float values are disabled. If a mixture of both texture and color is required, use the mix option (discussed in the next section). Textures are described in the Textures section.
|
|
diffuse texture
|
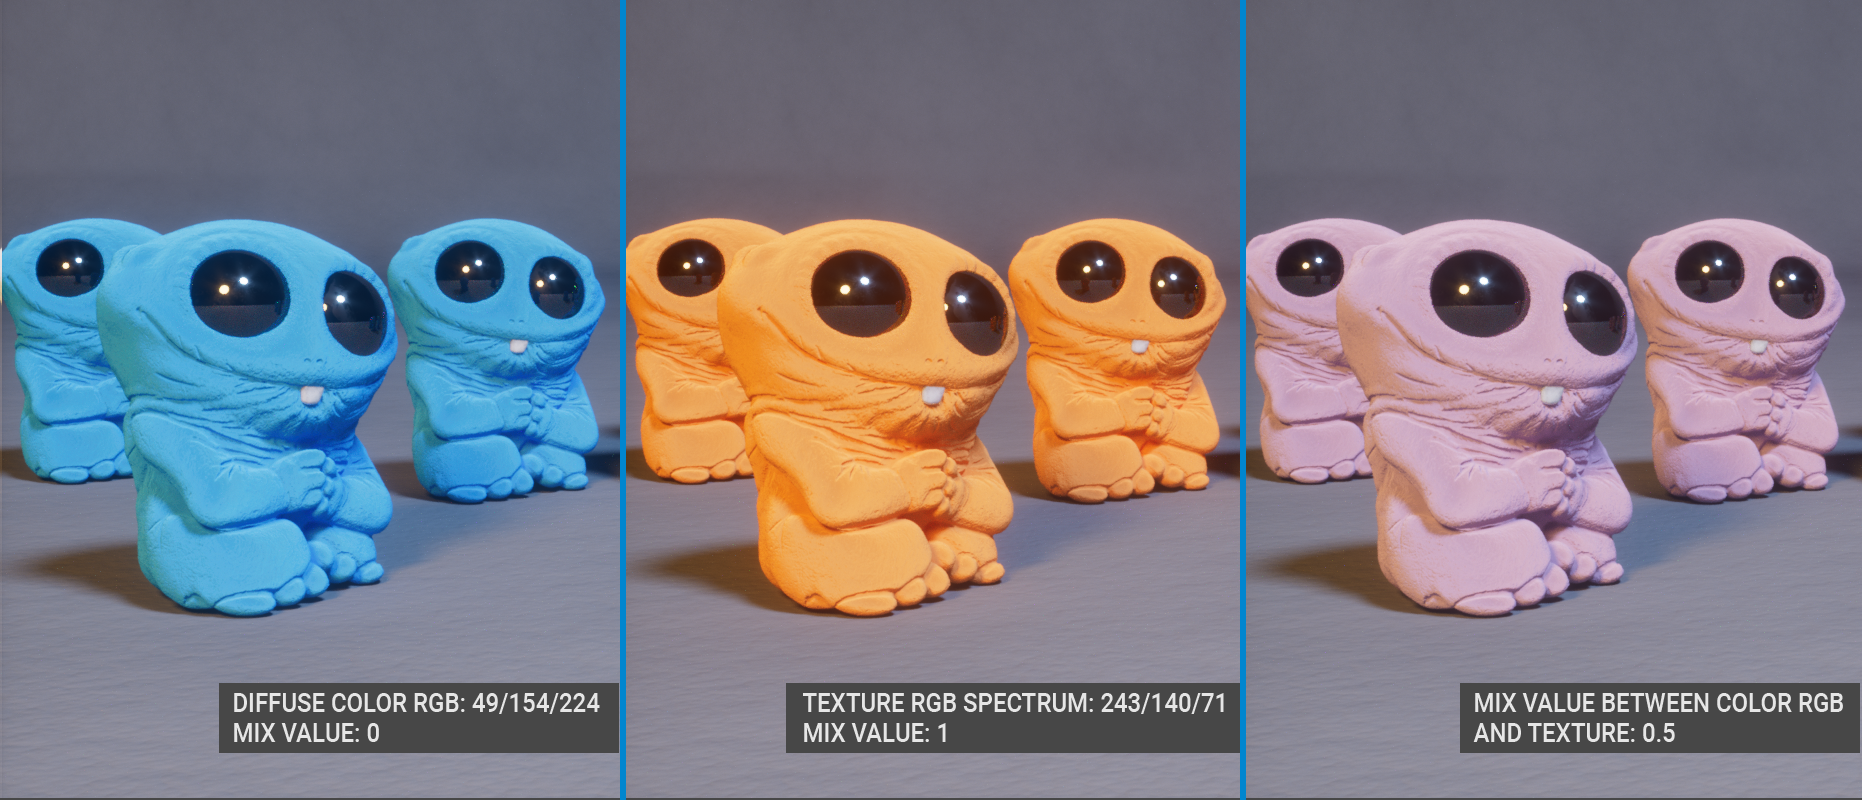
Mix: This option will mix both the RGB color and the texture type. The value of 0.0 on the slider will use the color assigned to the diffuse slot only. A value of 1.0 will use the assigned texture only. Any value in between will mix the two together per that value, as the image below illustrates:
|
|
diffuse material — mix
|
ROUGHNESS
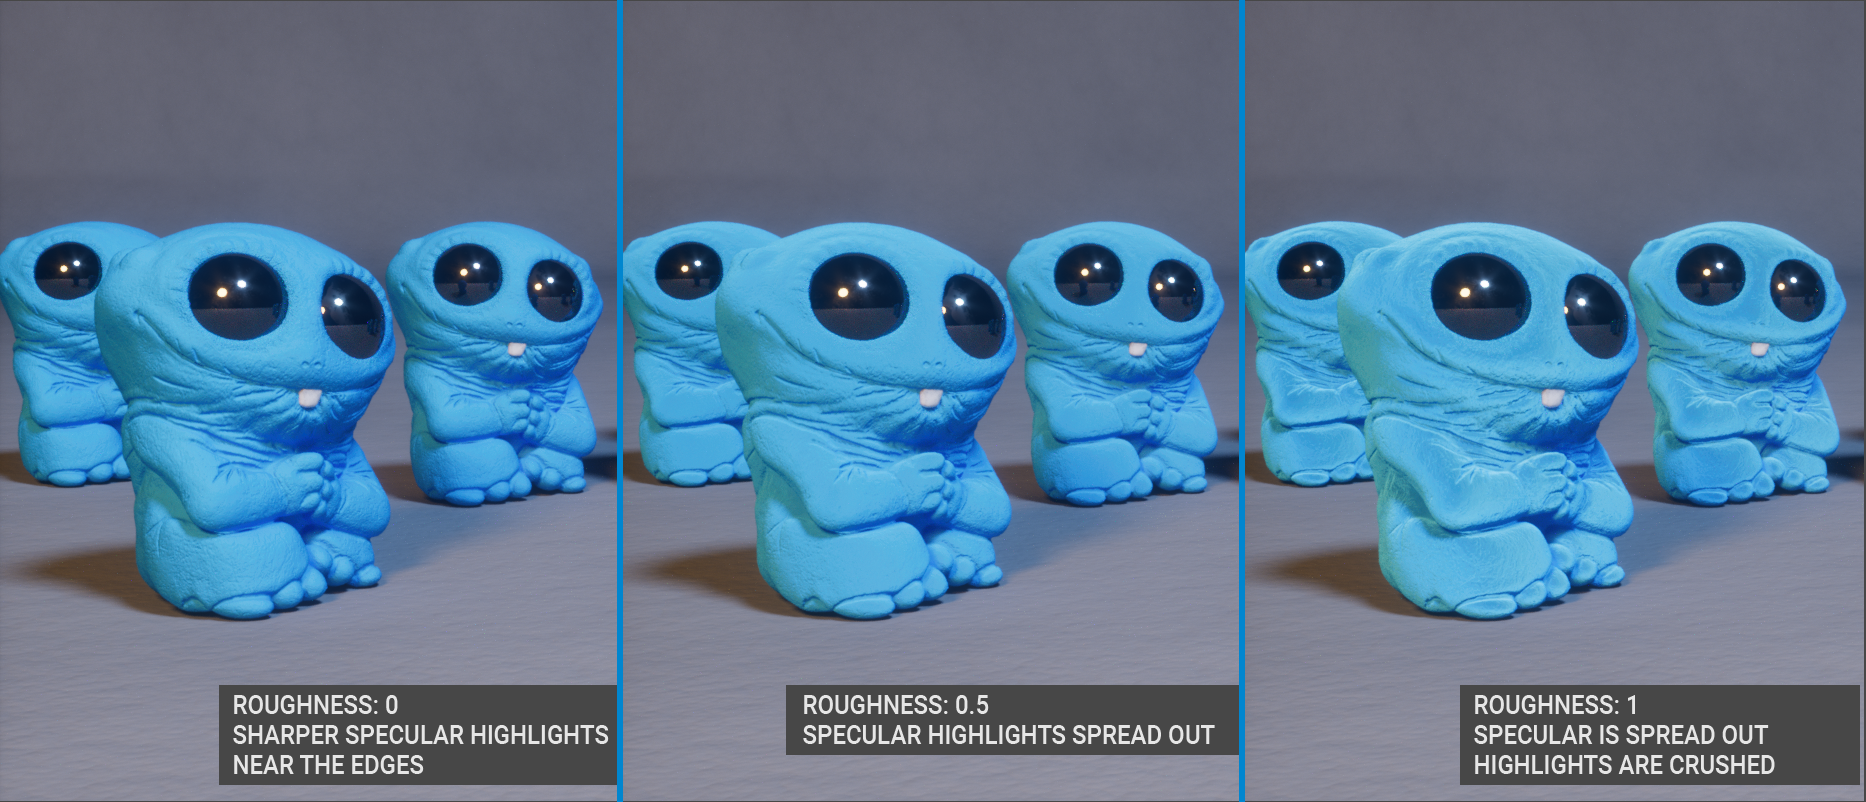
The roughness parameter controls the spread of reflected light (specular highlights) on the surface. Higher roughness values (or lighter colors) will result in more pronounced highlights, resembling crushed velvet. This parameter uses either grayscale or float values. Textures can also be used to vary the roughness value across the surface of an object.
|
|
diffuse material — roughness
|
BUMP
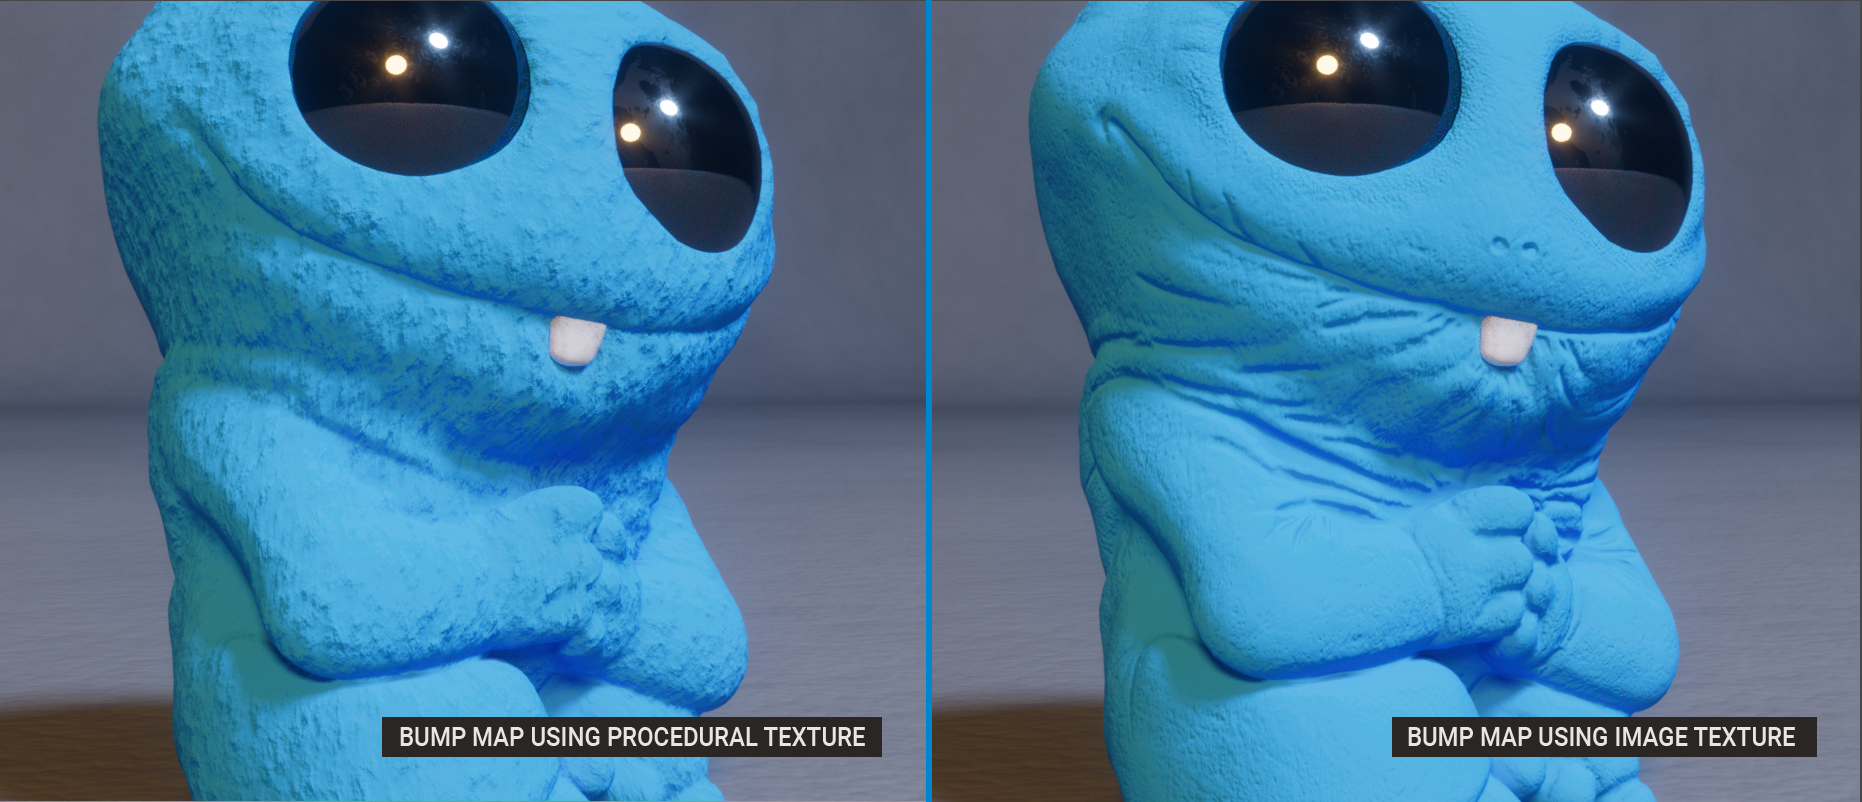
This parameter can create detailed perturbations on the surface of the material, such as chips, scratches and so on. Use any grayscale image or procedural texture, (to save VRAM). Bump maps are actually a cheat to create roughened surfaces while shading but will not affect the silhouette of the object to which it is applied. For that, use displacement. For more information about bump mapping and efficient use of VRAM for image maps in general, see the "Using Textures" section.
|
|
diffuse material — bump
|
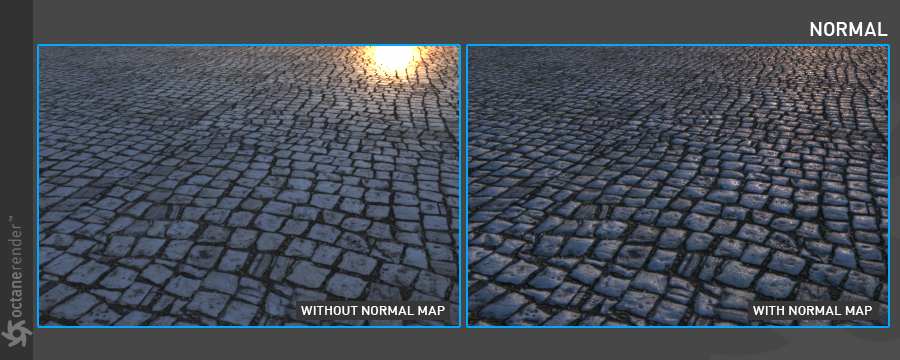
NORMAL
Normal maps are more advanced than bump maps and will produce a more realistic result. Normal maps store data in 32-bits per component, via the red, green, and blue channels, to create detailed indentations on the surface. To create a normal map, you need to use software such as ZBrush, Mudbox, Bitmap2Material or Xnormal. Like bump maps, normal maps will not change the silhouette of the object — use displacement to accomplish that. Normal maps are quite effective and more efficient than displacements, so it is wise to leverage normal maps as much as possible and use displacement maps as a fallback. Octane will treat the gamma of Normal maps as 1.0 regardless of the gamma setting.
|
|
normal
|
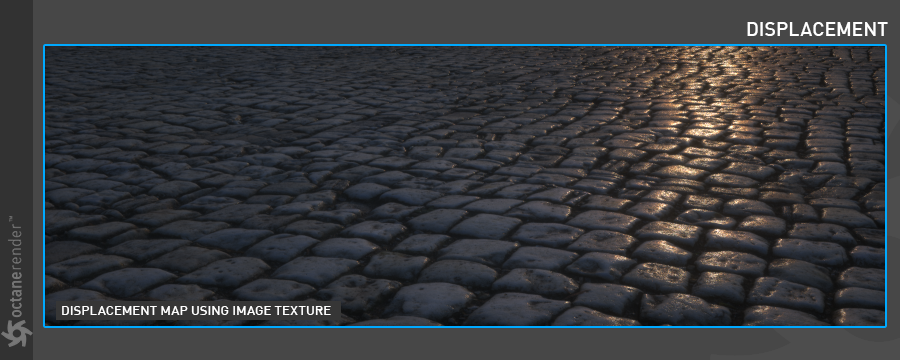
DISPLACEMENT
Displacements create new polygons at render time that are generated per the applied grayscale displacement map. Displacement maps require the object to have a UV map, applied via a Displacement node. It is also especially important that you have enough vertices/polygons in your object. The Octane Object tag can subdivide the object and add more resolution, and there is also a displacement value in the displacement node itself, which can do the same thing. Both of these options are more efficient than the Cinema Subdivision generator, with one caveat: only the Cinema Subdivision generator supports edge weights.
Displacements will produce the most realistic results as the additional polygons will conform and change the silhouette of the object. When viewed from any angle, the surface will look detailed in every sense. Displacement is quite versatile and capable of creating more than just small indentations. Displacement is a process that requires a lot of computation and VRAM, so use it wisely. Octane supports two different Displacement types, Texture and Vertex; these types are described in more detail in the chapter "Defining Displacement Types".
|
NOTE Texture displacement will not support displacement maps containing negative values. In this case, use Vertex displacement instead, or normalize the map into a positive range (0 to 1). |
|
|
displacement
|
OPACITY
This parameter is for setting the transparency of an object and only requires grayscale values (Floats). Black makes the object transparent; white makes it opaque.
|
|
opacity
|

TRANSMISSION
Transmission will allow light to pass from the object, giving it a sense of internal illumination. This effect can be used to cheat sub-surface scattering and is particularly suited to do so for single-sided objects, but for anything else, use a medium node. In this parameter, the Diffuse RGB and Transmission RGB are mixed according to the Indirect Light hitting the surface.
|
|
Diffuse material — transmission
|
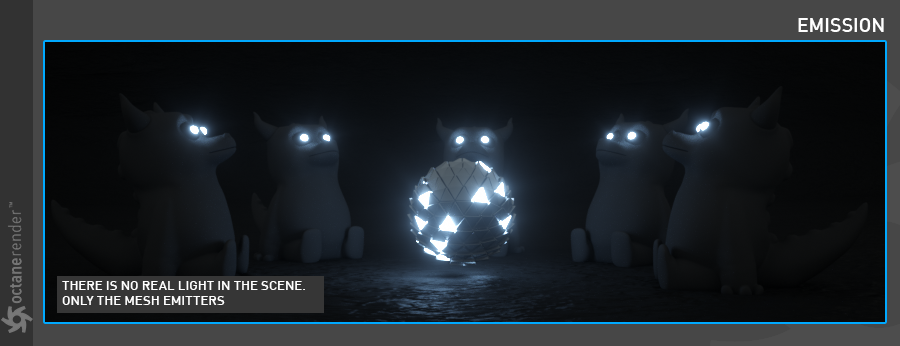
EMISSION
This parameter is used to convert any object or portion thereof into a light source or a Mesh Emitter. For more information about this parameter, please refer to the "Octane Light Tag / Emission" section.
|
|
emission
|
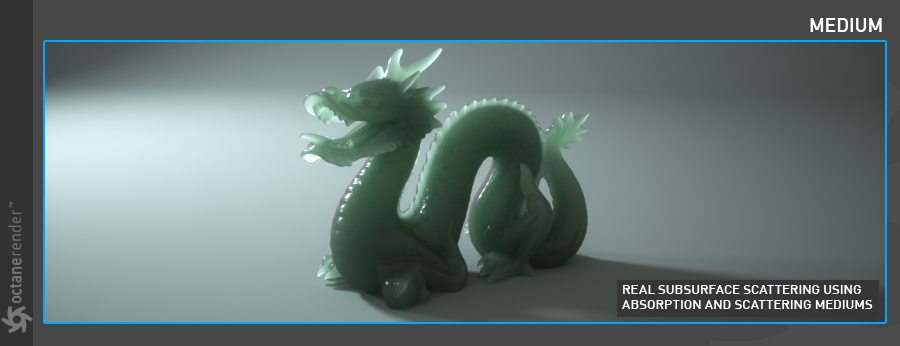
MEDIUM
This parameter is used to create complex translucent materials, such as wax, leather, skin, milk or leaves and so on. For more detailed information refer to the "Mediums" section.
|
|
medium
|
Material Layer
The Material Layer is used to create a custom material by adding up to eight material layers to an existing material (defaults to OFF). These layers are based on components used in standard Octane materials. Complex materials can be recreated in a physically based manner, as opposed to manually mixing materials together. When enabled on the Basic tab, a Material Layer tab will be added to the tab row. In the Material Layer tab, the Add button will display the available material nodes:
- Diffuse Layer — Used for dull, non-reflective materials.
- Layer Group — Adds multiple material layers to existing materials.
- Metallic Layer — Used for highly reflective materials.
- Sheen Layer — Simulates the grazing coloration in fabrics.
- Specular Layer — Used for shiny materials like plastic, or clear materials like glass.
The Layer Group is used to "stack" layers together. The other material types, if chosen, will replace the earlier layer choice.
The Remove button will remove one layer at a time.
Round Edges
The Round Edges option will round off the edges by using a shading effect instead of creating additional geometry (defaults to OFF). This option is best used for rounded edges that will appear small in the final render, as larger sizes will reveal the trick. When enabled on the Basic tab, a Rounded Edges tab will be added to the tab row. There are there five animatable parameters in the Rounded Edges tab:
- Mode — Choose from Fast, Accurate, Convex and Concave. Each choice offers a different look and render time. The Accurate mode will produce better-looking results but may be slower. Accurate mode can select the affected edges by using the Concave Only or Convex Only options.
- Radius — The radius of the rounded edge.
- Roundness — The rounded appearance of the edge (beveled to smooth). A value of 1.0 is completely round, while a value of 0.0 is a chamfer.
- Samples — The number of rays to use when sampling neighboring geometry.
- Consider Others — This option controls how rounded edges are applied to different objects. When enabled, intersections between different objects are rounded. When disabled, only the current object is considered.
Common
This section consists of several options:
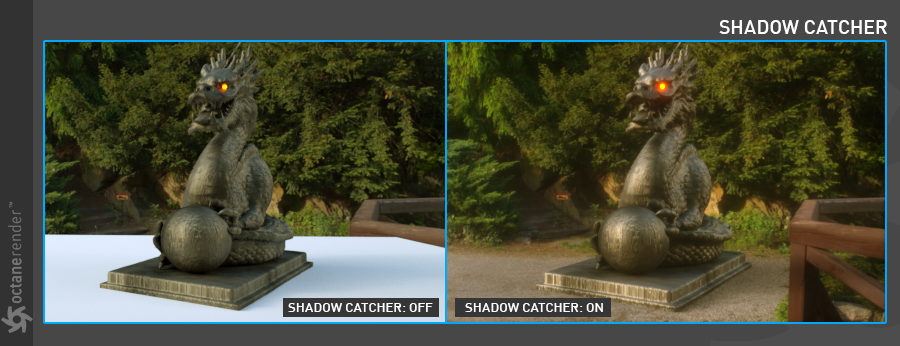
Shadow Catcher: This option will turn any object into a special object called a "Shadow Catcher" in the scene — useful to help "ground" a rendered object into a real world shot for compositing, as shown in the image below. The Shadow Catcher has some restrictions. See here for more information.
|
|
shadow catcher
|
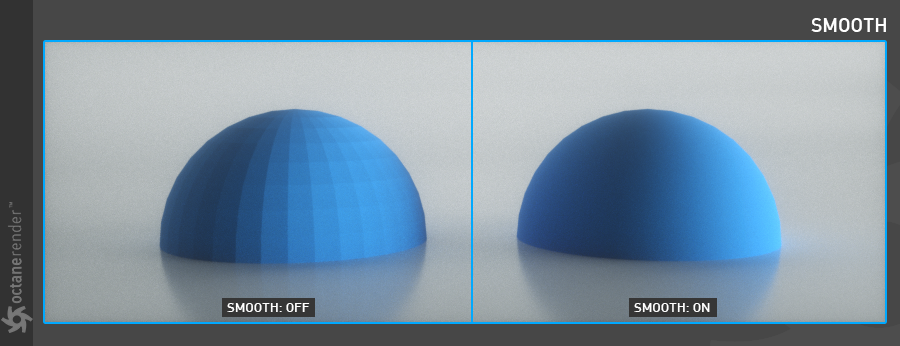
Smooth: The Smooth parameter is a toggle which smooths the transition between surface normals. If this option is disabled, the edges between the polygons of the surface will be sharp giving the surface a faceted look.
|
|
smooth
|
Smooth Shadow Terminator: The Smooth Shadow Terminator modifies the ray offset locally to avoid terminator artifacts resulting from geometry that is too coarse. There is a minor performance penalty and the projected shadow may shift when used in some cases.
|
|
smooth shadow terminator
|

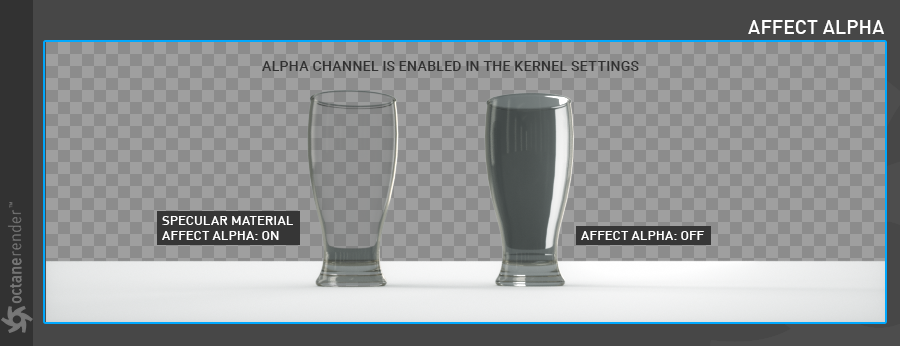
Affect Alpha: When used with the Specular material, this option will render the refractions of the material in the alpha channel for proper compositing. This parameter requires the "Alpha Channel" option be enabled in the Kernel settings.
|
|
affect alpha
|
Priority: This value determines the priority of transparent surfaces when Nested Dielectrics is enabled (valid range is -100 to 100). For more information, see here. The Priority value is also used by the Clipping material, discussed here.
C4D Shaders: This value determines the Cinema 4D shader quality. A detailed description of this topic can be found in this section.
Vertex Map Resolution: This parameter works internally. The default value is recommended.
Custom AOV
This section enables a customized AOV to be created by the material. Custom AOVs are just RGB containers that can be used to capture certain aspects of your scene via different methods. You can write specific object layer or material maskes into customer AOVs and choose whether the mask should be written into all channels or only into the red, green or blue channel. For more information, see Custom AOV.
Editor
This section offers the following options:
- Animate Preview — This option will enable the display animated textures or material attributes in the user interface.
- Texture Preview Size — This option determines the OpenGL texture preview size for the 3D viewport windows.
- Editor Display — This option will determine what aspect of the material is used in viewport display. The default is combined, which shows all channels. Use this option for Octane materials, as the individual channels in the list refer to Cinema 4D materials only.
Help Button
This option will present the corresponding section of this Help file.
Assignment Tab
Displays the scene objects that have the current material assigned.