Clipping Material
The Clipping material is a special purpose material and is used to remove portions of any geometry in the scene that intersects with any object(s) with the clipping material applied. The Clipping material uses the material priority to determine if an object will be clipped or not. The Clip material has a default priority of 100 and clips away any geometry with an assigned material priority less than the clipping material. This value can be changed to better suit the needs of the scene. Any number of Clipping materials can be present in the scene, each with separate Intersection materials as needed. Just make sure that the meshes to which the Clipping materials are applied to NOT intersect.
If an Intersection material is assigned in the Intersection slot, this material will be assigned to the faces that result from the subtraction process. Otherwise, the Clipping material serves no direct shading function.

Creating the Clipping Material
To create the Clipping material, go to the Octane dialog and choose Material > Create > Octane Clipping Material. The Clipping material will then be added to the Cinema 4D Material Manager. From there, the Clipping material can be assigned to any object. The Clipping material does not have multiple tabs; only the basic section is available, containing several attributes:
- Enabled — Enables or disables the material.
- Enable Shading — Enables or disables shading of the Clipping material (defaults to ENABLED).
- Intersection — The slot containing the material to use for the intersecting mesh.
- Priority — The value that determines if the material can be culled from the scene or retained.
- Custom Ray Epsilon — This value fine tunes the quality of the clipping results.
- Custom Ray Epsilon Enabled — Enables or disables the Custom Ray Epsilon attribute. Defaults to ON.
|
|
cLIPPING Material
|

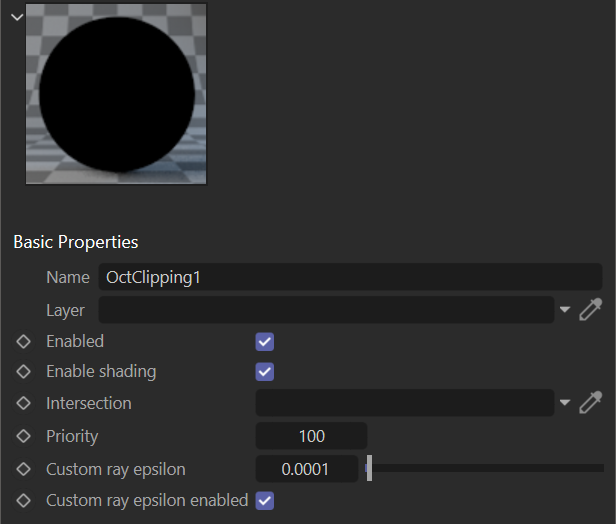
Note that the Clipping material shader ball renders black, with no shading. This is intentional.
Assigning the INtersection Material
The Intersection material is used wherever the clipping object intersects with other scene object meshes. This can be any Octane material. The Intersection material must be loaded into the Intersection slot of the Clipping material, otherwise, the intersections will render as white.
Applying the Clipping Material to an Object
The Clipping material can be assigned to any object that has clean geometry and is watertight. The object should have an Octane Object tag assigned.
Priority Matters
The image at the beginning of the section shows the use of the Clipping material to create the cutouts in the pumpkin. The scene consists of the outside pumpkin object; an inside pumpkin object (with a different material) to create the inner void of the pumpkin; the face cutting object, also with a different material for the thickness to read better (an aesthetic choice); and a cyclorama (curved cove) backdrop. The cutouts used a priority of 100; while all other materials in the scene had a priority of 0. In fact, any value below 100 will produce acceptable results.
Each material will need to have a priority value set lower than the Clipping material, which defaults to 100 (valid range is -100 to 100), if objects with those materials are to be clipped. Any objects with materials containing a priority value greater than the Clipping material will be left as-is.
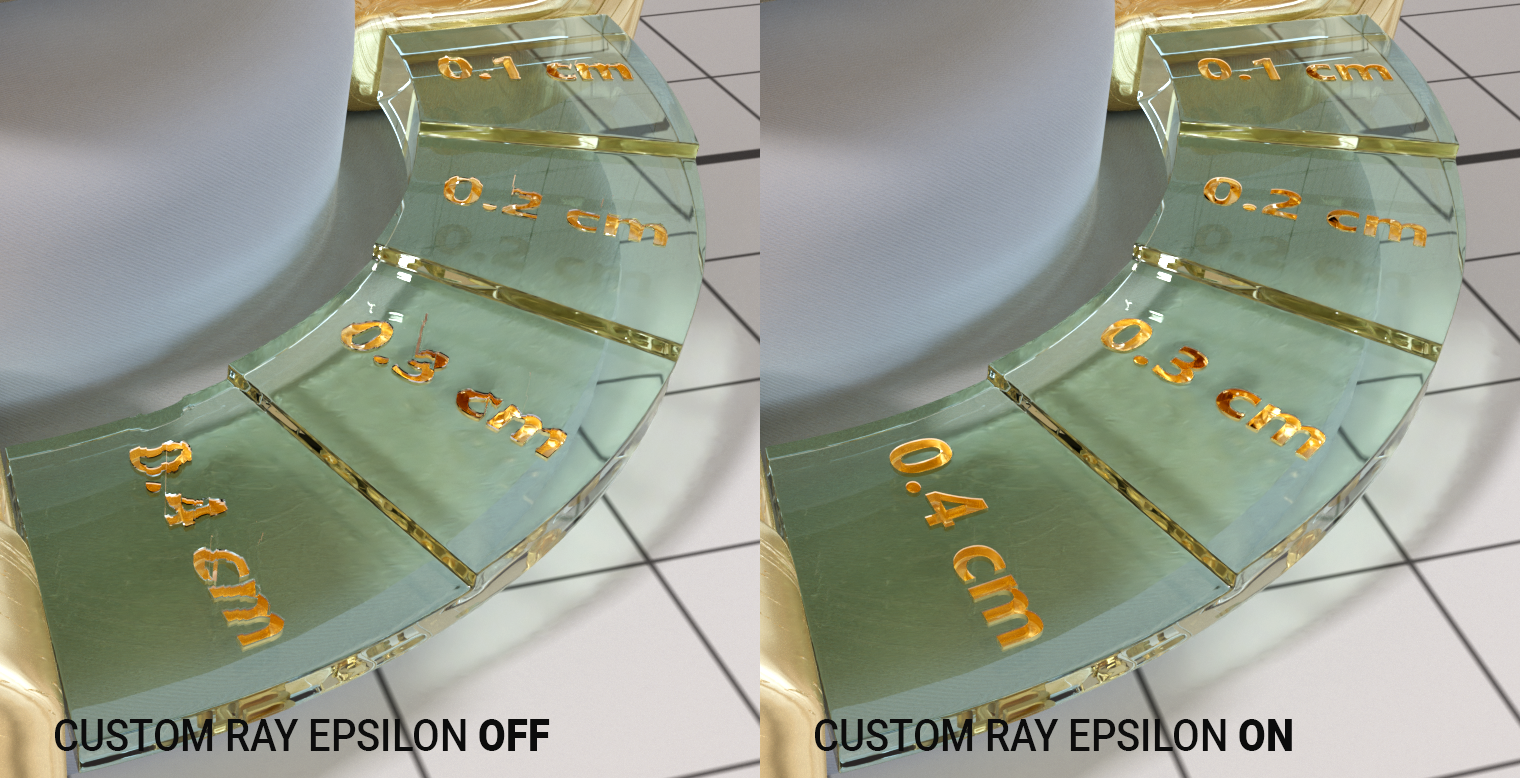
Precision where it counts — Custom Ray Epsilon
The precision of the result depends upon the Ray Epsilon value. Sometimes, artifacts occur in the areas of the intersection or clipping mesh. The Custom Ray Epsilon value is intended to resolve these artifacts. This value is similar to the Kernel Ray Epsilon value, but it is exclusive to the Clipping material (defaults to ENABLED). The image below shows an example of using the Clipping material applied to a text object so as to create some carved text into the glass; to the left, the Custom Ray Epsilon value is off. Many artifacts are present around the text used for the clipping. On the right, Custom Ray Epsilon is on, with a value lower than the main Ray Epsilon value in the Kernel settings, providing an artifact-free result. Depending upon the situation, this value may need to be greater or less than the main Ray Epsilon value.
Tips for Success with the Clipping Material
- The Clipping material must be the ONLY material assigned to the clipping geometry.
- Overlapping geometry (AKA co-resident polygons) will produce artifacts.
- Self-intersecting geometry or intersecting clipping objects can cause artifacts.
- Objects that are to be clipped must be enclosed manifolds. Faces applied with different materials will cause the clipping to fail.
- If multiple clipping objects are used, make sure they do not overlap with each other.
- If an intersection material is unspecified, the result will use the object-to be-clipped material instead.
- The intersection object must be clean geometry and watertight — no holes or gaps. Any excess vertices should be removed.
- If artifacts are observed, enable the Custom Ray Epsilon and edit the value to suit (typically a value lower than the Kernel Ray Epsilon value).
- If artifacts are encountered while using displacements, try switching to Vertex Displacement (or vice versa).
- If objects are unintentionally clipped, make sure material assigned to those objects have a priority higher than that of the clipping material.
- Visible lights may not appear within interior volumes created by the Clipping material, due to the lack of a priority attribute for the lights. These lights will still provide illumination within the scene, however, and will otherwise act normally.
- When using the Emission nodes with the Clipping material, it may be necessary to make the Emission nodes double-sided.
- Objects assigned to the Clipping material must also have an Octane Object tag assigned.
- If shadows from the Clipping material objects are visible, be sure to disable Shadow Visibility in Octane Object tag > Visibility tab.