Mesh Volume
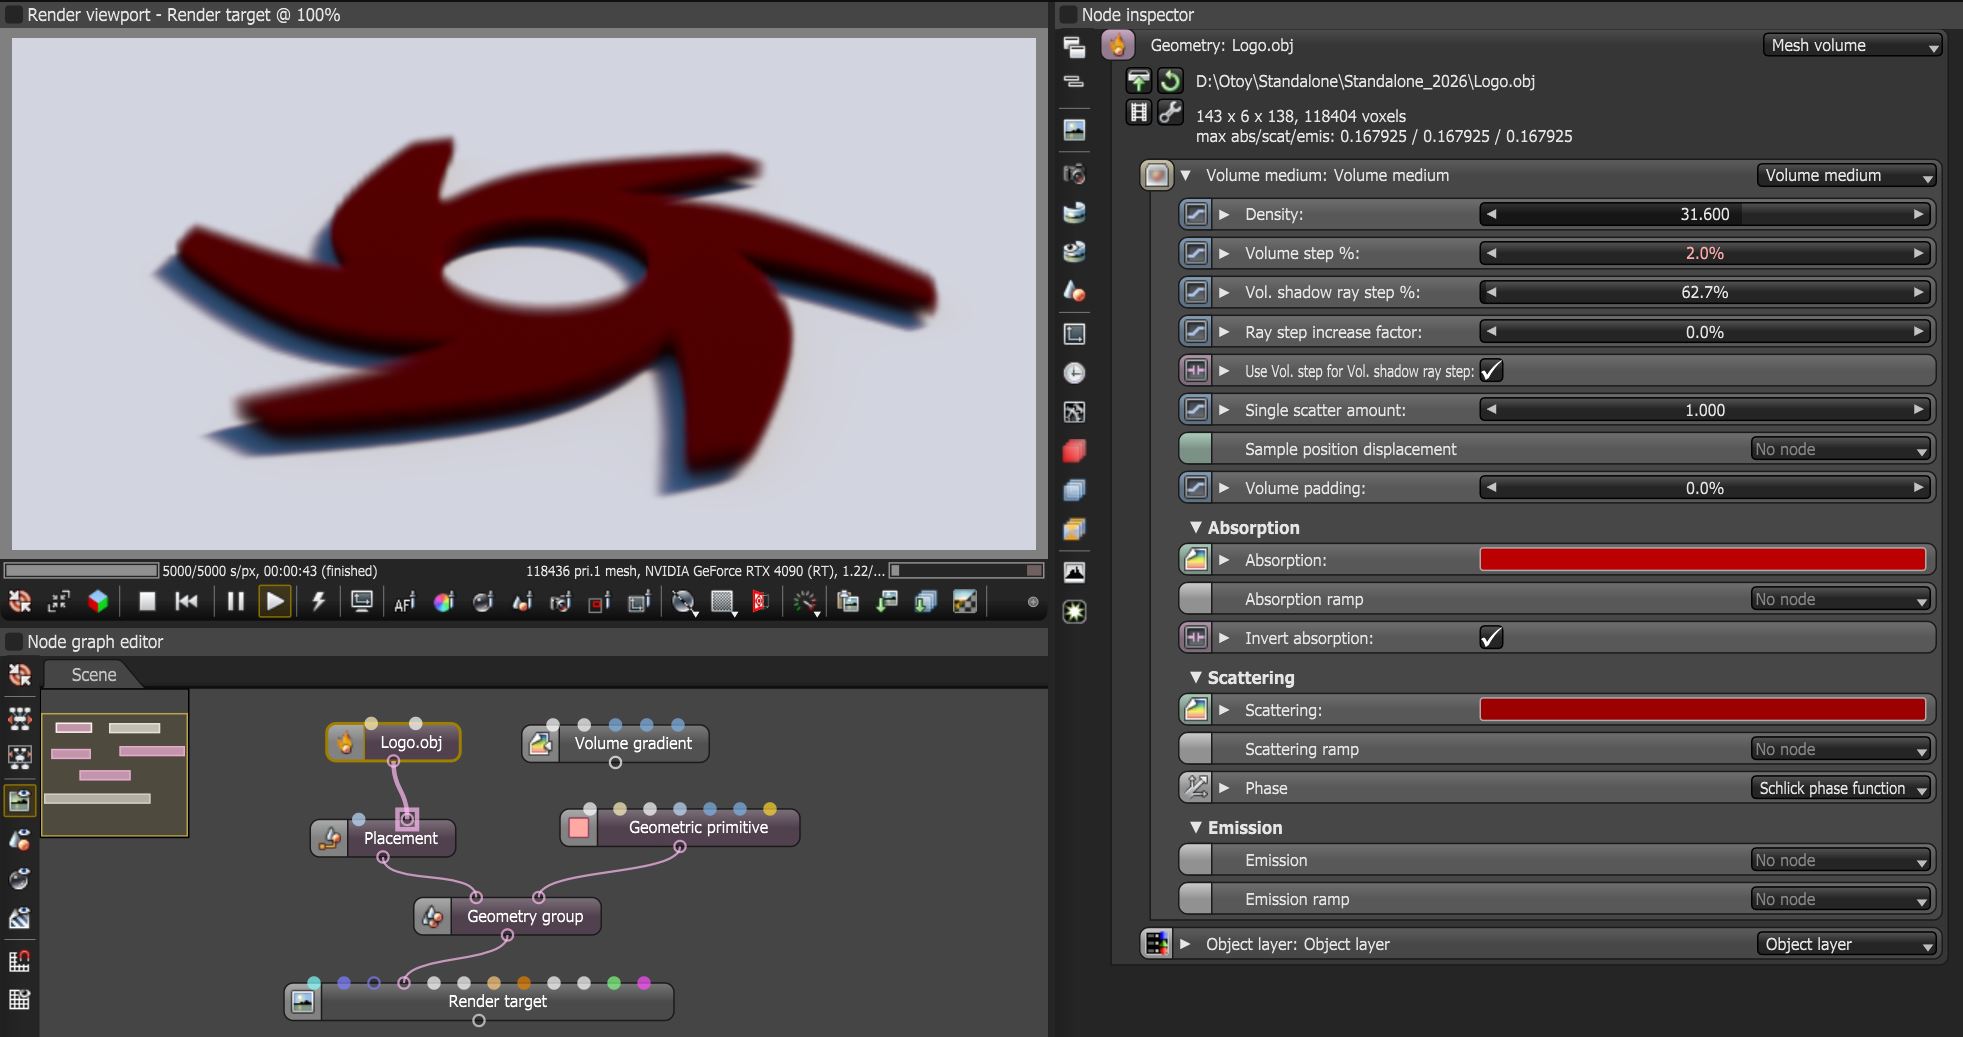
The Mesh Volume node will import a 3D model in .obj format and convert it to a volume (figure 1). The node can be found under the Geometry category in the Nodegraph Editor window.
|
|
mesh volume
|
Figure 1: The Mesh Volume node used to convert an obj file to a volume
Mesh Volume Parameters
Density - This parameter multiplies against Scattering.
Volume Step % - This attribute may need to be adjusted depending on the surface, it is measured as a percentage of voxel size. The default value is 100%. Should the volume be smaller than this, the step length will need to be decreased. Please note that decreasing this will reduce the render speed. Increasing this value will cause the ray marching algorithm to take longer steps. Should the step % far exceed the volume’s dimensions, then the ray marching algorithm will take a single step through the whole volume. Most accurate results are obtained when the step % is as small as possible.
Volume Shadow Ray Step % - Step % that is used by the shadow ray for marching through volumes. It is measured as a percentage of voxel size.
Ray Step Increase Factor - Determines how fast the volume ray step will increase.
Use Volume Step Length for Volume Shadow Ray Step Length - Check box for using the Volume Step % for the Volume Shadow Ray Step % as well.
Single Scatter Amount - Determines how often direct light is calculated in the volume.
Sample Position Displacement - Allows a texture to control a volume's sample positions displacement.
Volume Padding - Expands the volume bounding box by the given percentage in all 6 directions, but only if sample position displacement is being used.
Absorption - Determines the absorption value of the material by assigning a texture. This can be either a grayscale or color texture. When using greyscale values, 0 (black) means that there is no absorption. Values greater than zero determine how quickly the medium absorbs white light.
Absorption Ramp - A Volume Gradient can be connected to this pin in order to further control the absorption characteristics.
Invert Absorption - Inverts the absorption value allowing the specified absorbed color to be the actual color that is visible.
Scattering - The Scattering value determines how quickly light is scattered as it moves through the surface. A high value means that light is scattered sooner as it enters the surface, a low value means that light passes deeper into the surface before it is scattered. A value of 0 disables scattering entirely. This can be either a grayscale or color texture. When using a float or grayscale texture, values greater than zero determine how quickly the light scatters.
Scattering Ramp - A Volume Gradient can be connected to this pin in order to further control the scattering characteristics.
Phase - The Phase function controls the direction of the light as it is scattered in the surface. A value of 0 results in light being scattered equally in all directions, positive values result in forward scattering, where the photons continue in roughly the same direction they were going when they entered the surface. Negative values result in backwards scattering where the light moves through the surface in the direction roughly opposite to the angle at which the light entered the surface. Additionally, the Schlick node can be used to control which direction the scattering occurs.
Emission - This parameter allows the volume to emit or generate its own illumination.
Emission Ramp - A Volume Gradient can be connected to this pin in order to further control the emission characteristics.
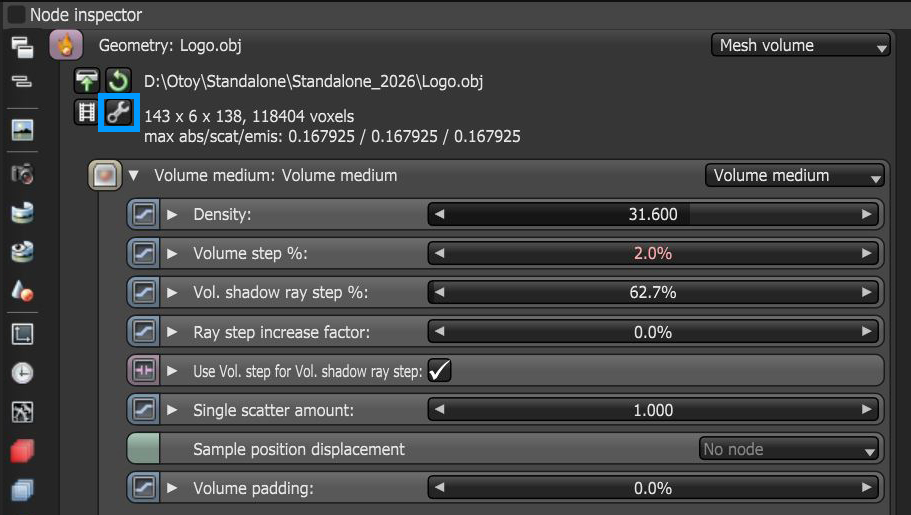
The resolution or voxel size of the volume can be adjusted using the Edit Settings button (figure 2).
|
|
mesh volume import
|
Figure 2: Accessing the mesh volume import parameters from the Edit Settings button


