Working with Files and Geometry
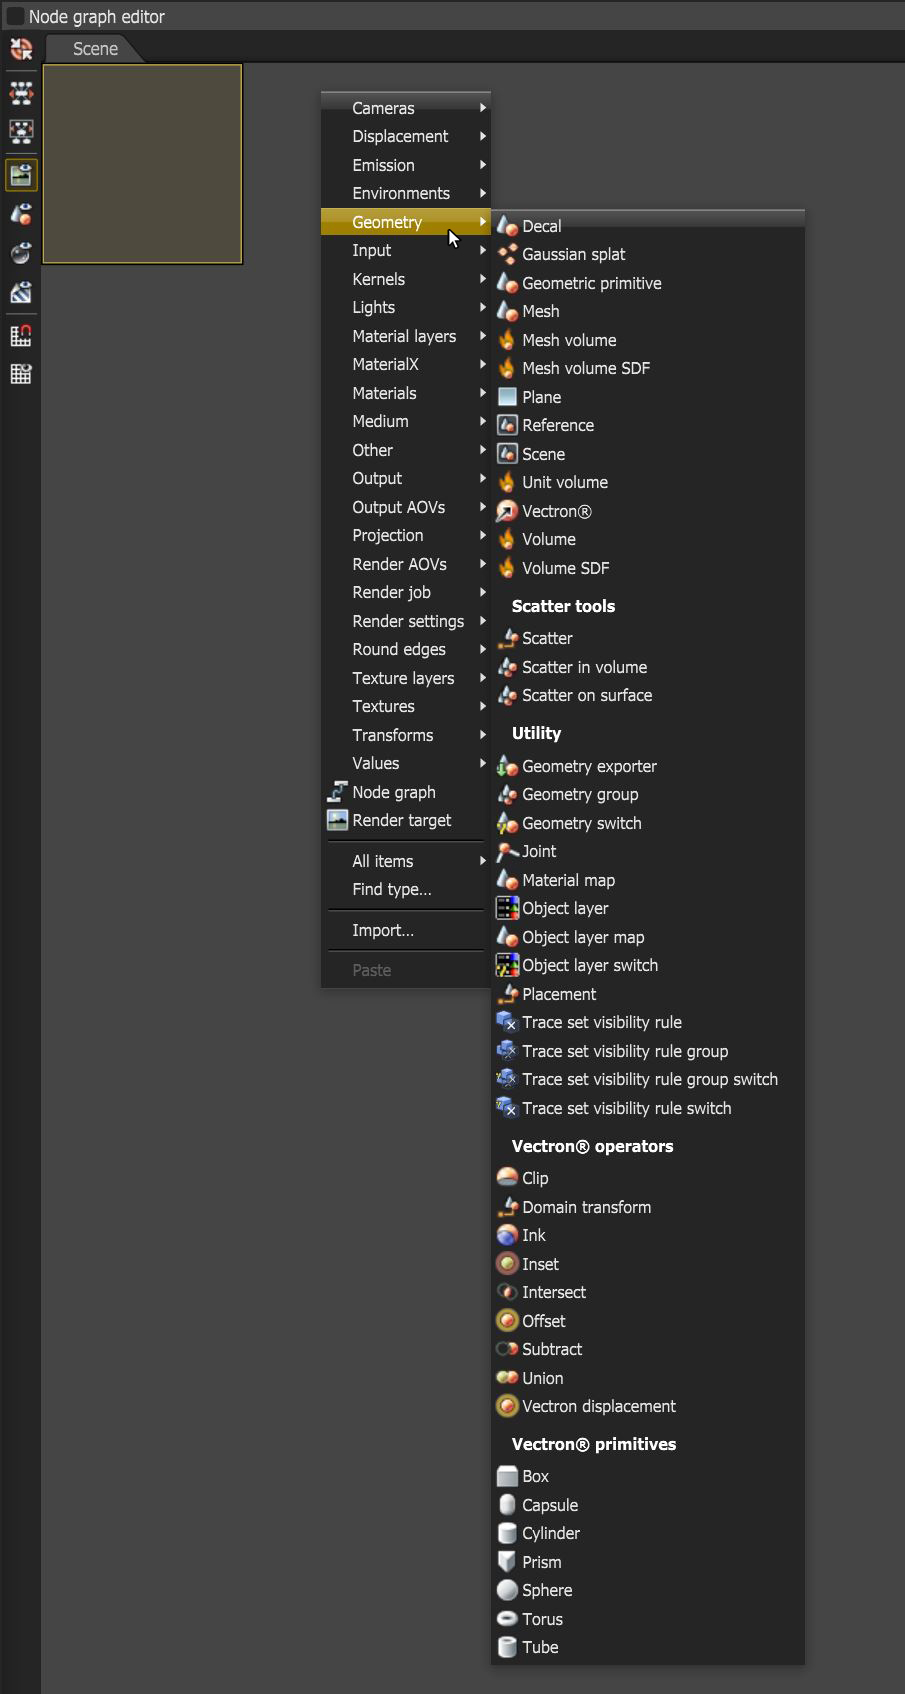
OctaneRender® can import many different geometry types by clicking on the Geometry menu in the Node Graph Editor window (Figure 1). Typical geometry types such as FBX, OBJ, USD, Alembic, as well as Gaussian Splat and volume formats are supported. These various file format types are covered in this section.
|
|
importing geometry
|
Figure 1: Accessing import file types in the Geometry menu.
If a scene contains multiple objects or animations, you’ll want to export the scene as a FBX, USD, or Alembic file (ABC) and then import it into OctaneRender® by clicking on the Scene option under the Geometry menu.
After importing the scene, connect it to the Render Target. You can combine multiple objects by using a Group node. If you need to reposition the object, connect a Placement node between the object and the render target. The Placement node settings can set the position, and a single mesh node can connect to multiple Placement nodes, each with its own settings, to create many instances of the same object. When an imported scene contains more than one object, the individual objects can be accessed by double-clicking on the import node. This will only work if a text (.txt) file has been placed in the install location of Octane Standalone. The text file needs to be named as octane_log_flags.txt. And, the file needs to contain the following log flag: makeAllInspectable
To determine how Octane renders meshes imported into a scene, you can adjust the settings in the Import tab of the Preferences. You can also access these settings by clicking on the Wrench icon in the Node Inspector when the mesh node is selected (Figure 2). Settings such as units, smoothing, and subdivision are found in the Import options.
|
|
accessing import settings
|
Figure 2: Accessing the Import settings for a scene object.


