Loading and Saving a Scene
OCS and ORBX are the file formats that are native to OctaneRender®. OCS stores all of the settings relevant to the scene file for future editing. The OCS file format does not store the geometry, image textures, or other external files referenced by the scene. Instead, the nodes in an OCS file store the paths to these scene elements. This means that files stored in the OCS format are small in terms of file size, and easy to store and manage. It also means that links to files referenced by the OCS file can break if you move, rename, or delete the referenced files.
OctaneRender also gives you the option of packaging the scene into the ORBX format, which is also native to OctaneRender. ORBX packages all of the referenced geometry, image textures, and other scene elements into a single file format that can move the entire scene without worrying about breaking links to external files. Working with ORBX files is covered in the Packager And The ORBX File topic in this manual.
To save your scene, click on Save As… from the File menu (Figure 1). Use the dialog to choose a location on your local drive to store the file and give it a unique name.
|
|
save as
|

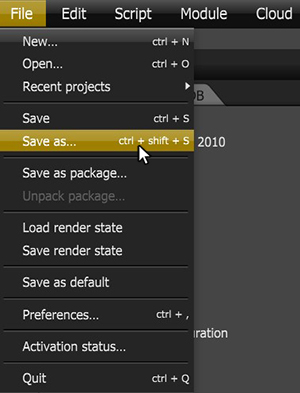
Figure 1: Using the Save As... option
To load or reload a scene, click on Open, use the File dialog to navigate to the location of the file on disc, and select the OCS file to open. You can also drag and drop the OCS file from the folder window straight to OctaneRender® while it's open. If you already loaded and saved the scene as an OCS file, click on Geometry > Import to load an OCS file. You can also load OCM files, which are material macros stored as individual files in the local drive.
When the scene loads, it is represented by a new node in the Graph Editor. Clicking on this new node starts the rendering in the Render Viewport, and the Node Inspector displays all the materials associated with the scene. Working with the nodes involves connecting the nodes to Materials, Camera, and Render output nodes. Each dot-shaped connection pin at the top of the Geometry node corresponds to a material in that scene. You can determine the identification for all Node pins by hovering your mouse over the pin connection (Figure 2).
|
|
Input Pins
|


Figure 2: Hover the mouse over the input pins to show the input type
Reloading Textures, Images, And Objects
While working on a scene, you may need to reload or replace some textures or objects. At the top of any Object or Image node is the active path to that image or object. Click on the Load icon to the left of the path to choose a different file while keeping the rest of the scene intact. Click on the Reload icon to reload the object or image (Figure 2).
|
|
load & reload
|

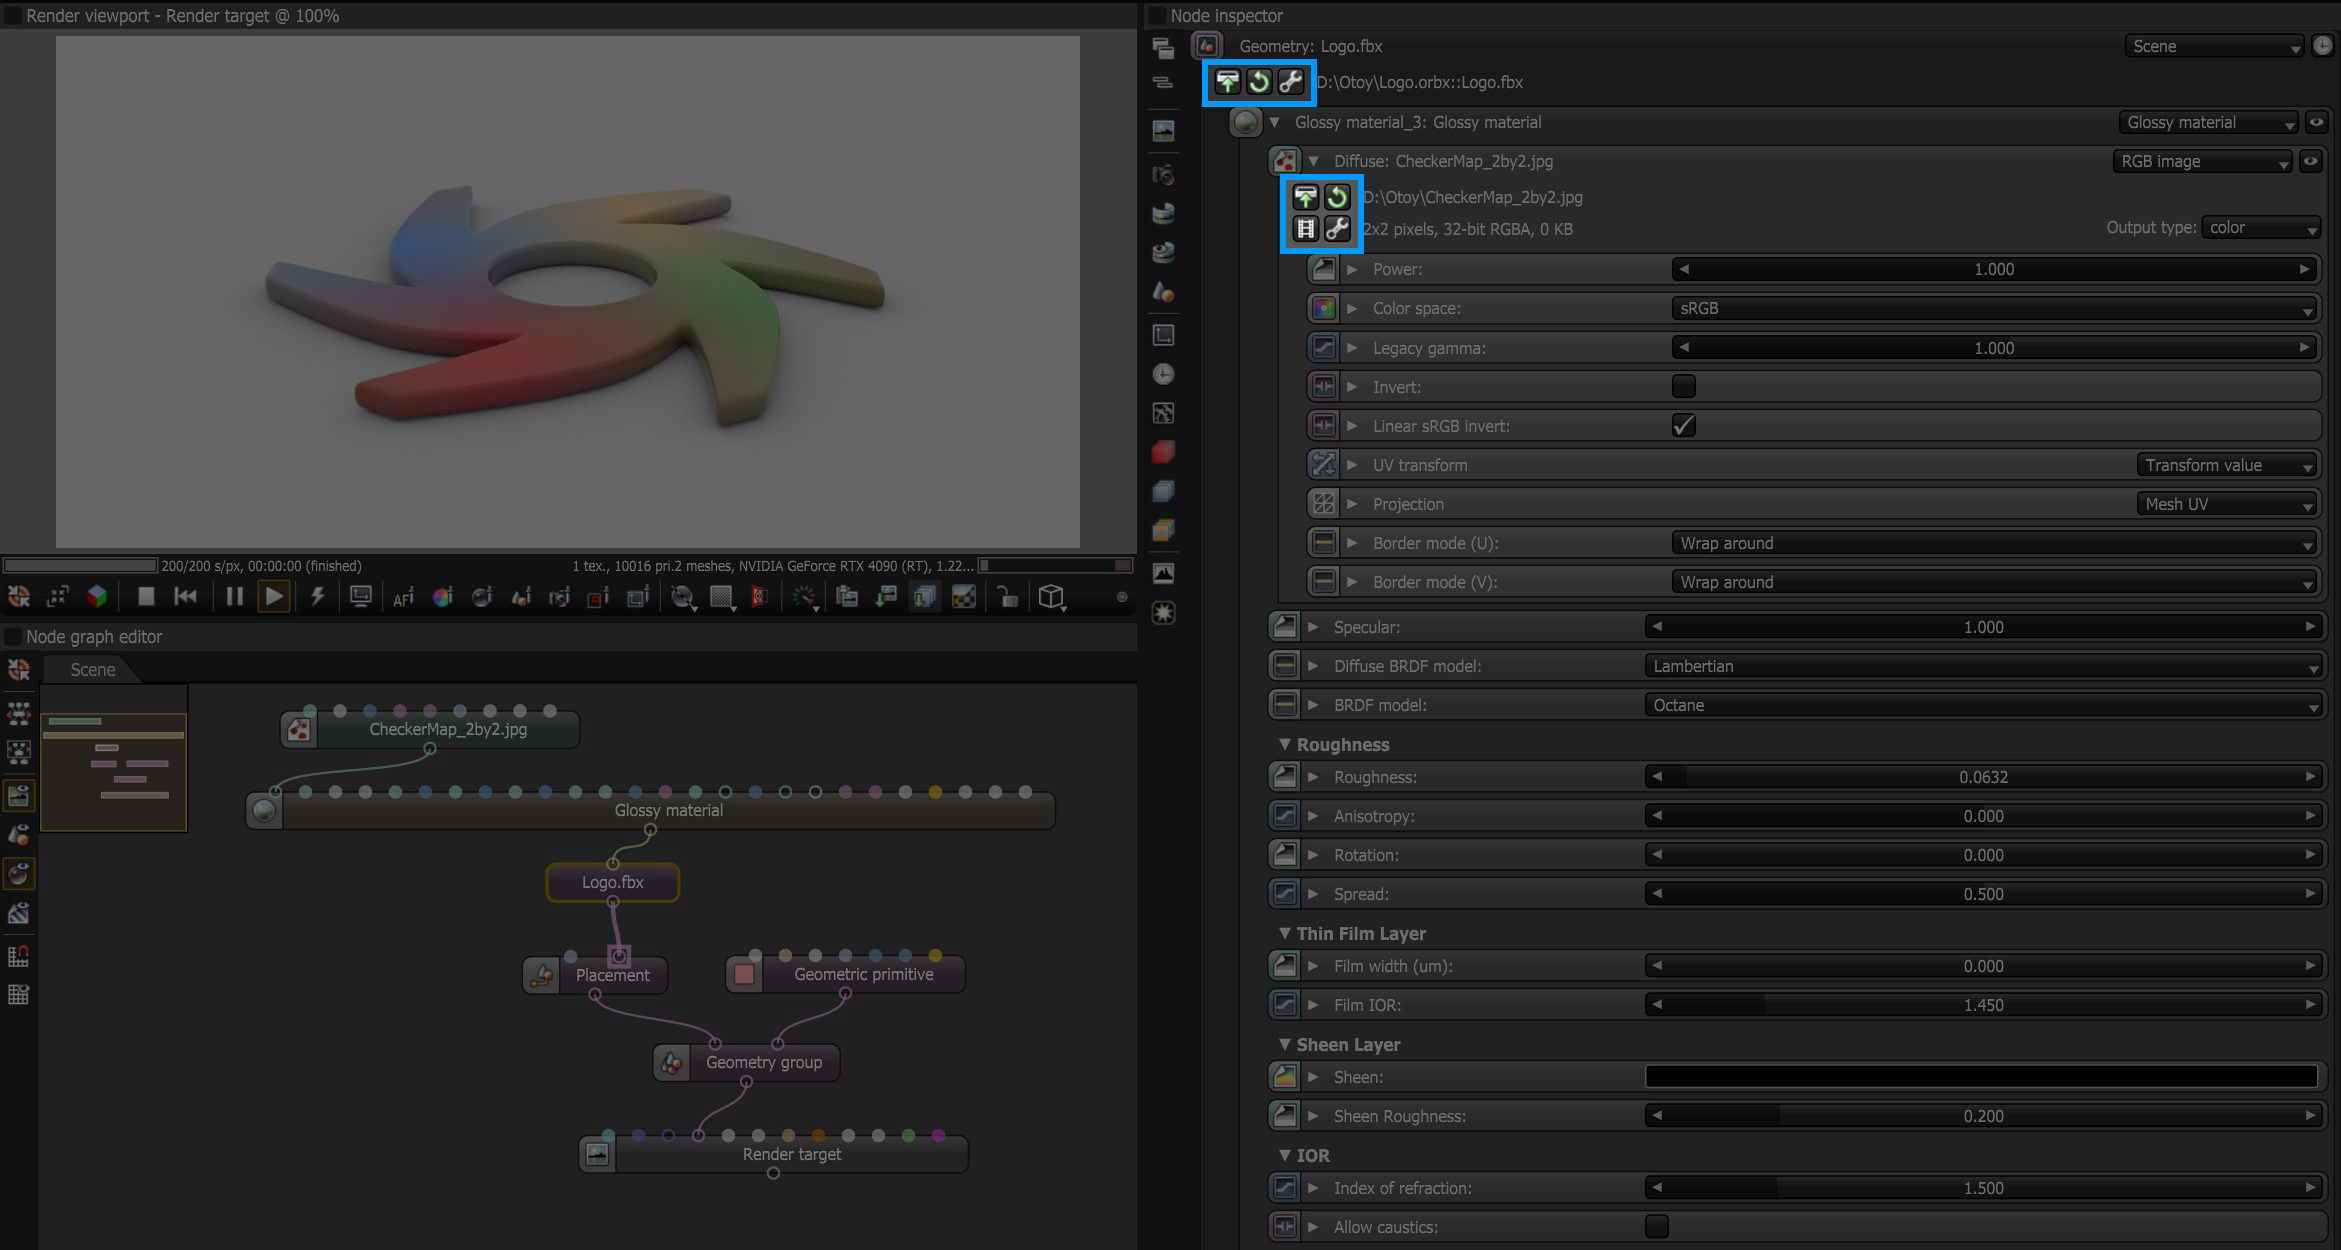
Figure 2: Load and Reload icons