Turbulence
The Turbulence texture generates a procedural noise texture that has a different quality than the Noise texture.

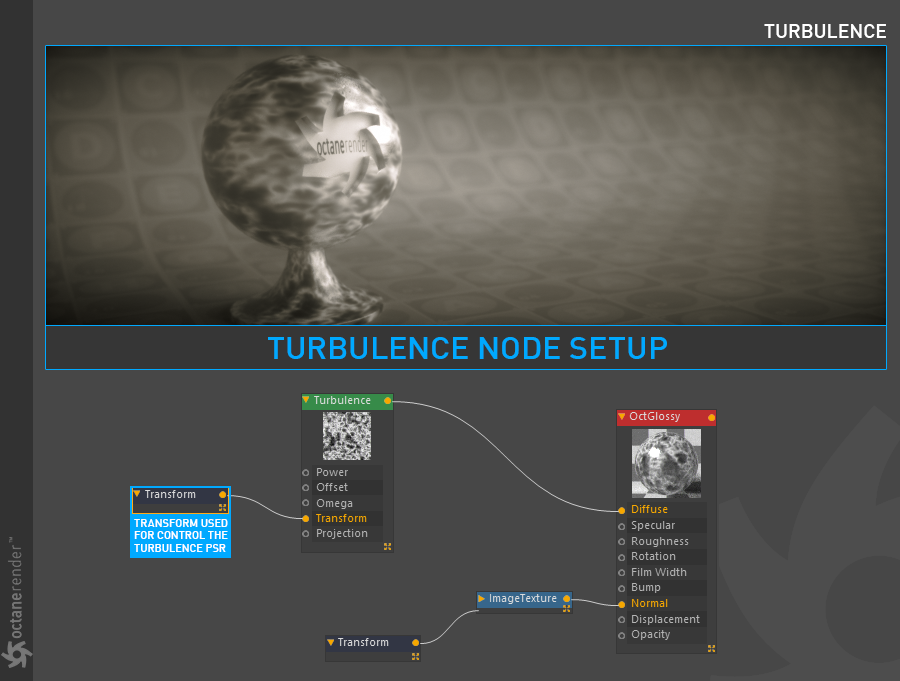
How to Use
Open the Node Editor and prepare the setup as seen in the image below. Here, a Turbulence node is connected to the diffuse channel of the material. The Gradient node is used to set the colors of Turbulence as desired. A Transform node used to change the PSR values of that node.
Turbulence Settings
Power
A multiplier which controls the overall brightness of the texture.
Offset
Shifts the Turbulence pattern in 3D space.
Octaves
Sets the scale of the detail in the noise.
Omega
Controls the detail in the underlying fractal pattern.
Use Turbulence
Toggles on the turbulent noise calculation which is multiplied against procedural noise.
Invert
Inverts the values of the noise texture.
Gamma
Adjusts the luminance values of the noise texture.
Transform
Sets the position, scale, and rotation of the texture on the surface. as explained in here.
Projection
Sets the way the texture is projected onto the surface, as explained in this section.