Diffuse material
The Diffuse material is used for dull, non-reflecting materials or light-emitting surfaces (figure 1). A Diffuse material simulates a rough surface that reflects light back into the environment in all directions. Specular highlights and reflections do not appear on diffuse surfaces.
|
|
Diffuse Material
|

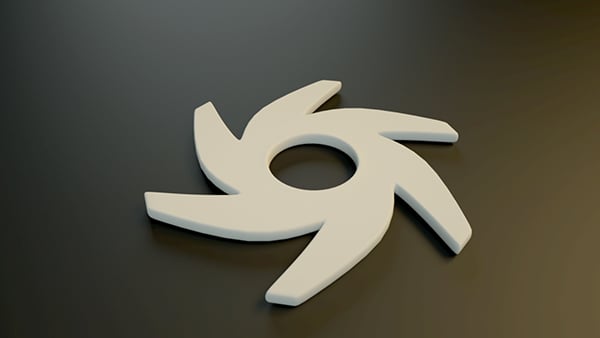
Figure 1: An object rendered with the Diffuse material
|
|
Diffuse Material
|

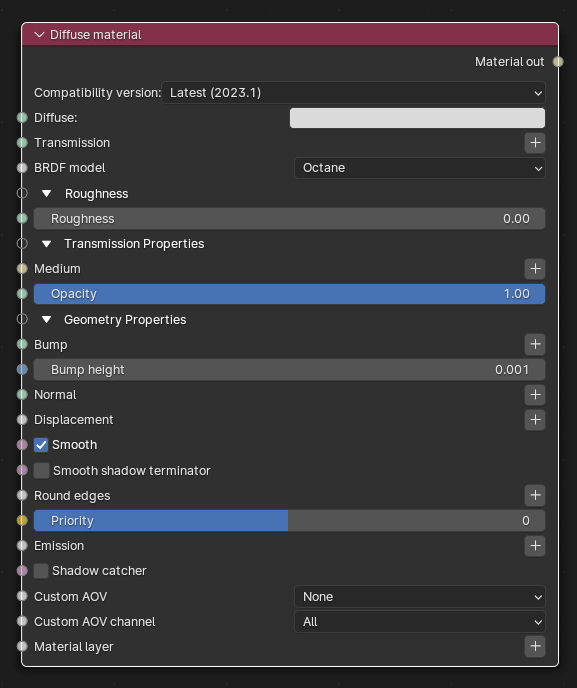
Figure 2: Diffuse material Node
Diffuse Material Parameters
Compatibility version - The Octane version that the behavior of this node should match.
Diffuse - Provides color to the material. This is also known as base color or albedo. You can set Diffuse color by using a value, or connecting a Procedural or Image texture.
Transmission - Uses a color or texture that is mixed with the material’s Diffuse color, and is most noticeable in areas affected by indirect lighting.
BRDF model - From Wikipedia: "The bidirectional reflectance distribution function (BRDF), is a function of four real variables that defines how light from a source is reflected off an opaque surface." Lambertian reflects light equally in all directions and does not support roughness. The Octane option creates a sheen effect much like velvet. And, the Oren-Nayar option behaves more like clay.
Roughness - Determines the spread of highlights on the surface. A high Roughness value or light color can simulate very rough surfaces such as sand paper or clay. You can set Roughness using a value, or by connecting a Procedural or Image texture. A roughness value of 1 (white color) creates a diffuse sheen along the edges of the surface, simulating the look of crushed velvet.
Medium - OctaneRender® has numerous types of mediums to create translucent surfaces:
- Absorption Medium - Produces the appearance of a material that absorbs light while passing through a surface. The resulting color depends on the distance that light travels through the material. For more information, see the Medium topic in this manual.
- Random Walk - A newer variant of subsurface scattering that utilizes a stochastic or random process for the scattering of light through an object. This provides the most realistic result when rendering scatter volumes.
- Scattering Medium - Similar to the Absorption medium, but with an additional option for simulating subsurface scattering. Subsurface scattering is the phenomena that gives human skin and similar organic surfaces their characteristic glow under certain lighting conditions. It's a major component for creating the look of realistic skin. For more information, see the Medium topic in this manual.
- Standard Volume - This provides volume medium options with comprehensive controls for adjusting volume, scatter, transparency, emission, and temperature parameters based on imported VBD grid data.
- Volume Medium - Adds color and other qualities to a VDB file. VDBs are a generic volume format for creating effects such as smoke, fog, vapor, and similar gaseous objects. VDBs can consist of a single frame, or an animated sequence. 3D software packages like Houdini generate and export VDBs. You can also download VDB files at http://www.openvdb.org/download/.
Opacity - Determines what parts of the surface are visible in the render. Dark values indicate transparent areas, and light values indicate opaque areas. Values in-between light and dark indicate semi-transparent areas. You can lower the Opacity value to fade the object's overall visibility, or you can use a Texture map to vary the opacity across the surface. For example, if you want to make a simple polygon plane look like a leaf, you would connect a black-and-white image of the leaf’s silhouette to the Opacity channel of the Diffuse shader. When using an Image texture map, set the Data Type to Alpha Image if the image has an alpha channel, or Grayscale Image for black-and-white images, to load an image for setting the transparency. To invert the transparency regions, use the image's Invert checkbox.
Bump - Creates fine details on the material’s surface using a Procedural or Image texture. Often a Greyscale image texture connects to this parameter - light areas of the texture indicate protruding bumps, and dark areas indicate indentation. You can adjust the Bump map's strength by adjusting the Power or Gamma values on the Image texture node.
Bump height - The height represented by a normalized value of 1.0 in the bump texture. 0 disables bump mapping, negative values will invert the bump map.
Normal - Creates the look of fine detail on the surface. A Normal map is a special type of Image texture that uses red, green, and blue color values to perturb the surface normals at render time, giving the appearance of added detail. They can be more accurate than Bump maps, but require specific software such as ZBrush®, Mudbox®, Substance Designer, xNormal, or others to generate. To load a full-color Normal map, set the Normal channel to the RGB Image data type. Note that Normal maps take precedence over Bump maps, so you cannot use a Normal map and a Bump map at the same time.
Displacement - Adjusts surface vertices' height at render time using a Texture map. Displacement maps differ from Bump or Normal maps by having the texture alter the geometry, as opposed to creating the appearance of detail on the surface. Displacement mapping is more complex than Bump or Normal mapping, but results are more realistic, such as a surface's silhouette. The Displacement topic in this manual covers displacement mapping in more detail.
Smooth - Smooths out the transition between surface normals by blending the polygon edges together. If this option is disabled, the edges between the polygons of the surface appear sharp, giving the surface a faceted look.
Smooth Shadow terminator - If enabled, self-intersecting shadow terminator for low polygon is smoothed according to polygon's curvature.
Round Edges - Rounds the geometry edges by using a shading effect instead of creating additional geometry. See the Round Edges topic in this manual for more information.
Priority - Used to resolve the ambiguity in overlapping surfaces, the surface priority control allows artists to control the order of preference for surfaces. A higher number suggests a higher priority for the surface material, which means it is preferred over a lower priority surface material if a ray enters a higher priority surface and then intersects a lower priority surface while inside the higher priority surface medium.
Emission - Also known as a Mesh emitter, this creates a surface that emits light. To activate an emission, connect the Emission input of the Diffuse material to either a Blackbody or a Texture emission map. The Emission topic covers emission parameters in more detail.
Shadow Catcher - Converts the material into a Shadow Catcher, which is visible in areas that are in shadows. All other areas are transparent in the render.
Custom AOV - Writes a mask to the specified custom AOV.
Custom AOV Channel - Determines whether the custom AOV is written to a specific color channel (R, G, or B) or to all the color channels.
Material Layer - Adds a Material Layer above the base material. See the Material Layers topic in this manual for more details.