Using Instances
Instancing an object means taking a single imported mesh object, such as an OBJ or an FBX file, and then making multiple copies and placing them in different parts of the scene. This saves an enormous amount of computational resources because just one object is loaded into the scene. You can alter the relative position, rotation, and scale of each instance by using a Placement node to specify parameters (Figure 1).
|
|
placement node
|
Figure 1: Placement node
The Placement node creates the instance of its input geometry, and you can connect any number of Placement nodes to a single piece of geometry. You can then reposition the instances throughout the scene using the Position node's Translate, Scale, and Rotate parameters.
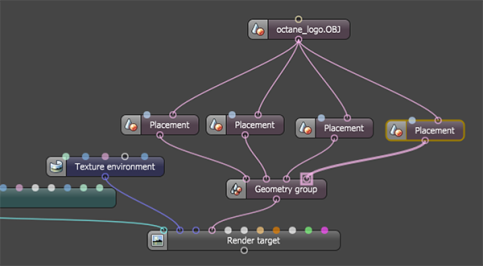
A Geometry Group node can group all of the instances, and then you can connect it to the Render Target to get rendered in the scene. You can also instance Geometry Group nodes by using Placement nodes.
Instancing Example
To instance an object:
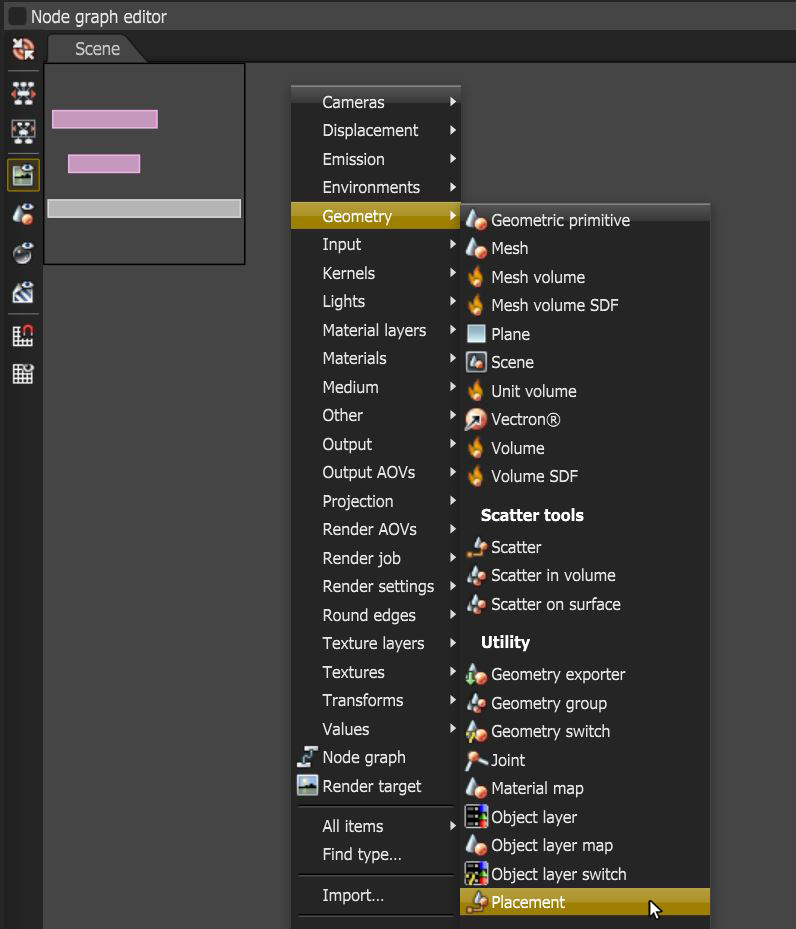
- Right-click your mouse in the Nodegraph Editor, click on Geometry, and select a Mesh node.
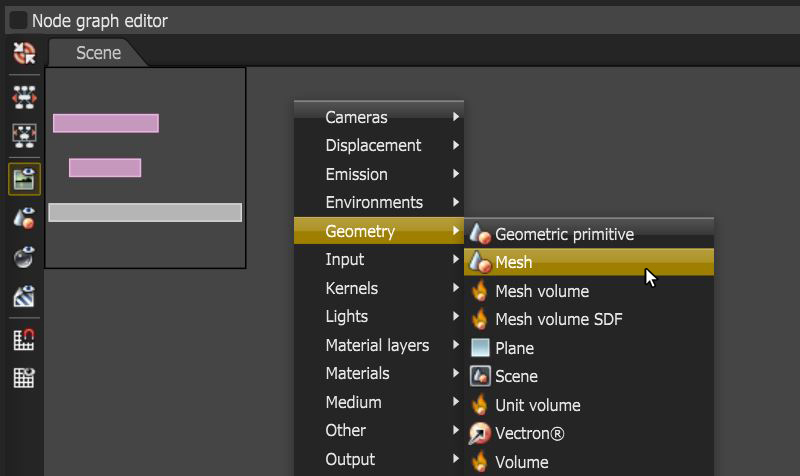
Figure 2: Selecting a mesh object from the pop-up menu to import a mesh object
- Add a Placement node to the scene.
- Connect the imported mesh node's output to the Placement node's input, then connect the Placement node to the Render Target. You can copy and paste the Placement node to make several instances of the imported mesh node.

Figure 3: Adding a Placement node to the scene
- The Render Target node has a single input for the geometry, so you must group the instances. Bring up the context menu to create a Group node.
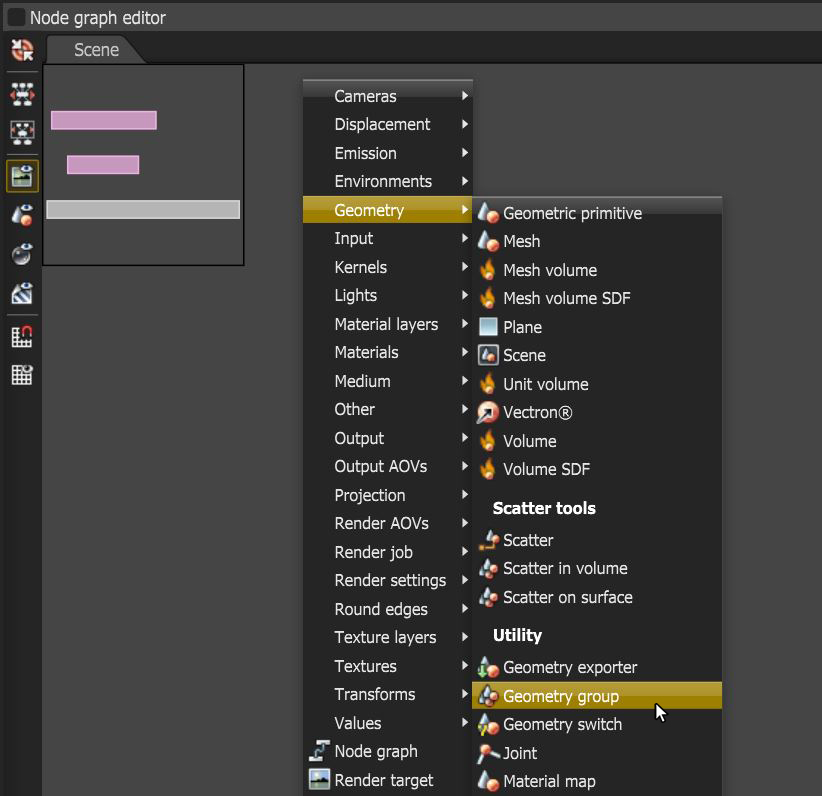
Figure 4: Connecting the Mesh node to the Placement node (left); copying-and-pasting the Placement node to make instances (right) - To group all of the Placement nodes you'll need to add inputs to the Geometry group node. To do this, select the Geometry Group node and click on the Add input button in the Node Inspector (Figure 5).
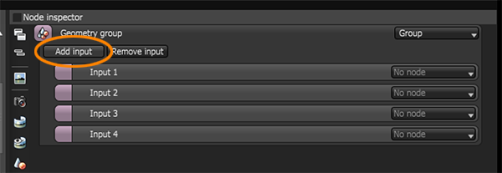
Figure 5: Adding a Group node to the scene - Add as many input nodes as you need to accommodate the instances created by the Placement nodes. To place the instances in the scene use the Rotate, Scale, and Translate settings in the Node Inspector for each Placement nodes (Figure 6).
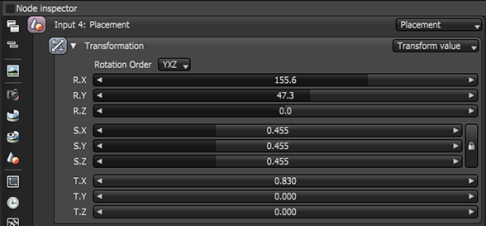
Figure 6: Placement node parameters
Placement Parameters
Rotation - Rotates the Mesh instance on a specified axis.
Scale - Scales the Mesh instance on a specified axis. To scale an instance in a non-uniform way, press the Unlock button to unlock the three-scale axis.
Translation – Moves the Mesh instance on a specified axis.
|
|
Placement Nodes
|
Figure 7: Nodegraph with Placement nodes and Geometry group
|
|
Placement Nodes
|
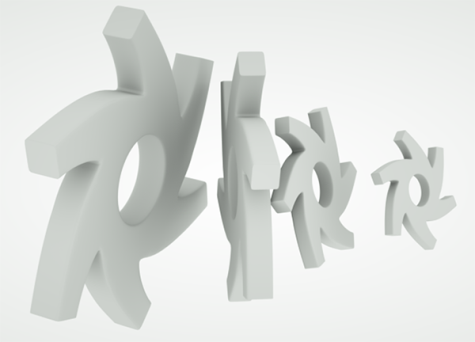
Figure 8: The results after adjusting the Placement nodes' settings
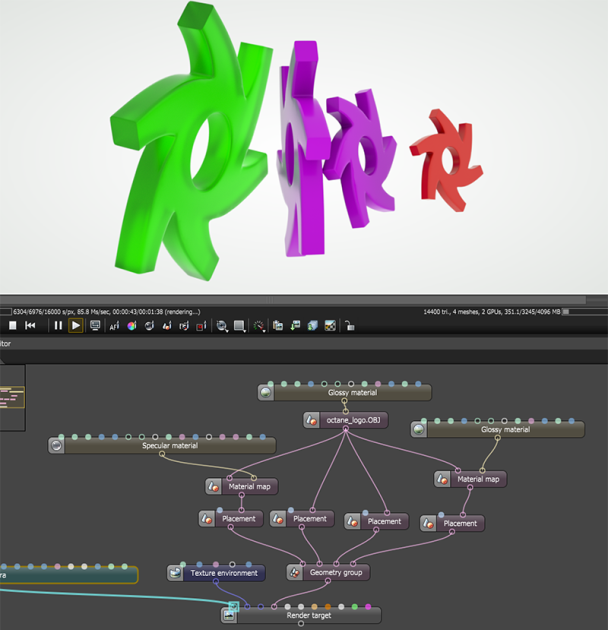
To assign a different material to the instance, right-click in the Nodegraph Editor, click on Geometry, and select a Material Map node to put between each mesh node and the Placement node. You can connect materials to the Material Map node as shown in Figure 9. The Material Map node overrides any materials applied to the original mesh object.
|
|
Material Map Node
|
Figure 9: The Material Map node can assign materials to geometry instances

