Object Layer Map
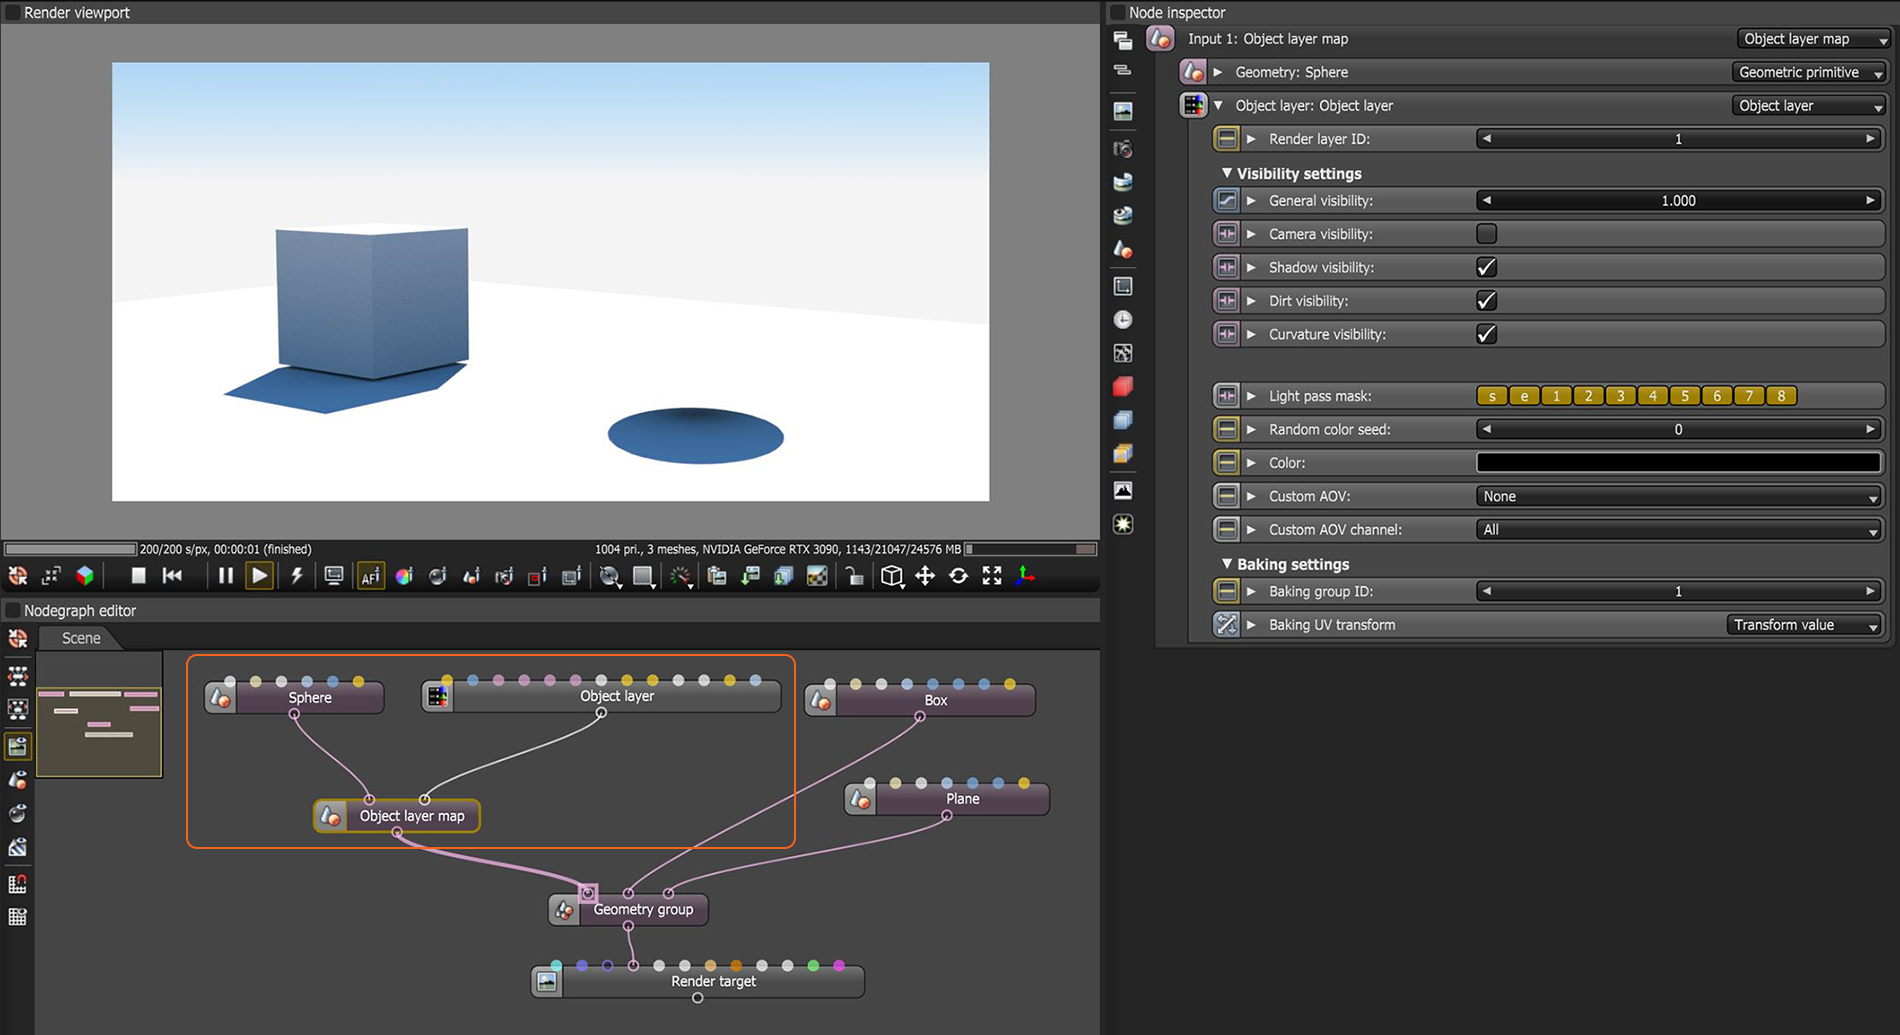
The Object Layer Map node in conjunction with an Object Layer node provide visibility and rendering parameters (Figure 1). This includes parameters to control both the object and the shadows it casts on other geometry around it. The node can be found under the Geometry category in the Nodegraph Editor window. More information can be found in the Object Layer Node topic under the Rendering section.
|
|
object layer map
|
Figure 1: Object Layer Map node used to deselect camera visibility for a sphere primitive
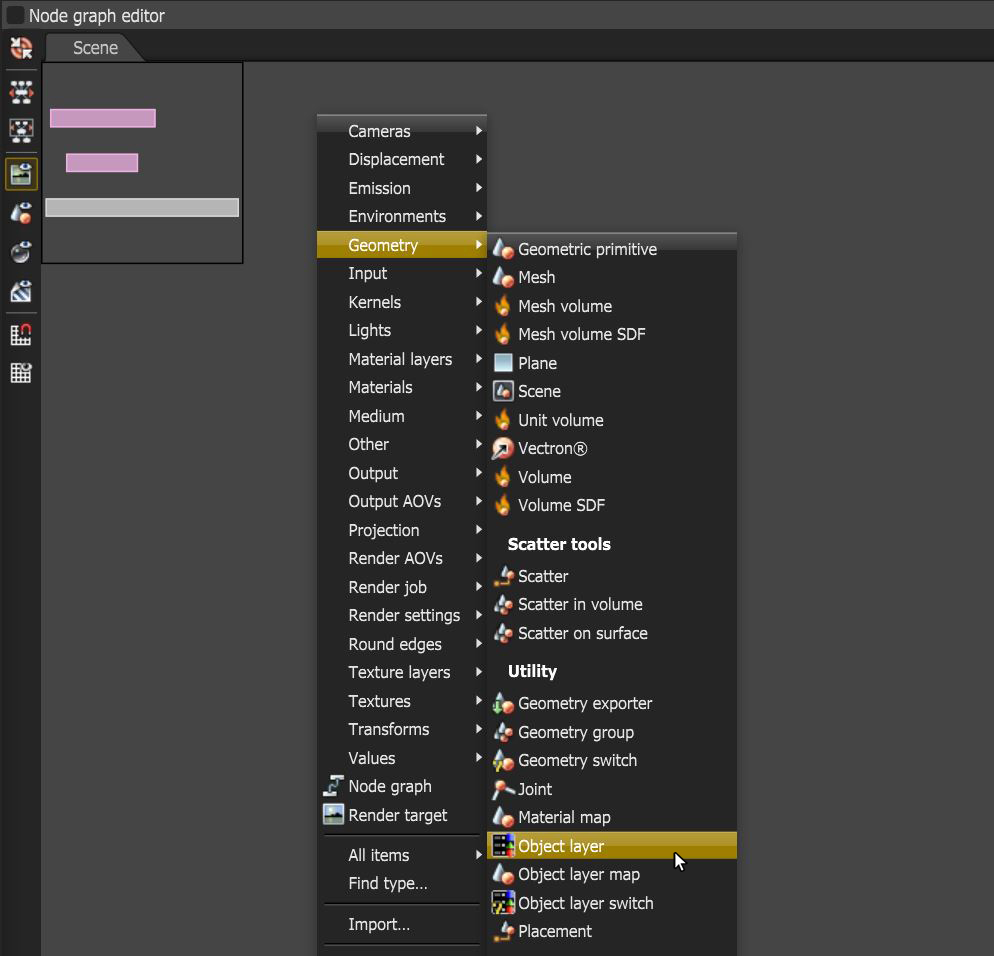
The Object Layer and Object Layer Map nodes can be accessed from the Geometry category in the Nodegraph Editor window as well (figure 2).
|
|
object layer
|
Figure 2: Accessing the Object Layer node from the Nodegraph Editor window,
Object Layer Parameters
Render Layer ID - Specifies the render layer for which the object belongs.
General Visibility - This controls the level of visibility for both the object and its shadow.
Camera Visibility - Takes a boolean value to specify if the object is visible to the camera. This is enabled by default.
Shadow Visibility - Takes a boolean value to specify whether the shadow cast by the object is visible to the camera. This is enabled by default.
Dirt Visibility - If checked, this parameter will make the mesh affect meshes that are using a Dirt texture. If disable, any Dirt Texture node will ignore that mesh.
Curvature Visibility - If checked, this parameter will make the mesh affect meshes that are using a curvature texture. If disable, any Curvature Texture node will ignore that mesh.
Round Edges Visibility - If disable, the round edges effect applied to an object will be ignored.
Trace Sets & Trace Set Visibility Rules - See the Trace Sets topic for more information.
Light Pass Mask - Enable or disable illumination from light sources with a corresponding light ID number.
Random Color Seed - Specifies the start point to initialize the color after which random colors are generated. This is 0 by default when random colors are not in use.
Color - The color used for the assigned object when it is rendered in the object render layer pass.
Custom AOV - If a custom AOV is selected, this parameter will write a mask to where it is visible.
Custom AOV Channel - If a custom AOV is selected, the selected channels(s) will receive the mask.
Baking Group ID - This specifies what baking group the object belongs to. The value provided assigns the object to the corresponding baking. This is the first baking group by default.
Baking UV Transform - This tells the Baking Camera how to project the UV sets of the object layer. This affects the way the UVs from that object layer are projected into the UV space when rendered using the baking camera. The value specified as baking UV transform will be used by the baking camera to place all UVs that belong to the geometry in that object layer in the UV space. This lets you bake entire scene light-maps, including all render passes in one single render without any additional compositing.


