Object Layer Node
The Object Layer node provides parameters control the object’s baking settings as well as other parameters to control both the object and the shadows it casts on other geometry. Additionally, this provides a way to modify the object visibility in the Viewport at render time.
|
|
Object Layer Parameters
|
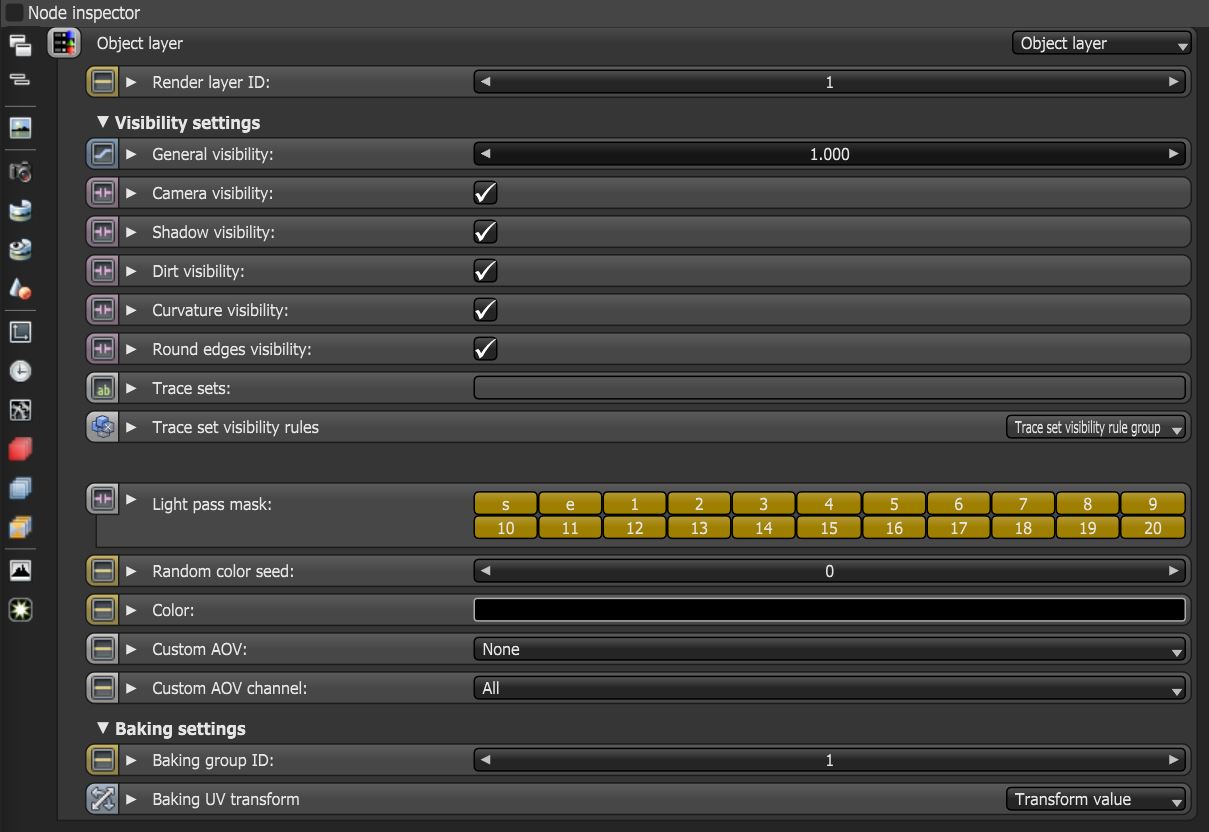
Figure 1: Object layer parameters in the Node Inspector
Object Layer Parameters
Render Layer ID - This specifies the layer to place the object on. The value provided assigns the object to the corresponding render layer. This is the first render layer by default.
General Visibility - This controls the level of visibility for both the object and its shadow.
Camera Visibility - Takes a boolean value to specify if the object is visible to the camera. This is enabled by default.
Shadow Visibility - Takes a boolean value to specify whether the shadow cast by the object is visible to the camera. This is enabled by default.
Dirt Visibility - If enabled, the mesh will affect other meshes that are using a Dirt texture. If disbaled, any Dirt texture node will ignore that mesh.
Curvature Visibility - This option determines whether or not to sample curvature data.
Round Edges Visibility - This option determines whether or not to sample round edges data.
Trace Sets & Trace Set Visibility Rules - The Trace Set system allows for greater control over including or excluding scene data from object surfaces when light hits the surface. Refer to the section on Trace Sets for more information.
Light Pass Mask - Determines which light pass IDs will contribute to the illumination of the object for which this node is attached.
Random Color Seed - Specifies the start point to initialize the color after which random colors are generated. This is 0 by default when random colors are not in use.
Color - The color used for the assigned object when it is rendered in the object render layer pass.
Custom AOV - Writes a mask to the corresponding Custom AOV present in or attached to the Render Target node.
Custom AOV Channel - Determines which channels will receive the custom AOV mask.
Baking Group ID - This specifies what baking group the object belongs to. The value provided assigns the object to the corresponding baking. This is the first baking group by default.
Baking UV Transform - This tells the Baking Camera how to project the UV sets of the object layer. This affects the way the UVs from that object layer are projected into the UV space when rendered using the baking camera. The value specified as baking UV transform will be used by the baking camera to place all UVs that belong to the geometry in that object layer in the UV space. This lets you bake entire scene light-maps, including all render passes in one single render without any additional compositing.
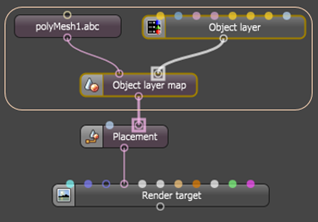
In some cases, when you import a Geometry object into OctaneRender®, an Object Layer is already present. In cases where the geometry is imported and has no Object Layer present, you can set up the Object Layer by creating an Object Layer Map, which lets you map the Object Layer parameters to the Geometry object (figure 3). The Object Layer Map must connect to the Geometry node.
|
|
Node Graph Editor
|
Figure 3: An Object Layer Map node connects the geometry with the Object Layer node
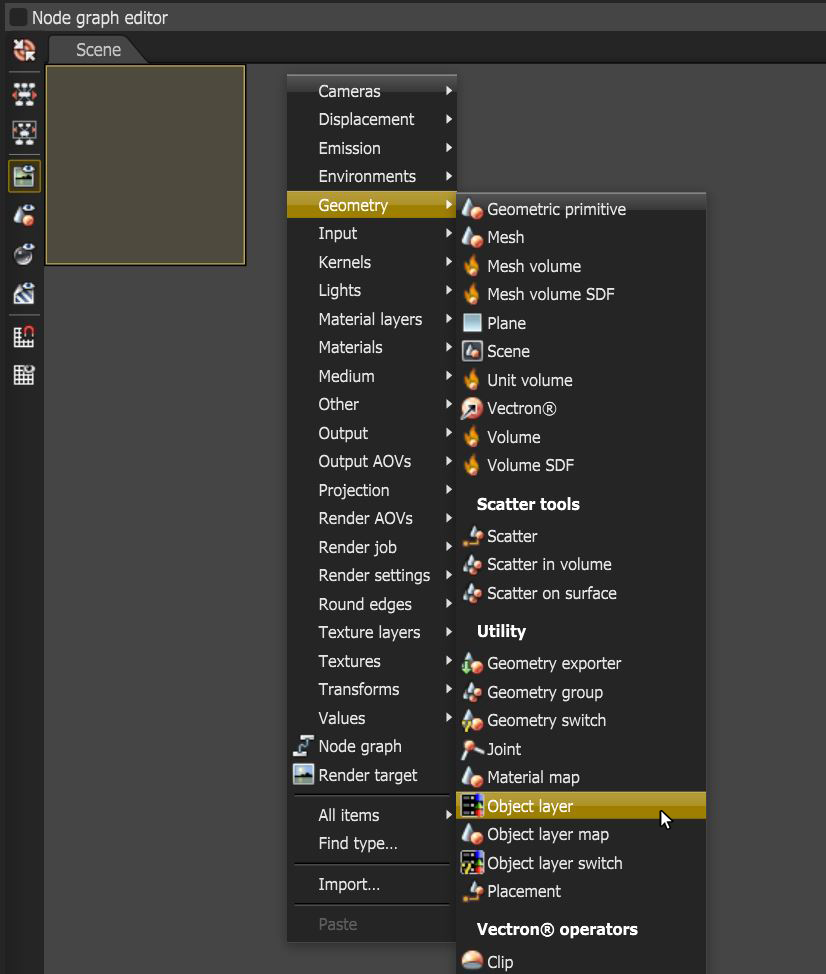
The Object Layer node can be accessed by right-clicking in the Nodegraph Editor and clicking on Object Layer under the Geometry category (figure 4).
|
|
Node Graph Editor
|
Figure 4: Object Layer nodes are created using the pop-up menu in the node graph
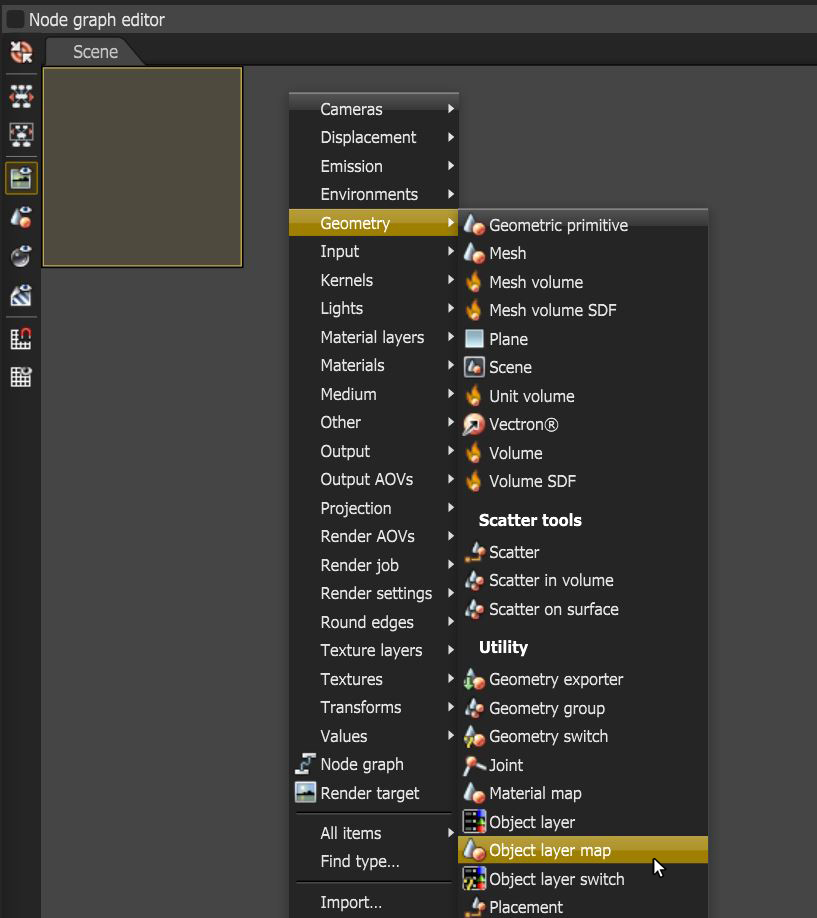
The Object Layer Map node can be accessed by right-clicking in the Nodegraph Editor and navigating to the Geometry category then clicking on Object Layer Map.
|
|
Node Graph Editor Window
|
Figure 5: Object Layer Map nodes are created using the context menu in the Nodegraph Editor


