Rendering Overview
The quickest method for setting up a Houdini® scene for rendering via OctaneRender® is to click on the Octane button in the Octane shelf (Figure 1) or choose the Create Render Setup from the Octane menu in the Network window (figure 2).
|
|
Rendering Overview
|


Figure 1: Adding an Octane Render Setup node from the Octane shelf
|
|
Rendering Overview
|

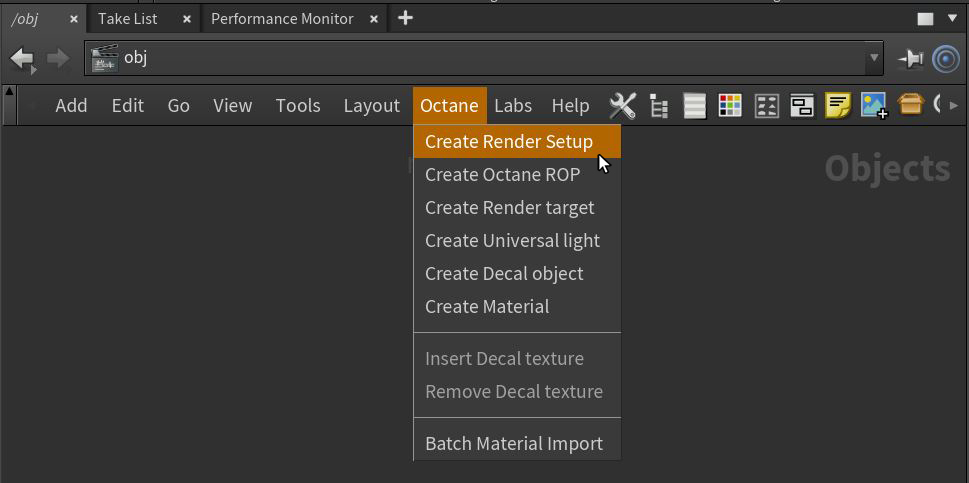
Figure 2: Adding an Octane Render Setup node from the Network window
This creates an Octane Render Setup node in the Houdini OBJ network window. This node contains the necessary parameters for both the Octane Render Target and the Octane ROP nodes. Otherwise these need to be created indivually in their respective Network windows. Refer to the Octane Render Target section and the Octane ROP section for more details regarding parameters contained in these nodes. A camera is also required for Octane to render correctly. This can be done manually or by clicking on the Open IPR button in the Octane Render Setup window (figure 3) which will automatically create a camera in the scene and open the IPR window.
|
|
Rendering Overview
|
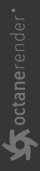
Figure 3: Opening the IPR window from the Octane Render Setup node
Rendering via the OctaneRender plugin consists of utilizing the OctaneRender IPR for viewing quick iterations, then using the Houdini MPlay window alongside the Octane ROP settings to produce final renders or animations. The typical animation workflow conducts test renderings with the IPR due to its responsiveness, makes note of the amount of samples needed to eliminate noise, then set the Kernel Type - Max. Samples to this value in the Render Target parameters.