Post Processing
OctaneRender® includes the ability to add effects like glow, glare, bloom to your images after rendering. These effects can be saved directly with the images or as separate layers to add in a compositing application. The Post Processing parameters are accessible from the Octane Render Target node under the Post Processing tab (Figure 1).
|
|
Post Processing
|

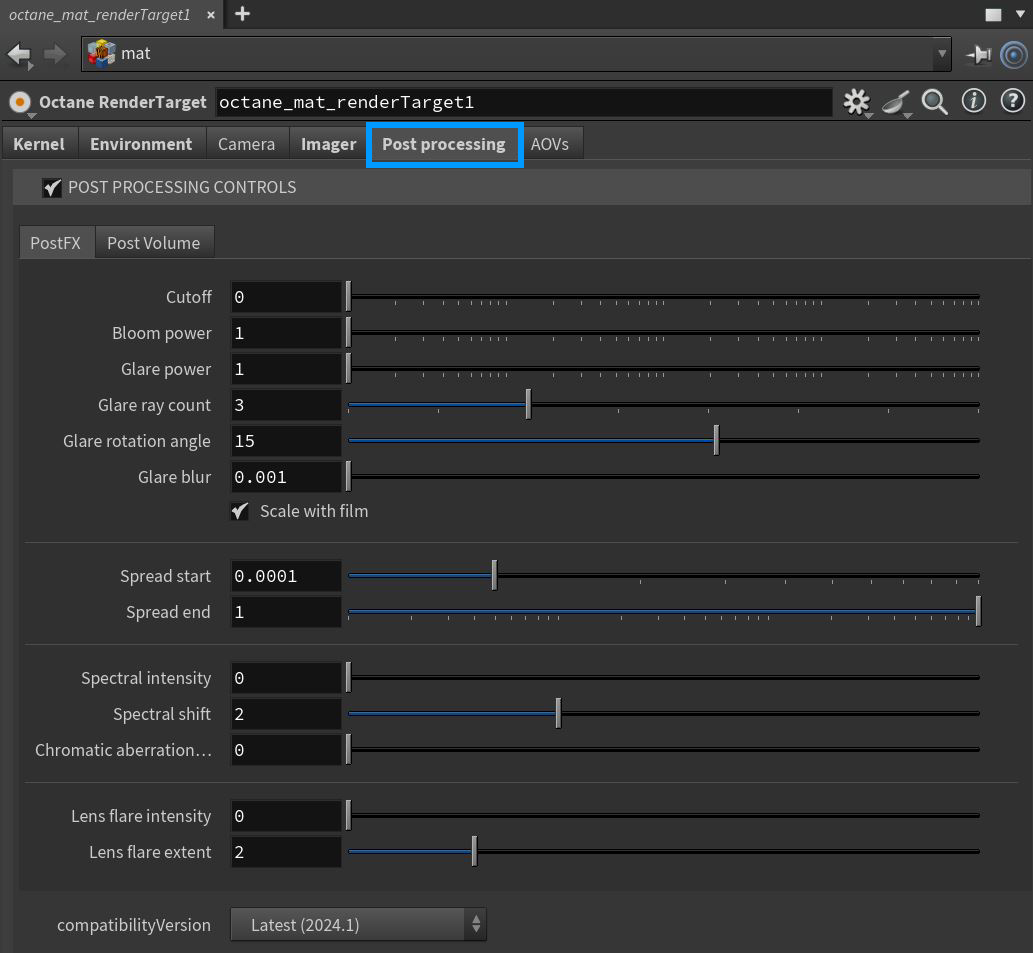
Figure 1: Post Processing parameters
Post Processing Parameters
PostFX Tab
Cutoff - Applies bloom/glare to pixel values above the Cutoff value.
Bloom Power - Controls the size of the glow originating from an emitter, and the size of the halo originating from the sun and/or concentrated light on reflective Glossy materials.
|
|
Bloom
|

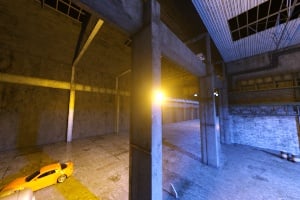
Figure 3: Bloom Power adjusted
Glare Power - Controls the size of the visible rays originating from an emitter, and the size of the glare originating from reflective Glossy materials.
|
|
Glare
|

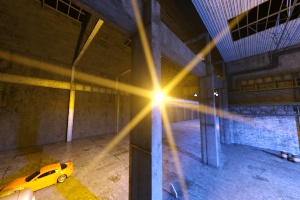
Figure 4: Glare Power
Glare Ray Amount - Controls the number of radiated or reflected visible rays.
Glare Rotation Angle - This is used to adjust the glare direction relative to the object.
Glare Blur - Controls the glare sharpness. Small values result in a crisp linear glare, and large values result in a softer glare.
Scale with Film - If enabled, bloom and glare will scale with film size. If disabled, the size of the bloom and glare will be the same number of pixels regardless of film size. This should be disabled to match the behavior of previous versions of Octane.
Spread Start - The minimum blur radius for Bloom/Glare, as a proportion of image width or height (whichever is larger). This is ignored if Scale with Film is disabled.
Spread End - The maximum blur radius for Bloom/Glare, as a proportion of image width or height (whichever is larger). This is ignored if Scale with Film is disabled.
Spectral Intensity - Adjusts intensity distribution of the rays across a source. This affects the brightness of the radiant energy.
Spectral Shift - Adjusts the spectrum displacement as the emitted light's frequency changes. The shift is evident by a color change, similar to the doppler effect, as the distance traveled by the ray from its source increases or decreases.
Chromatic Aberration Intensity - Determines the intensIty of the chromatic aberration effect. Higher values will distort the image from the center out, in a circular fashion.
Lens Flare Intensity - Controls the intensity of the lens flares.
Lens Flare Extent - This option controls the overall length and distances between lens flare highlights.
Post Volume Tab
Light Beams - Activate the light beams and it's associated parameters.
Medium Density - This option controls the density of the Light Beam effect.
Fog - Activate the fog and it's associated parameters.
Extinction Distance - Determines the overall distance in which the Fog effect is visible. Smaller values will make the scene appear as if the fog is dense, while larger values will act to minimize the fog contribution.
Base Level - Sets the base level of the fog effect in world space (great for ground fog). Smaller values will lower the height of the fog and larger values will raise the height (and also affect the fog density as seen from the camera.
Half Density Height - Sets the height of the Fog effect.
Env. Contribution - Controls blends between the Base Fog Color and the scene environment (effectively tinting the scene with the Fog Base Color). Lower values strengthen the bias towards the Fog Base Color.
Base Fog Color - Sets the color of the Fog.
Medium Radius - Radius of the post volume. The post volume acts as a sphere around the camera position and the radius. This value may need to increase or decrease depending upon the scale of a given scene.