Decal Texture
The Decal system provides a toolset for applying a texture map to the surface of scene objects. The system consists of two nodes: the Decal Texture node found in an Octane VOPNET and the Octane Decal node found in the OBJ network window. A decal texture can be used across multiple materials and scene objects. An object's material that contains the Decal Texture node will display the decal texture if the Octane Decal node is positioned on the object surface (figure 1).
|
|
Decal Texture
|

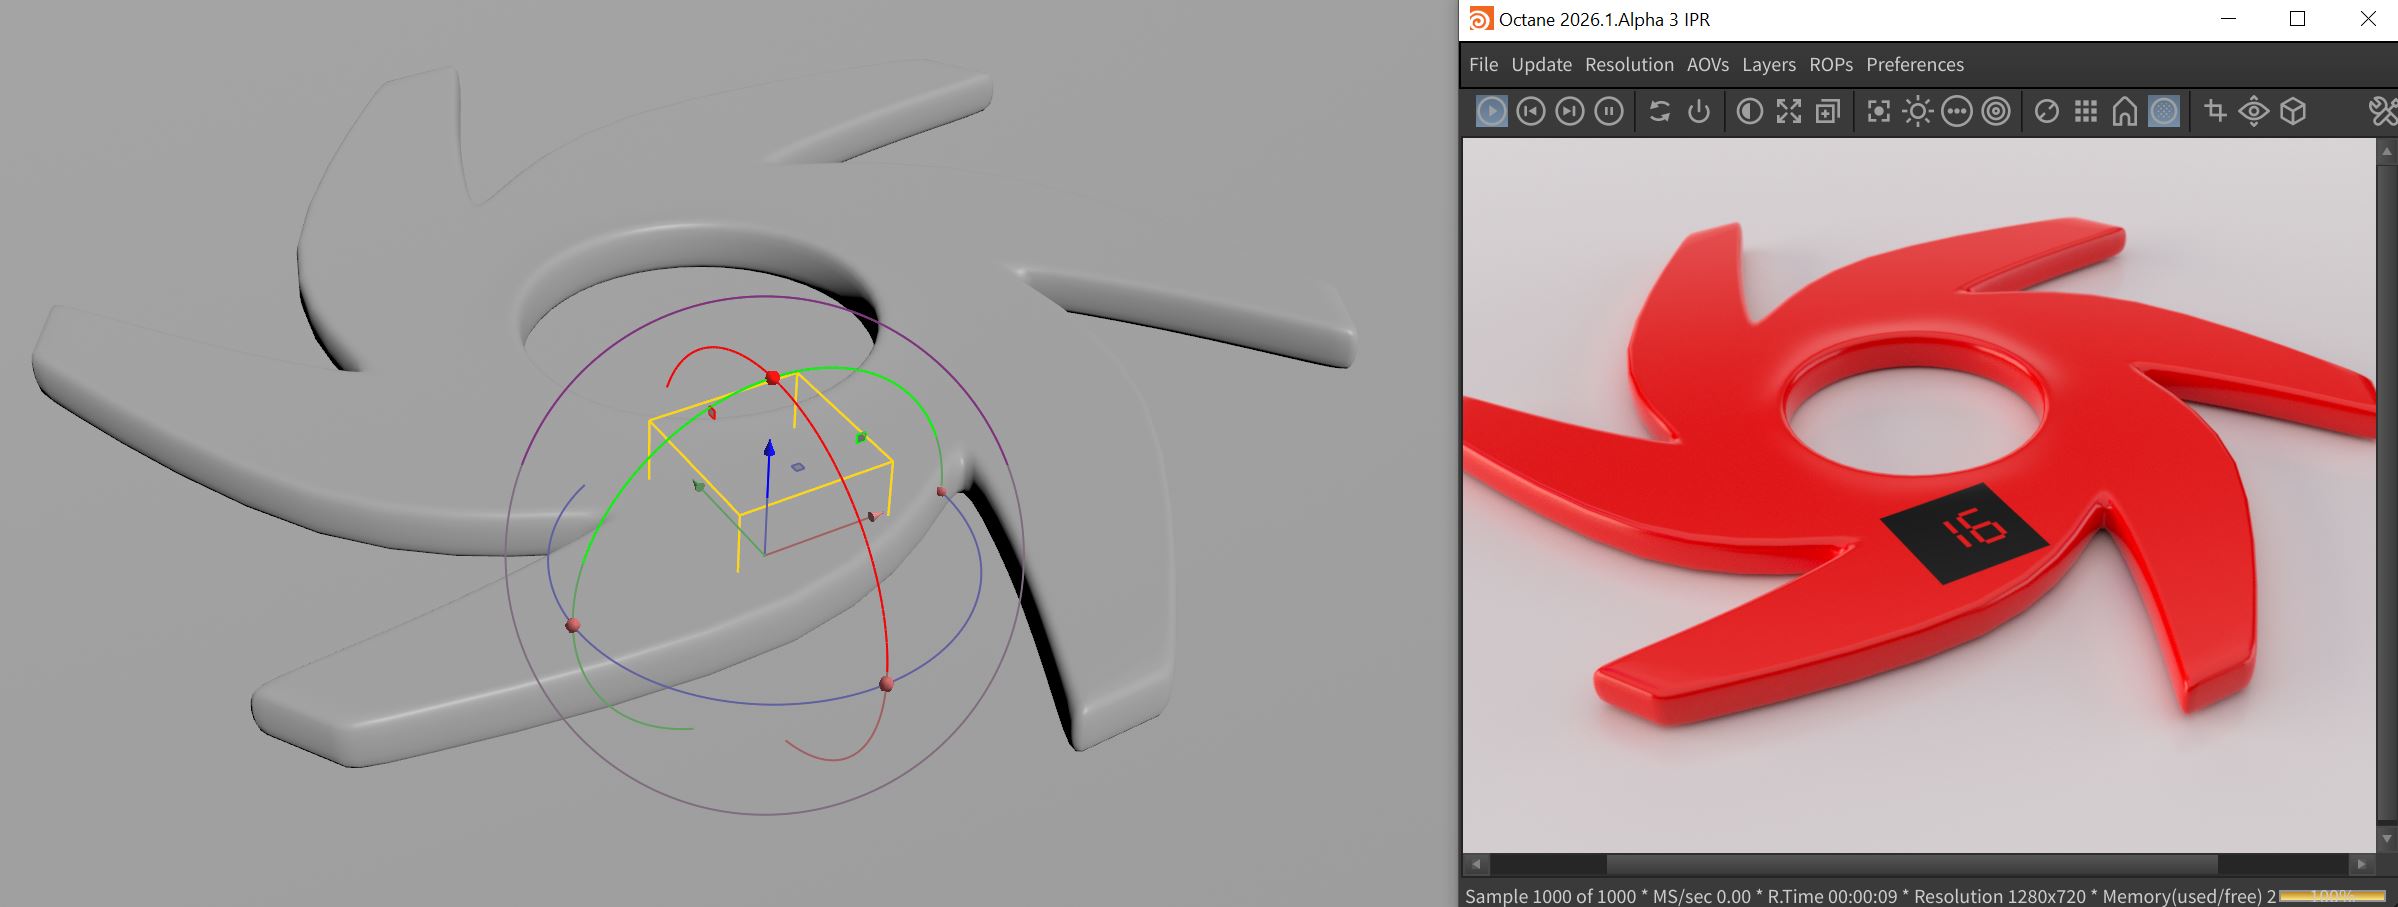
Figure 1: The Digit texture is displayed as a decal on the Octane logo
The Decal Texture node can be accessed in an Octane VOPNET and applied to a material (figure 2). The texture map to be used as a decal is not connect here. This node only specifies that this material will use a texture map as a decal. What texture map is used as a decal is determined by the Decal Texture Index parameter that communicates with the Octane Decal node which is where the actual decal texture is specified. The Blend Mode parameter detemines how the decal texture will display on the surface of an object. Additionally, there is a Texture pin for connecting a color or texture map that displays under the decal texture. In figure 2, a Color RGB node is connected to the Texture pin to give the surface a red color under the decal texture.
|
|
Decal Texture
|
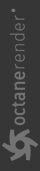
Figure 2: The Decal Texture node attached to a material in a VOPNET
The Octane Decal node can be access from the Octane shelf. Once the Octane Decal node shelf icon is pressed, you will be instructed to select position for the decal. This will create a bounding box where the decal will be displayed.(figure 3). The position of the decal can be further manipulated with the Houdini® Move, Rotate, and Scale tools.
|
|
Octane Decal
|

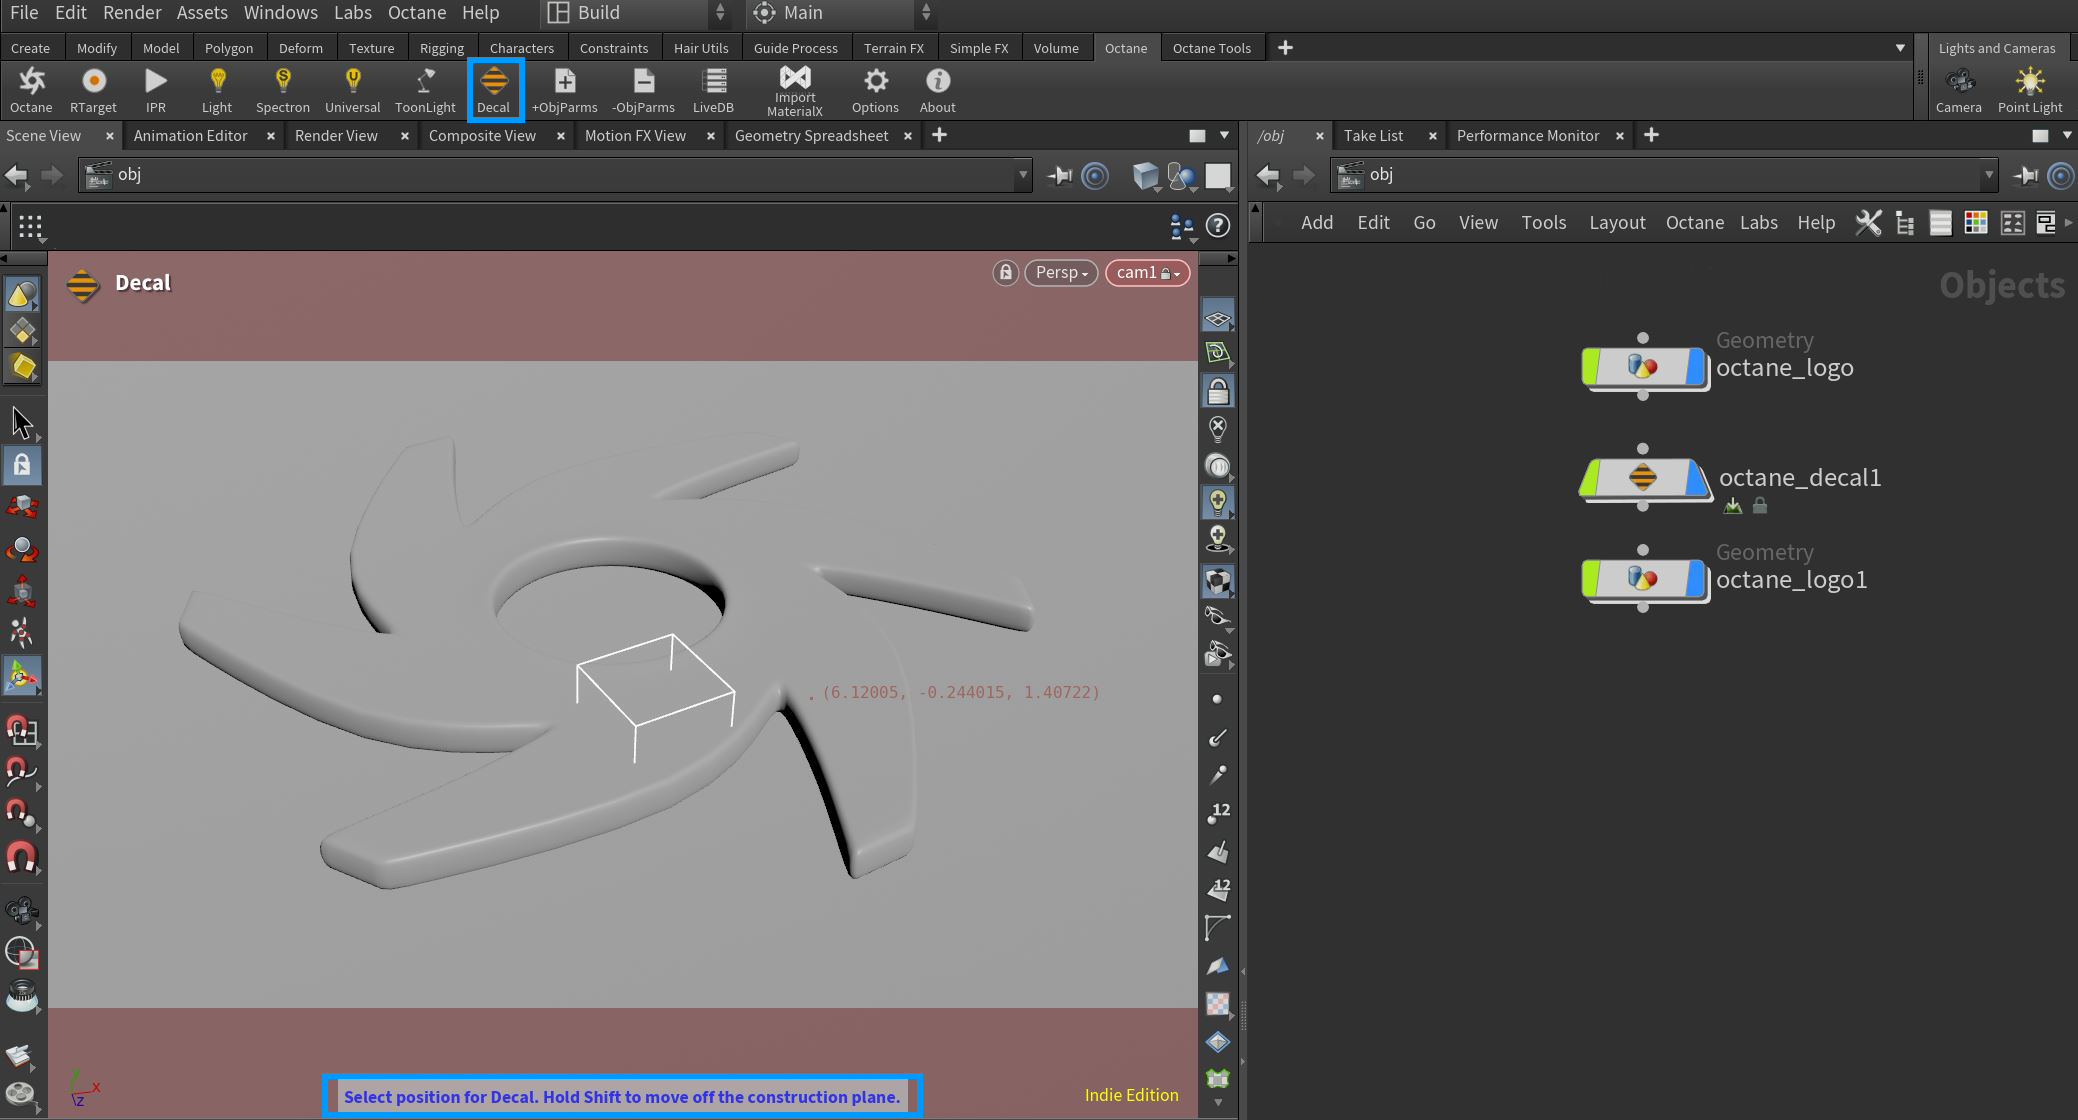
Figure 3: Accessing the Octane Decal node
Any object with a material that matches its Decal Texture Index parameter with the Octane Decal's Input Textures index (figure 4) will have the decal texture displayed on the surface where the bounding box overlaps with the surface.
|
|
Octane Decal
|

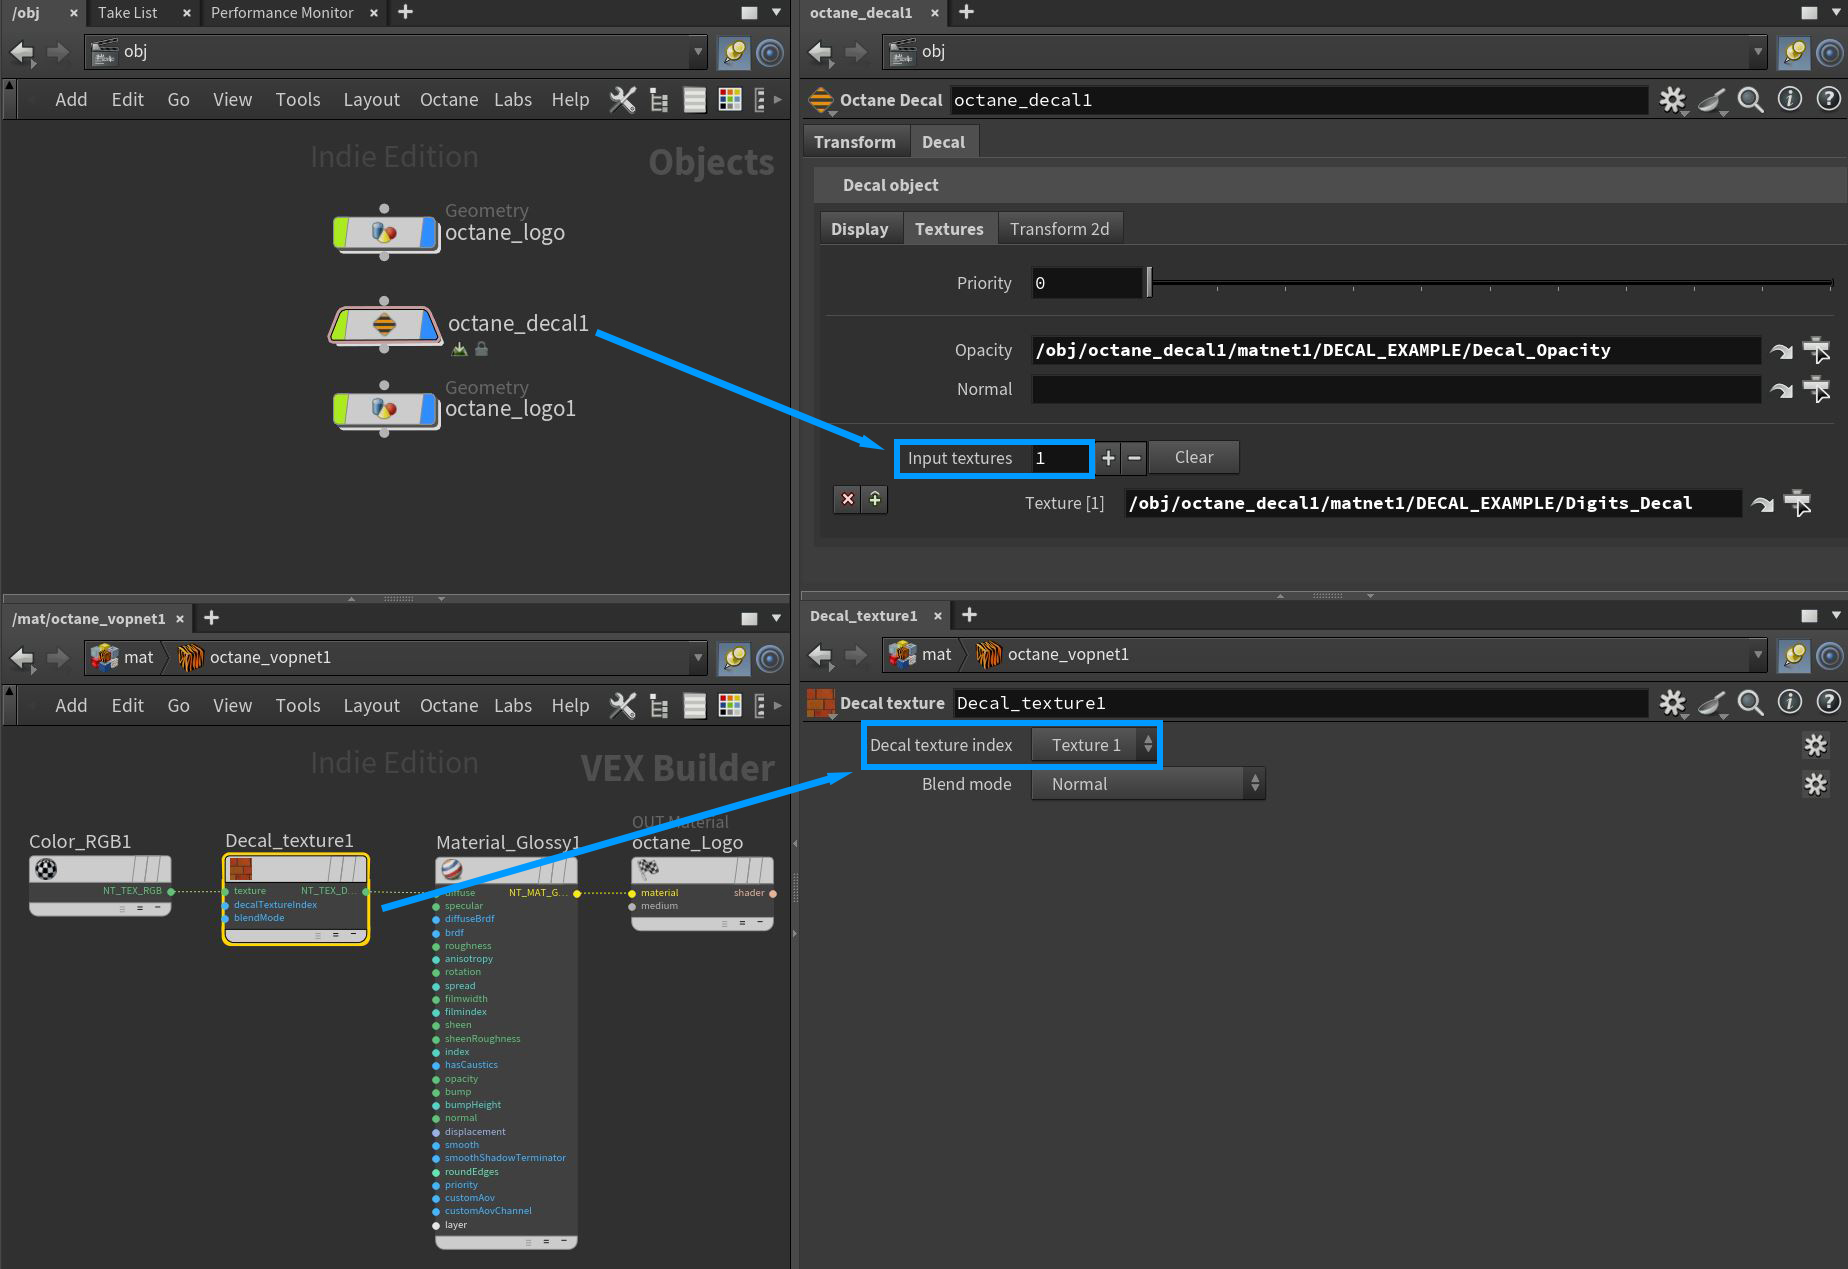
Figure 4: Matching decal texture index numbers
The texture maps to be used as decals are specified in the Octane Decal node's Decal > Textures parameter tab (figure 5). There is a default set of decal texture maps specified for Opacity, Normal, and Input Texture but these parameters can be mapped to texture maps located in any Octane VOPNET.
|
|
Decal Texture Maps
|


Figure 5: Adding the decal texture maps
Decal Texture Parameters
Transform Tab
Contains typical transform type-in values for the position, rotation, and scale of the Octane Decal scene object.
Decal Tab
Display Tab
- Display As - Determines how the Octane Decal will be displayed in the viewport.
- Wireframe Color - Determines the wireframe color of the Octane Decal display in the viewport.
- Render Wireframe Color - Determines the wireframe color in the IPR window when the Decal Wireframe button is active.
Textures Tab
- Priority - Determines which decal has priority when multiple decals overlap on a surface.
- Opacity - Specifies the texture map to be used for opacity on the decal. This texture map is required otherwise the decal texture will not show. Any Octane texture that generates greyscale can be used where white is fully opaque and black is fully transparent.
- Normal - Specifies the texture map to be used for normal mapping on the decal.
- Input Textures - This parameter is where the texture map(s) to be displayed as the decal is specified.
Transform 2d Tab
- UV Rotate - Rotates the decal texture map in UV space.
- UV Scale - Scales the decal texture map in UV space.
- UV Translate - Moves the decal texture map in UV space.