Octane Light Tag Introduction
The Octane Light tag is created by adding a light in OctaneRender®, which will then add a "Light Tag" to the new light at the same time. All of the settings related to the light, outside of the Cinema 4D-supplied attributes for the light, reside in the Octane Light Tag. The Light Tag consists of five tabs: Basic, Main, Light Settings, Visibility and Motion Blur. The Basic tab is the classic Cinema 4D tab, where you can name the light and choose the layer for the light to reside; the other tabs are explained in the following sections.
General Settings of the Light Tag
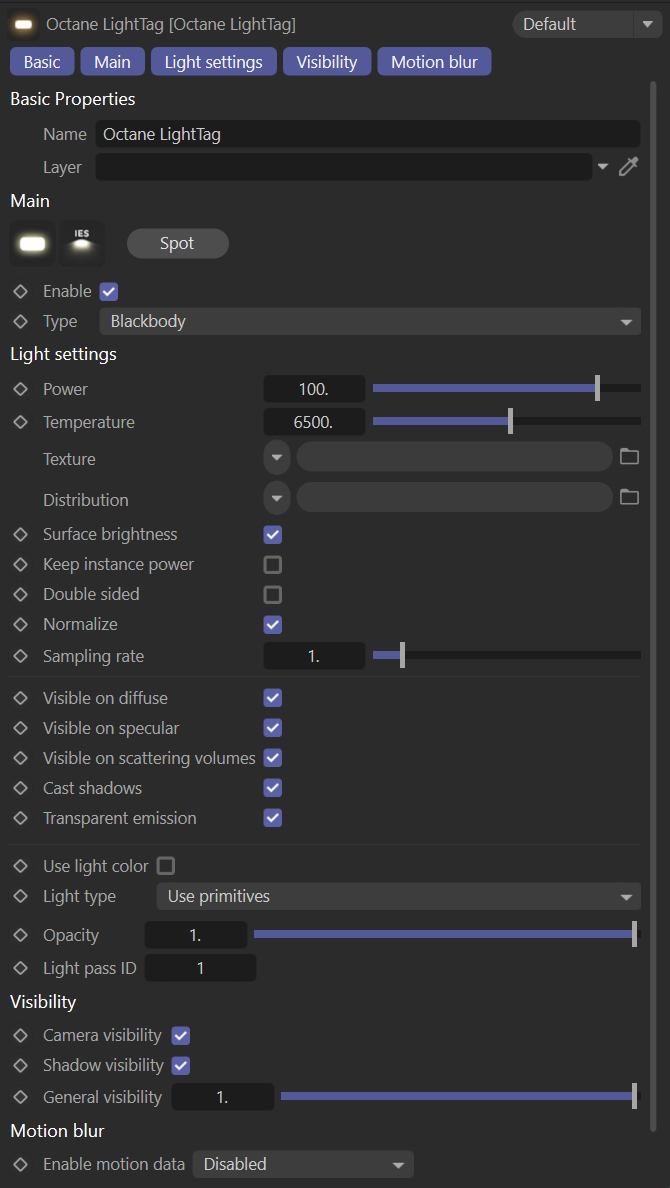
These settings apply to all light types supported by OctaneRender®. The image below illustrates the components of the Octane Light tag, as seen in the Attribute Manager.
|
|
octane light tag
|

Main Tab
The Main tab contains settings to choose the Light type, enable the light and to choose the type of emission of the light source.
Normal and IES Light Icons
Select the icon that represents the light type desired. When you press the IES icon, you can start using special light data with the "ies" file extension. This topic is discussed in detail in "IES Lights".
Spot Button
Define or remove.
Enable
Enable/Disable the use of the light.
Type
Choose between Blackbody and Texture emission for the light.
Light Settings Tab
The Light Settings tab contains most of the settings needed to control the characteristics of the light.
Power
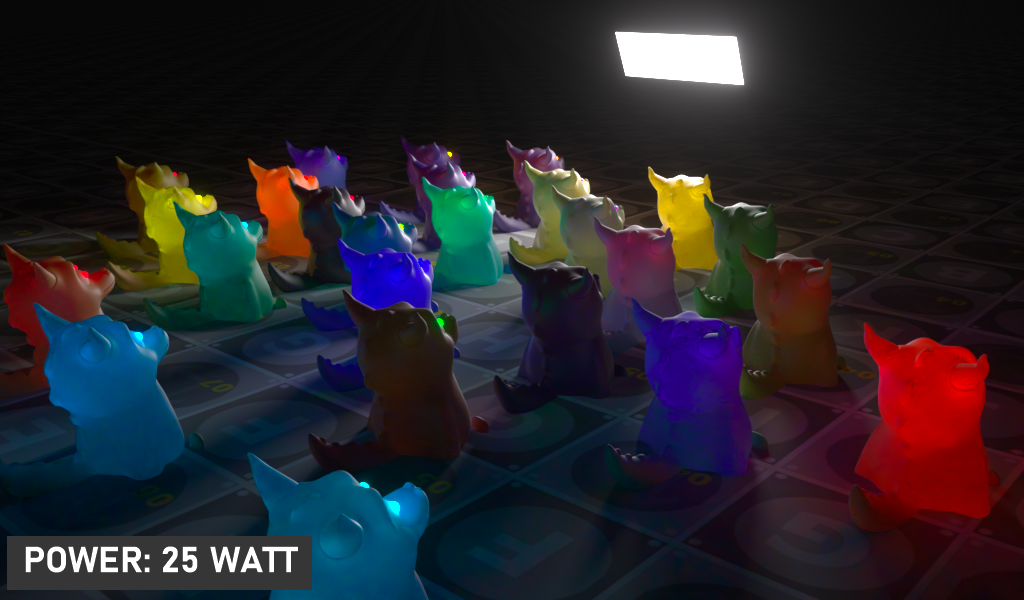
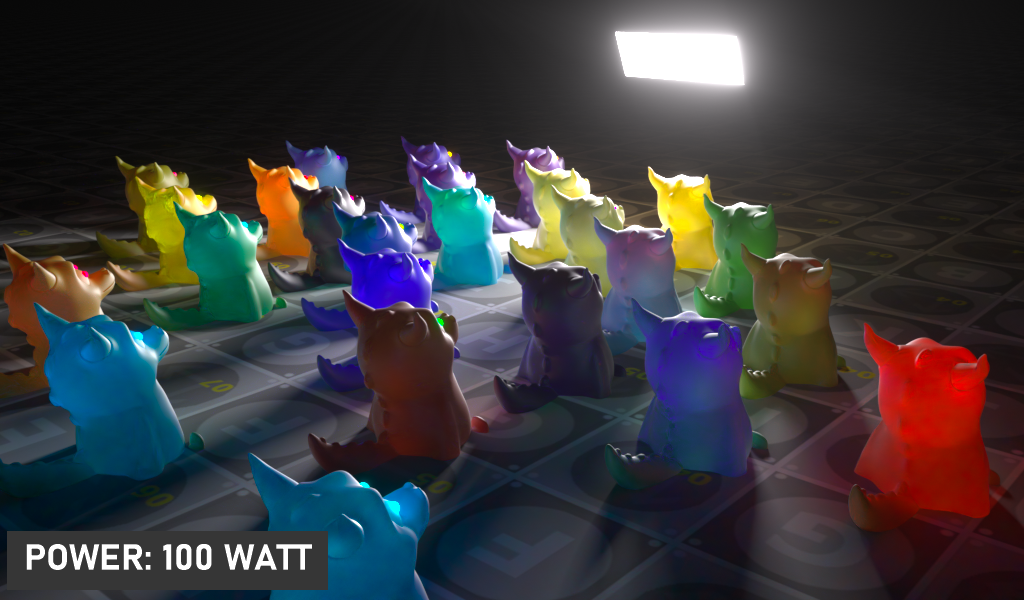
The Power attribute value represents light energy in Watts. To get a realistic render output, enter real world light wattage values into the power setting, representing the proper values for the desired light source. For example, standard bulb wattage typically has a range of between 25 to100 watts and radiates a brightness of about 250-1600 Lumens. In this same range of lumens, Halogen bulbs are 18-72 watts for the same brightness as standard bulb. LED bulbs fall into the 4-20-watt range for standard bulb brightness. Of course, any value can be used, but if realistic results are desired, it is best to stick with known wattage values.
|
|
POWER |
|
|
|
|
|
|
|
|
|

Temperature
Set the emission color of the light in degrees Kelvin, commonly used for light description. The following chart shows the visible spectrum of light mapped to the Kelvin scale:
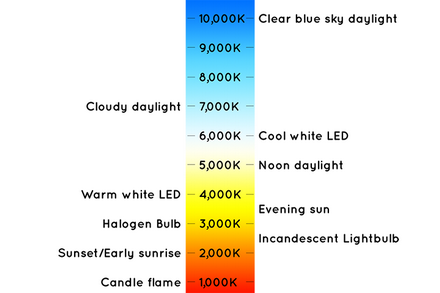
Attribution: Ilumi.co
This scale suffices in the case of typical lights commercially available for home or business use, however, there are plenty of other situations where lights are actually colored in with different methods (such as cinematic gels that are used to color lights on movie shoots.) The Kelvin scale refers to color temperature (from warm to cool) and cannot represent specific colors in the RGBSpectrum or Gaussian spectrum. This can be easily done via the Texture option, discussed in the following section, or by enabling Use Light Color, and choosing the color from the Cinema 4D color picker.
Texture
This option uses Octane nodes for more direct control to color the light source, with either RGB Spectrum, Gaussian, or Image Texture nodes, beyond basic color temperature control as offered by Kelvin scale in the Temperature slot. HDR images can be used, but may add noise, requiring an increase in Sampling Rate. For details see Texture Emission.
|
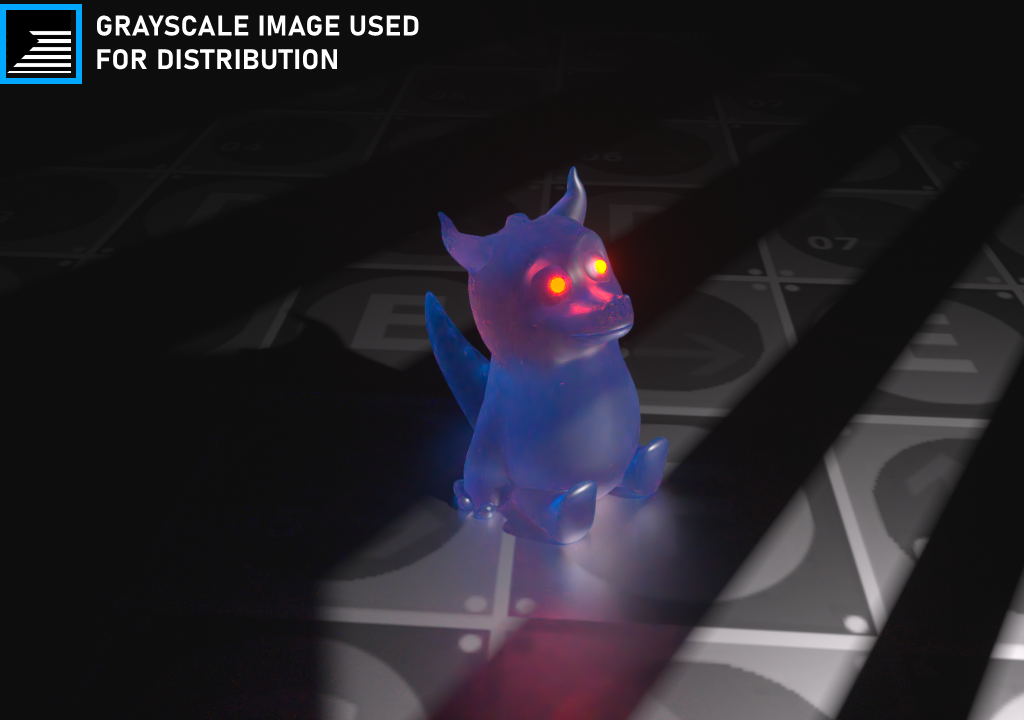
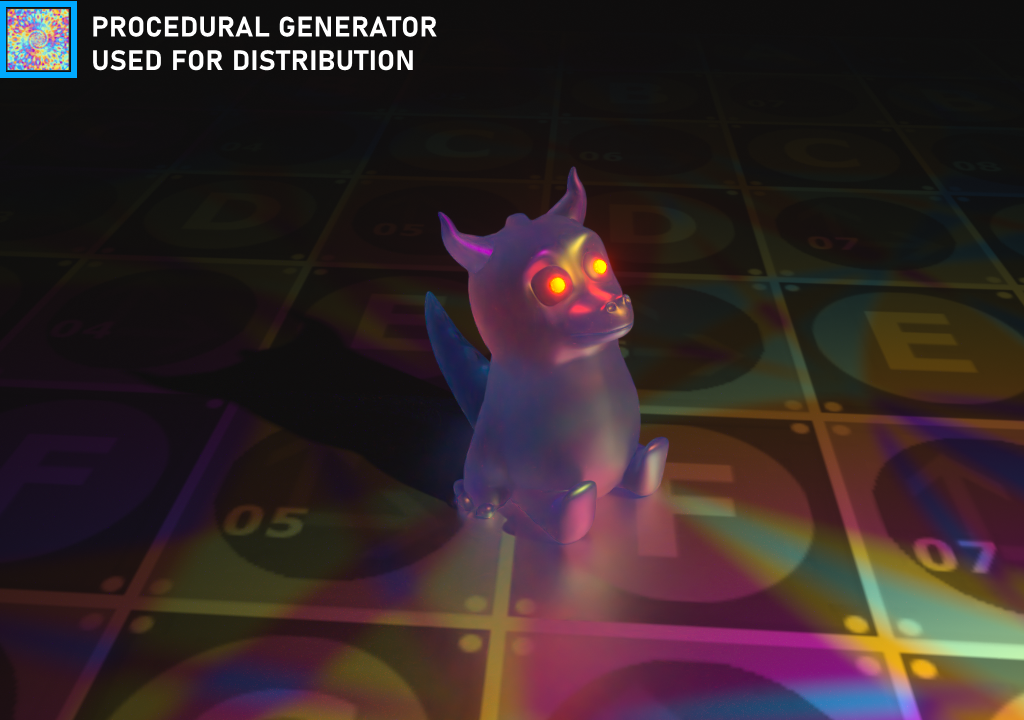
NOTE Procedural Generator nodes work differently when used in the Texture slot of lights. Instead of seeing the pattern projected into the scene, the pattern instead is visible on the light shource itself; therefore, any scene illuminated with a Procedural Generator in the Texture slot of an Octane Light will have generator pattern averaged over the light area, and, likely, not very useful to you. Instead, use Procedural Generators in the Distribution slot of an Octane Light if you wish to see that pattern projected into the scene (as shown in the following examples). |
Distribution
This option is used to define the pattern of the light cast, and is useful for creating "gobo Lights" and "IES Lights", for example. You can create various light patterns using any image or Procedural Generator. In the example below, various light patterns are created using grayscale images in the Distribution channel (alpha images work as well). Once you have defined the image in the Distribution channel, you can position, scale and rotate the texture by adding a Transform node (using the Octane Image Texture), explained in the "UsingTextures" section. For IES lights, just connect the ".ies" file into Distribution pin via an Image Texture node.
|
IMPORTANT The Texture Projection option in the Image Texture or Procedural Generator must be set to Perspective (when you position/rotate/scale the light, the texture will move with the light as well). |
|
|
distribution |
|
|
|
|
|
|
|
|
|

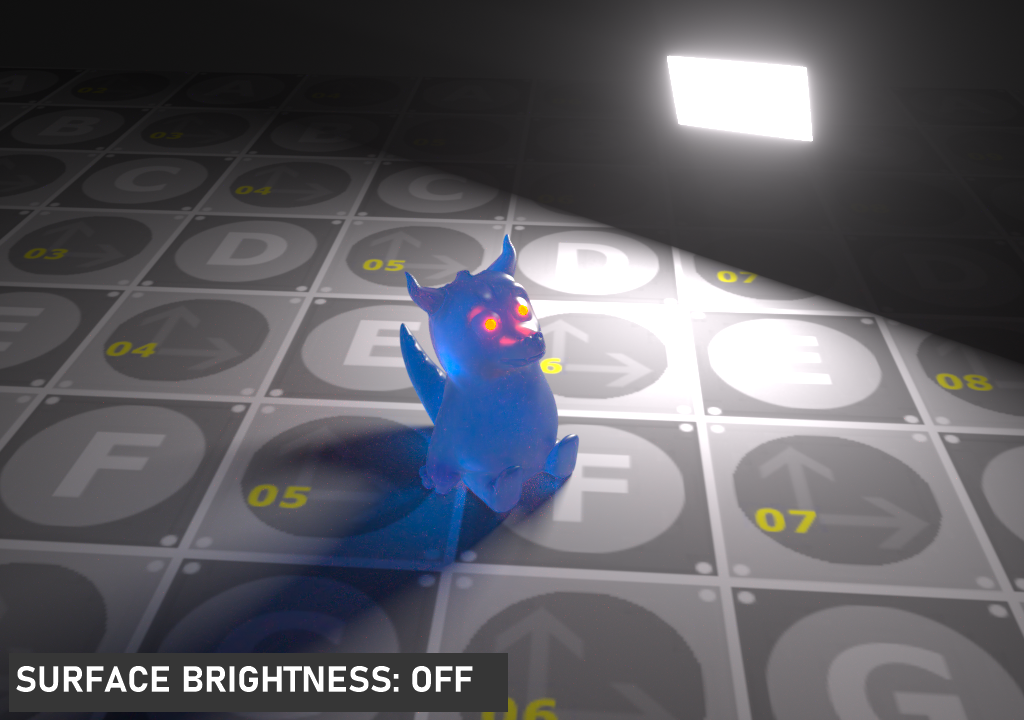
Surface Brightness
This option increases or decreases the brightness value of the light according to the size of the Emitter Object. Enable to see that brightness changes when the Emitter object is scaled. Disable to allow brightness to remain constant, regardless of the scale of your Emitter Object.
|
|
surface brightness |
|
|
|
|
|
|
|
|
|


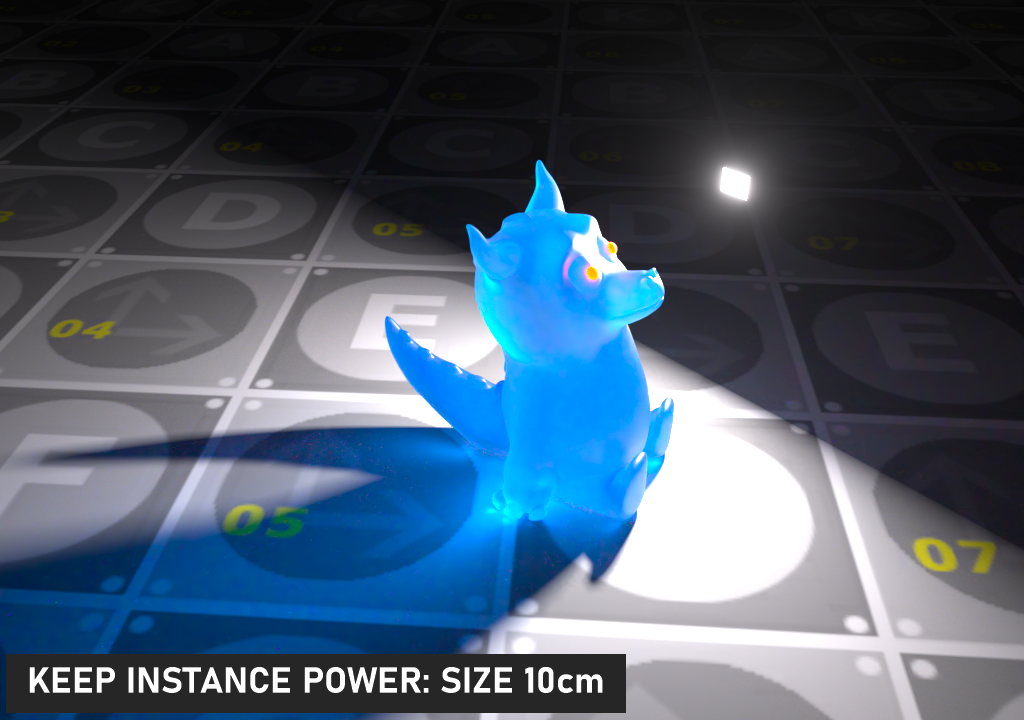
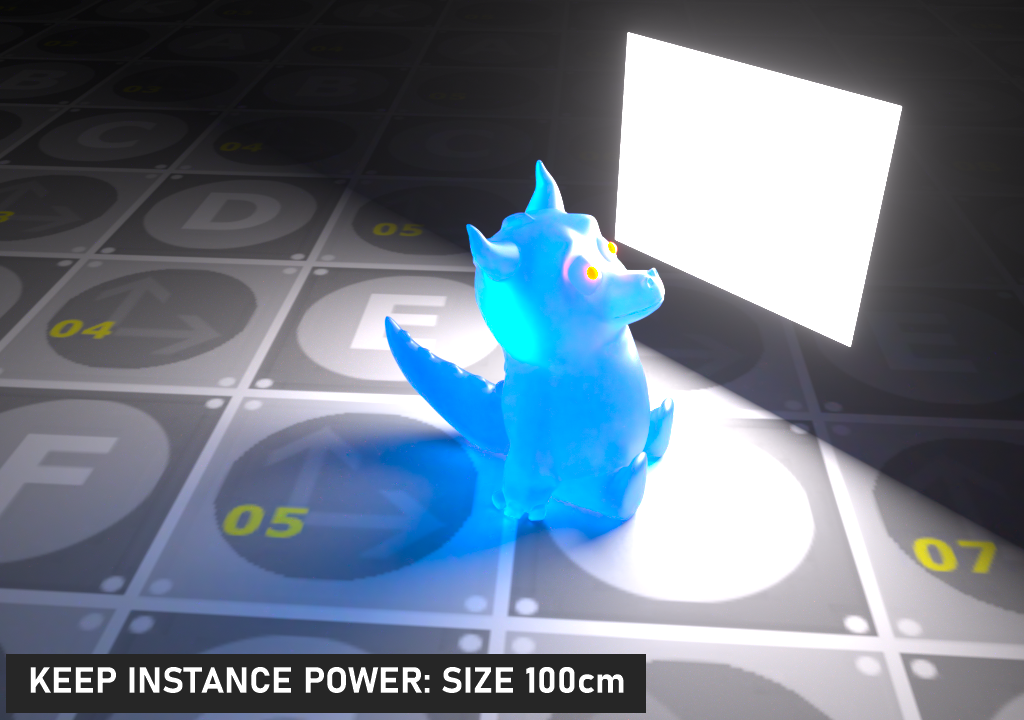
Keep Instance Power
Enabling this option with Surface Brightness disabled and Uniform Scaling applied to the object causes Power to remain constant, as shown in the images below. The size of the light has been changed, but the illumination output is the same, regardless of the light size, with Keep Instance Power enabled. Note that the shadows and caustics will conform to the size of the light, as expected.
|
|
keep instance POWER |
|
|
|
|
|
|
|
|
|

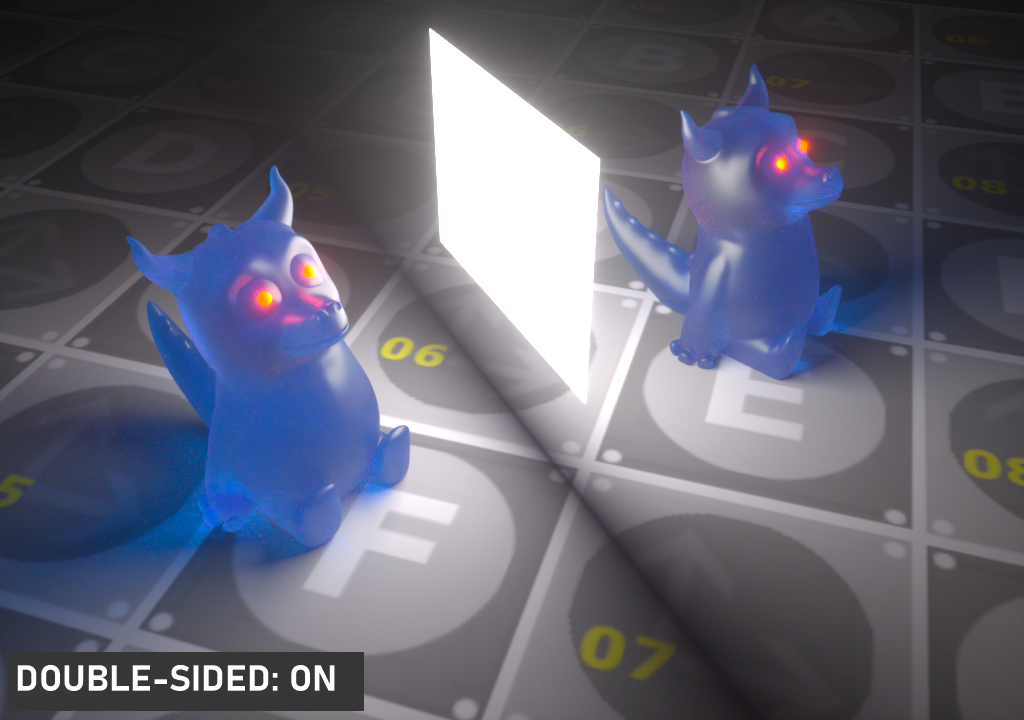
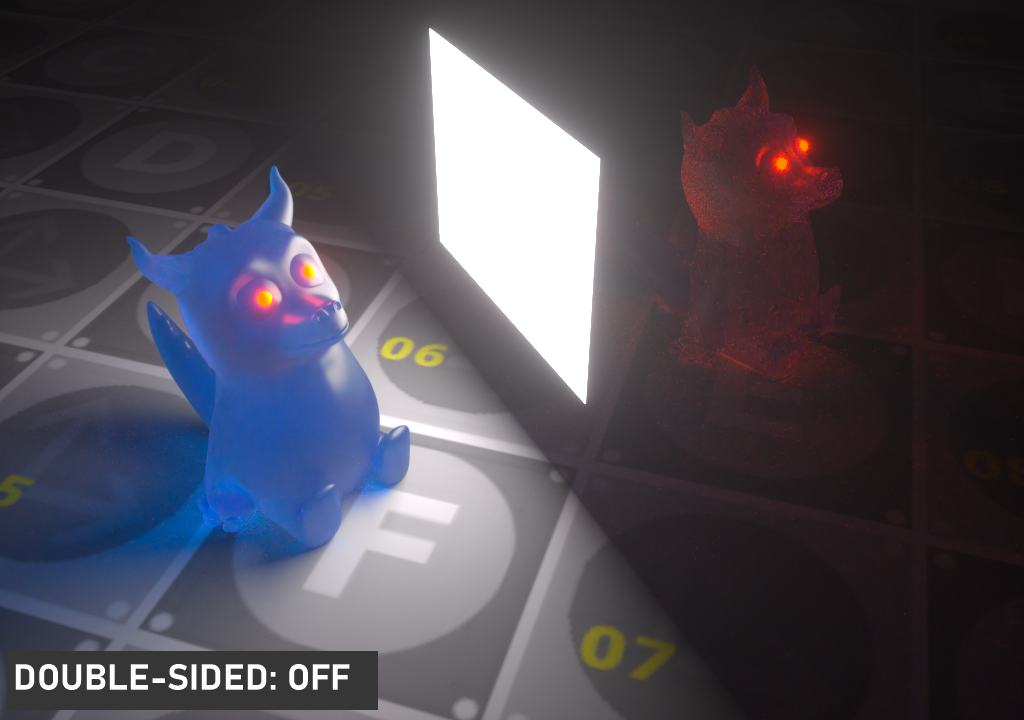
Double Sided
This option is used to emit both sides of the Emitter Object. Default is Disabled.
|
|
double-sided |
|
|
|
|
|
|
|
|
|

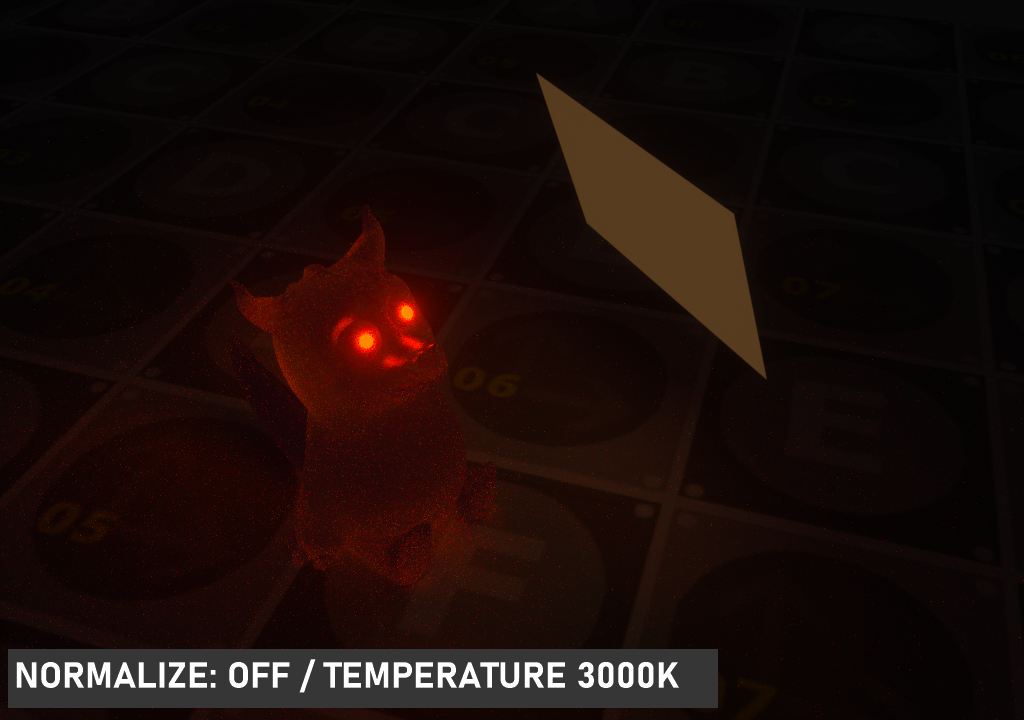
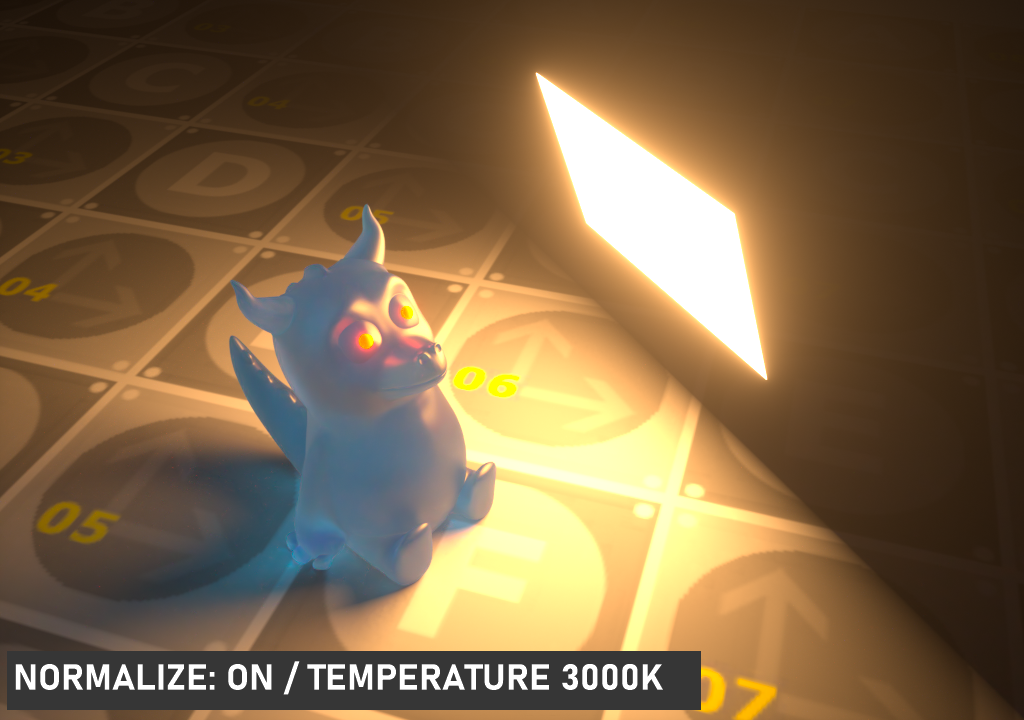
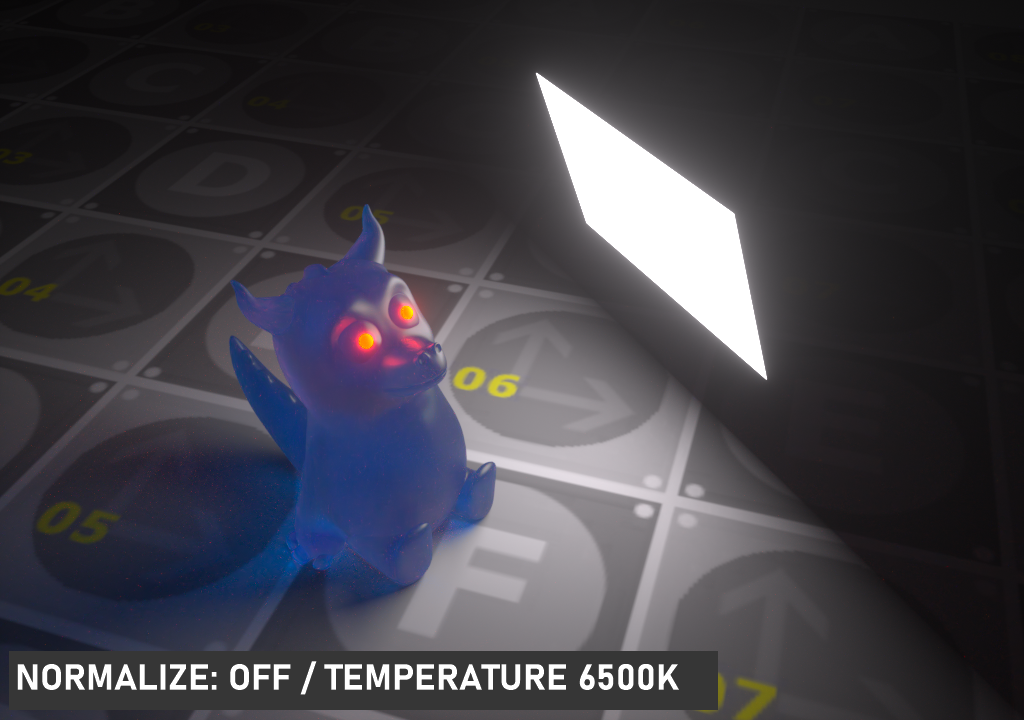
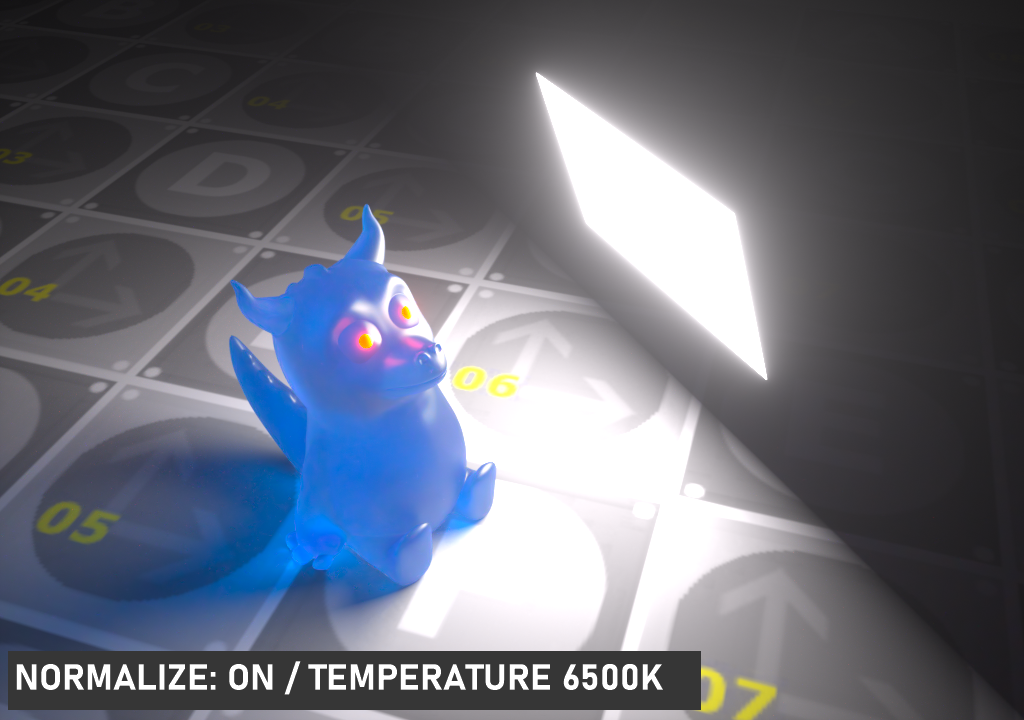
Normalize
Normalize will keep the Luminance value constant as the temperature values of the emission change. When it is disabled, the Luminance value will change as the temperature changes. According to this, in the low temperature parts of the Visible Spectrum (orange, red), the light brightness will decrease, and at the higher points (white, blue) the light brightness will increase. Default is Enabled.
|
|
normalize |
|
|
|
|
|
|
|
|
|

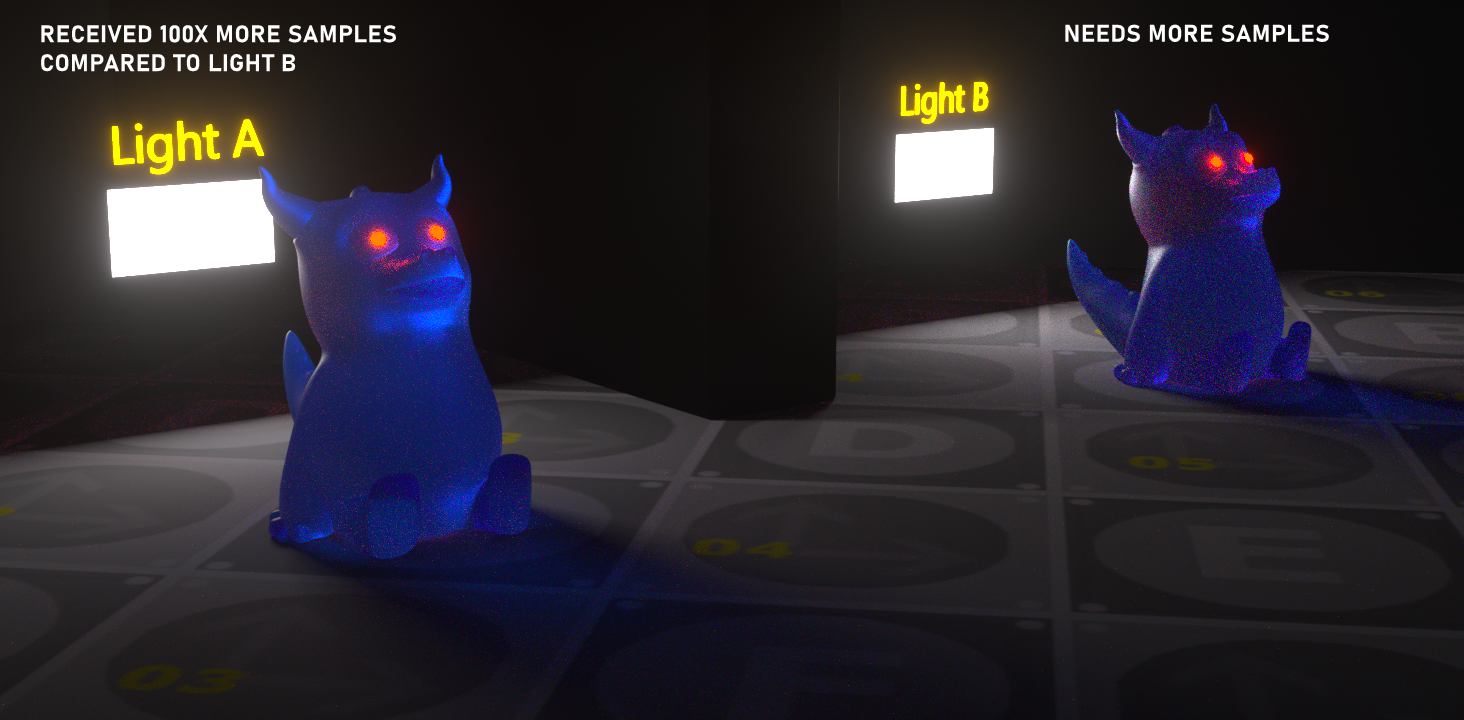
Sampling Rate
The sampling rate determines how many samples will be used in the shading of the light being cast. In some cases, there may be more than one light in your scene, and some of them may create noise in a certain area. In such cases you can reduce noise by defining more samples for a given light. However, you may need to set the sample rate of other lights when doing this, because this option works as a "ratio". You can think of blackbody emissions on the scene as "sample weighting". In the example below, which has not been denoised, "Light A" has 100x more samples than "Light B," which is far noisier. In most cases, the default value of 1 works well-enough, and you shouldn't need to change it unless something specific occurs in your renders.
|
|
sampling rate
|

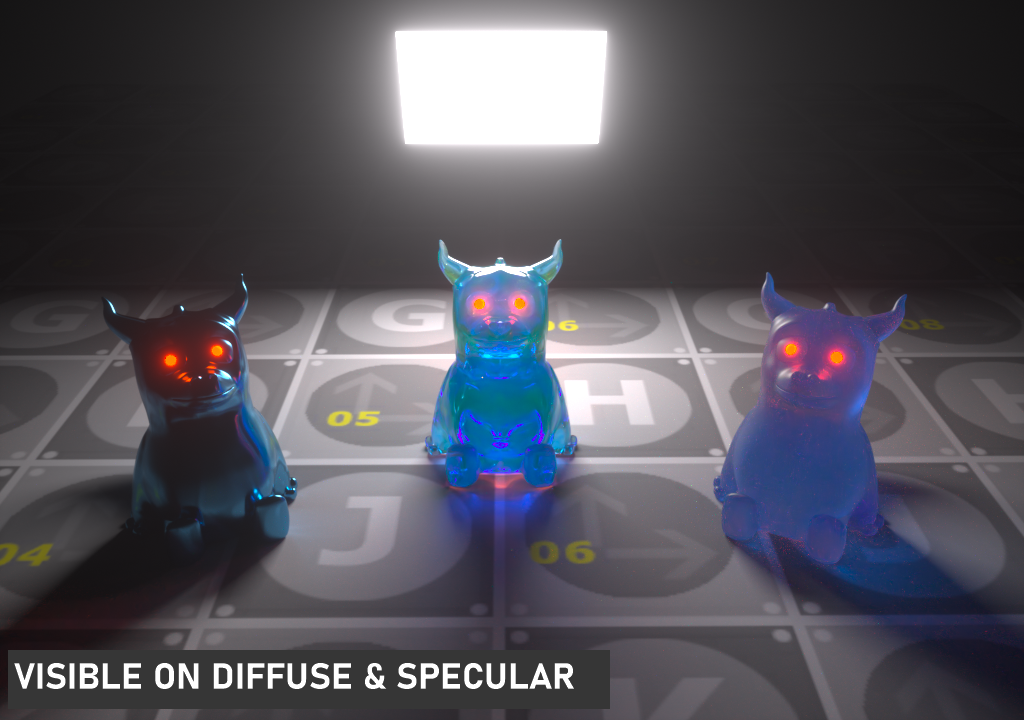
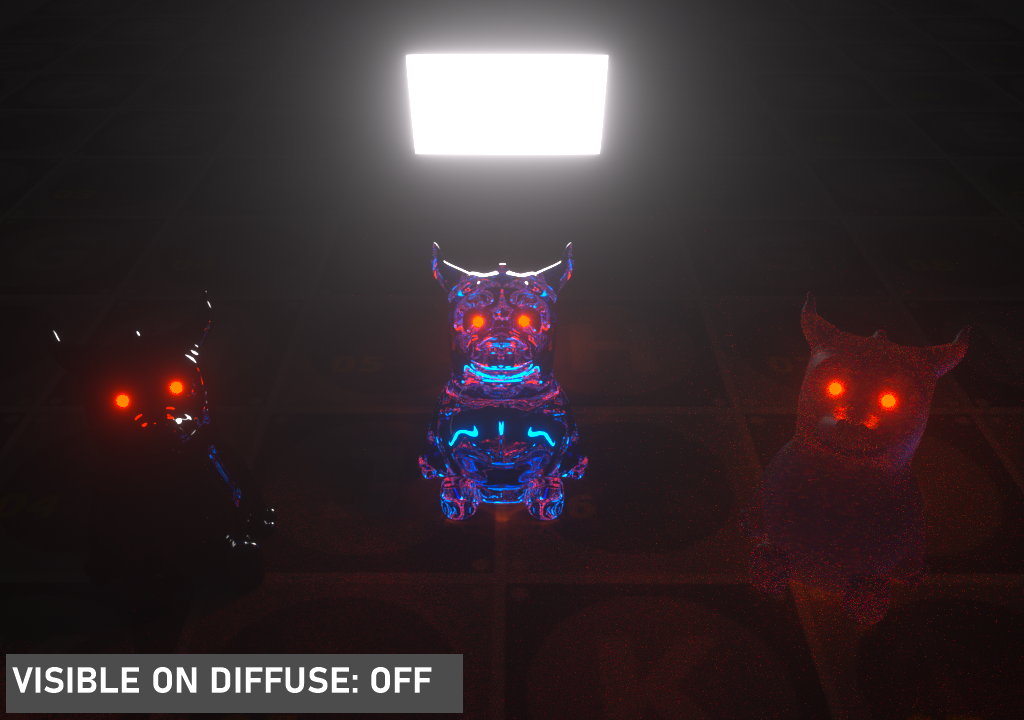
Visible on Diffuse
This option enables the light source to be visible on diffuse surfaces (defaults to ON), enabling or disabling light sources from casting illumination or shadows on diffuse objects. Disabling this option will disable emission, i.e., it won’t be visible in diffuse reflections, but still be fully visible in specular reflections. It will also be excluded from the direct light calculation.
|
|
visible on diffuse |
|
|
|
|
|
|
|
|
|

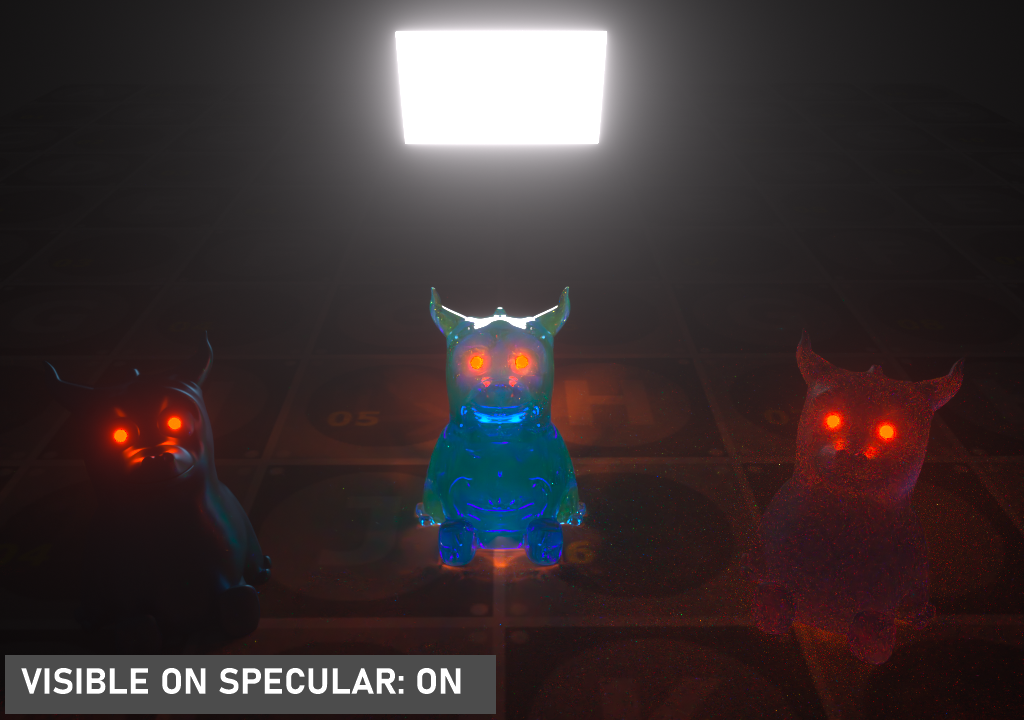
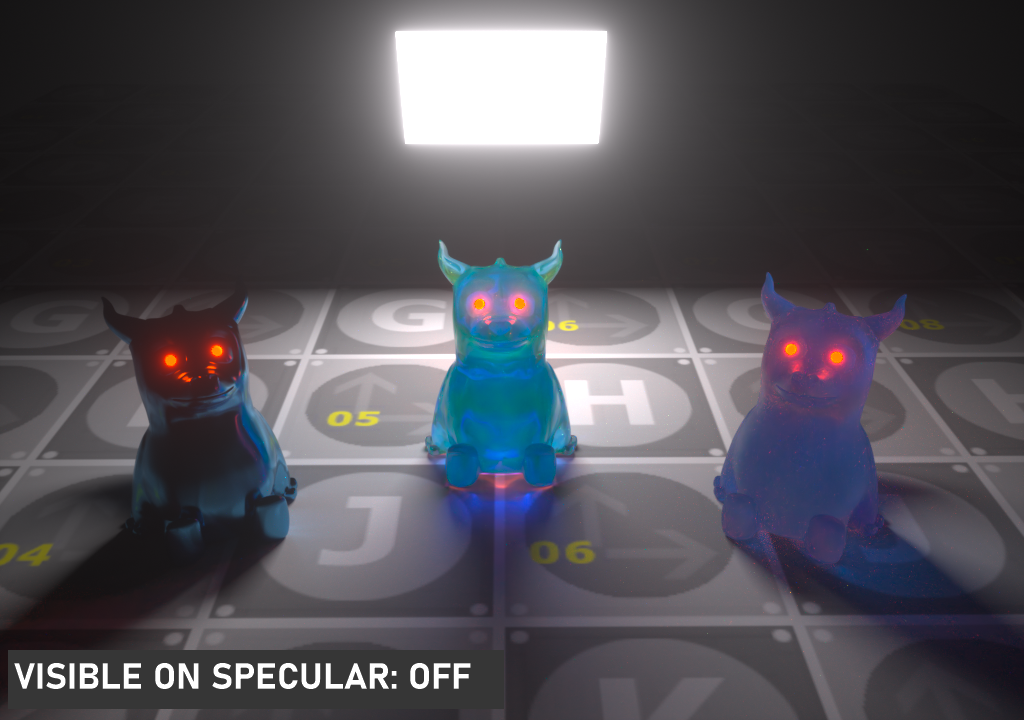
Visible on Specular
This option will enable the light source to be visible on specular surfaces (defaults to ON). This allows users to hide emitters on specular reflections/refractions only.
|
|
visible on specular |
|
|
|
|
|
|
|
|
|

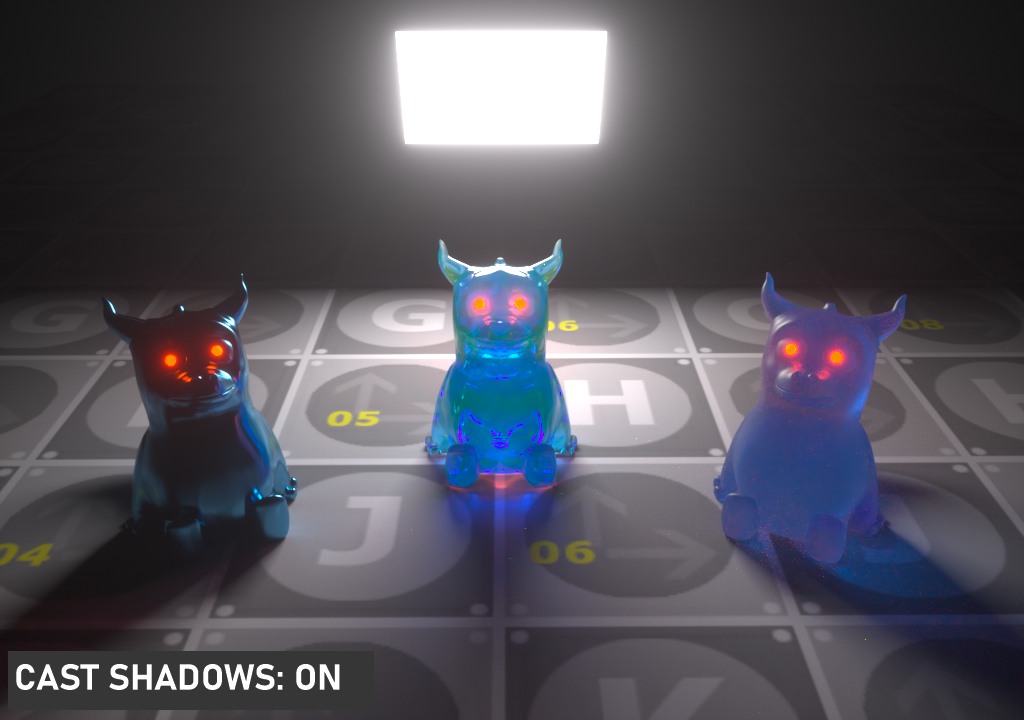
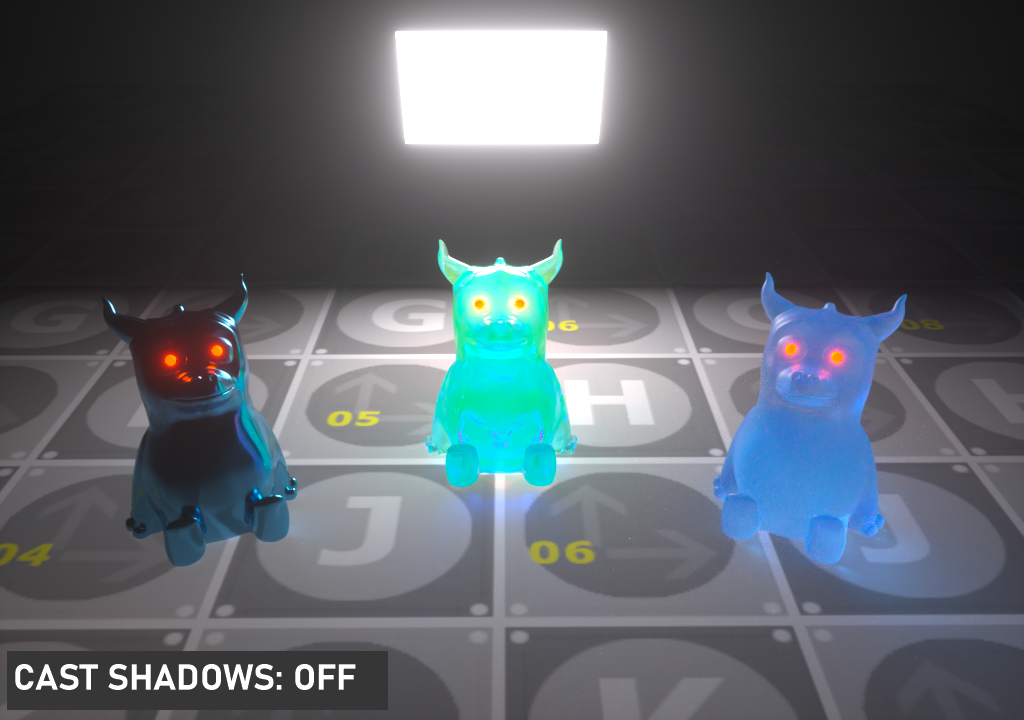
Cast Shadows
This option enables shadows to be cast from the light source, and provides the means to disable direct light shadows for mesh emitters (defaults to ON).
|
|
cast shadows |
|
|
|
|
|
|
|
|
|

Transparent Emission
This option determines whether or not the emission power should be scaled with opacity (defaults to ON). This is useful if you want to control the light in your scene without your emitters being directly visible. But there are cases when transparent emitters should not emit light. Consider the following example: if you define any alpha image on the Opacity channel of this object, the reflection will not be correct. However, if you turn off "Transparent Emission", the reflection will look correct.
|
|
|
transparent emission |
|
|
|
regular plane object with emission assigned to become a light object (you can look at the blackbody emission section on how to do this) |
|
|
alpha image texture assigned to diffuse material's opacity channel Reflection is wrong when transparent emission is "on" |
|
|
|
reflection is correct when transparent emission is "off" |
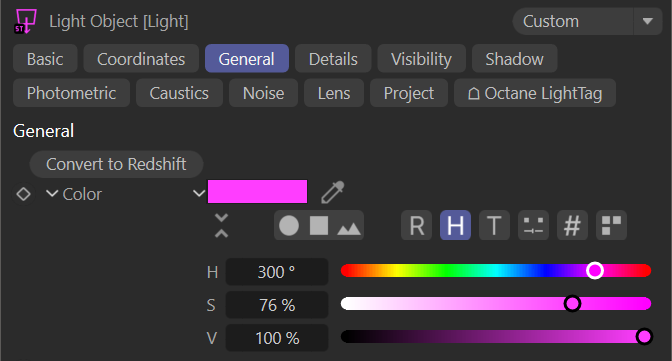
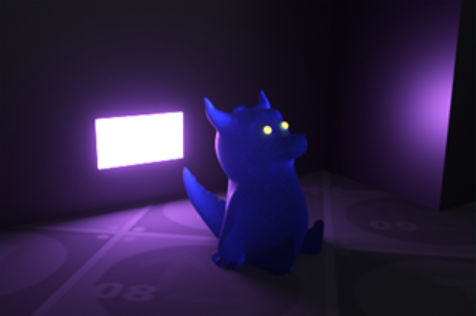
Use Light Color
This option will use the color of the light from the "General" tab in the light options of Cinema 4D.
|
|
use light color |
|
|
|
|
|
|
|
|
|

Opacity
This option is to define the opacity value in Blackbody Emission.
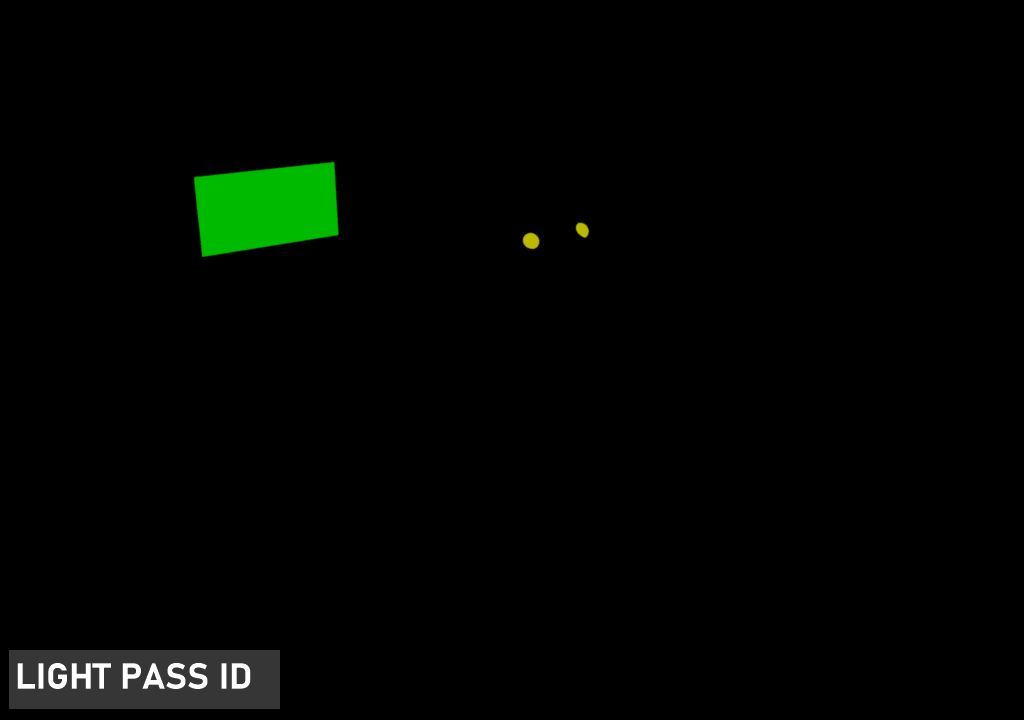
Light Pass ID
This option will set the Light ID for the specific light (lights with the same ID will be contained in the same light pass/AOV). The light pass ID is used for light linking and excluding, as discussed here.
|
|
light pass id |
|
|
|
|
|
|
|
|
|

Visibility Settings Tab
The Visibility Settings tab determines whether or not the light will be visible to the camera (but still cast light), visible to shadows, or completely invisible.
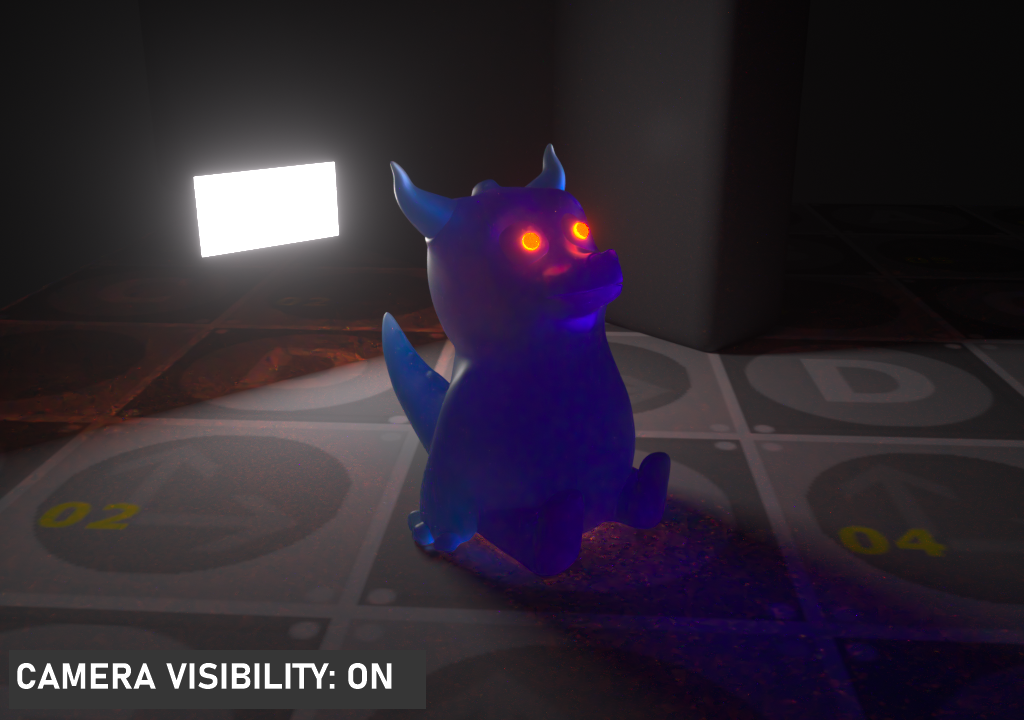
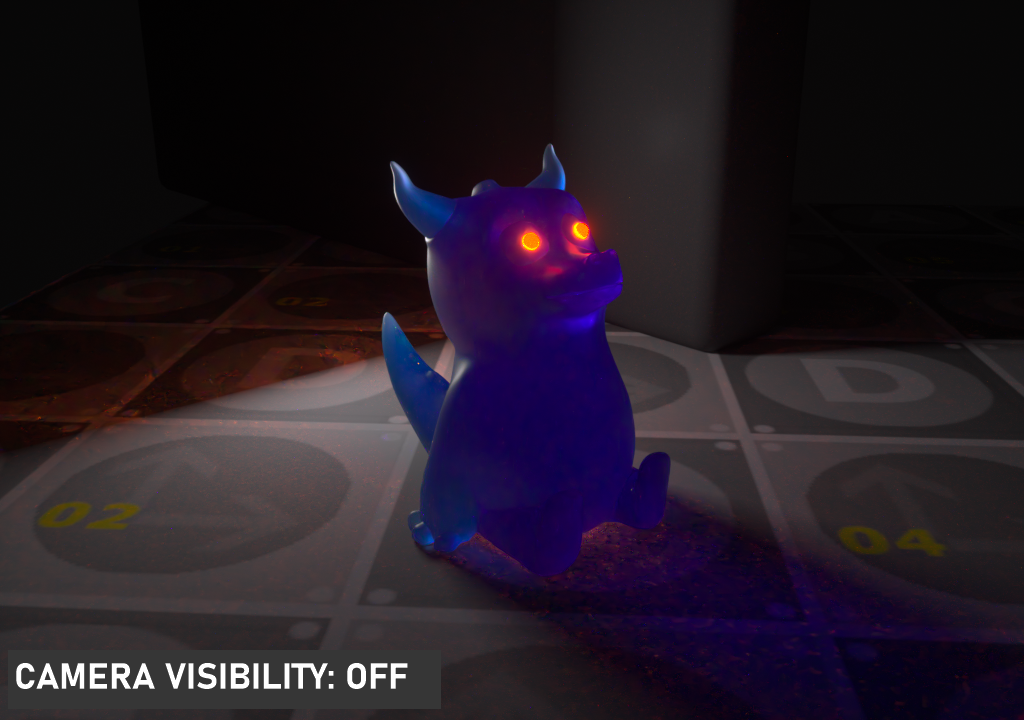
Camera Visibility
With this option you can control whether the light will be seen by the camera. When "on", the light object is rendered. When "off", the object itself is not rendered, but illumination other features remain the same.
|
|
camera visibility |
|
|
|
|
|
|
|
|
|

Shadow Visibility
This option works for normal polygon objects rather than light objects. For a detailed description, please refer to the Octane Object Tag section.
General Visibility
This option is basically a global combination of the Camera visibility and Shadow visibility options, and honors the Transparent Emission setting. Unlike the Camera and Shadow visibility options, General Visibility offers a slider, to gradually decrease these effects.
Motion Blur Tab
The Motion Blur tab enables/disables motion blur for the light.