Interface & Settings
The Octane Object tag is one of the most important components in OctaneRender®. This tag is required to control object motion blur, particle rendering visibility and so on. The Octane Object tag is also used to assign Layer and Bake IDs, manage light visibility for the object, and control subdivison, removing the need to use the Cinema 4D Subdivision generator (in most cases).
The Octane Object tag is applied to the object and is listed in the Object Manager tag view pane, listed to the right of the object itself. If the object is part of a hierarchy, the tag can be placed on the parent or grandparent objects; all settings of the tag will apply to ALL objects of that hierarchy in that case. If separate settings are desired for a particular object within a hierarchy (different subdivision settings, for example), add a tag to that specific object in the hierarchy with the desired settings to override.
|
IMPORTANT If no Octane Object tag is applied to a given object or object hierarchy, it will be treated as a generic object, with no Octane attributes. While this state will indeed render, it may contribute to rendering issues in some situations. Best practice is to always have an Octane Object tag on an object or object parent. |
|
|
octane object tag — Layout
|

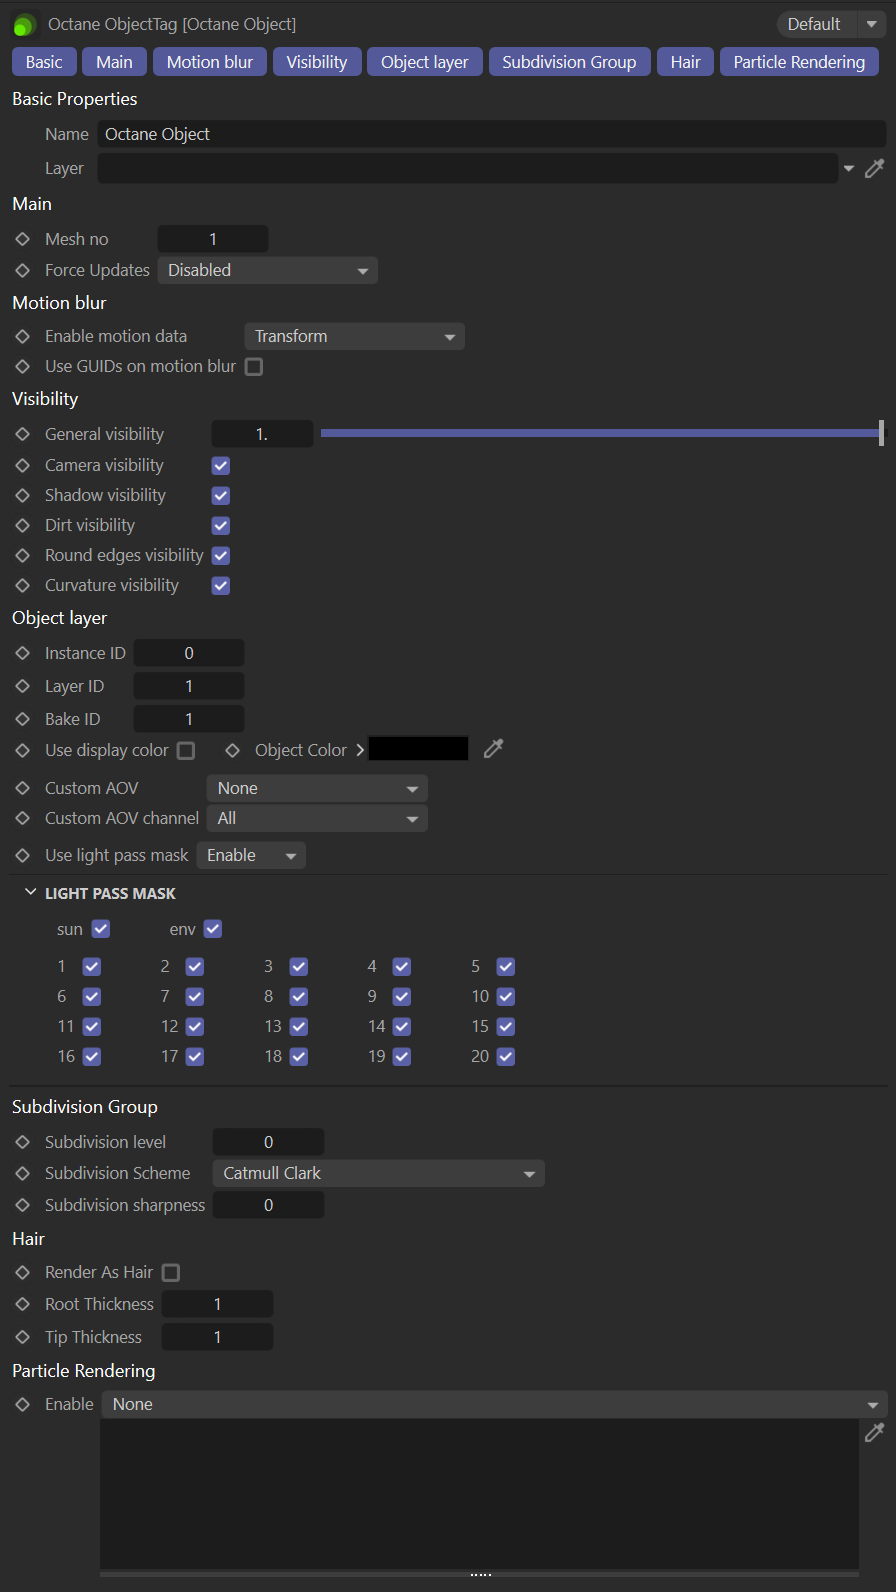
Main Tab
The options in this section are designed to manage geometry updates while moving or editing objects, and for making rendering faster for scenes with static geometry and some moving objects.
Mesh No
Object group number for exporting to Octane Render. A value of zero (0) is used for static objects. Values greater than zero are used for movable objects. If Live Viewer > Options > Update Check > All Geometry Movable is enabled along with Render Settings > Octane Renderer > Main tab > Main group > Geometry Control > Auto Detect from the render settings, this option is not needed.
Force Updates
This setting can be used to force updates of the mesh for every frame while rendering. Enable this option if materials and other aspects of the object are not animating as expected. Make sure that Manual Assignment is set in Render Settings > Octane Renderer > Main tab > Geometry Control setting, explained here.
Motion Blur Tab
This tab contains options for Object Motion Blur, explained in detail here.
Visibility Tab
This tab contains the visibility options of the assigned object.
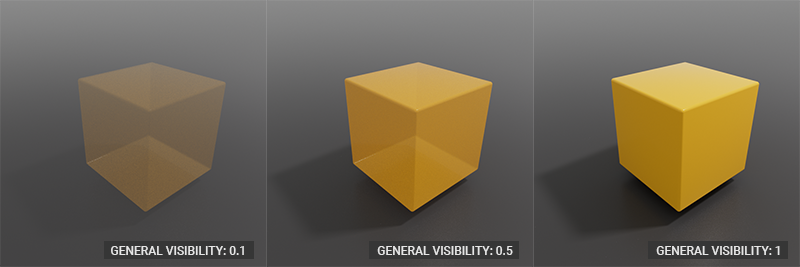
General Visibility — General visibility determines the overall visibility of the assigned object. Set this option to 0.0 if the object is not intended to be seen or rendered. Default is 1.0 (visible).
|
|
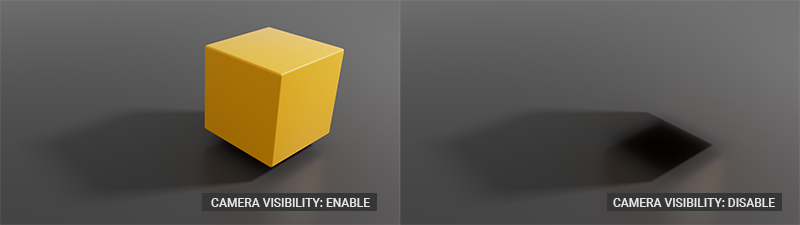
octane object tag — Camera Visibility
|
Camera Visibility — This toggle determines if the assigned object is visible to the camera. Default is visible.
|
|
octane object tag — General Visibility
|
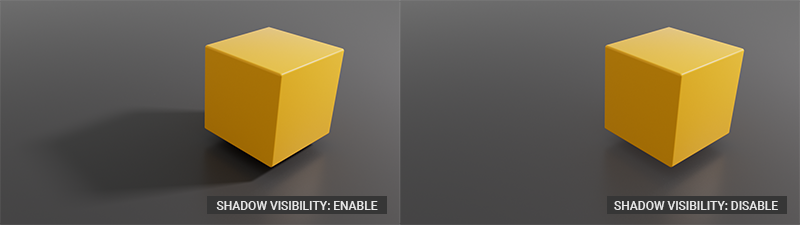
Shadow Visibility — This option determines the visibility of the shadow cast from the assigned object. For this option to work properly, "Alpha Shadows" must be active in the kernel settings.
|
|
octane object tag — Shadow Visibility
|
Dirt Visibility — This option determines whether or not the object will be visible to the Dirt node.
Round Edges Visibility — This option determines whether or not the object will be visible to the Round Edges node.
Curvature Visibility — This option determines whether or not the object will be visible to the Curvature node.
Object Layer Tab
This tab contains options to manage Object Layer AOV attributes of the assigned object. These ID descriptions are required for the Info, Bake and Render AOVs. These options are discussed at the links below.
- Instance IDs can be manually assigned here. Instance IDs can be used for materials, cryptomattes and so on.Go to this link for Instance ID.
- For Render Layers to be output, a Layer ID must be specified here. Go to this link for Layer ID.
- Go to this link for Bake ID.
- Display Color — This option will use the Display color as defined in the Basic tab of the object for the Object Layer Color AOV. If this option is enabled, the Object color swatch will be hidden. This option can also be used to provide color to the Diffuse channel of a given material, via the ObjectDisplayColor.osl node, discussed here.
- Object Color — Sets the albedo (color) of the Object Layer Color AOV.
- Custom AOV — Sets the desired Custom AOV for the object. See the link for more on Custom AOVs.
- Custom AOV Channel — Sets the desired channel used for the Custom AOV output. The options are:
- All — All three color channels will be used for the output.
- Red — Only the red channel will be used for the output.
- Green — Only the green channel will be used for the output.
- Blue — Only the blue channel will be used for the output.
- Use Light Pass Mask — This menu determines how the Light Pass Mask effect is processed for rendering. There are two options: Enable/Disable. For more, see here.
Subdivision Group Tab
This option will subdivide the assigned object and works similarly to the Subdivision Surface Generator in Cinema 4D, with one exception: It does not leverage the SubD weight tag. Unlike the Cinema SubD generator, the Octane Object tag will subdivide the assigned object on the GPU itself, which is much faster than doing so on the CPU. Sending a simpler mesh to the GPU and subdividing onboard is also much faster than sending a fully subdivided mesh to the GPU VRAM. Use this option instead of the Cinema 4D SubD Generator except when noted. The options include:
- Subdivision Level — The amount of subdivision applied. It is very easy to overwhelm VRAM with larger values.
- Subdivision Scheme — The type of Subdivision applied. The options are:
- Catmull Clark — A uniform refinement is applied to the Mesh faces. It subdivides the Mesh by the same amount.
- Catmull Clark (Smooth Variant) — OpenSubdiv Catmull-Clark with a smoothed preview version of the Mesh.
- Loop — Subdivision scheme for triangular meshes, where each recursively defined subdivision surface divides into smaller ones.
- Bilinear — Subdivision scheme where the limit surface goes through the existing vertices, resulting in softened edges but no drastic changes in shape.
- Subdivision Sharpness — Controls the Sharpness values for the crease at and around a vertex. Crease sharpness values range from 0 (smooth) to 10 (infinitely sharp).
Hair Tab
This tab contains the controls necessary to set up the object for hair rendering. The controls are explained here.
- Render as Hair — Enables the Hair Render effect.
- Root Thickness — Sets the thickness of the hair root.
- Tip Thickness — Sets the thickness of the hair tip.
Particle Rendering Tab
The Octane Object tag > Particle Rendering tab is used to add any geometry intended to stand in for the generic particles created by the generator. There are several options available to describe how Octane should handle the particles, described below.
|
|
Octane Object Tag — Particles
|
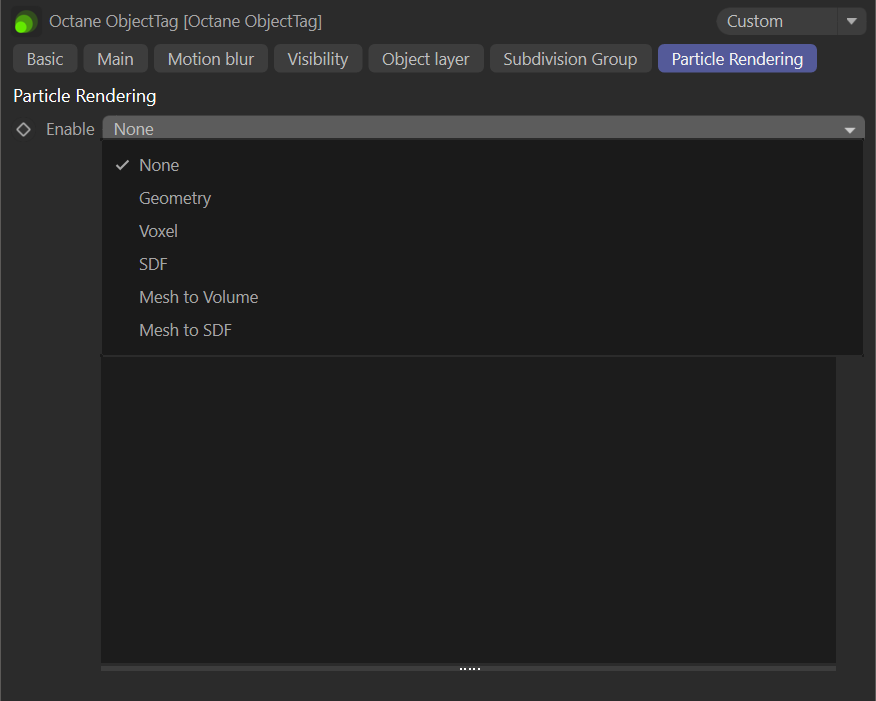
The Enable menu in the Particle Render section contains six options:
- None — No particles will be rendered with this option.
- Geometry — Any Cinema 4D geometry can be used as a particle (take care to keep particle geometry very simple to conserve VRAM). The geometry may also need an Octane Object tag applied, depending upon the specific setup. Materials can be directly applied to the geometry or to the emitter.
- Voxel — Use this option when the particle object is a Volume Builder object (Volume Type must be set to Fog mode) or Pyro object. This option does not work with X-Particles.
- Medium — This option appears when Voxel is selected. See below.
- SDF — This option will use Vectron objects as particles. SDF does not work with X-Particles.
- Mesh to Volume — This option loads a mesh and treats that object as a "fog volume" — a volume that has a constant grid value inside the geometry and 0 grid values outside the geometry.
- Medium — This option appears when Mesh To Volume is selected. See below.
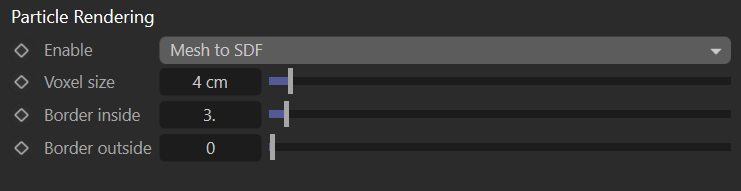
- Mesh to SDF — Use this option to create an SDF out of a mesh (similar to Volume Mesher in Cinema 4D).
In each case, a list of of the specified object type to use as a particle is listed below the menu. If Voxel or Mesh to Volume is chosen, additional Volume parameters are listed, as shown in the following illustration:
|
|
Octane Object Tag — Voxel options
|

If Mesh to SDF is chosen, these options appear:
|
|
octane object tag — mesh to sdf options
|