Using Pyro with Octane
Pyro is a smoke and fire simulator for Cinema 4D. Maxon introduced the Pyro feature in Cinema 4D release 2023.1, and Octane can render Pyro output without conversion directly in Cinema 4D. However, while Pyro output can be rendered directly in OctaneRender for Cinema 4D, a Pyro VDB cache file is required when rendering to Octane Standalone and Octane The Render Network, as Cinema 4D is not available to those applications.
In addition to Pyro live output, Pyro can also output VDB files, which are required for Render Network or Octane Standalone renders.
|
|
Pyro
|

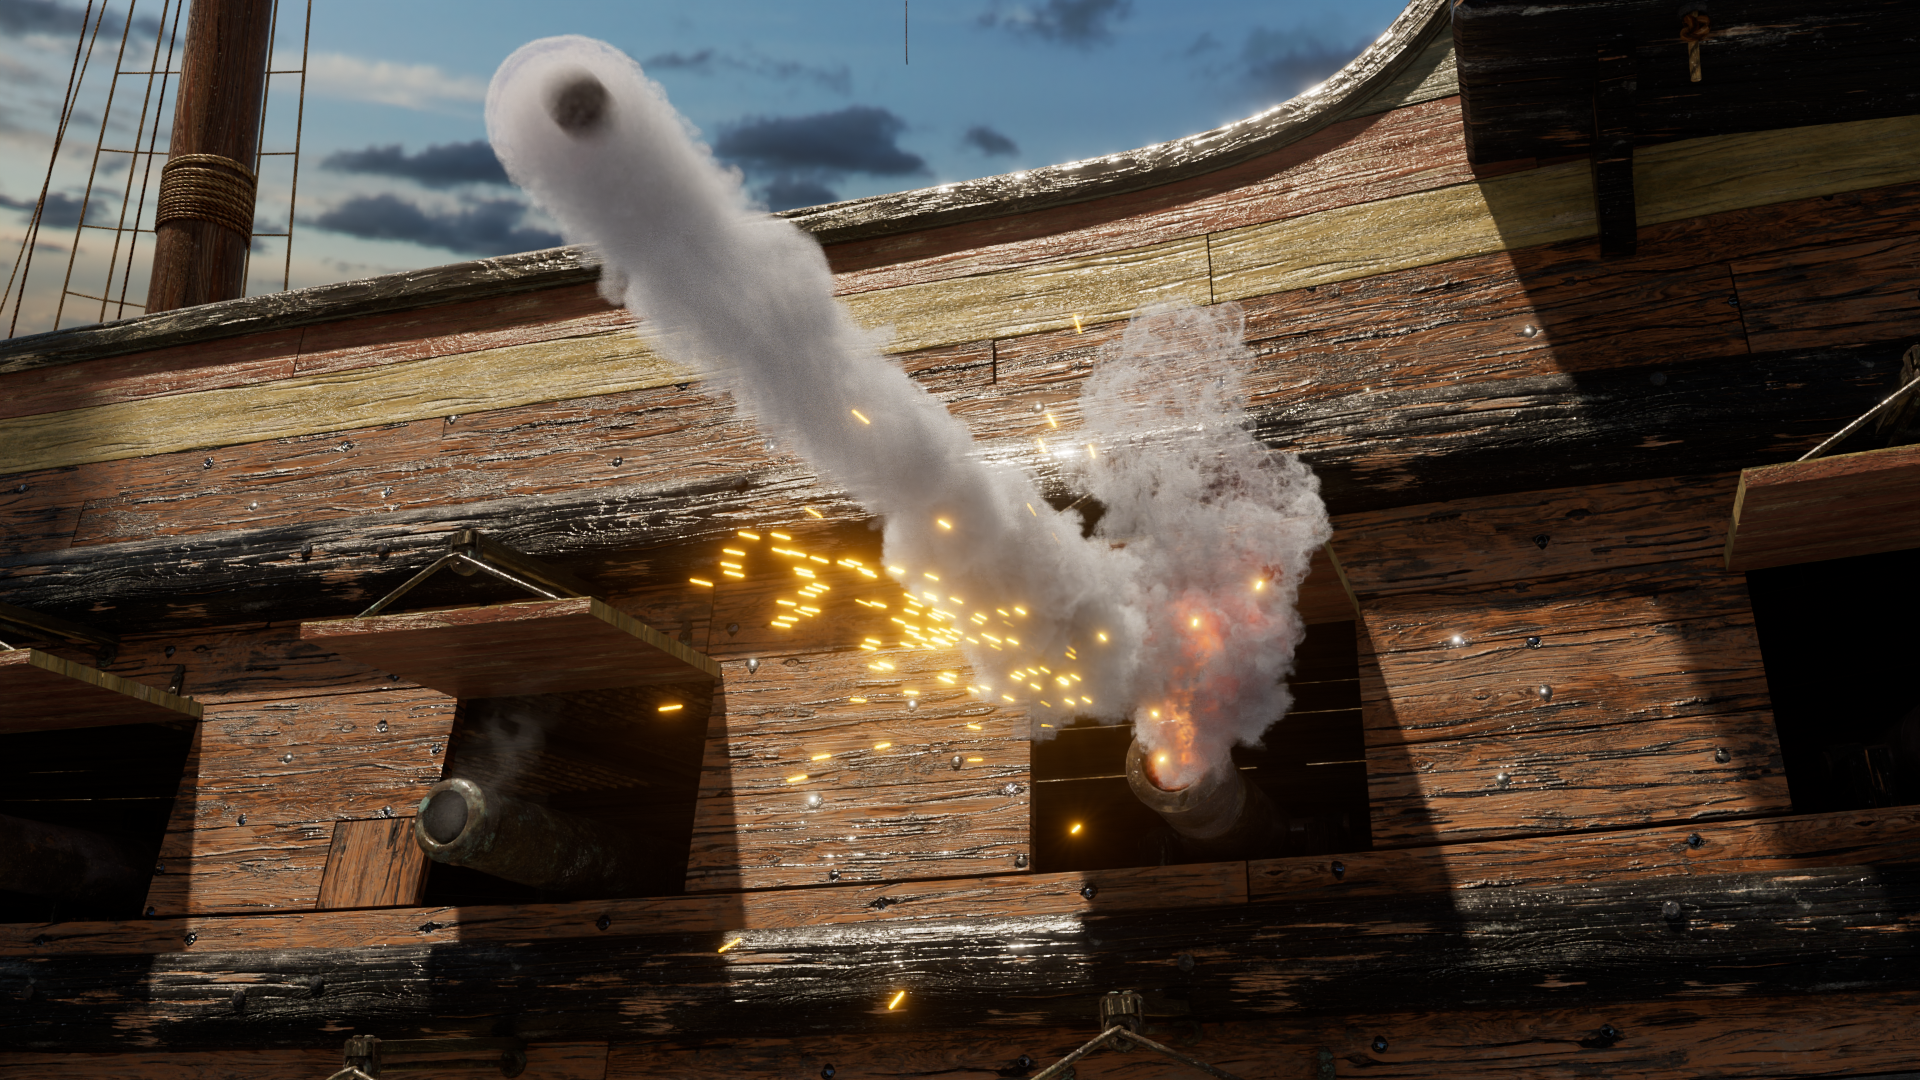
The image above shows the C4D Pyro Output object rendered in Octane using the Standard Volume medium, described here. The tall ship asset is from the Kitbash 3D Treasure Island set.
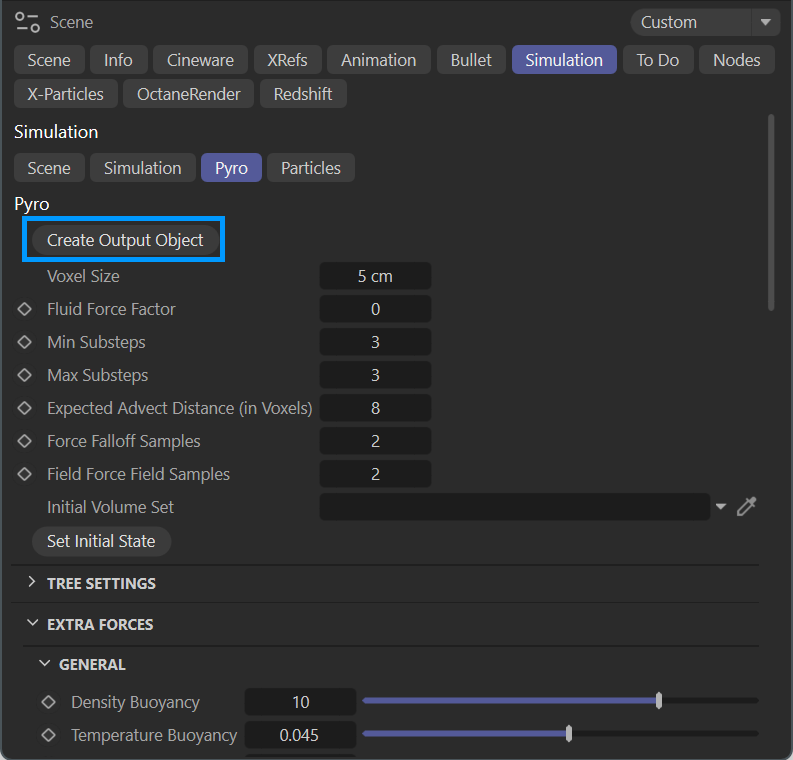
Add the Pyro Simulation output object into the scene
The Pyro Simulation Output Object needs to be added to the scene. Choose Project Settings > Simulation tab > Pyro tab and click on the Create Output Object button. This will add the Pyro Output (Default) object into the Cinema 4D Object Manager.
|
|
add the pyro simulation output object
|
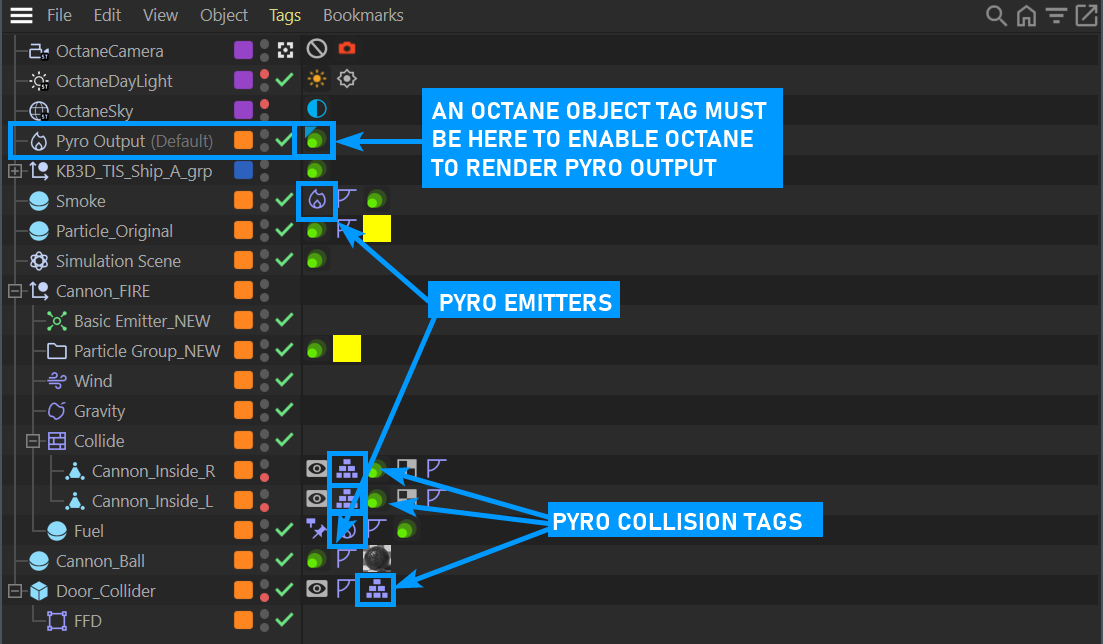
Setting up Pyro in the object Manager
Select the Pyro Output (Default) object in the Object Manager. In the Tags menu of the Object Manager, choose Tags > Extensions > OctaneRender > Octane Object Tag to add an Octane Object tag to the Pyro Output object. This tag contains all of the shading information to properly render the Pyro output in Octane.
|
|
Pyro Output and tags in the c4d object manager
|
Set up the emitter
You will also need to add a Pyro Emitter tag to the object intended to function as an emitter in your scene. Every Pyro effect requires an emitter. Any Cinema 4D object can be an emitter. Reference the Cinema 4D Pyro documentation for more information. In this case, we are using a Sphere object, sized to 40cm (the size of a cannon ball).
Set up any collider objects
Any objects that you wish to interact with the Pyro simulation will require Collider tags — Tags > Simulation Tags > Collider. In this scene, Collider tags were applied to a non-rendering polygonal object of the cannon barrel. This object is "watertight," that is, a solid, with no openings, and the normals of the polygons aligned correctly. The object is aligned with the cannon barrel in the Kitbash 3D asset.
A Collider tag was also applied to a Cannon Ball object that was intended to be rendered, so as to interact with the smoke plume from the cannon firing. The Cannon Ball is out of frame in this render.
Set up the Octane Object Tag
As noted previously, the Octane Object tag attached to the Pyro Output (Default) object is required to render the Pyro output. Select that tag, and go to the Particle Rendering tab, illustrated below:
|
|
octane object tag — particle render tab
|
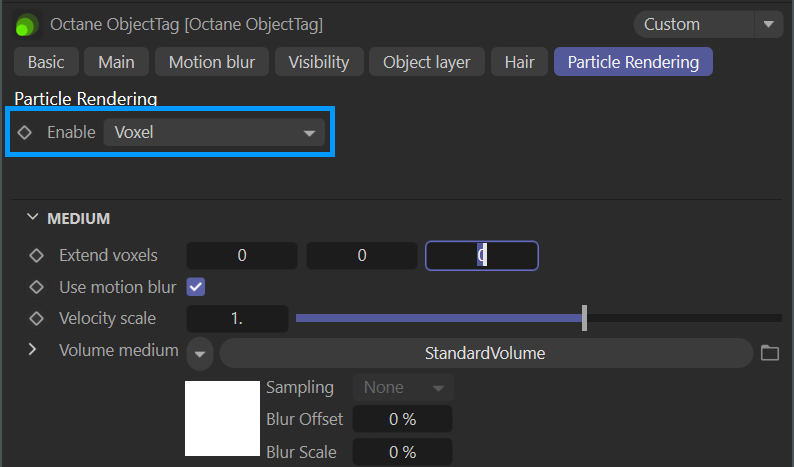
Set the Enable menu to Voxel. This will add a Standard Volume Medium to the Volume Medium slot. Now, when setting the following values, you will be able to see the results in Live Viewer.
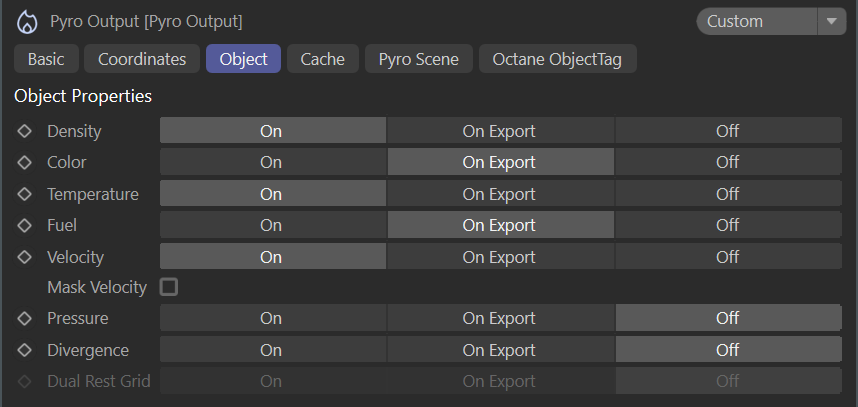
Pyro Output (Default) Object
Select the Pyro Output (Default) object and go to the Object tab. This tab determines what the Pyro object will be including. There are three states to choose from:
- On — This option enables the specified channel immediately in the viewport and in Live Viewer when working with Pyro on a live basis.
- On Export — This option will include the channel when the Pyro object is exported as a VDB object. It is exported as a grid. For more information, see here.
- Off — This option will disable the channel from either live or exported VDB files.
Choose the option you need. To speed up the simulation process as you work, you can enable only the specific channel you are interested in, and enable the others for rendering.
These channels are available to the Standard Volume Medium, by name. You will need to manually type in the name of the channel in the appropriate slot in order for the Standard Volume Medium to act on it. If the channel is not enabled via either the "On" or "On Export" options, yet referenced by the Standard Volume Medium, Octane may ignore the Pyro volume until that error is rectified.
|
|
pyro output (default) object
|
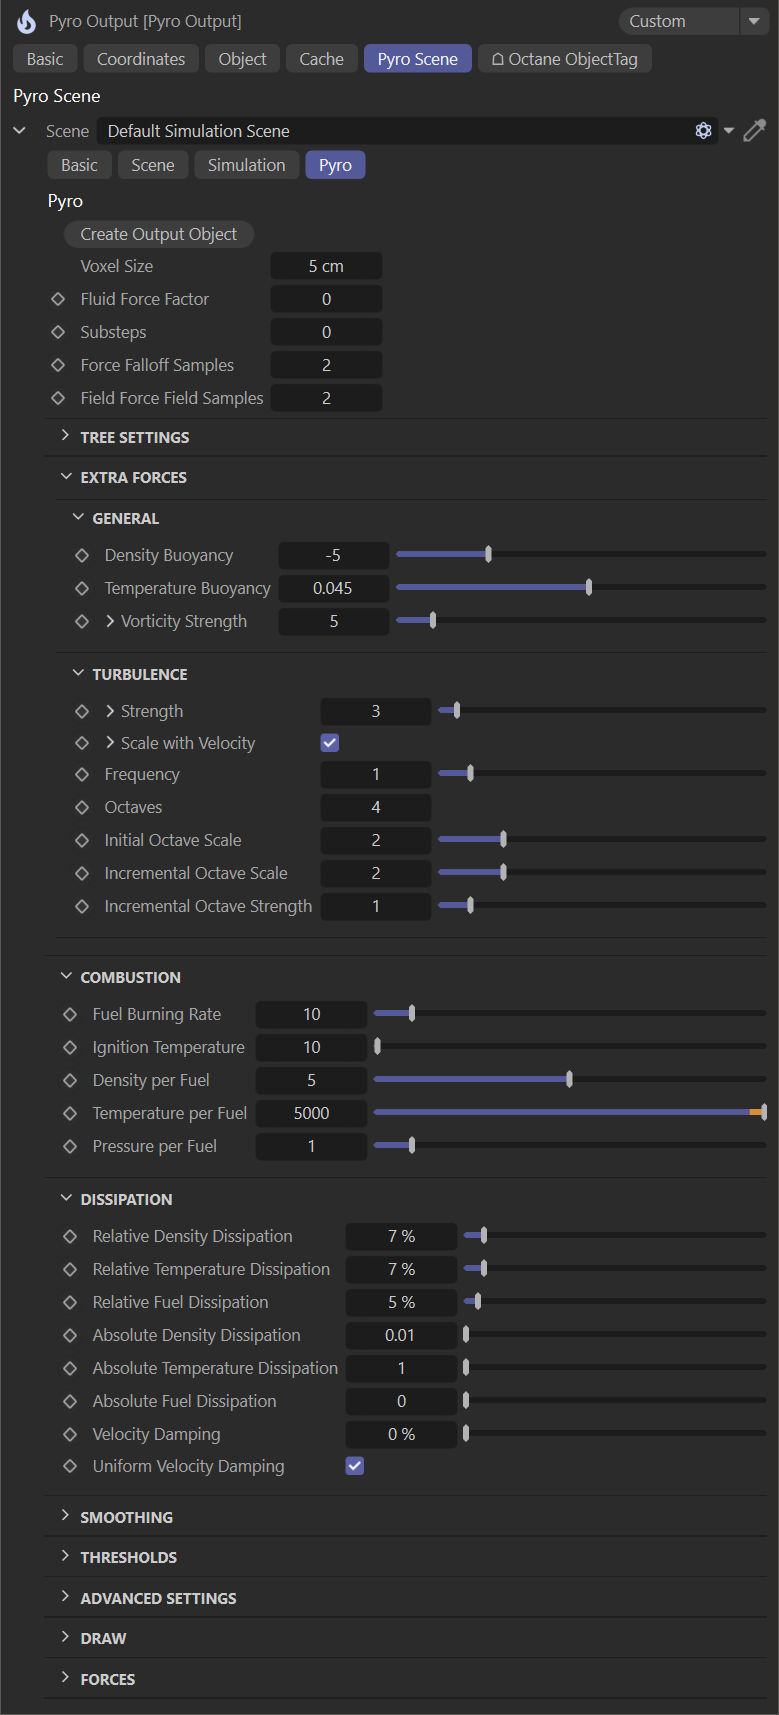
Pyro Output (Default) Pyro Scene — Pyro Tab
Pyro Output > Scene > Pyro tab contains simulation-specific information you use to dial in the desired behavior of the sim. These items are explained in the Cinema 4D documentation for Pyro. Note that the Voxel Size parameter will affect the collision tests in the Collider tag; you may need to make this value lower if your simulation seems to get "stuck."
|
|
pyro output (default) — pyro tab
|
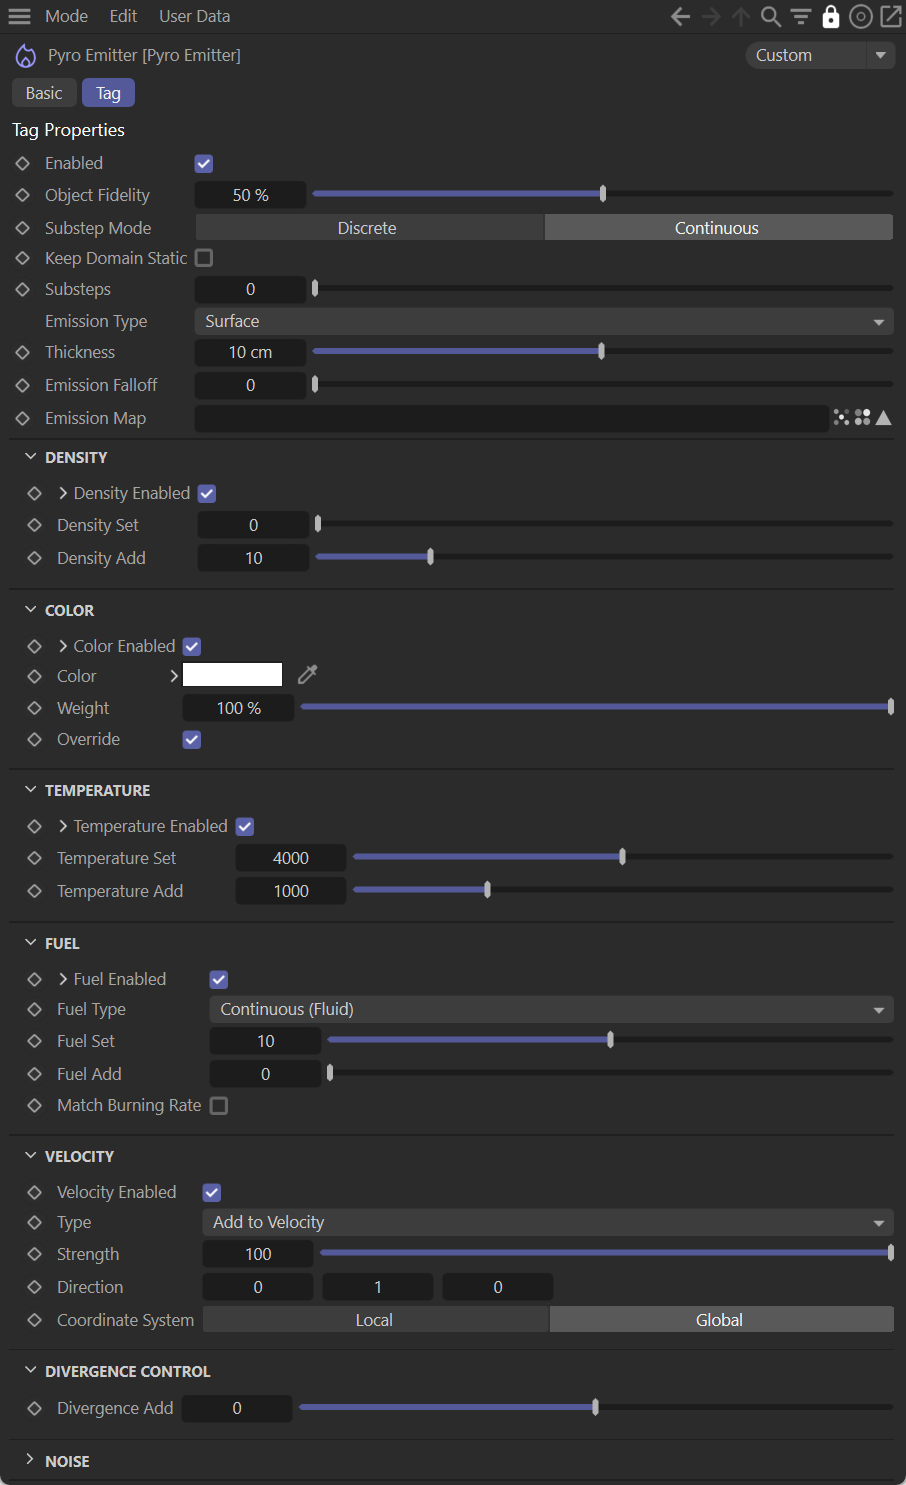
Pyro Emitter/Pyro Fuel Tag
Either one of these tags are attached to any emission source in the scene. Note that channels also need to be enabled in the tag itself in order for the channel to be available to the Standard Volume Medium for rendering. The following illustration shows the Pyro Emitter tag.
|
|
pyro emitter tag
|
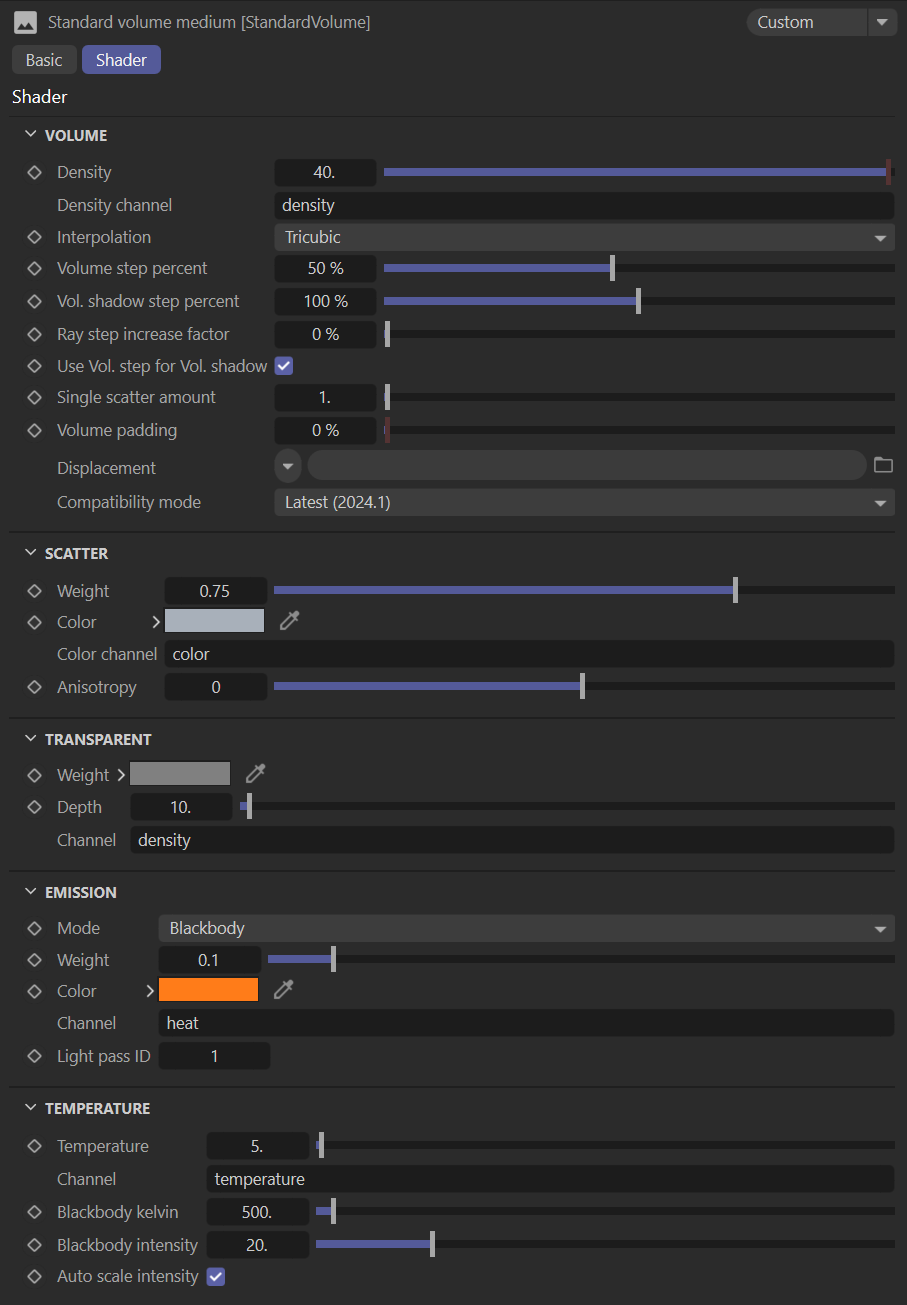
Pyro standard volume Settings
The Standard Volume Medium settings determine the final appearance of the Pyro simulation. Not all channels need to be specified in order to have a visual impact. Play around with different channels in these attributes to find the best look overall.
Note the Auto Scale Intensity can be unpredictable; if used, the results are best if the Black Body Intensity value is low, so as not overdrive the result. The image below shows the settings used for the topic illustration above.
For more information on the Standard Volume, see here.
|
|
pyro — standard volume medium settings
|
limitations
- It may be necessary to adjust the Velocity Scale attribute in the Pyro Output object's Octane Object tag to 0.1 if the Pyro motion blur looks strange.
- For the most reliable and realistic results, the scene must be in correct, real world units.
- Large values in the simulation can cause the GPU to run out of VRAM and/or fail to produce consistent results; Cinema 4D will warn you when this condition occurs. As with the previous point, real world values work the best in this situation. It may also be necessary to minimize scene assets.
- The Pyro output MUST be defined, or Octane for Cinema 4D will not be able to render the effect, even if you can see the effect in the viewport