IES Light
The Octane IES Light enables the representation of hundreds of different real world light source types that are used today in various light fixtures, by way of IES files. The IES (short for Illuminating Engineering Society) specification was developed to realistically mimic the distribution of these lights. Manufacturers of lighting systems provide this data for free.
|
|
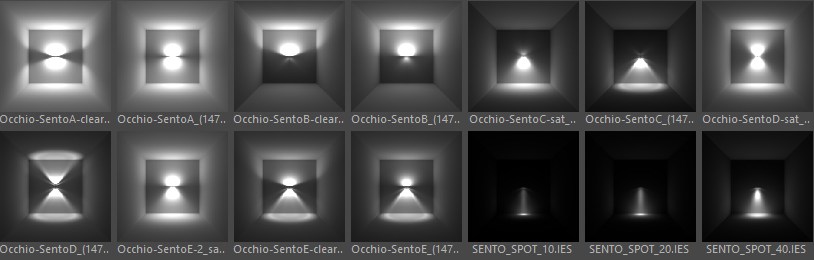
ies light profiles
|

|
|
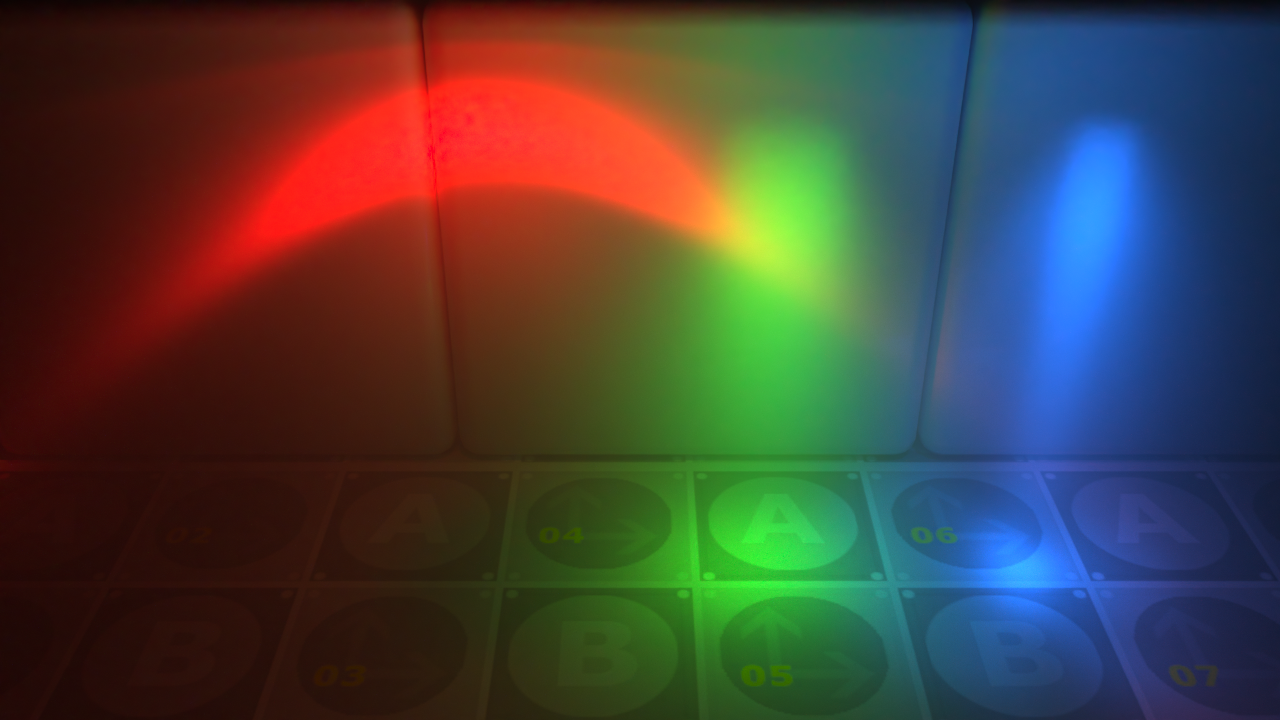
ies lights
|
Assign IES Profile
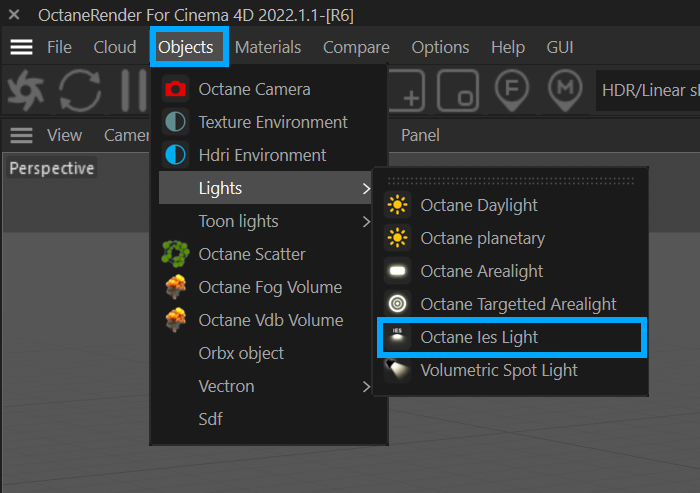
With Octane you can achieve realistic light distribution using IES data. To use IES, first go to the "Object" menu from Live Viewer and select "IES Light" from the Lights Drop down menu. The scene will have a classic Area Light. However, if you click on Octane Light tag in Object Manager, you will see that Octane Image Texture is automatically assigned to the Distribution section. You need to assign an IES file for this image texture. There are plenty of "IES" light definitions in the Cinema 4D Content Browser. You'll also see that Projection is in Sphere mode and rotation is 90 degrees. All of these options are automatically created when you create an IES light from the Live Viewer.
The following "Quick Sheet" simply describes the IES Light creation process. After creating your light, adjust both power and IES light data power and gamma as needed.
|
NOTE You can apply an IES light profile to all objects, but it is important that the size of the object should be small (IES lights are usually small), to get the most accurate result. In addition, brightness settings are written to the IES file by default. Do not use IES light "power" unless necessary. |
IES Workflow
Follow these steps to get IES lights up and running quickly:
- Add the IES light to the scene by going to Octane Menu > Objects > Lights > Octane IES Light
- Scale and position the IES light as needed
- IES Profiles are typically meant for lights smaller than the default light size in Cinema 4D, so it is a good idea to scale them down.
- Change the Light Shape as desired.
- Assign the IES profile to the Distribution slot of the light
- Set the IES Profile projection to Spherical in the Octane Light Tag > Projection > Texture Projection > Spherical
- Set the Octane Light Tag > Position > Normal Space (IES Lights)
|
NOTE As of this writing, IES lights will not be visible or illuminate the scene when the Render Kernel is set to Photon Mapping. |