Live Viewer Commands
The OctaneRender® Live Viewer features several tools and options that are accessible from the icons below the Live Viewer menu section. These options are described below:
|
|
live viewer commands
|

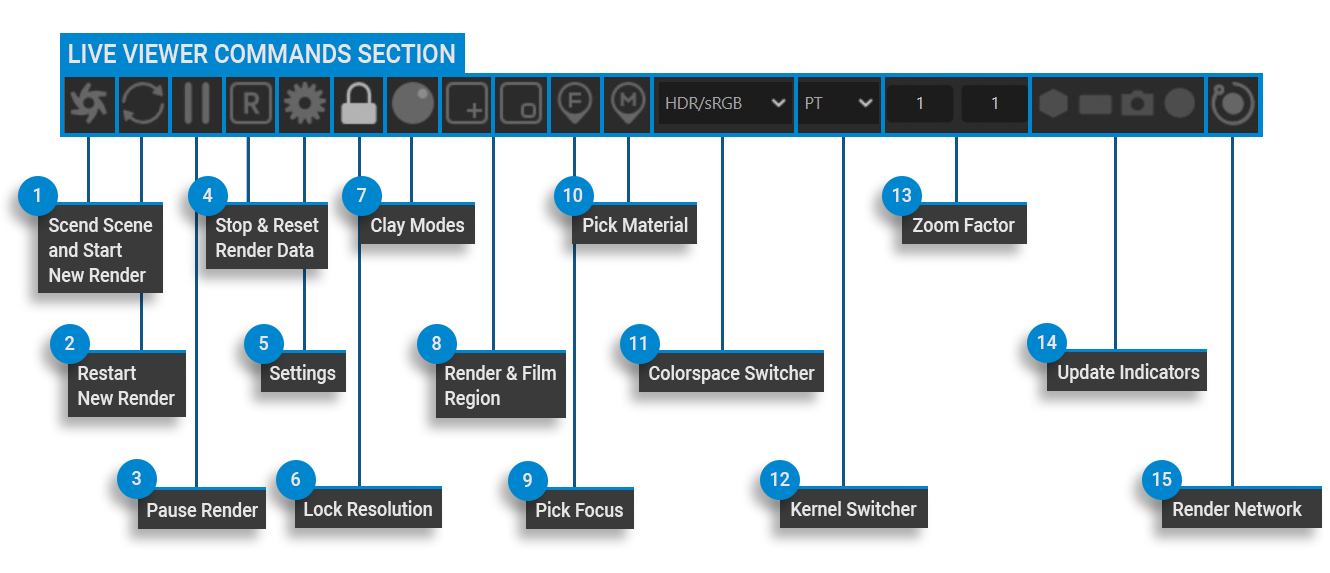
1- Send Scene and Start New Render
Use this command to send the scene to Octane. This command collects the scene data each time and starts the render process from the beginning. Using this command will clear the GPU data and start over; use this command if Live Viewer no longer reacts to changes that you are making to your scene.
2- Restart New Render
This command will only reset the number of samples and re-render without clearing the GPU data.
3- Pause Render
This command allows you to pause the Render without clearing the GPU data. For example, if you have a heavy scene and you must do some scene operations (modeling, Mograph, etc.), use this command. It works as a toggle.
4- Stop & Reset Render Data
This command will completely reset the data on the GPU.
5- Settings
See this section.
6- Lock Resolution
The render resolution in Live Viewer is locked according to your project resolution with this setting. This will present the image in Live Viewer in a 1:1 relationship to the pixels you will see in your final render, without any scaling. You can use this feature when framing the camera at your scene. When you activate this command, the numeric field next to Kernel Switcher in the Live Viewer menu bar also becomes active. Here you can increase/decrease the resolution presented (values less than 1 will decrease resolution).
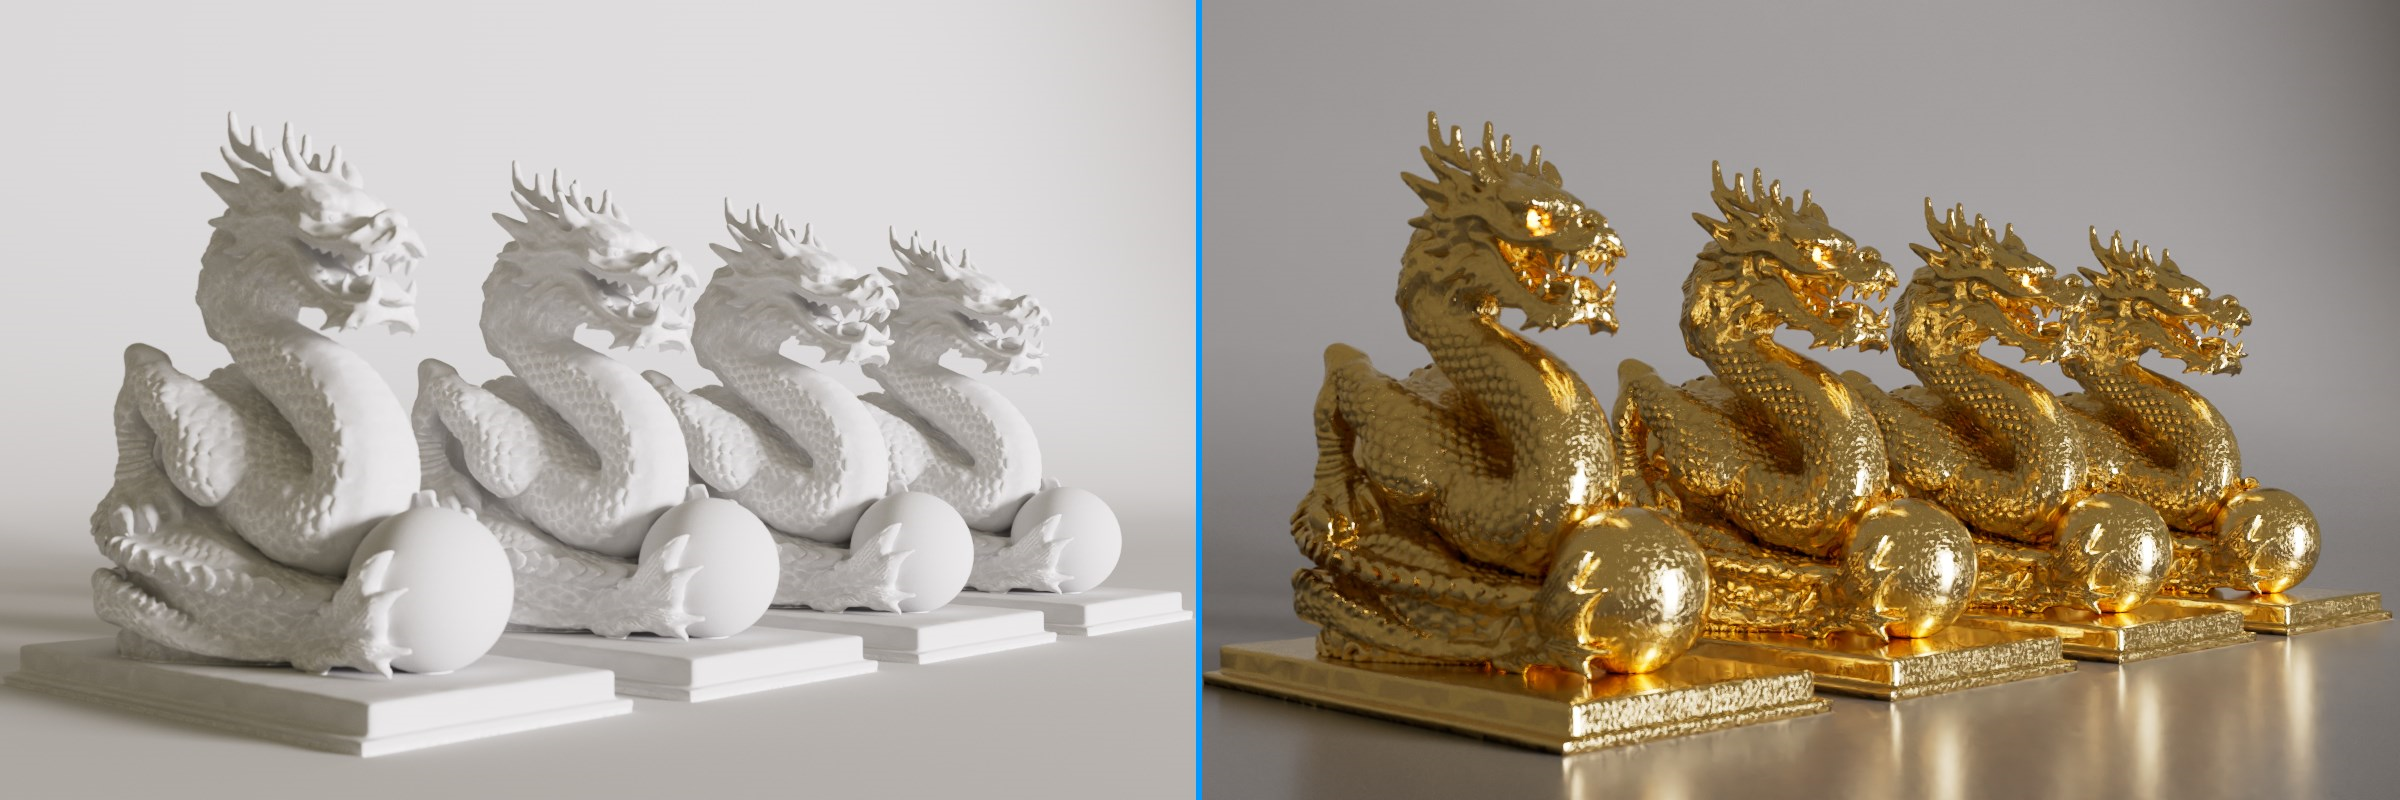
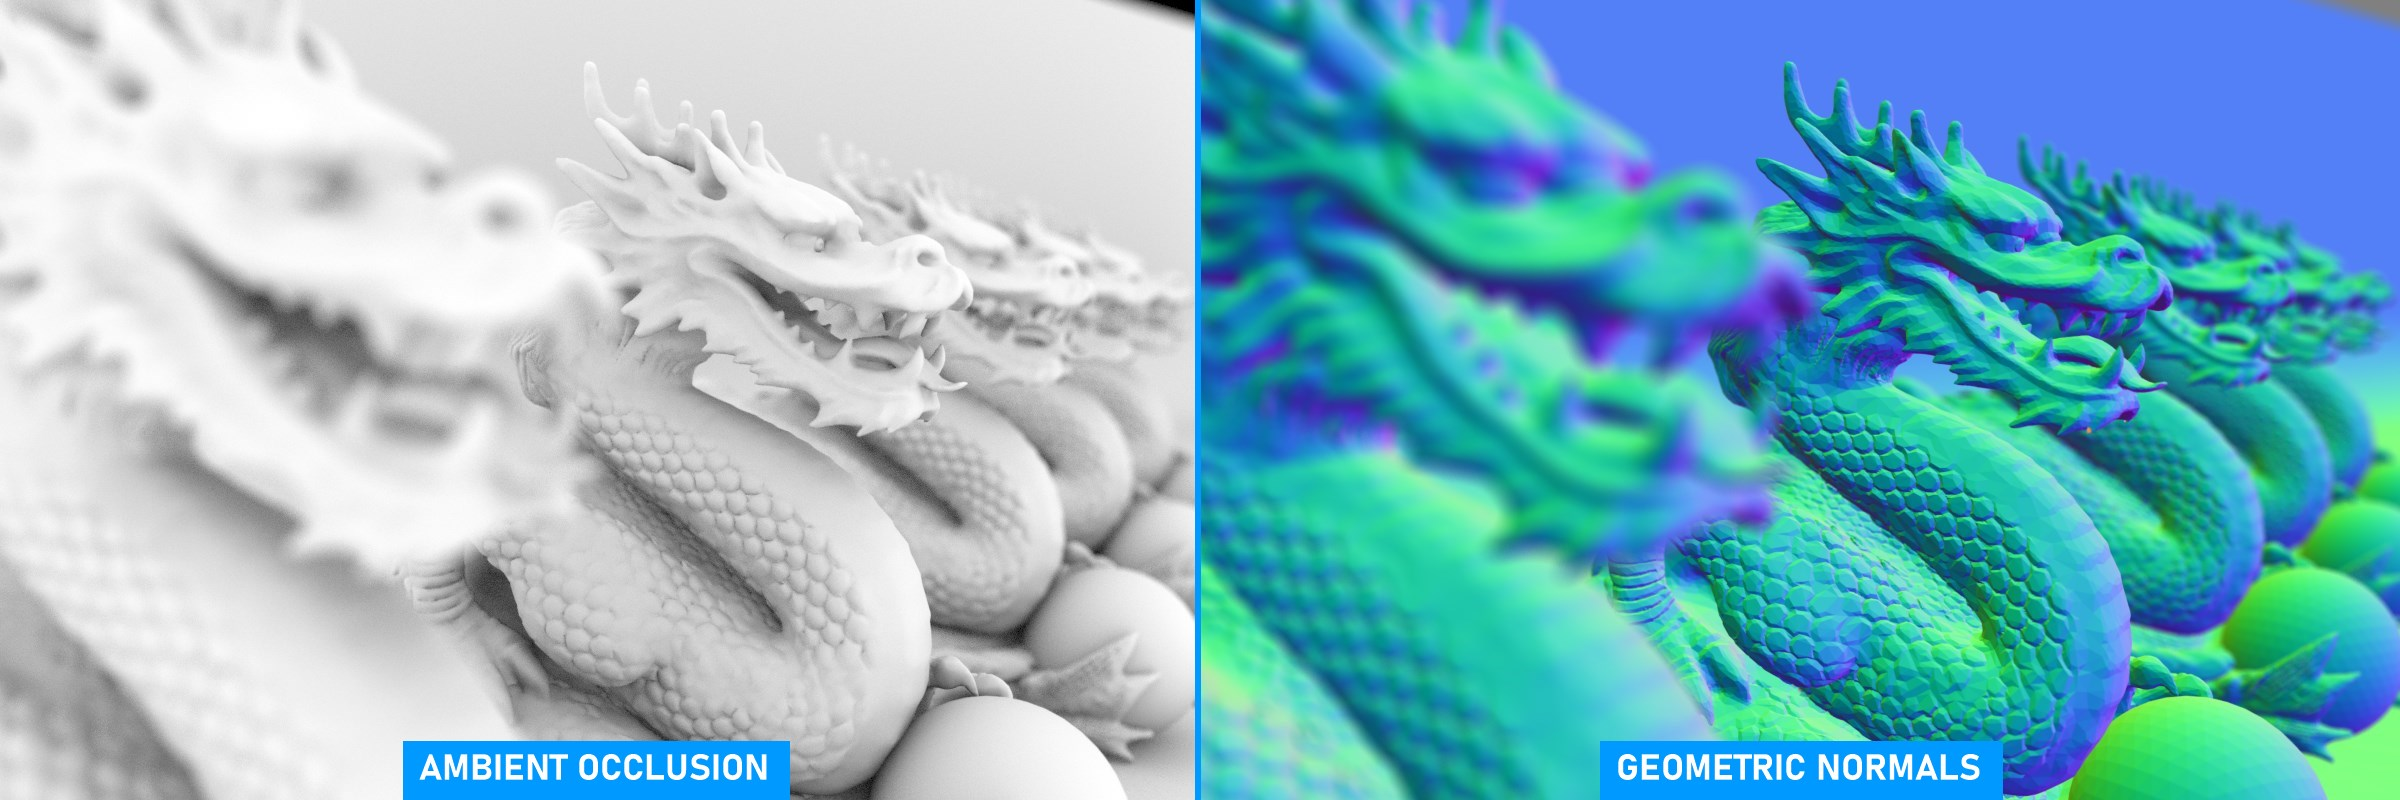
7- Clay Modes
A toggle that will render your scene in grayscale without textures (the result looks like Clay). This is useful to check the overall light distribution in your scene. You can also use it to review Shadows and Ambient Occlusion.
|
|
clay mode vs. normal render
|
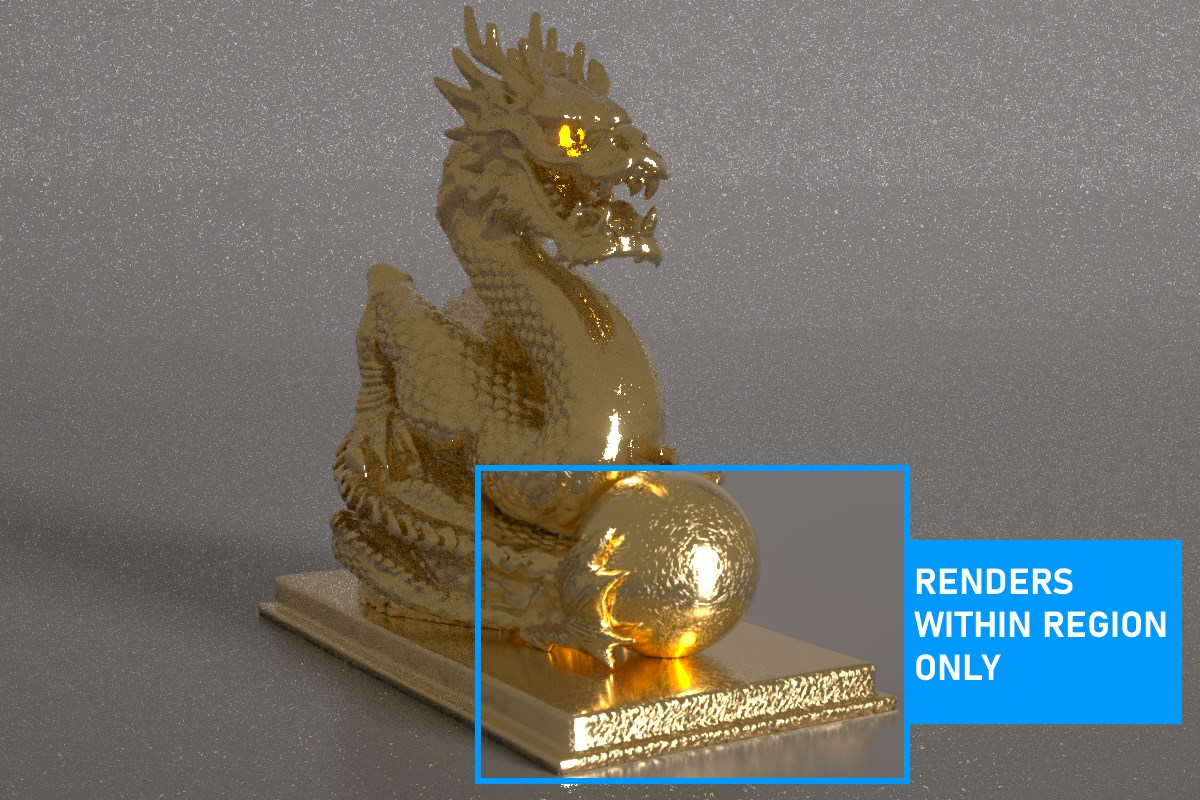
8- Render Region & FILM Region
These commands are used to render just a portion of the scene in Live Viewer, allowing multiple adjustments to an object or material in your scene. Select Render Region from Live Viewer and see only that part of the scene, without waiting for the rest of the image to render. This is useful to dial in material settings without waiting for the full frame to render.
You can then use this region to specify the render region in the Final render (this will be explained in detail in the Rendering section). In Film Region, only the area you select is rendered in Live Viewer. Other areas are rendered as black.
|
|
RENDER REGION
|
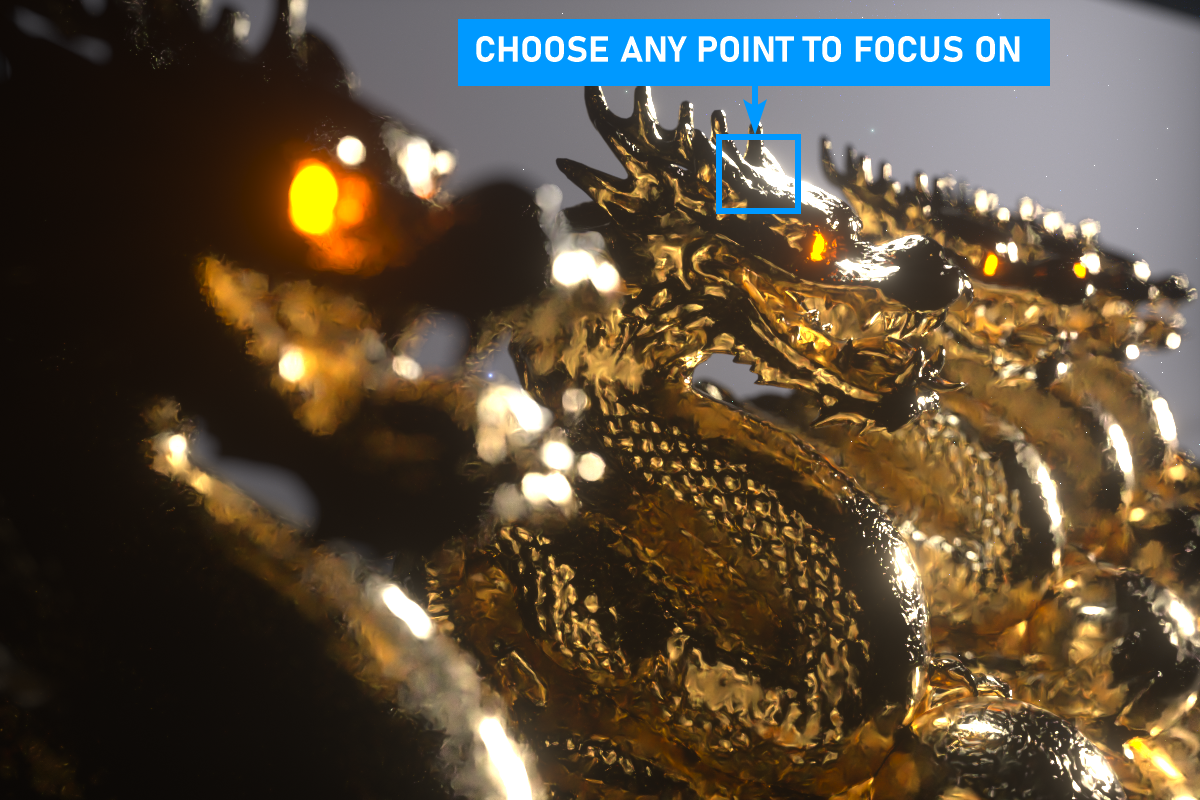
9- Pick Focus
With this command you can select any region or object in Live Viewer as the Focus Center (also select with CTRL + MMB button). It works with the Thinlens section of the Camera Tag, and the "AutoFocus" setting in the Thinlens section needs to be disabled (explained in detail in the Octane Camera Tag topic).
|
|
PICK FOCUS
|
10- Pick Material
This command allows you to directly pick any material in the scene just by clicking on the pixel in Live Viewer containing the desired material. This will speed up your material selection workflow, saving you time.
11- Colorspace Switcher
You can choose the color space applied to the image displayed in Live Viewer with this menu. Pick between:
- LDR/sRGB
- HDR/sRGB
- HDR/Linear sRGB
- ACES 2065-1
- ACES CG
- OCIO<sRGB>
See the Color Management and ACES topic for information on ACES and OCIO.
12- Kernel Switcher
Here you can see how the scene in Live Viewer looks in other kernel mode options. For example, you can get a brief overview of how the scene looks at Pathtracing or Z-Depth. You can see some kernel modes in the image below. We will also look at these Kernels in the Info Channel Section in Octane Settings.
|
|
various lv kernels |
|
|
|
|
|

13- Zoom Factor
This item will display the zoom factor of the Live Viewer based upon click drag of the arrows next to the text display, mouse wheel/middle mouse action and/or direct text entry of the zoom factor desired. The Live Viewer can be zoomed in (larger values, making the image bigger) or out (smaller values, reducing the size of the image in the Live Viewer).
14- Update Indicators
These items will enable/disable updates for Geometry, Lights, Cameras and Materials respectively.
15- Launch Render Network
Selecting this item will launch the Otoy Render Network® wizard, which makes submitting jobs to Render Network easier.