Complete: Configure Cinema 4D ACES for Octane
Previous to Cinema 4D R2023, Octane renders created with ACES/OCIO settings would not correctly display in the Cinema 4D Picture Viewer, regardless of the settings. As of Cinema 4D R2023, Cinema 4D can now work with ACES and OCIO, and, as a result, images previewed in Live Viewer will now match the output in Picture Viewer, as long as the Cinema 4D Color Management settings are configured properly. This section describes the settings for ACES Color Management in Cinema 4D, so that Octane and Cinema 4D can work together to correctly produce renders using ACES/OCIO. If you are using an older version of Cinema 4D than R2023, this section does not apply and can be skipped.
|
IMPORTANT The ACES/OCIO settings discussed in this section are NOT compatible with the ACES Tone mapping option in the Octane Camera > Camera Imager tab (discussed here). Make sure that you disable that option if you are using the settings described in this section. |
The necessary steps are listed below. Click on a step for more information on that step.
Getting Started
Before Rendering
Render
- Render your scene
After Rendering
The following sections describe each setting in detail. It is necessary to follow the instructions completely otherwise some functions may not be available or operated properly.
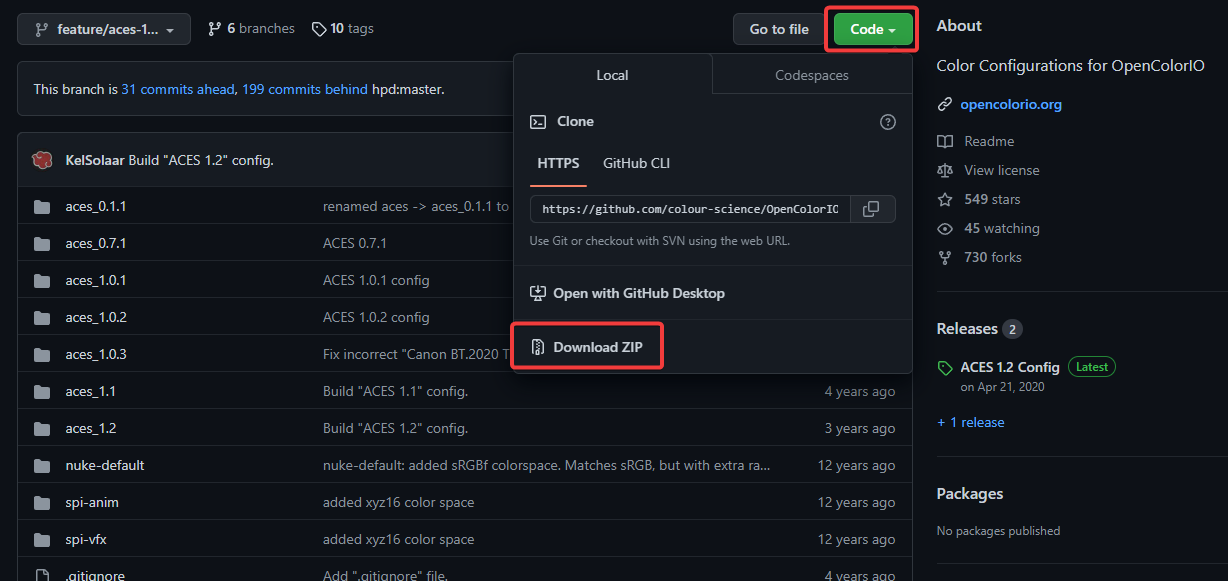
Download Complete OCIO Package
Go to github and follow these instructions:
- Click on the green Code button
- Choose the Download ZIP at the bottom of the drop down menu (warning — it is a large file)
- Save the file on a local disc
|
|
Download OCIO Package
|
Install the OCIO Package
Next, the opencolorio package needs to be installed so that Octane can use it. Go to Octane > Settings > Color Mgmt. tab; if there is already an entry listed in the Environment config file slot, as shown in the following illustration, then all that is necessary is to ensure that the Automatic(recommended) flag is enabled.
|
IMPORTANT The two intermediate color space entries need to be set to the same option, otherwise the color management system will fail. |
|
|
Install OCIO Package
|
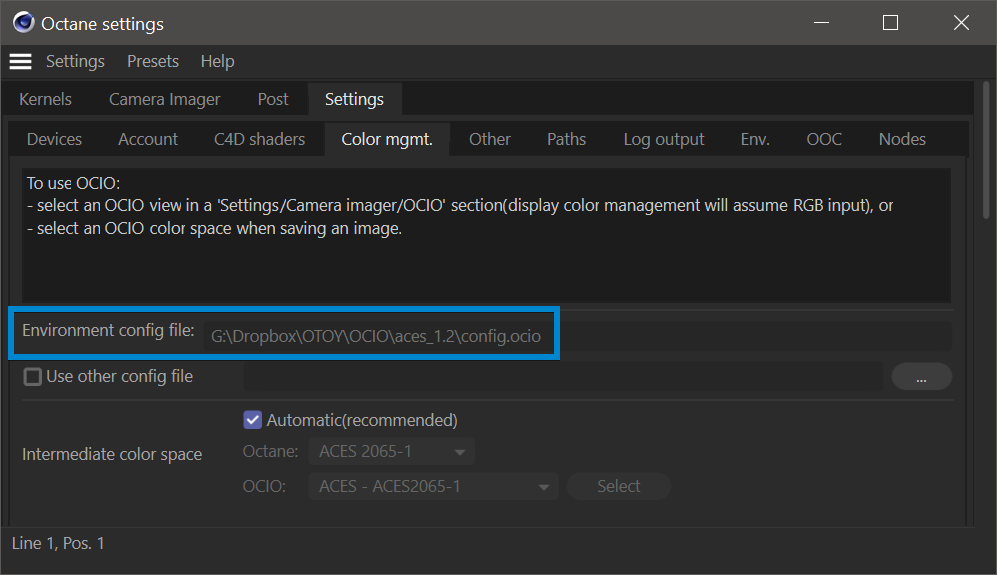
Octane Settings > Settings > Color Mgmt. tab
In the event no file is listed in the Environment Config file, just select the Use other config file option, select the ellipsis button (...) and navigate to the directory containing the config.ocio file, and then restart Cinema.
|
Environmental Variable If you are familiar with creating Environmental Variables, you can set one up for your config.ocio file. This will enable ACES/OCIO for ALL applications on your system that are ACES and OCIO aware. Once created, the next time Octane is run, the config.ocio file will be listed in the Environment config file slot in the Color Management tab of the Octane Settings window in Live Viewer. You also have the option of using a separate config file for Octane, and that is what the Use Other config file slot is meant for. |
Set Up the Camera Imager
Go to Octane Settings > Camera Imager > Imager tab and do the following:
- Set Response to Linear
Go to Octane Settings > Camera Imager > OCIO tab and make these settings:
- Set OCIO view to ACES:sRGB — this will set the view transform to sRGB
- Set OCIO look to Use View Look
|
|
Camera Imager > OCIO tab
|

Set Up Color Management In Project Settings
In Cinema 4D R2023 and later, professional ACES and OCIO-based color management has been added to the program. Most of the necessary settings are found in Edit > Project Settings > Project tab > Color Management turndown, as shown in the illustration.
|
|
C4D Color Management settings for ACES
|

Project Settings Dialog > Color Management
Make the following changes to the default settings as follows:
- Select the OpenColorIO button
- Set the Preset dropdown menu to ACES
- Choose the location of the installed config.ocio file — This should be the same file and location as specified in Octane Settings > Settings > Color Mgmt.
- Set Render Space to ACES2065-1 — This will conform Cinema to Octane standards. You can choose ACEScg, but you will then be limiting your color space to a subset of the full range offered in the ACES2065-1 option.
- Display Space — There is only one option, sRGB, which is correct
- Set the View Transform to Raw — This will allow Cinema to show you the Octane results without additional processing.
- Set the Thumbnails to Raw — This will allow the Thumbnails to be correct, without additional processing by Cinema 4D.
Set Up Color Management in Preferences
In previous versions of Octane, Otoy required the Display Color Profile be disabled. In Cinema R2023.1.3, this is no longer the case. Instead, this setting should be sRGB (settings vary, based on monitor make/model). This setting is necessary in order for the Picture Viewer to properly support correct results with changing the View Transforms.
|
|
CINEMA 4D DISPLAY COLOR PROFILE
|

Preferences > Viewport Display > Display Color Profile
Set Up Octane Renderer Settings
In Render Settings > Octane Renderer> Main tab, change the Buffer Type to HDR(Float 32-bit) and the Color Space to ACES2065-1, as shown in the following illustration:
|
|
Octane renderer settings for ACES
|
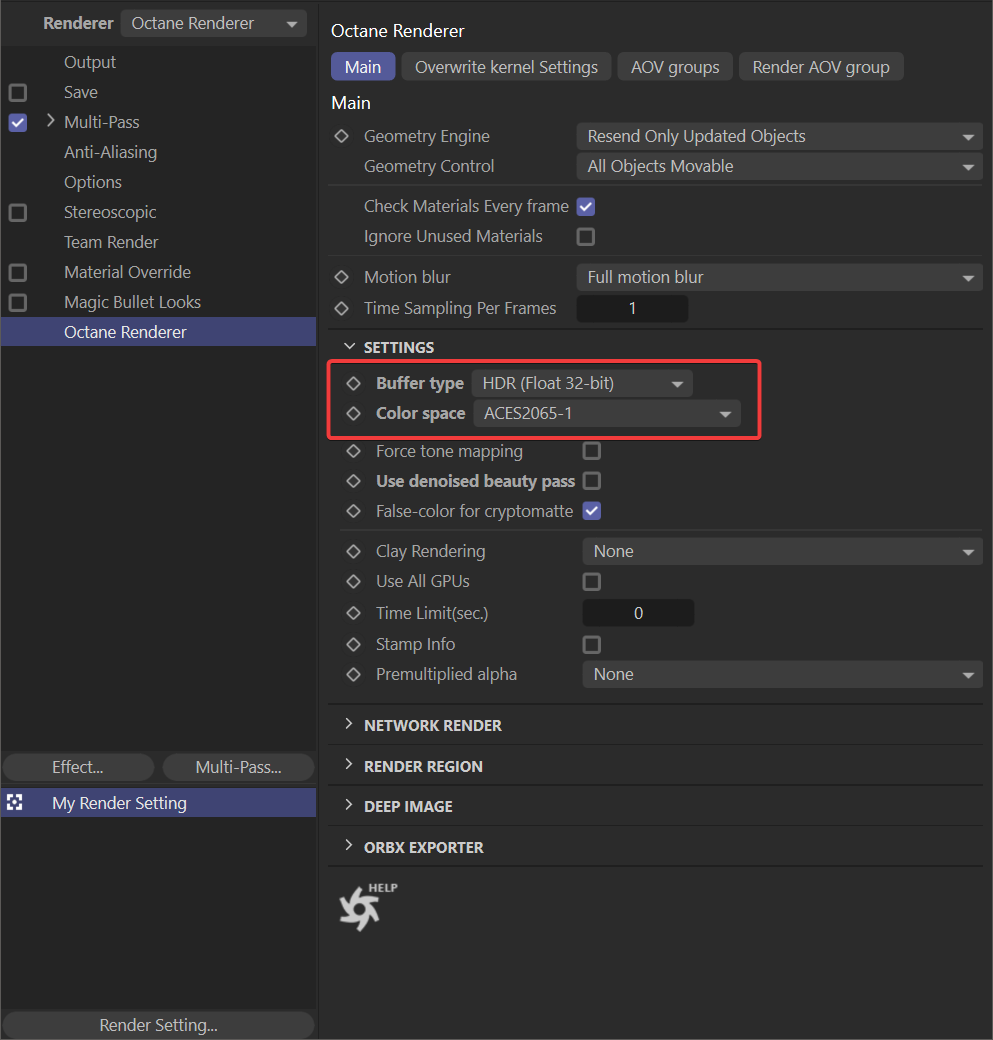
Octane Renderer Settings > Main tab
Picture Viewer Output
As of Cinema 4D R2023, Picture Viewer results will match the results in Live Viewer, using the settings as presented above. Start with a Live Viewer preview (such as the sample shown in the following illustration). Choose the OCIO <sRGB> option in the Live Viewer Color Space drop down menu. This will apply the sRGB transform to the ACES/OCIO rendered image.
|
|
Octane Live Viewer ACES Output
|
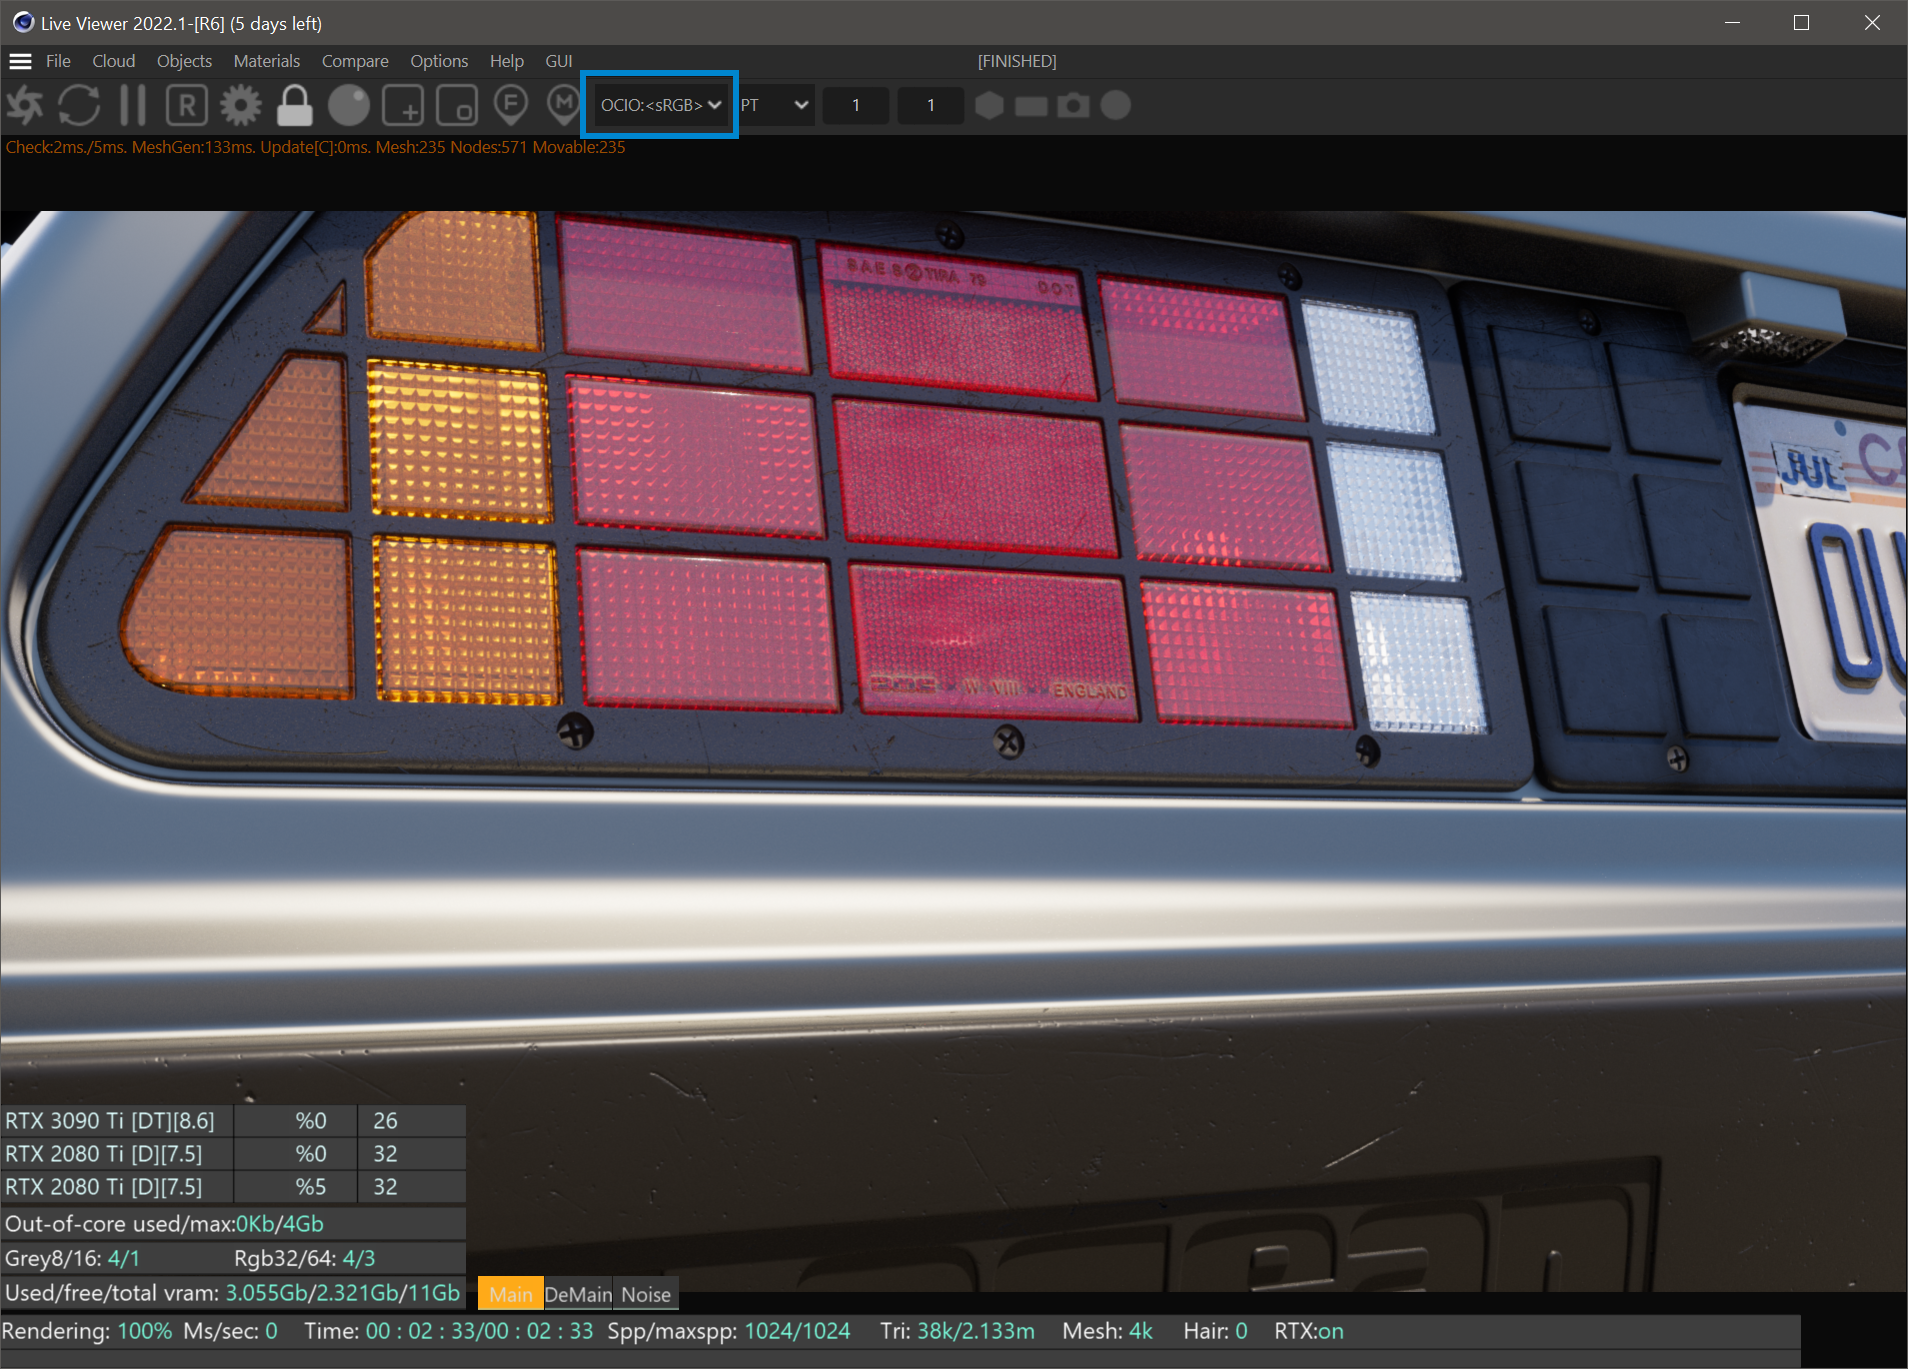
Live Viewer Output
Now, render the image to the Picture Viewer, having set up the output settings described here. It is necessary to set the View Transform option in the Picture Viewer, located in the upper right of the window, to Embedded/Raw. The Embedded/Raw setting will present the Octane output without any Cinema-based color processing. The result is shown in the following illustration:
|
|
C4D Picture Viewer with Octane ACES render
|

Picture Viewer Output
Verifying the Results
Using an external image comparison application (Beyond Compare is used for this illustration) is a good way to verify the results between Live Viewer (left image) and Picture Viewer (right). In the illustration, these two images appear to be virtually identical, and, effectively, they are; the only exception being differences in noise, as shown in the results, as shown in the comparison window below the two image windows. This is indicated in the red points appearing around high detail areas, showing the noise itself. Overall, the image has mostly a gray presentation in the comparison, which indicates no difference between the images. This confirms that the output from Live Viewer is matching Picture Viewer when the ACES/OCIO settings are configured properly.
|
|
Comparing Live Viewer to Picture Viewer
|

Beyond Compare
Final validation is how the image looks in another application that supports ACES/OCIO. In the following illustration, the image is loaded into Affinity Photo. OCIO Transform is selected, and the image then matches the output in Live Viewer and Picture Viewer.
|
|
Affinity Photo
|

Affinity Photo
Adobe has recently updated After Effects (version 23.1.0) to support OCIO without plugins (EXR support still requires an external plugin). In Project Settings, choose the ACES option. There are additional opens in the View menu to choose display transform options. See the After Effects 2023.1.0 documentation for more information.
|
|
Adobe After Effects
|
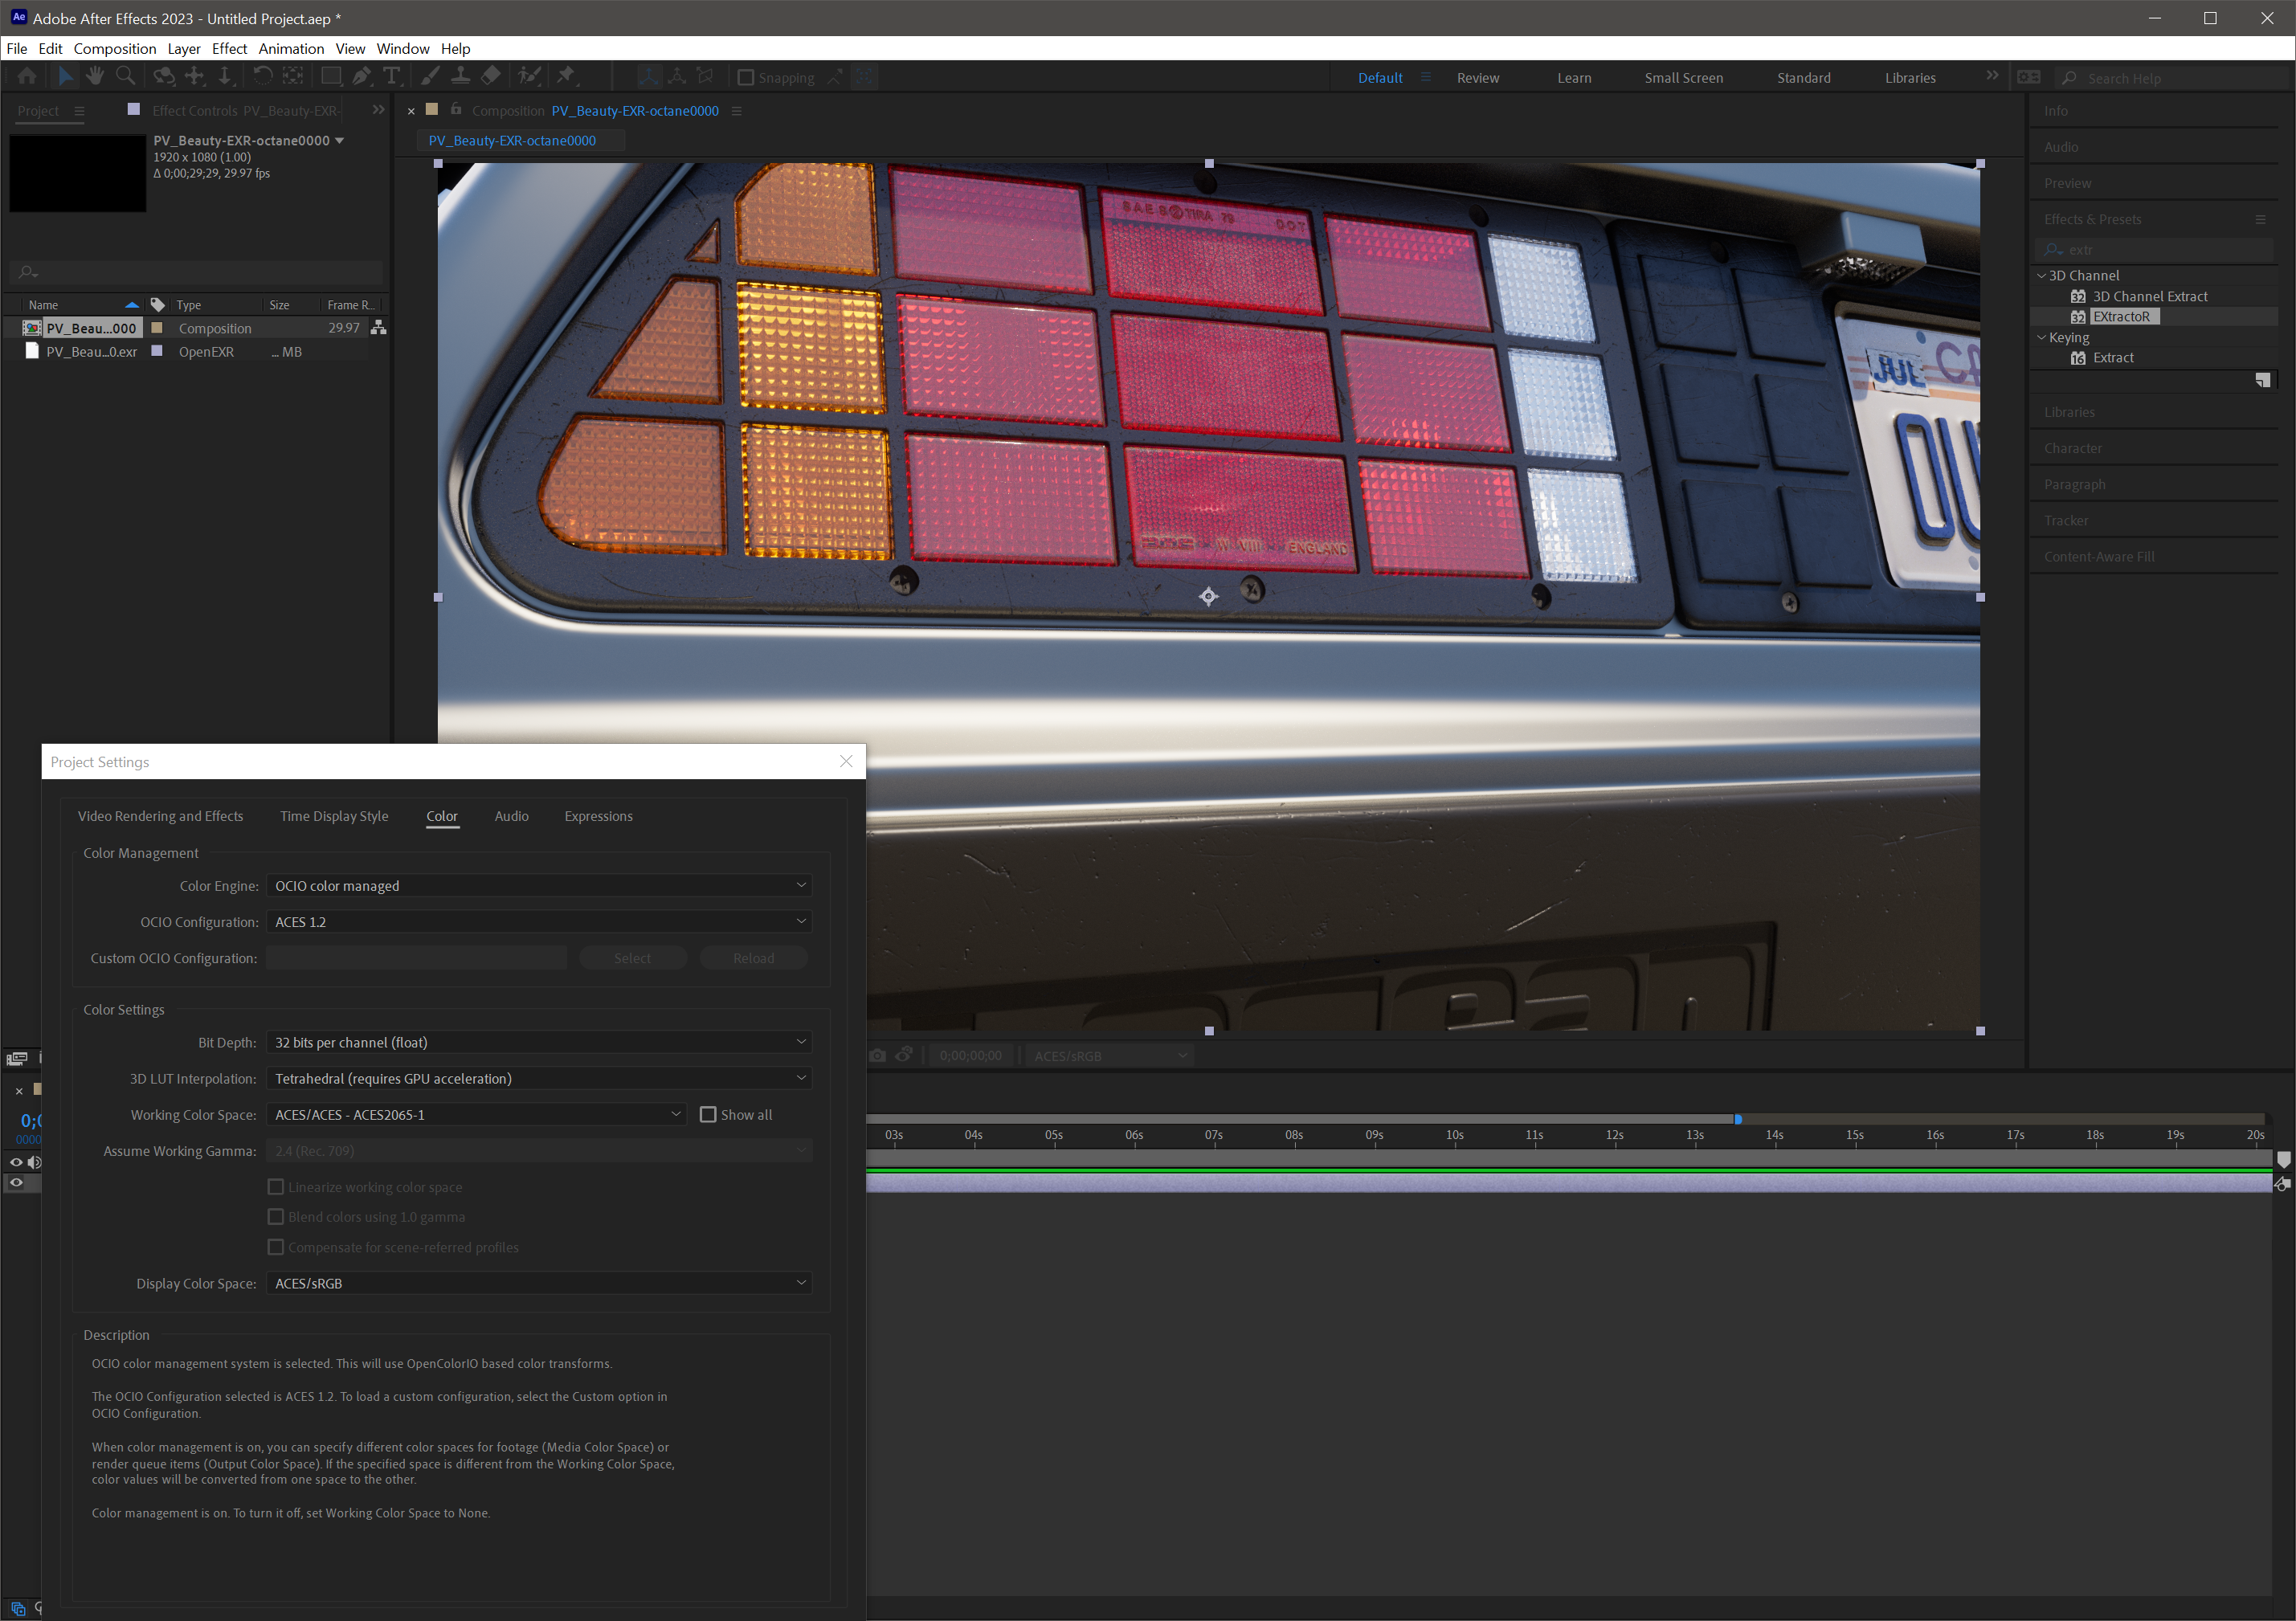
Adobe After Effects V23.1.0
|
NOTE If your version of After Effects does not show the Project Settings as represented in the image above, you will need to contact Adobe support. Updating older After Effects installations to version 23.1.0 may show an older version of this panel without the OCIO options. |