Substance Painter Export and Import
Substance Painter Workflow
There are two Octane materials that are best used for external application material support: Universal Material and Standard Surface Material. The following mini tutorial serves as a quick introduction to using Substance Painter output with Octane.
1- Scene PreparatIon (C4D)
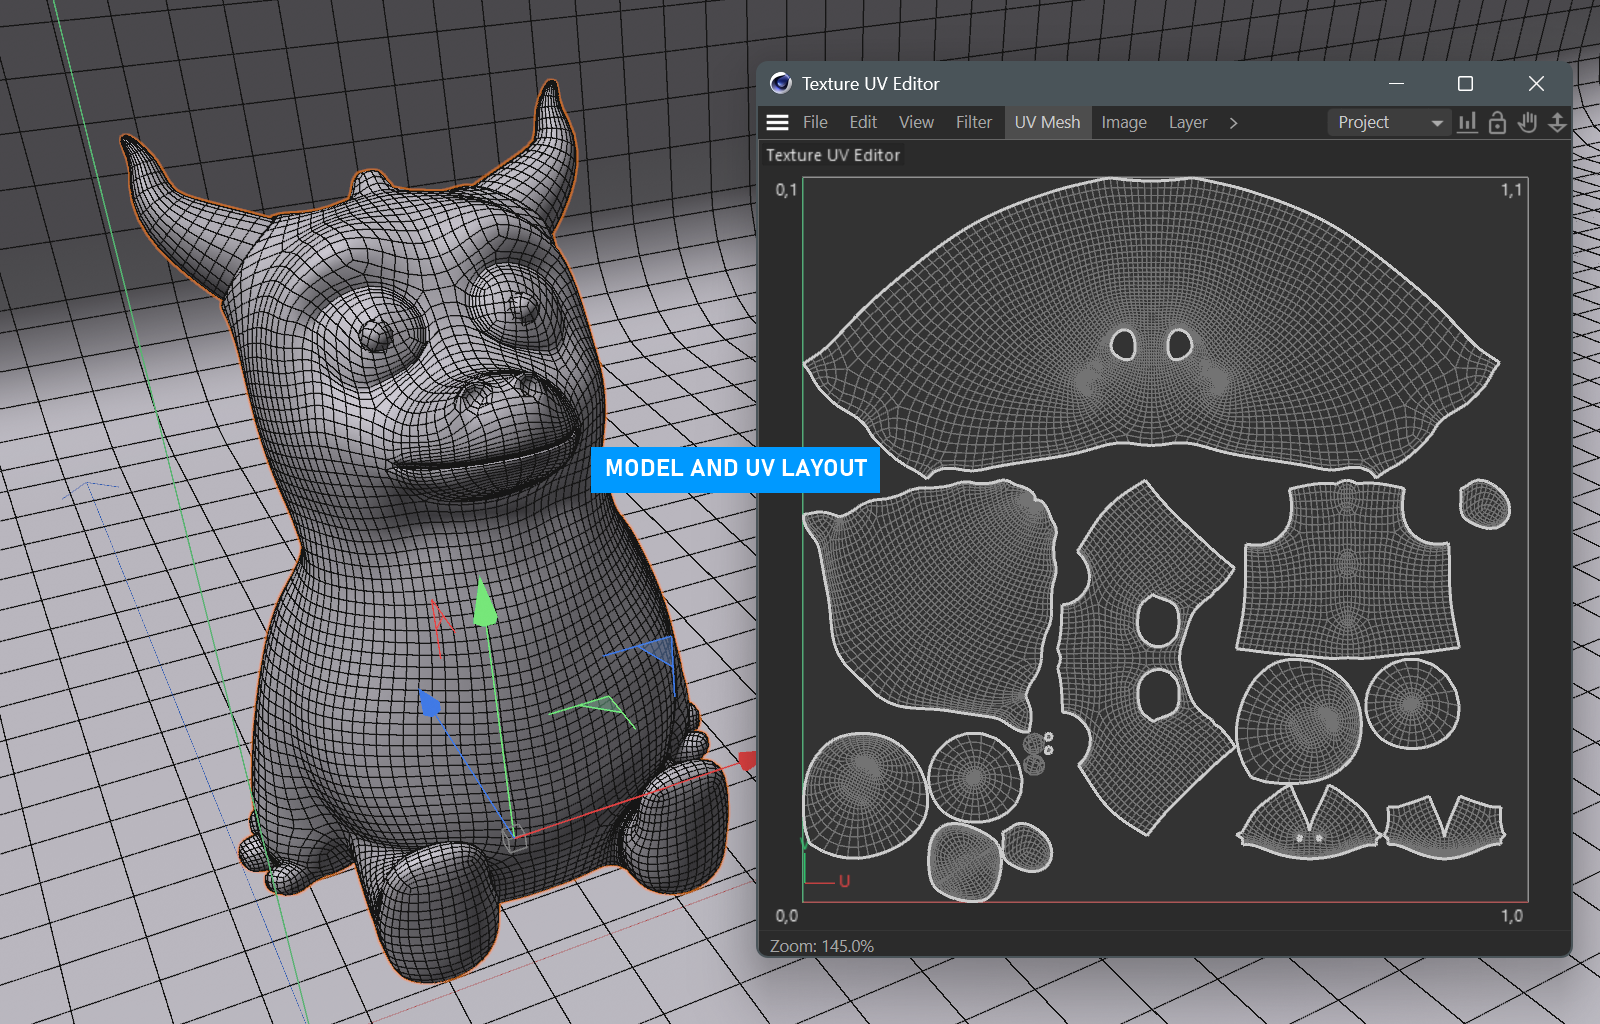
Prepare the model in Cinema 4D. A UV layout must be created to properly work with Substance. This model was unwrapped using Cinema's UV toolset.
|
|
prepping for substance painter
|

In addition to a good UV layout, it might help to isolated portions of the mesh for easier selection, and this can be done via Vertex tags in Cinema 4D, as Substance can use this color information to select parts of the model for easier painting and texture assignment. Make sure to enable Vertex colors when exporting.
For more, see Wes McDermott's excellent Substance Painter tutorials hosted by Adobe, here.
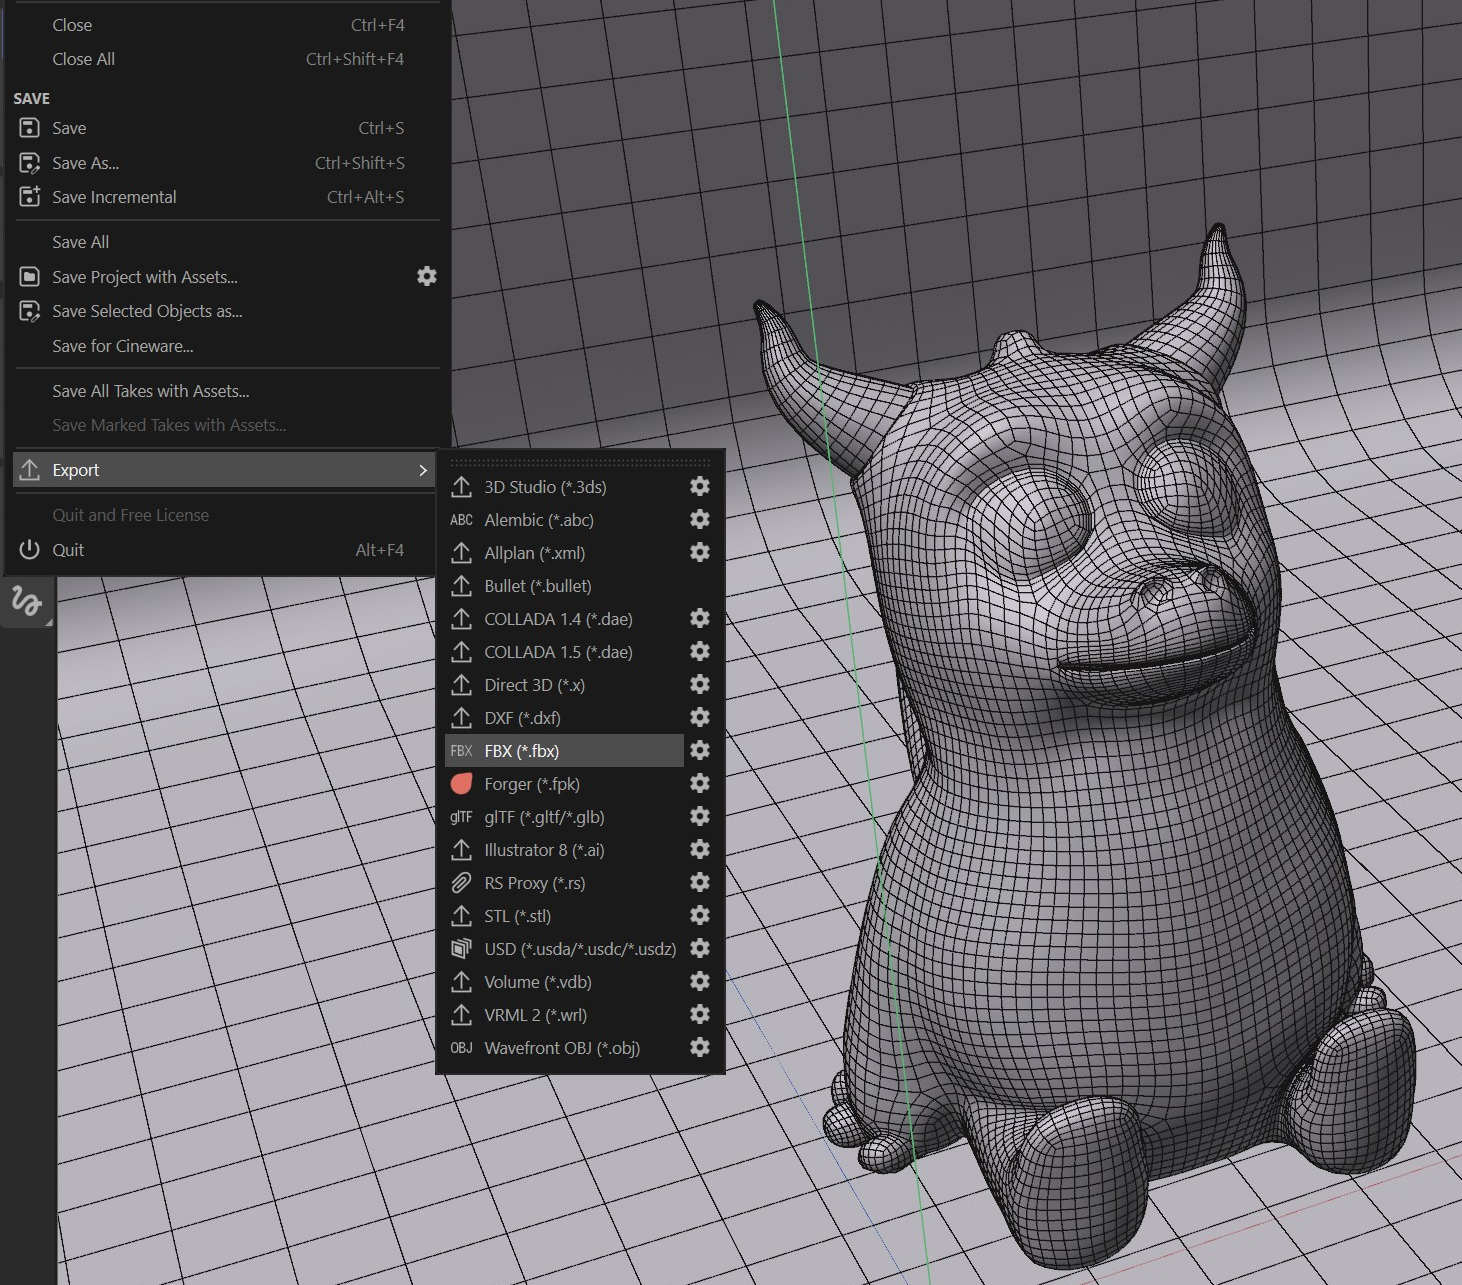
2- Export Your Mesh for Substance
Choose File > Export > FBX (for example) to export to the FBX format. If necessary, click on the gear icon to enable additional export attributes (such as the aforementioned Vertex Colors.)
|
|
exporting for substance
|

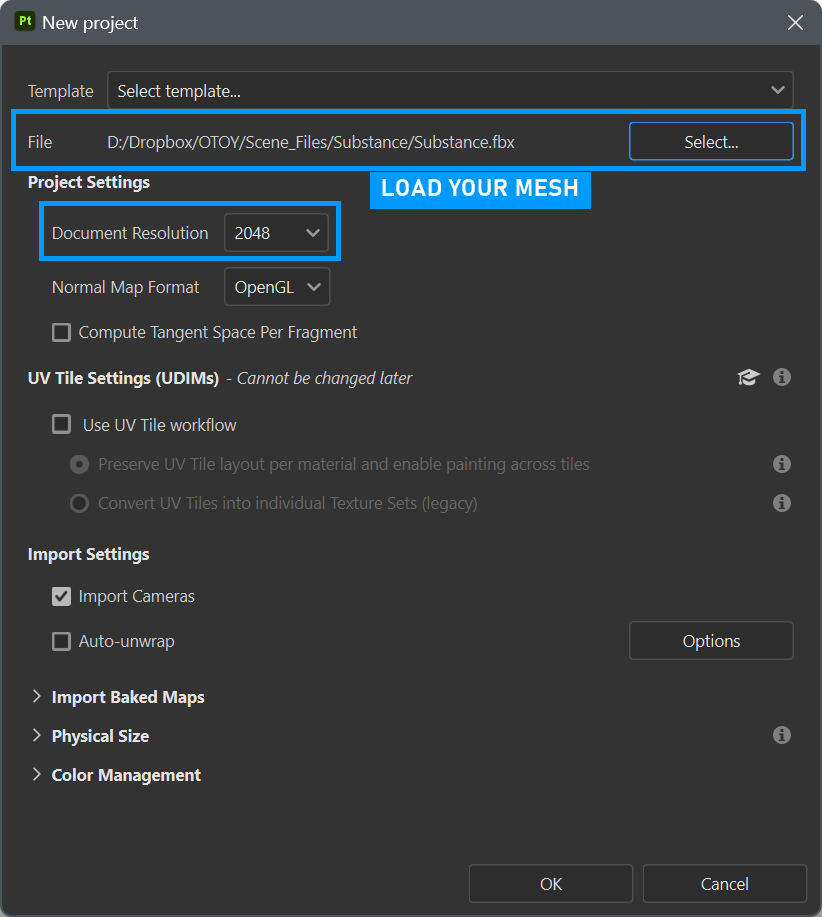
3- Import Your Mesh to Substance Painter
In Substance Painter, choose File > New Project and load the object exported from Cinema 4D. Also, make the Document Resolution 2048. If necessary, the resolution can be lowered to 1024 to work more comfortably. When exporting the final output in Substance, it can be saved at a higher resolution. Due to its procedural nature, there is no loss of quality in processes such as texture enlargement or reduction in Substance Painter.
|
|
substance painter import
|

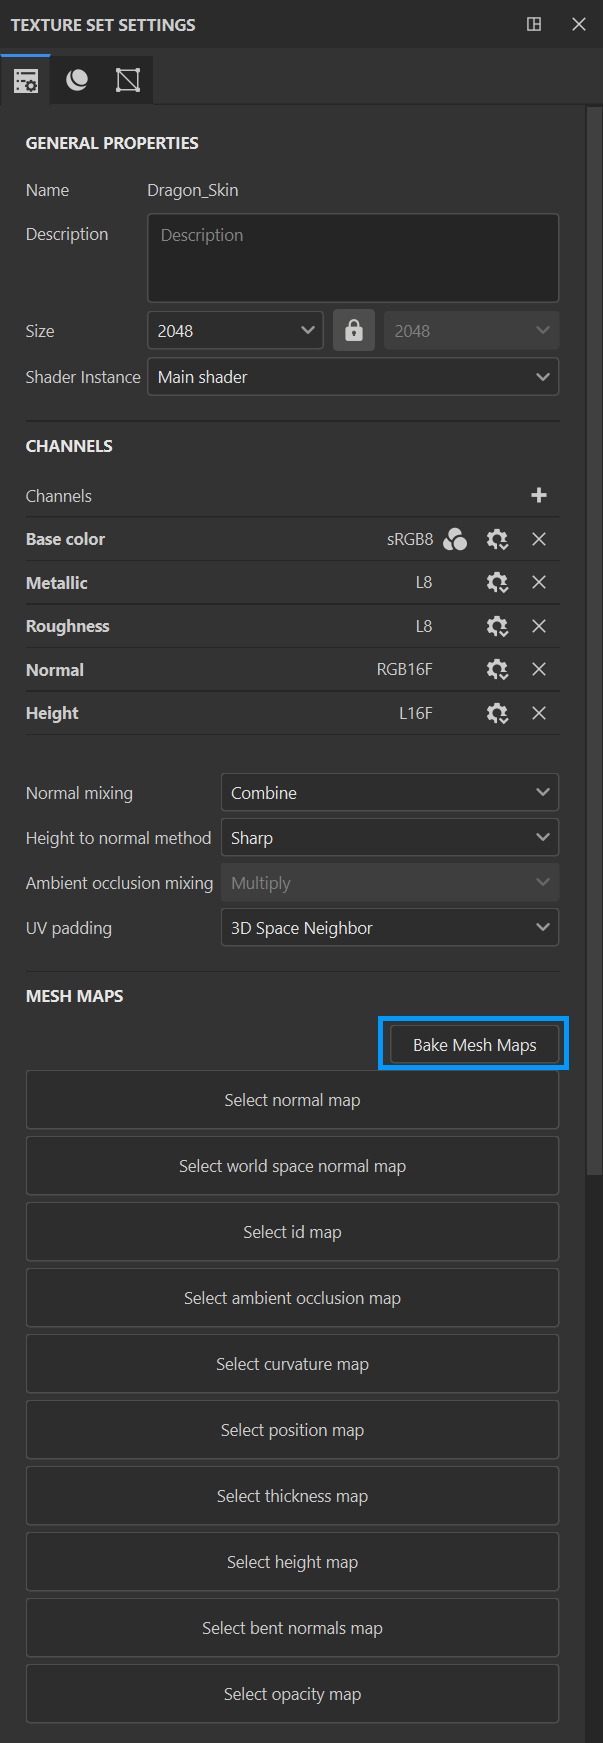
4- A Few Small Steps...
Go to the Texture Set Settings window and click Bake Mesh Maps as indicated below.
|
|
choose bake maps
|

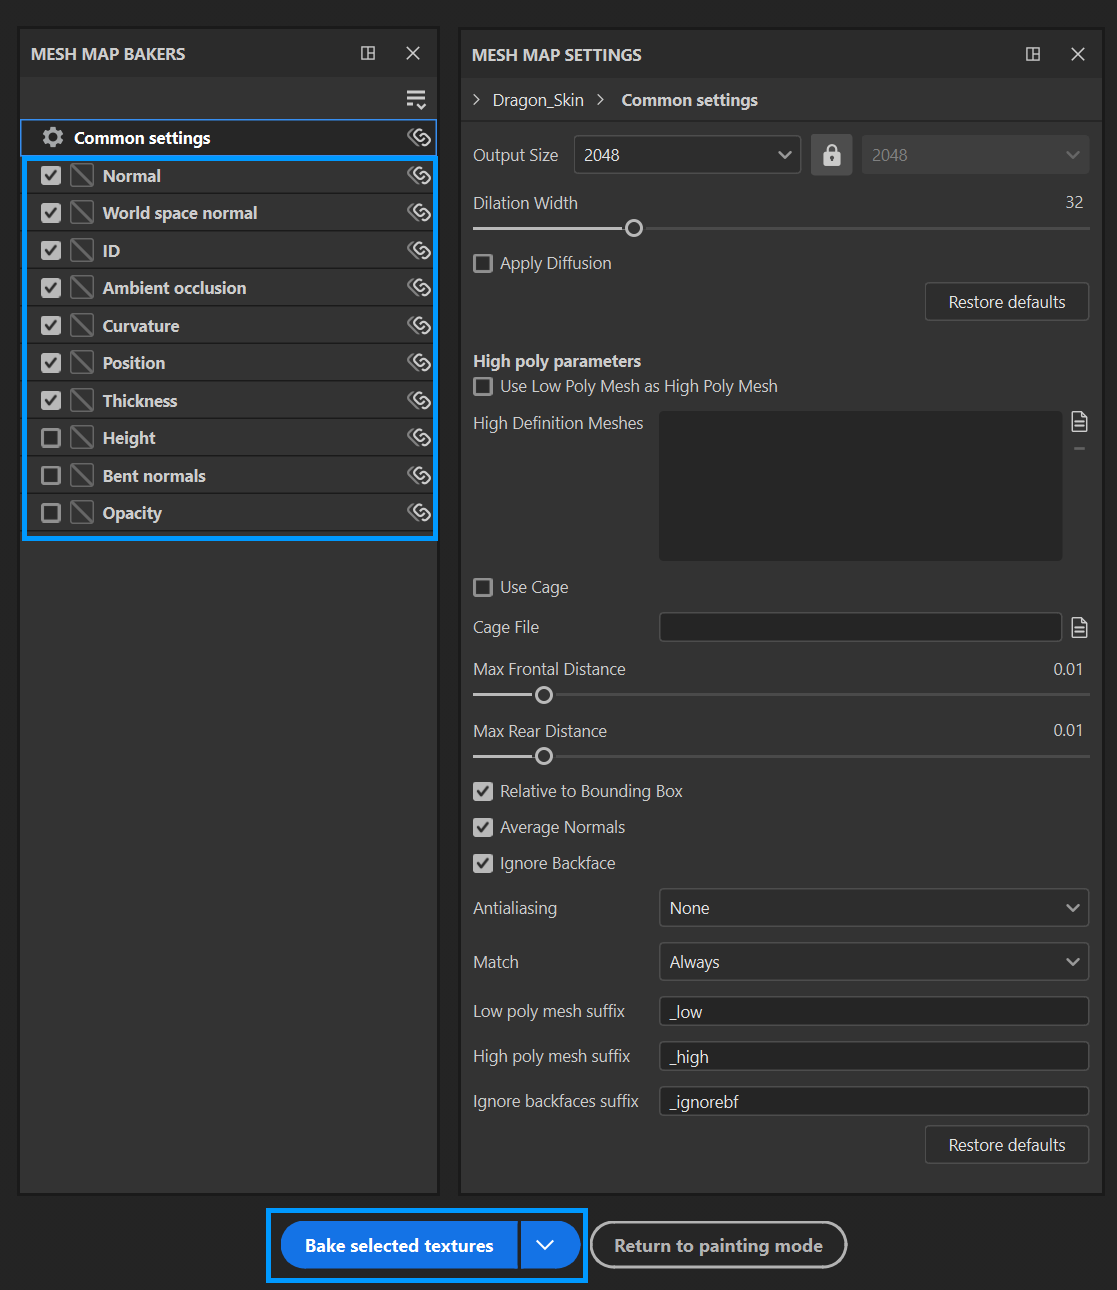
The following window will appear. Here, select the desired maps to work with in Substance. To configure a map, select it from the list on the left. Once satisfied with these configurations, click on the Bake Selected Textures button at the bottom of the screen.
|
|
bake mesh maps
|

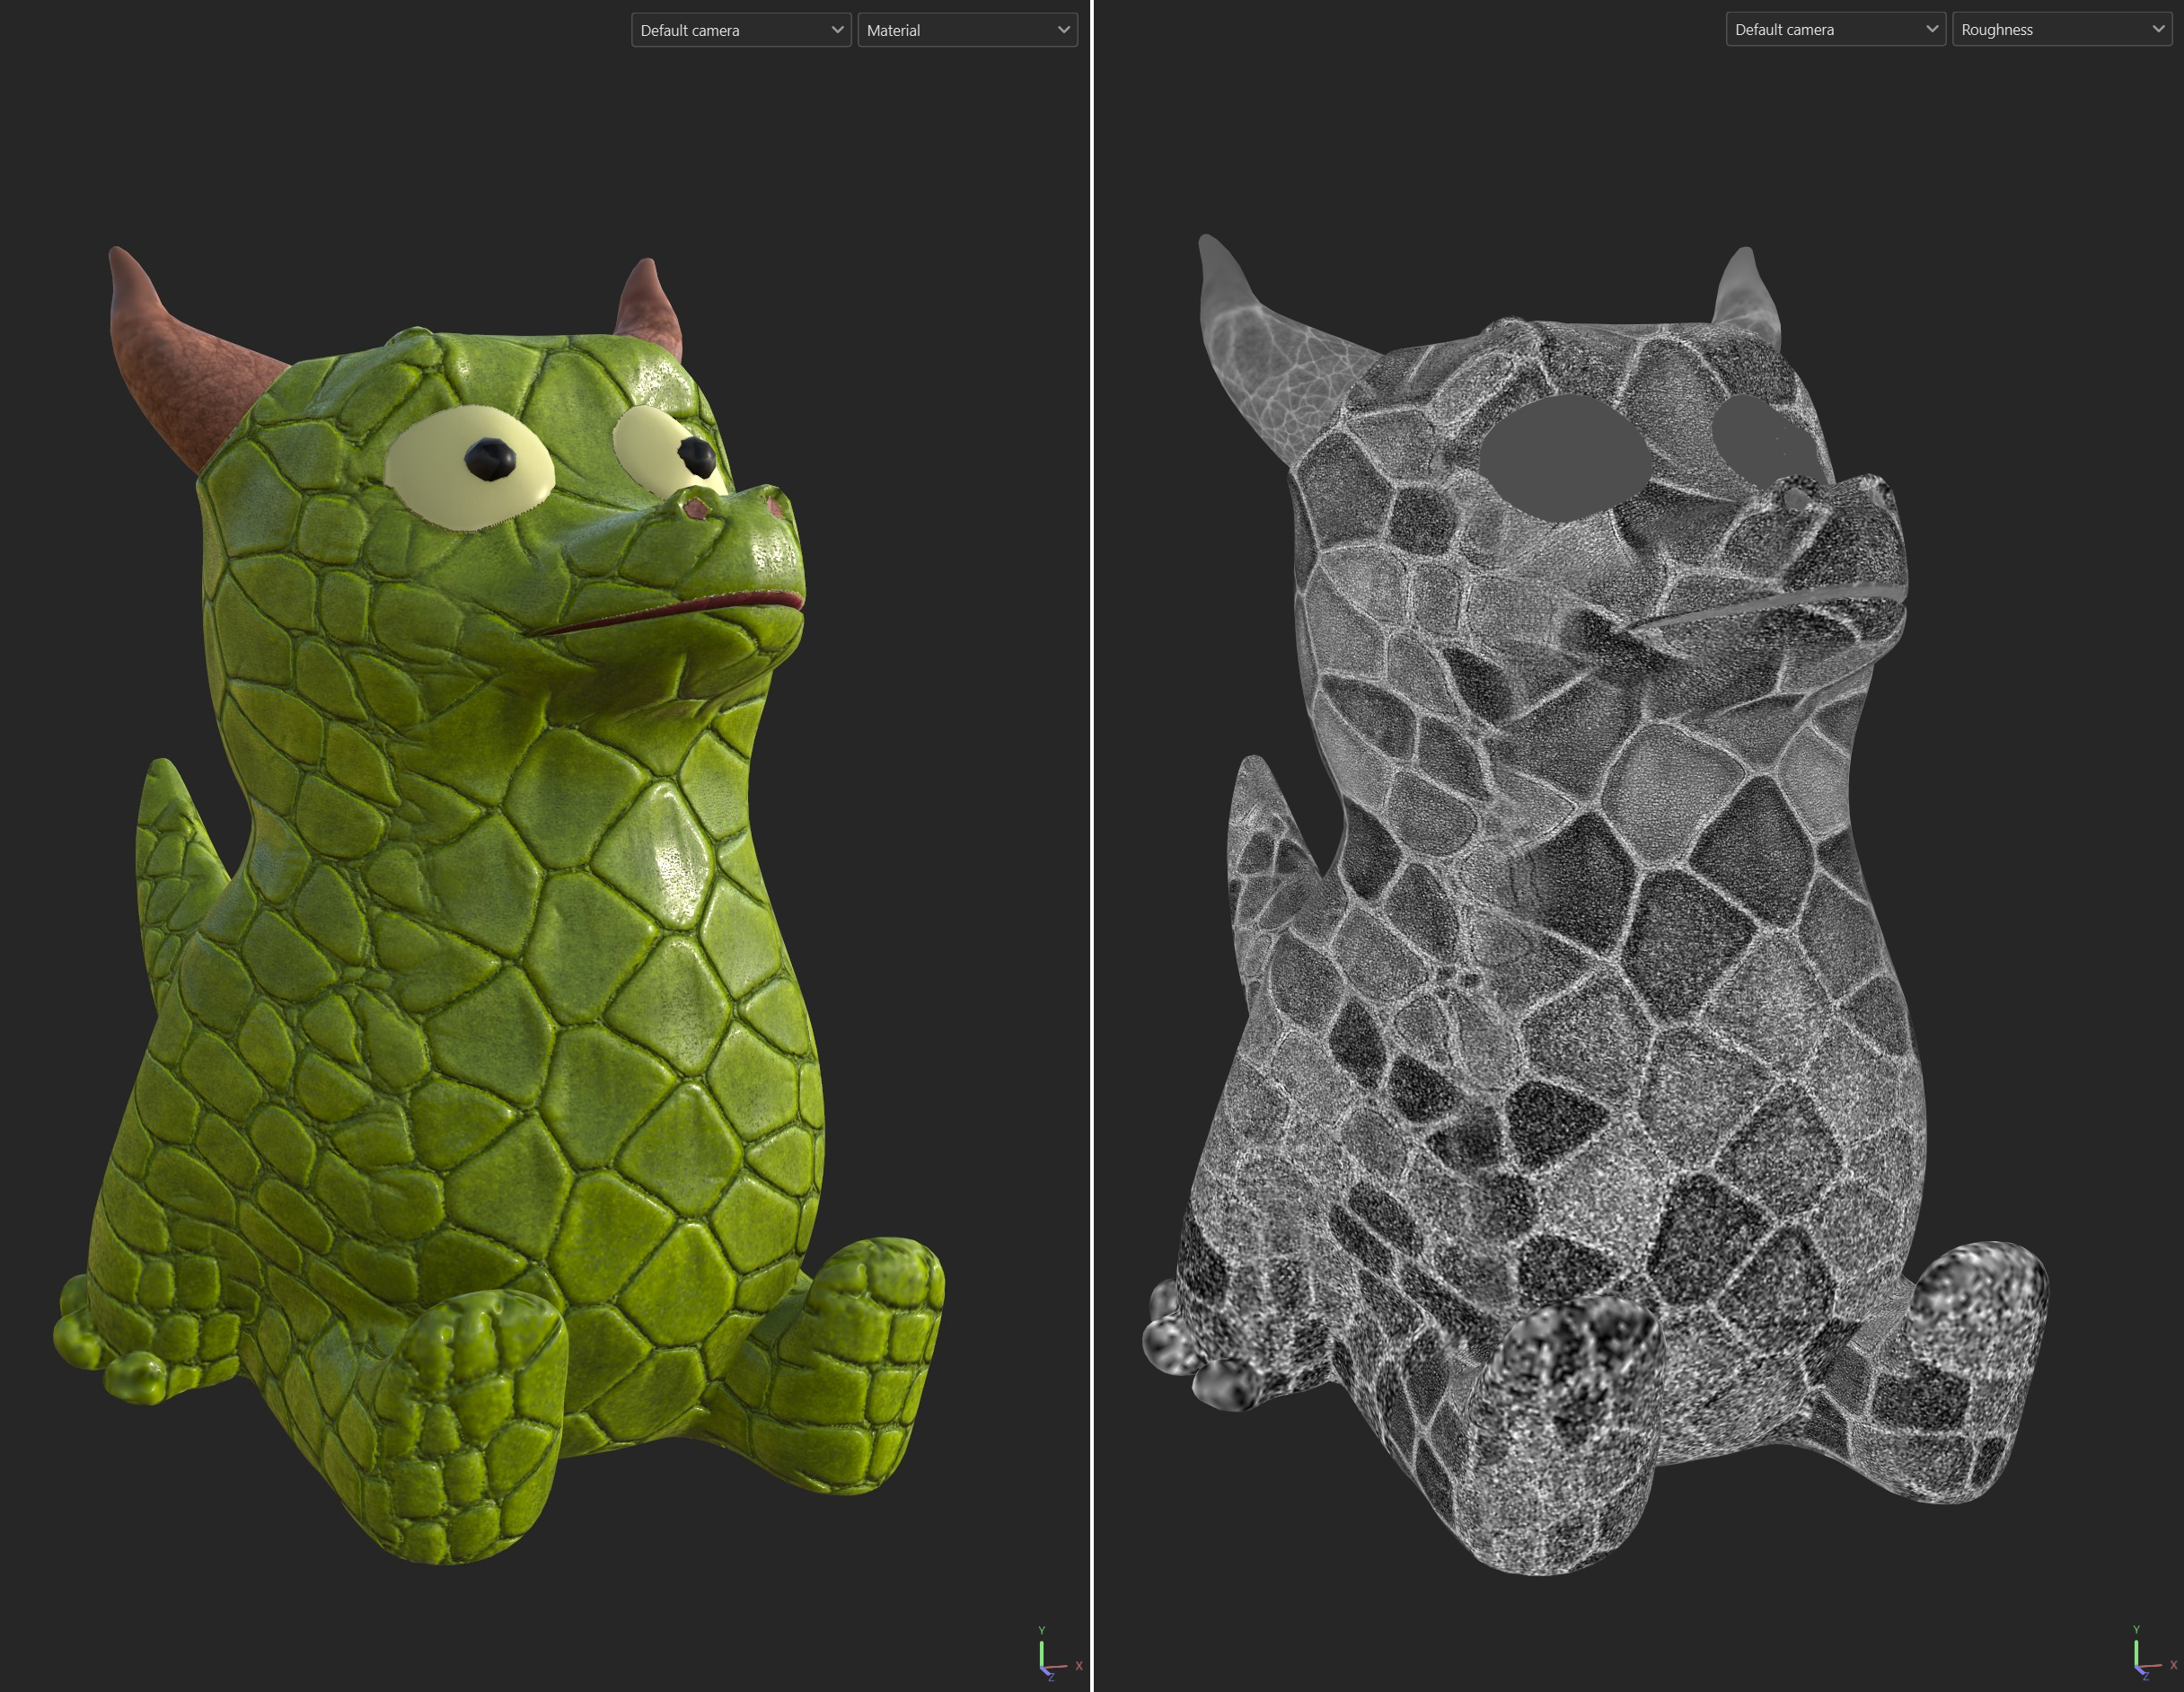
5- Texture CreatIon
For more information on the actual creation of the materials in Substance, see the Substance documentation or review Wes McDermott's tutorials mentioned earlier. The example here used the default set up, and added several layers, generators and masks. The material output is presented on the left, and an example channel, in this case Roughness, is shown on the right.
|
|
substance painter material channel display
|

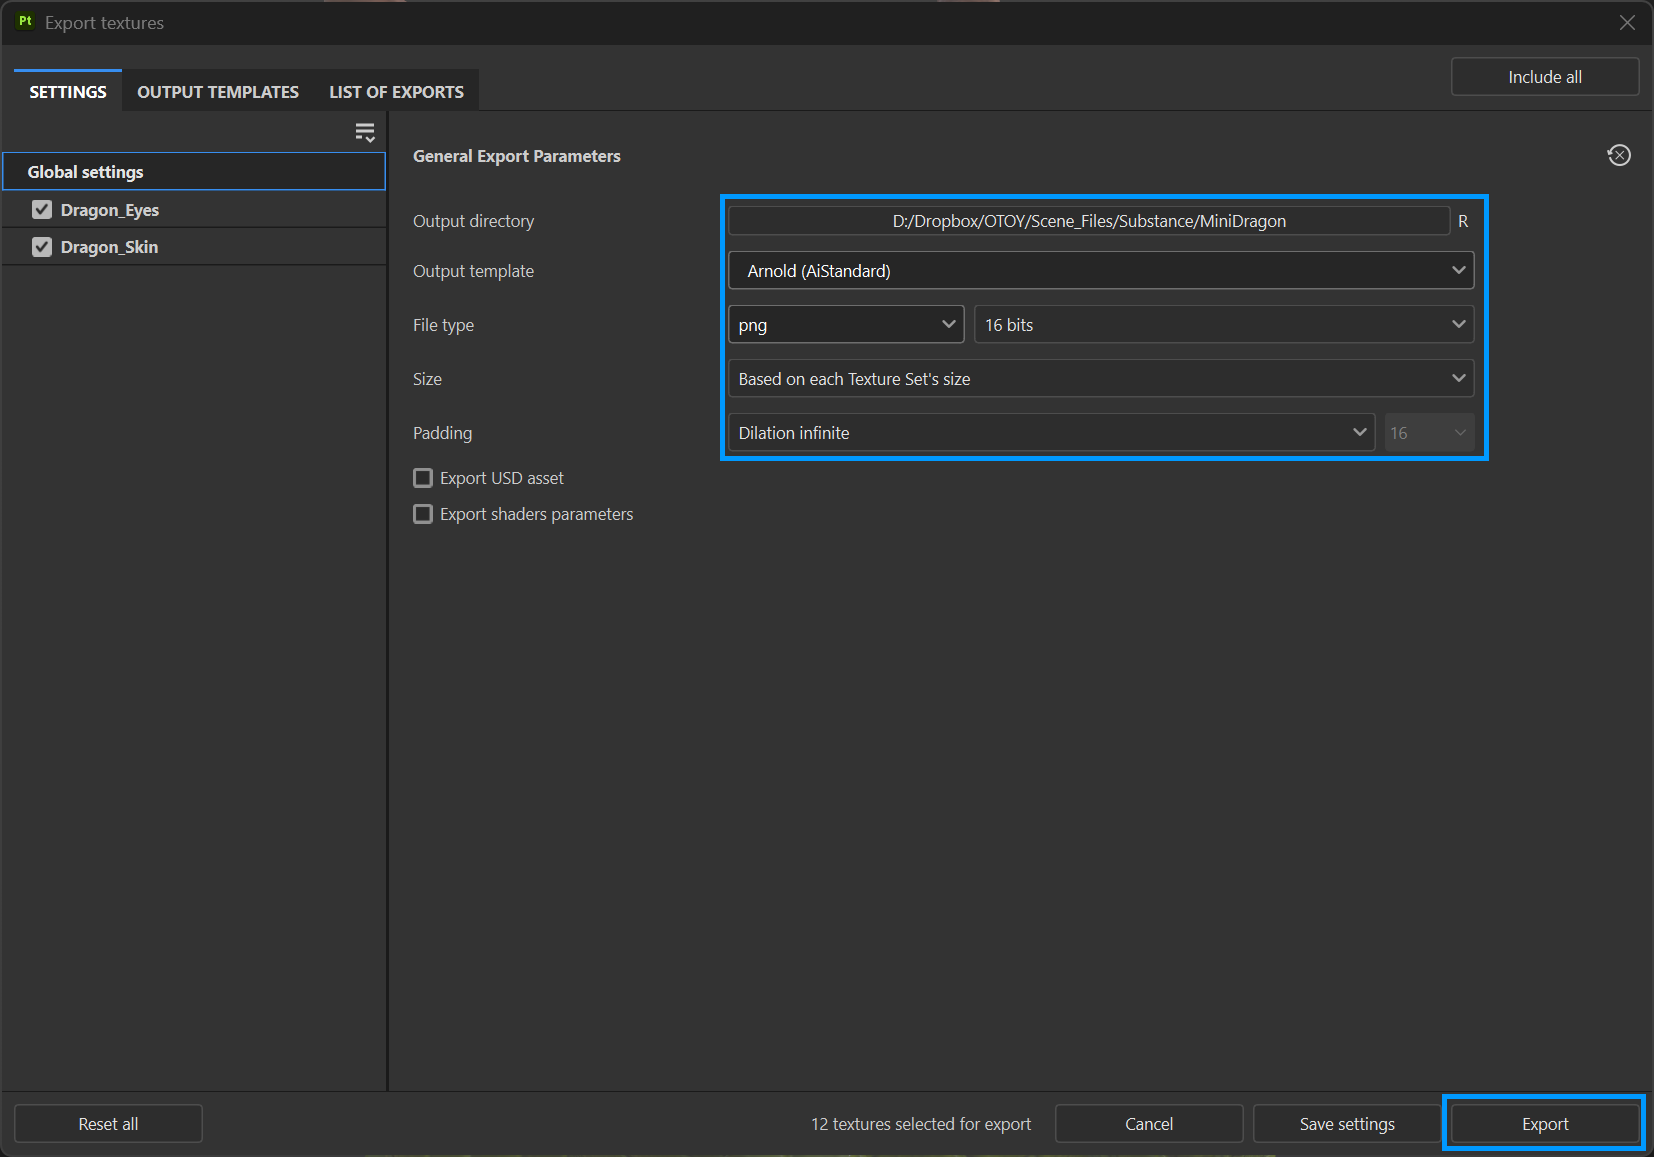
6- Export the Textures
Once complete, the textures can now be exported for use in Octane. To do this, select File > Export Textures (CTRL+SHIFT+E). After making the appropriate settings in the General Export Parameters section, press the Export button at the bottom of the panel. Now, back to Cinema 4D.
|
|
set up image texture export from substance
|

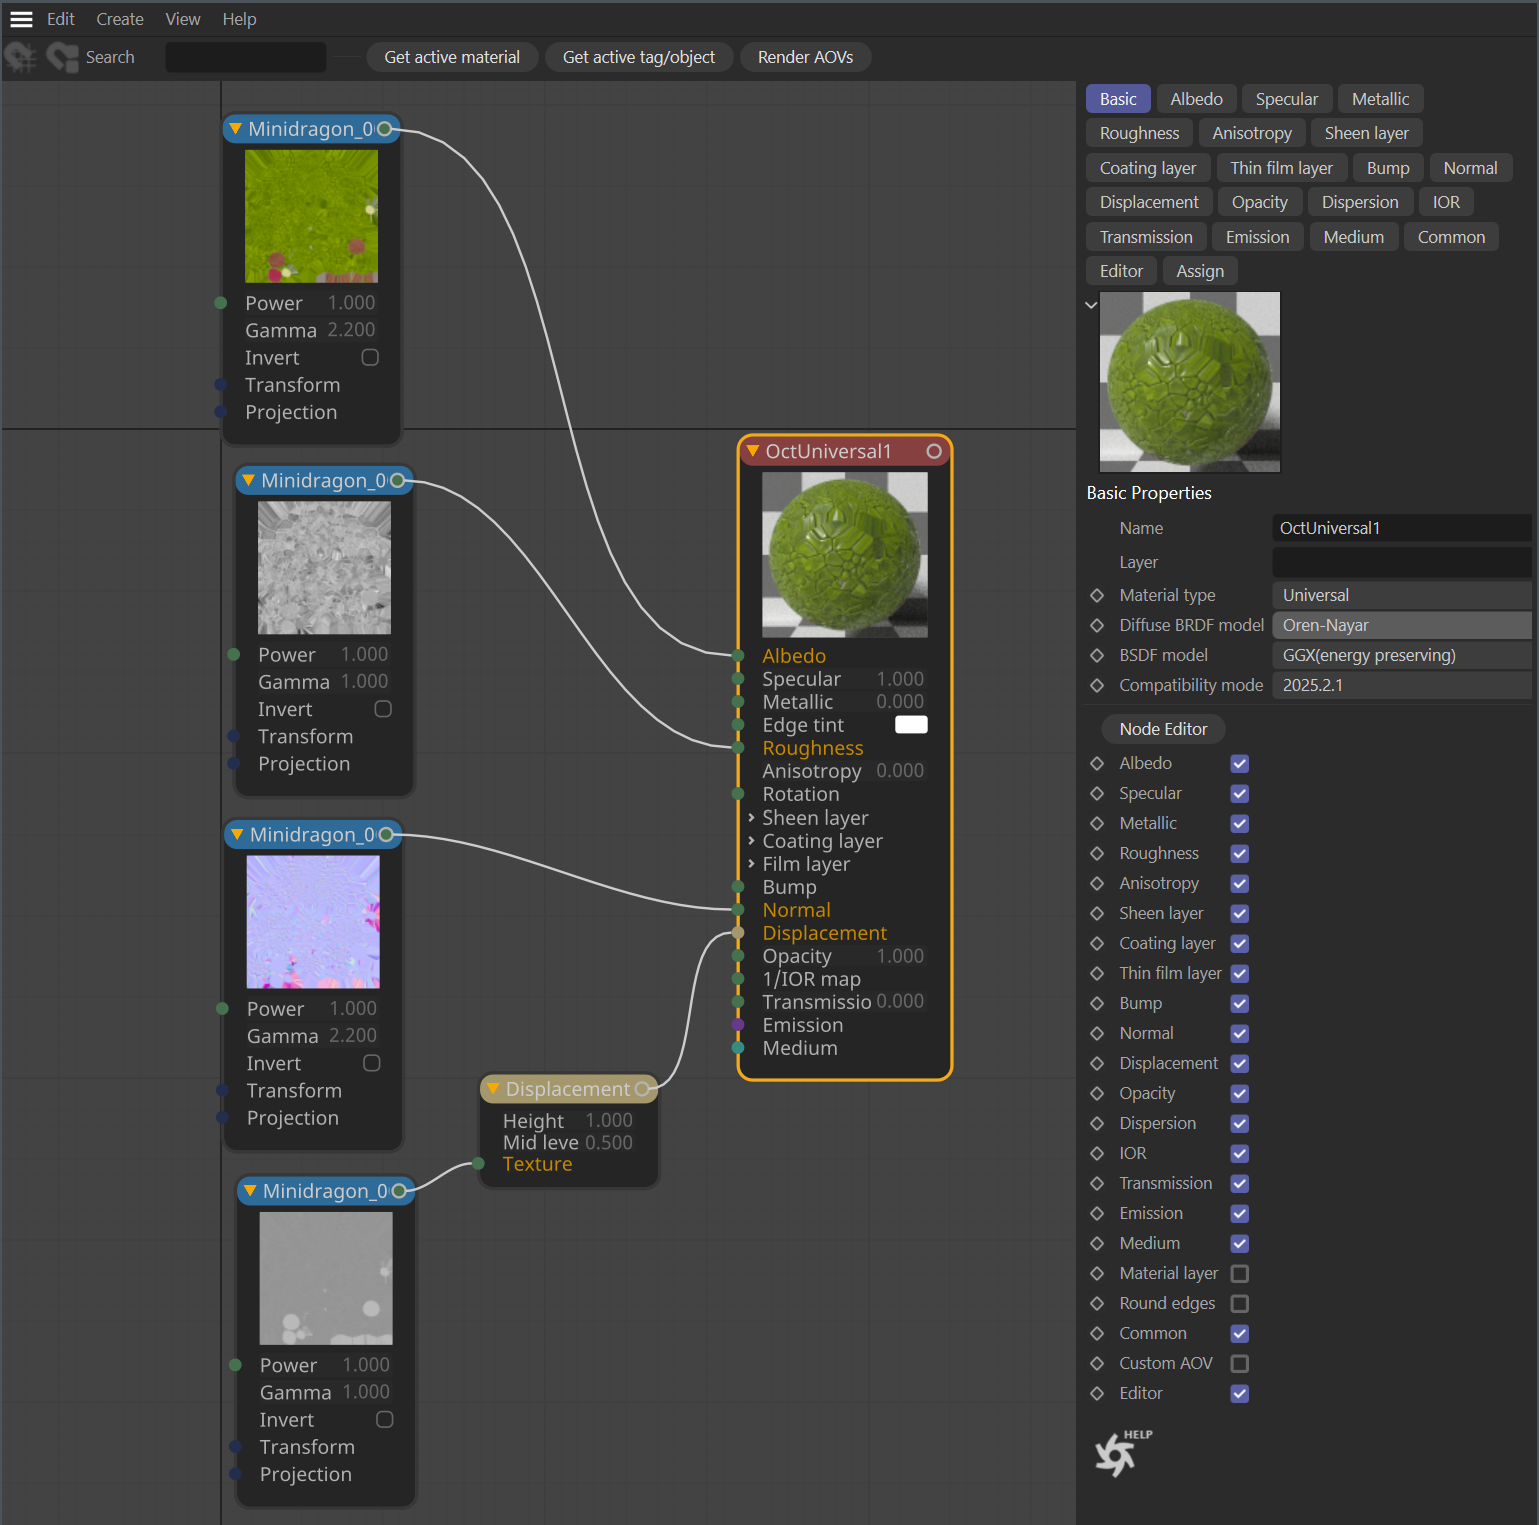
7- Use Textures in Octane Universal Material
In Cinema 4D, go to Live Viewer > Materials and create an Octane Universal Material. Set the Diffuse BRDF model to Oren Nayar, and the BSDF model to GGX (Energy Conserving). Next, open the material in the Octane Node Editor and create a Node setup as in the image below. Apply the material to the object.
|
|
universal material with substance image textures
|

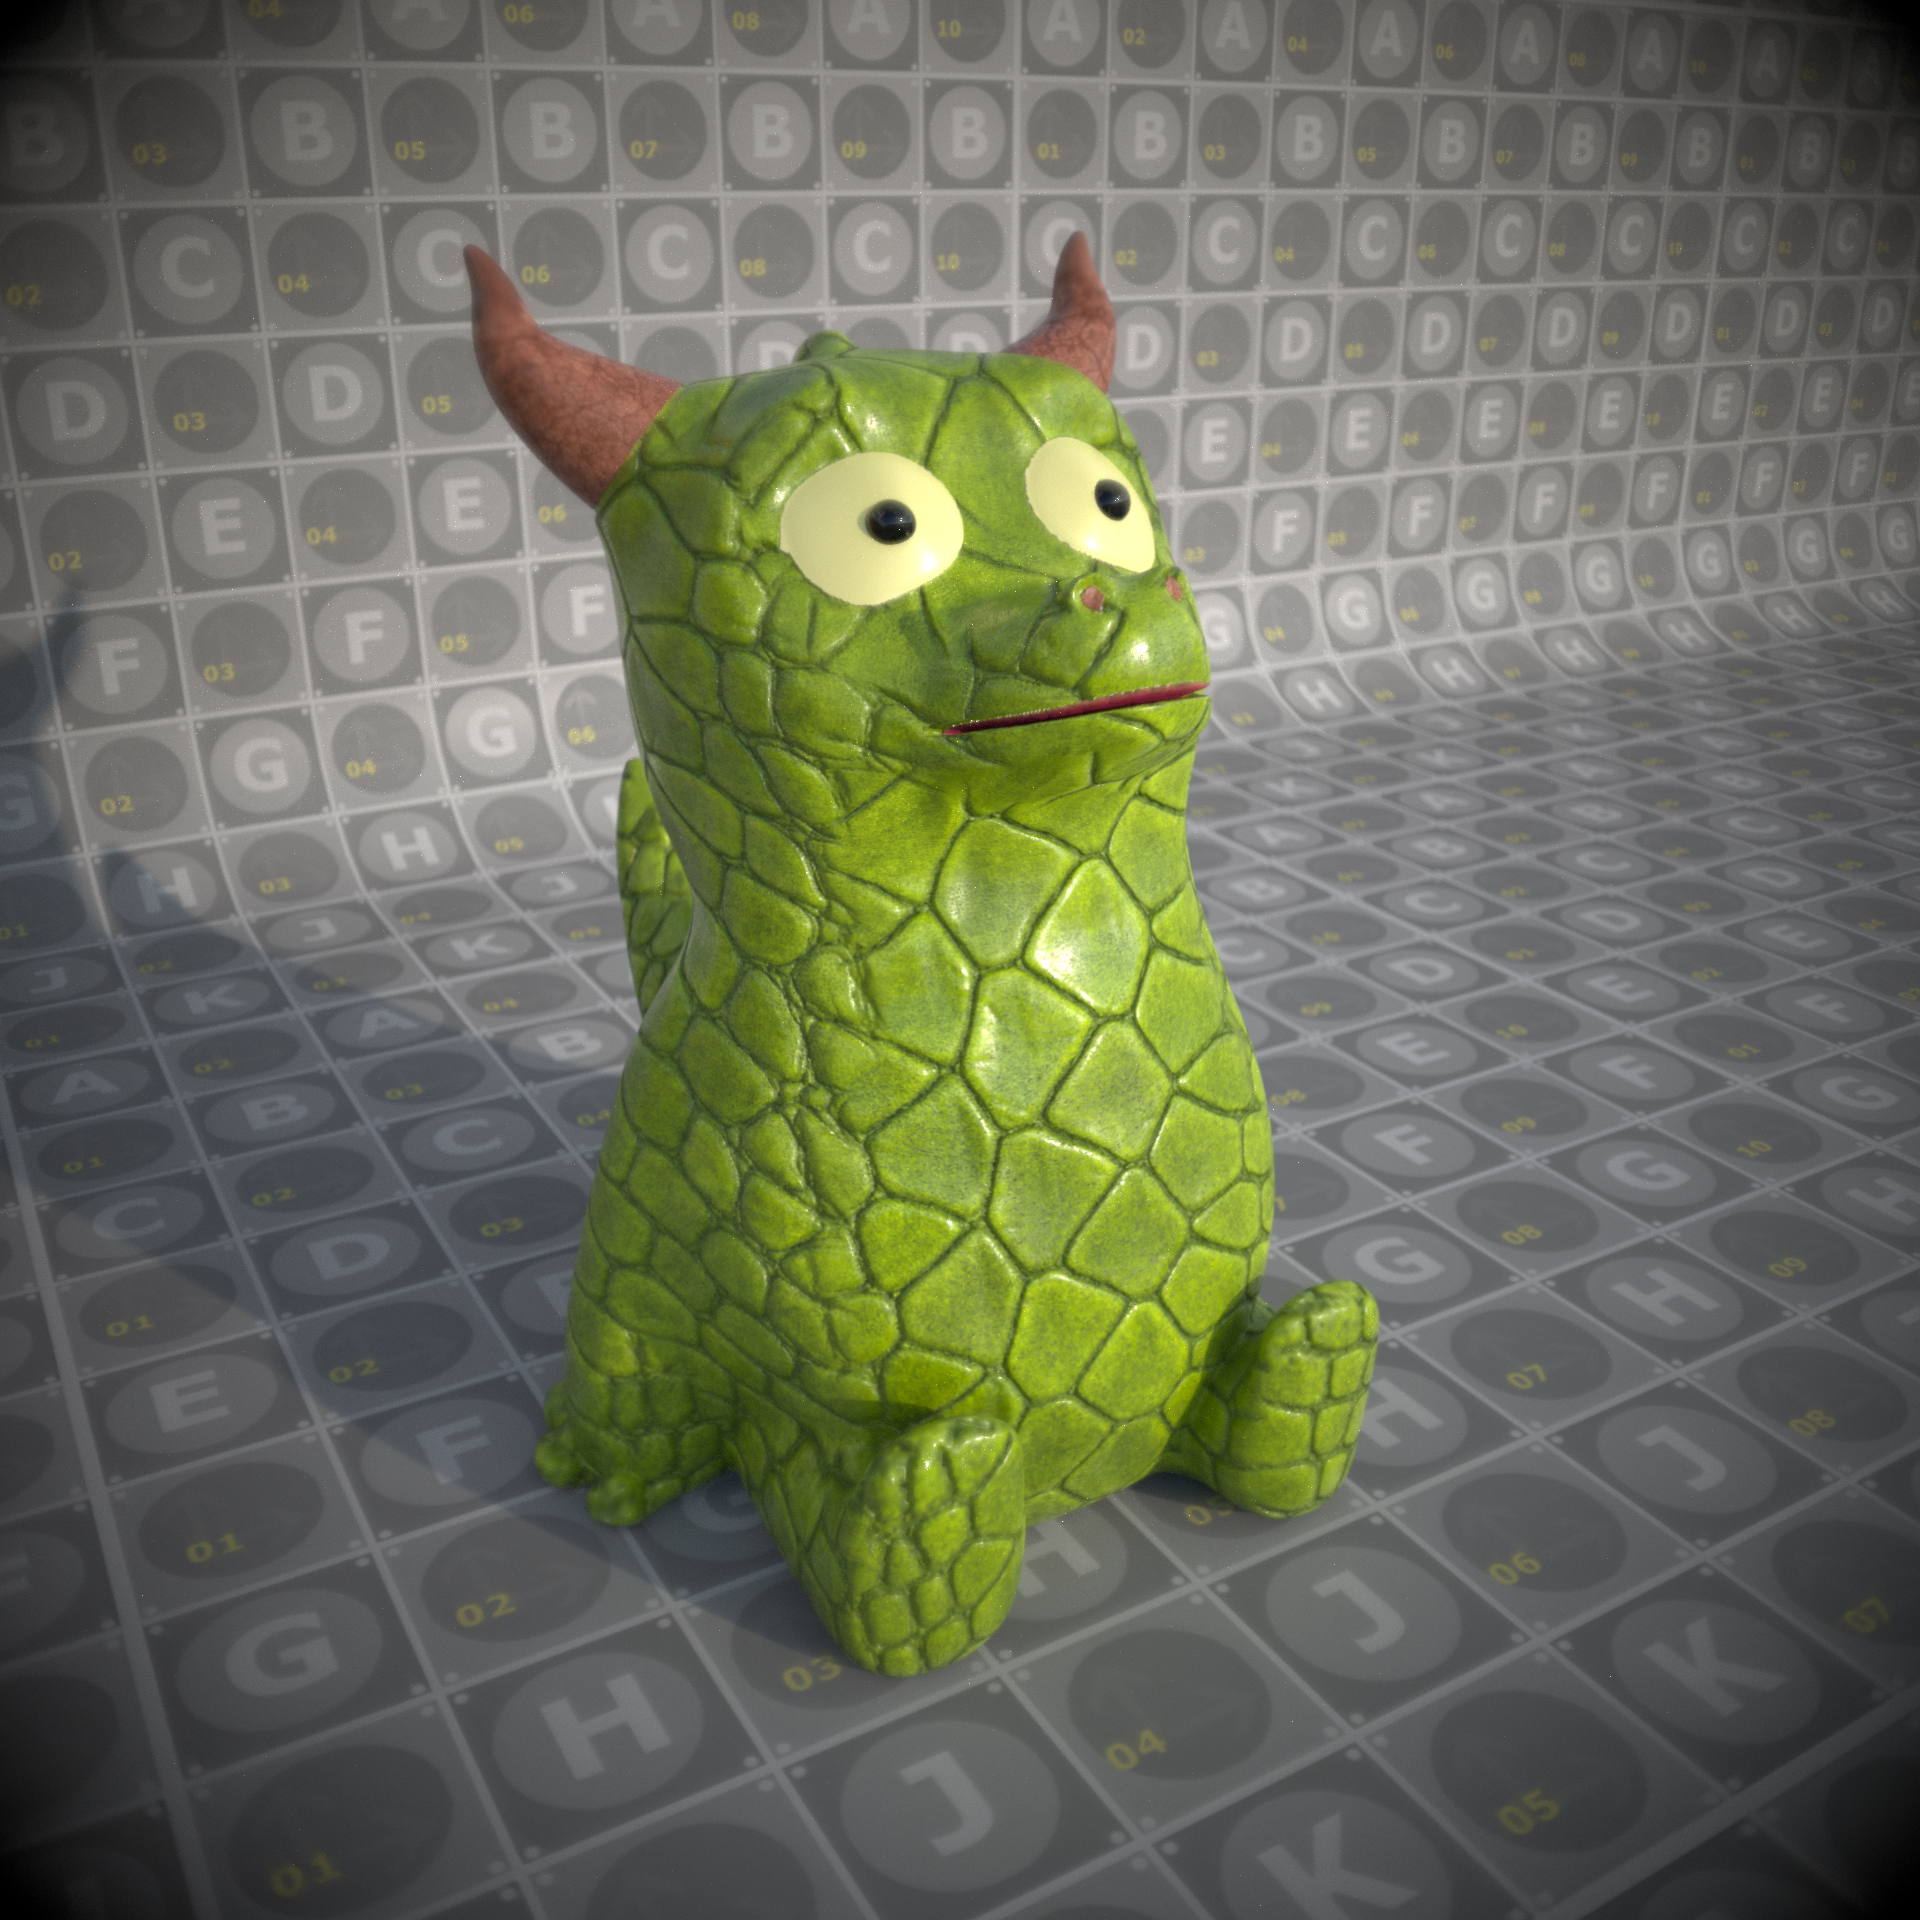
8- Finalizing Your Render
After connecting the textures to Universal Material, run Live Viewer. Set up the camera and lights for the scene. The material visible in the Substance viewport is for reference purposes — only the light setups in your actual scene determine the primary appearance of the material.
That's it! You're all set with the basics of working with Substance materials in Octane with the Universal Material.
|
|
Final REnder
|