Post-Processing Node
The Post-Processing parameters are accessible from the Node Inspector window without adding and connecting a specific Post-Processing node to the scene (figure1).
|
|
Post Processing Node Inspector
|

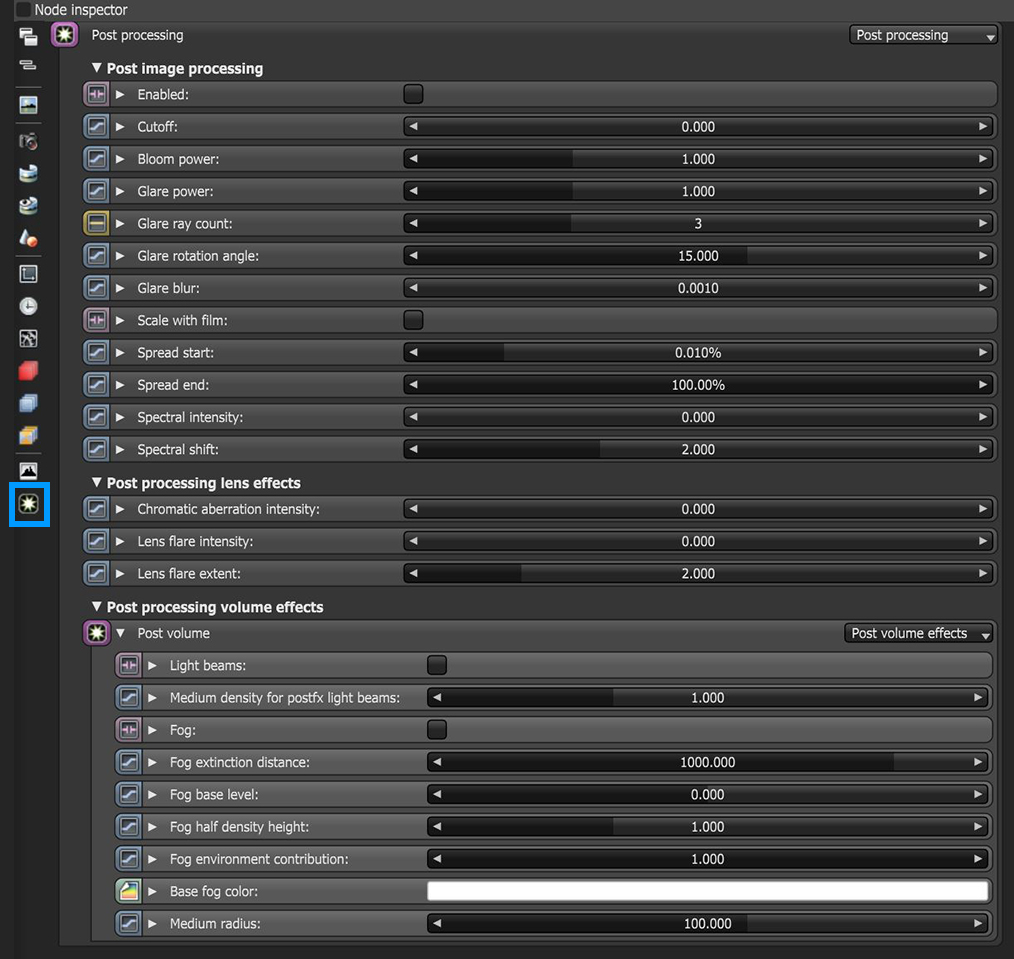
Figure 1: Right-clicking the Post-Processing icon next to the Node Inspector
You can add a Post-Processing node by right-clicking in the Nodegraph Editor, navigating to the Render Settings category, and clicking on Post Processing (figure 2).
|
|
Post Process Node Graph Editor
|

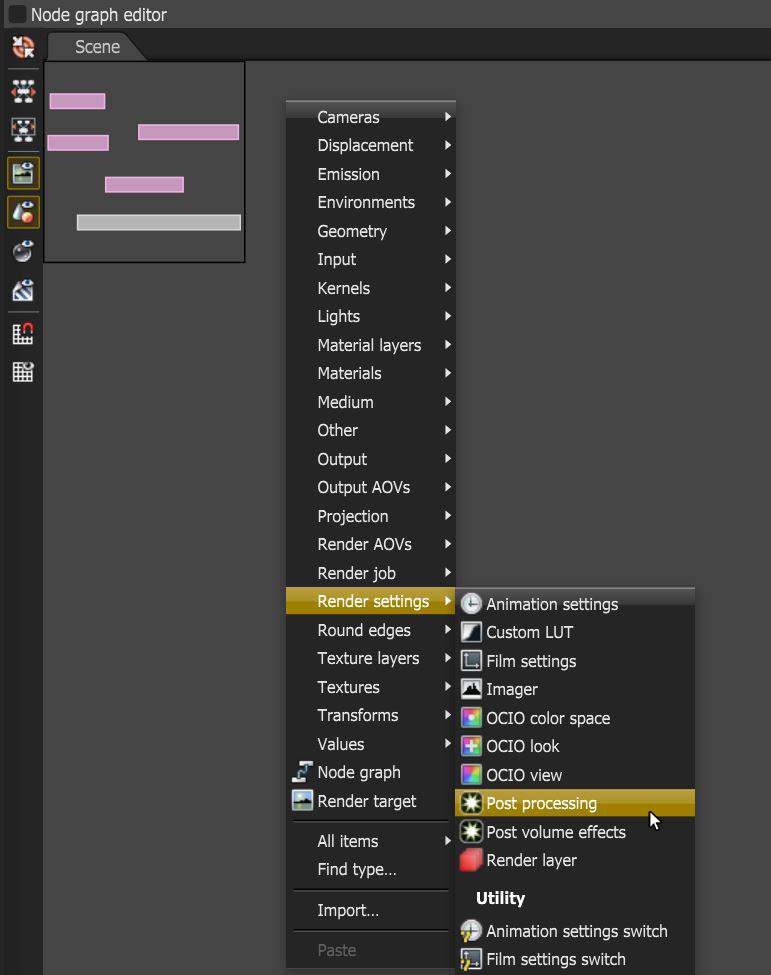
Figure 2: Add a Post-Processing node using the context menu in the Nodegraph Editor
Post Processing Node Parameters
Post Image Processing
Enable - Enables post-processing effects on the render. Post-processing is disabled by default.
Cutoff - Applies bloom/glare to pixel values above the Cutoff value.
Bloom Power - Controls the size and intensity of the halo around the sun, light source, or reflective Glossy materials.
Glare Power - Controls the size and intensity of the glare originating from reflective Glossy materials.
Glare Ray Amount - Controls the number of visible rays radiated or reflected.
Glare Rotation Angle - Adjusts the glare rotation relative to the object. A glare angle of -90 and 90 results to one main horizontal glare, and a glare angle of 0 results to one main vertical glare.
Glare Blur - Controls the glare sharpness. Smaller values result in a crisp linear glare, and this is softened with higher values.
Scale with Film - If enabled, bloom and glare will scale with the film size. If disabled, the size of the bloom and glare will be the same number of pixels regardless of film size. This parameter should only be disabled to match the behavior of previous versions of Octane.
Spread Start/End - Sets the minimum and maximum blur radius for bloom and glare, as a proportion of image width or height (whichever is larger). This parameter is ignored if scale with film is disabled.
Spectral Intensity - Adjusts the intensity distribution of the rays across a source. This affects the radiant energy's brightness.
Spectral Shift - Adjusts the spectrum displacement as the source's emitted light frequency changes. The shift is evident by a color change, similar to the doppler effect.
Post Processing Lens Effects
Chromatic Aberration Intensity - Adds color fringing or color distortion to the edges of the image.
|
|
Chromatic Aberration
|


Figure 3: Chromatic Aberration is applied to the object on the right
Lens Flare Intensity - Produces a lens flare effect on shiny surfaces and light sources.
Lens Flare Extent - Changes the lens distance which affects the sahpe of the lens flare.
Post Process Volume Effects
Light Beams - Enables post FX light beams for all configured light sources in the scene. This effect is only available with the Analytic light type.
Medium Density for Post FX Light Beams -
Fog - Enables post FX fog.
Fog Extinction Distance - The distance where the primary ray's transmittance becomes 0 due to fog's density accumulation.
Fog Base Level - Base height in world space for post fog effects.
Fog Half Density Height - The height from the base level where post fog density halves.
Fog Environment Contribution - Controls how strong fog color is affected by the environment.
Base Fog Color - The base color for the fog contribution.
Medium Radius - Radius of the post volume. The post volume acts as a sphere around the camera position with the specified radius.
Sample Images With Post-Processing Applied
|
|
Post Processing Examples
|

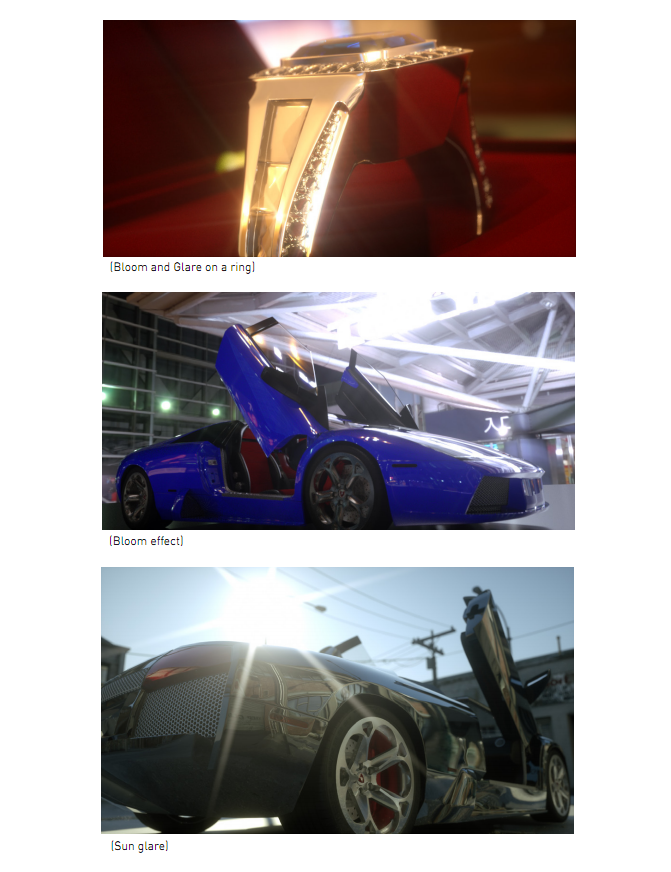
Figure 4: Renders using post-process effects
The follow example utilizes the Post Processing Lens Effects and the Post Processing Volume Effects (figure 4).
|
|
Post Processing Lens & Volume Effects
|

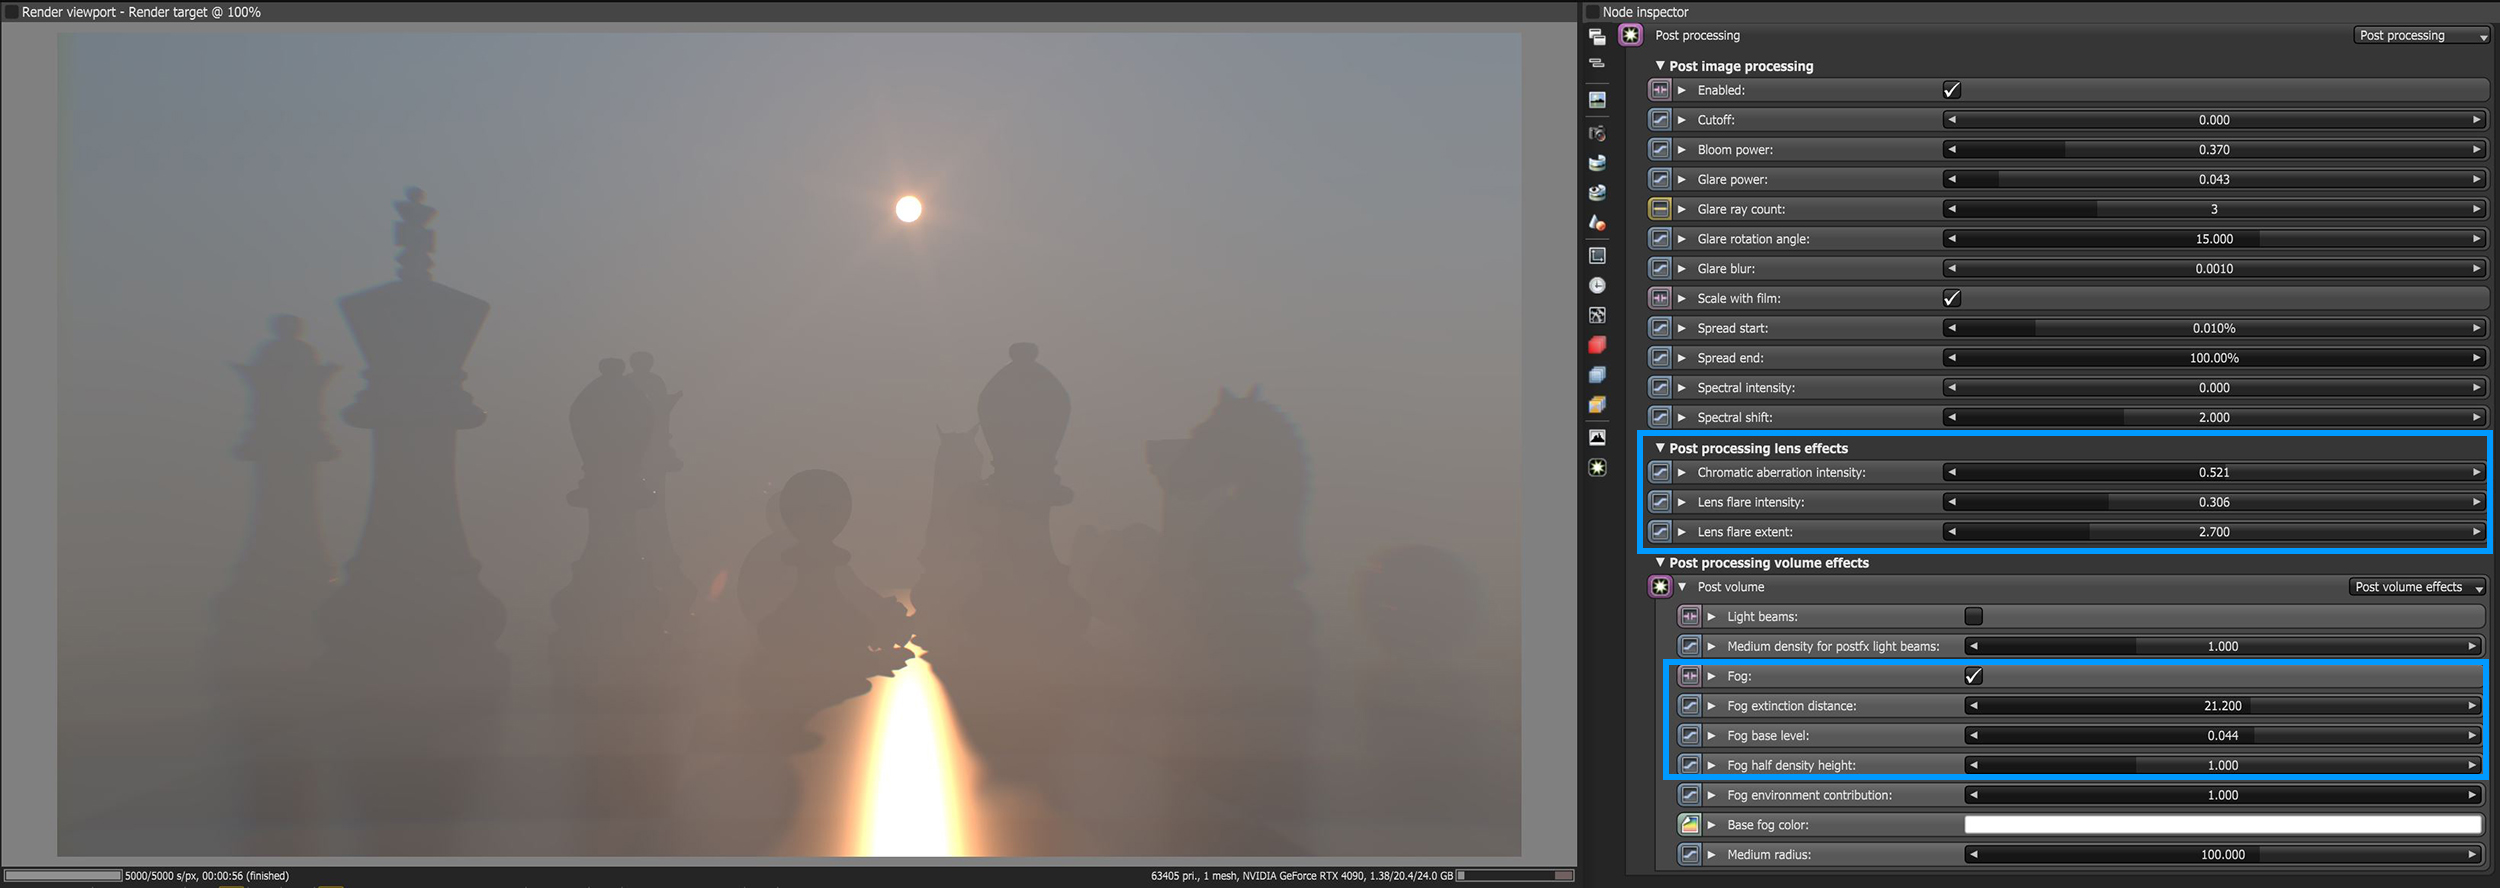
Figure 5: The Post Processing Lens Effects and Post Processing Volume Effects Fog enabled