Film Settings
The Film Settings parameters are accessible from the Node Inspector window without adding and connecting a specific Film Settings node to the scene as long as there is a Render Target node in the scene. Click on the Render Target node, then click the Film Settings icon in the Node Inspector to bring up the parameters (figure 1).
|
|
Film Settings
|
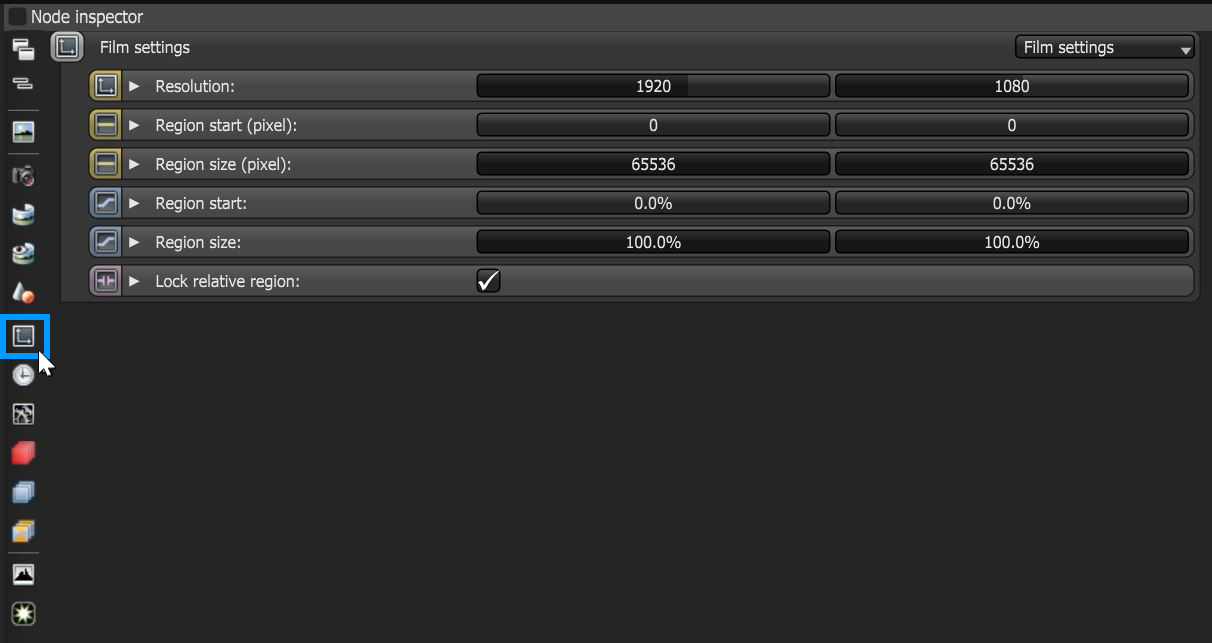
Figure 1: Clicking on the Film Settings icon in the Node Inspector
A Film Settings node can be added by right-clicking in the Node Graph Editor, then navigating to the Render Settings category and clicking on Film Settings (figure 2).
|
|
Node Graph Editor Access
|

Figure 2: Add a Film Settings node using the context menu in the Node Graph Editor
Film Settings Parameters
Resolution - Determines the scene's rendering resolution.
Region Start (pixel)- These are the coordinates for where the rendering region begins measured in pixels.
Region Size (pixel)- The Render Region's size in pixels.
Region Start - These are the coordinates for where the rendering region begins measured in percentage.
Region Size - The Render Region's size in percentage.
Lock Relative Region - If enabled, and the film resolution is changed, the relative film region stays constant and the absolute film region in pixels gets updated. If disabled, and the film resolution is changed, the absolute film region in pixels stays constant and the relative film region gets updated.
Region Rendering
Sometimes a subsection of a whole frame might need to be re-rendered. The Region parameters can be used to define a region where everything else renders to black and stops at the maximum samples setting.
|
|
Region Rendering
|

Figure 5: Using region rendering in the Film Settings