Composite Material
The Composite material node mixes several materials using masks (figure 1). This is much cleaner than using several chained Mix materials. If a mask is not connected, the material's Opacity is used. The first Material pin becomes the base layer.
|
|
Composite Material
|
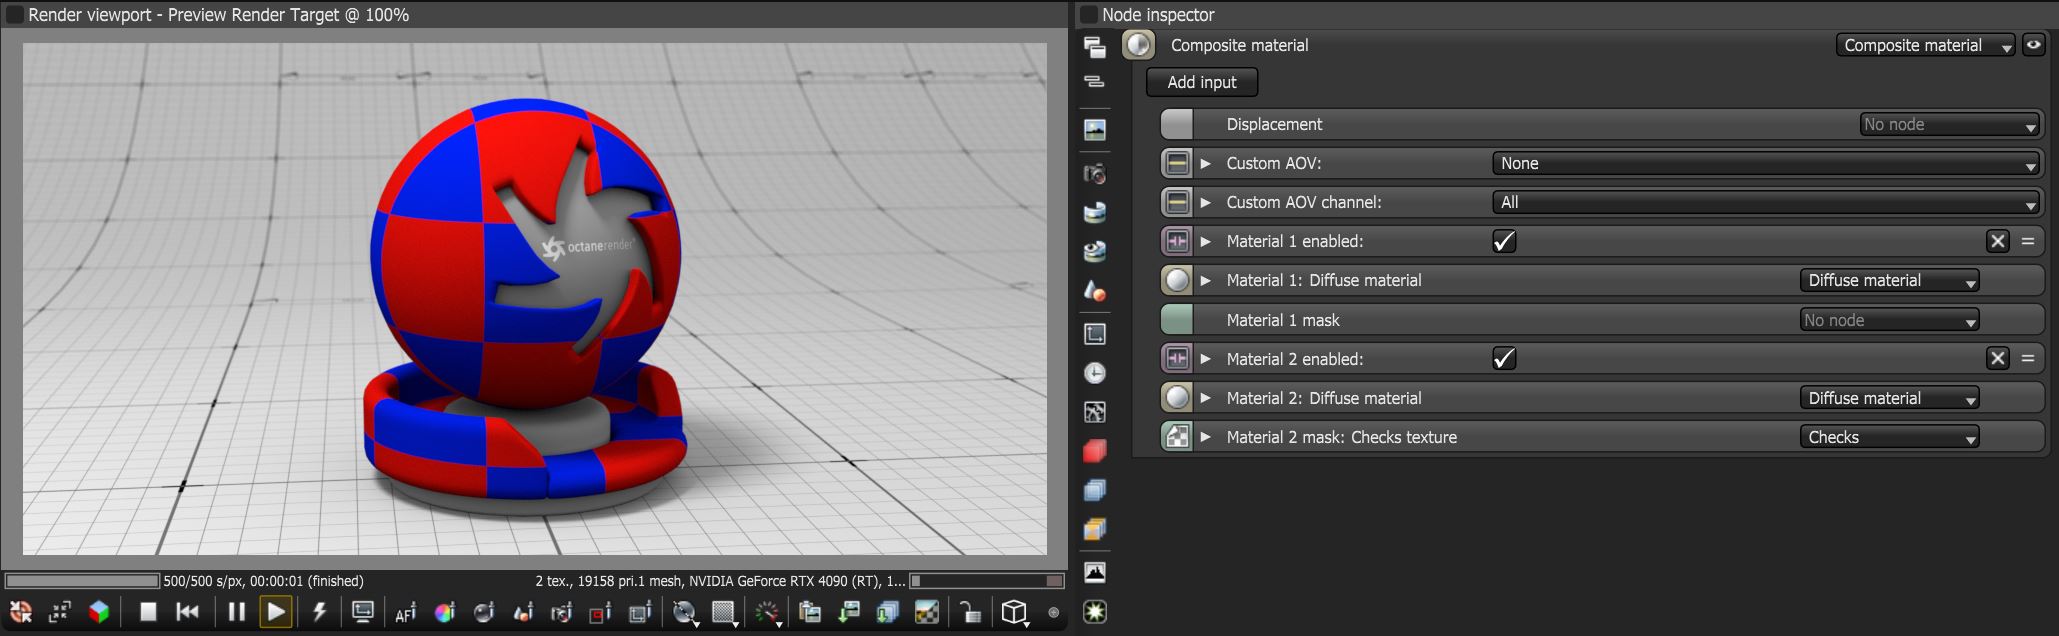
Figure 1: A Composite material node used to mix a red and blue Diffuse material with a Checks node as a mask
Composite Material Parameters
Add Input Button - Adds a new Material input to the end of the node.
Displacement - Adjusts the height of a surface's vertices at render time using a texture map. Displacement maps differ from Bump or Normal maps in that the geometry is altered by the texture, as opposed to just creating the appearance of detail. Displacement mapping is more complex than using a Bump or Normal map, but the results are more realistic, especially along a surface's silhouette. Displacement works with the texture nodes, and the displaced mesh must have UV Texture coordinates. Procedural texture nodes, such as Turbulence or Marble, need to be converted using the Baking Texture node. For more information, see the Displacement topic in this manual.
Custom AOV - Writes a mask to the specified custom AOV.
Custom AOV Channel - Determines whether the custom AOV is written to a specific color channel (R, G, or B) or to all the color channels.
Material - The Material input. When several Materials are used, the first Material pin becomes the base layer.
Material Mask - Controls the Material’s opacity using an Input map. If a mask is not connected, the Material's opacity is used.