Adaptive Sampling
In order to understand Adaptive Sampling, we need to look at an image as a group of pixels that may be recursively subdivided into subpixels. For example, we are rendering a cloud and we look at one pixel of that cloud:
|
|
Edge Sampling
|


Figure 1: Pixel sampling on the edge of the cloud object
Below is a closer look at the pixel, which we now divide on several levels:
|
|
Edge Close Up
|

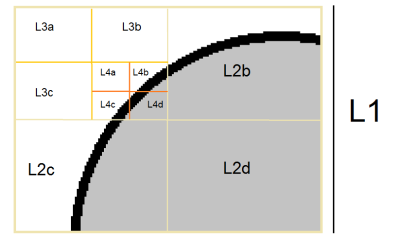
Figure 2: Pixel closeup from Figure 1
In Figure 2, some areas on the third level, like L3a, L3b, and L3c, do not need any more rendering, and as L3d is further divided on a fourth level, L4a will also finish rendering earlier than the rest of the areas in the fourth level.
With this concept in mind, rendering can adapt depending on the nearest subpixel, so it cuts the render time because the engine can stop rendering on areas that no longer need rendering, freeing more GPU power to render on pixels that still need to be rendered. If this was done for each pixel concurrently, there would be a considerable drop in render time, especially towards the later half of the overall estimated time of completion.
Adaptive sampling disables sampling for pixels that have reached a specified noise level. This lets you bump up the maximum samples quite high (more than 30,000) and then rely on the adaptive sampling to figure out what pixels need or don't need that many samples. This feature is useful in scenes that have areas that are a lot more noisy than other areas. It will not help if your whole image is just one noisy mess. Adaptive sampling is possible only for direct lighting and the path tracing kernels.
Adaptive Sampling is only available for the Direct Lighting, Path Tracing, and Photon Tracing kernels (figure 3).
|
|
Adaptive Sampling
|

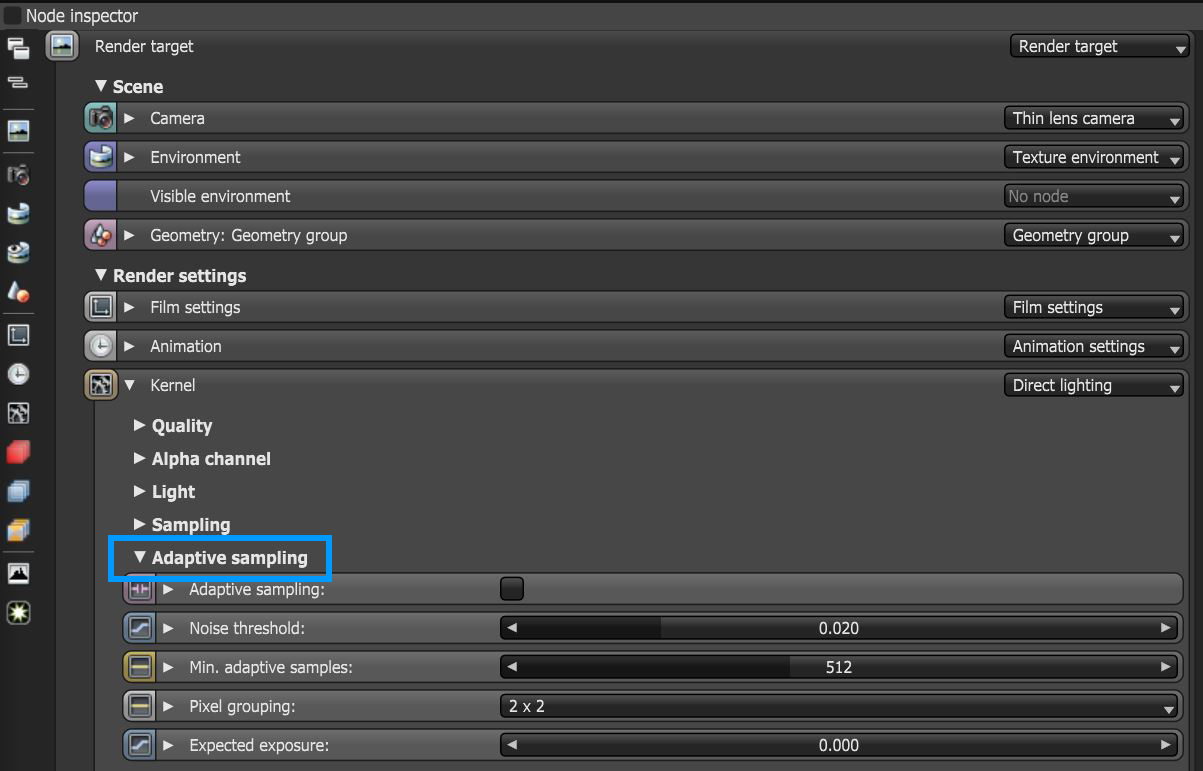
Figure 3: Accessing Adaptive Sampling for the Direct Lighting kernel
Adaptive Sampling Parameters
Adaptive Sampling - Enables adaptive sampling.
Noise Threshold - Specifies the smallest relative noise level. When the noise estimate of a pixel is less than this value, sampling switches off for this pixel. Good values are in the range of 0.01 - 0.03. The default is 0.02, which is pretty clean.
Min. Adaptive Samples - Specifies the minimum number of samples to calculate before adaptive sampling kicks in. A pixel's noise estimate has a large initial error. The higher you set the noise threshold, the higher you should also set this parameter to avoid artifacts.
Pixel Grouping - Specifies the number of pixels handled together. When all of the pixels in a group reach the noise level, sampling stops for all of these pixels.
Expected Exposure - This value should be close to the same value as the image's exposure, or 0 (the default value) to ignore these settings. Adaptive sampling uses this parameter to determine what pixels are bright and dark, which depends on the Octane Imager's exposure setting. If the value is not 0, adaptive sampling adjusts the noise estimate of the image's very dark areas. It also increases the Min. Adaptive Samples limit for very dark areas, because very dark areas tend to find irregular paths to light sources, resulting in over-optimistic noise estimates.
|
|
Adaptive Sampling Comparison
|

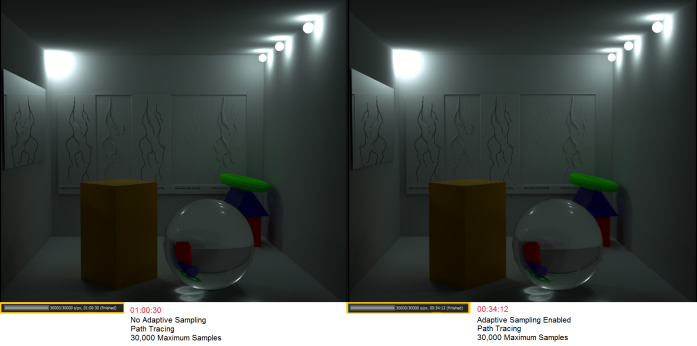
Figure 3: Adaptive sampling disabled (left) and enabled (right)
To visualize the progress, you can enable a noise pass AOV. The pass is calculated when you enable Adaptive Sampling. The green pixels in that pass mark those pixels that have reached the specified noise limit. This mask is re-calculated every time a new result is blended into the film buffer.
|
|
Noise AOV
|

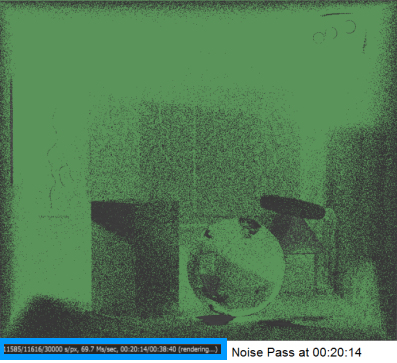
Figure 4: Noise AOV visualization
To tweak the Adaptive Sampling parameters, these parameters will not restart rendering:
- Noise threshold
- Min. adaptive samples
- Expected exposure
- Noise pass