Interface
Accessing the Node Editor
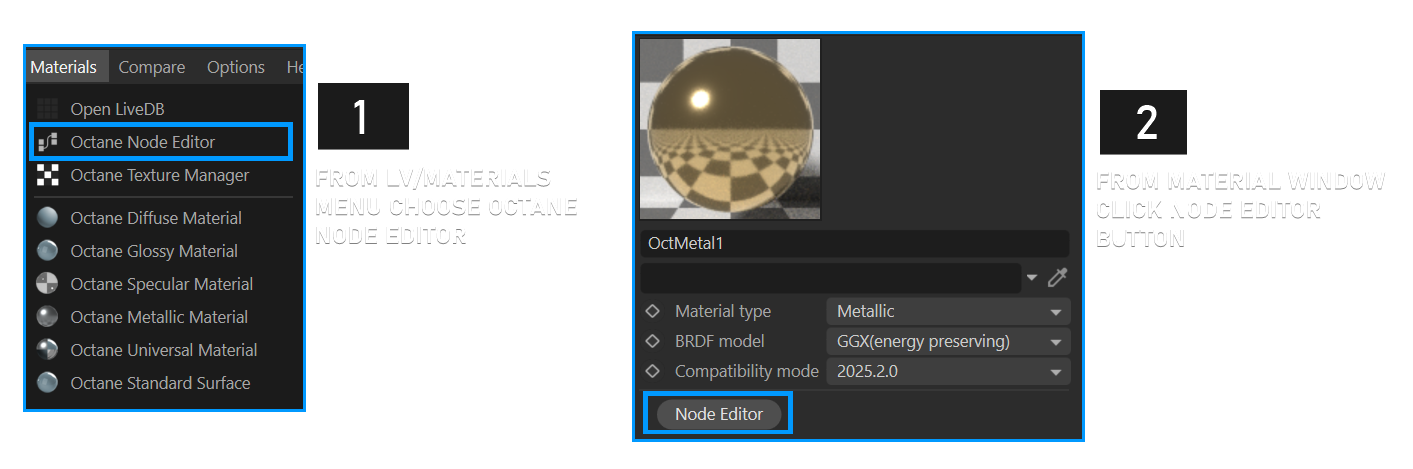
There are two ways to access the OctaneRender® Node Editor:
- In Live Viewer, choose Materials > Octane Node Editor, or
- Select any Octane material in the Cinema material window, and click on the Node Editor button found on the material's Basic tab.
Both methods are shown in the illustration below:
|
|
ACCESS THE NODE EDITOR
|

Navigating the Node Editor
To navigate within the Node Editor, use your mouse or track pad in the following manner:
Scroll/Pan
- MMB Drag
- Alt MMB Drag
Zoom
- MMB Scroll
- Alt Right Click Drag
Nodes can be positioned as needed by dragging within the editor using the LMB, or select multiple nodes by rectangular selection (shift + LMB.) The next section discusses the node connect and disconnect functions.
|
|
NODE EDITOR INTERFACE
|
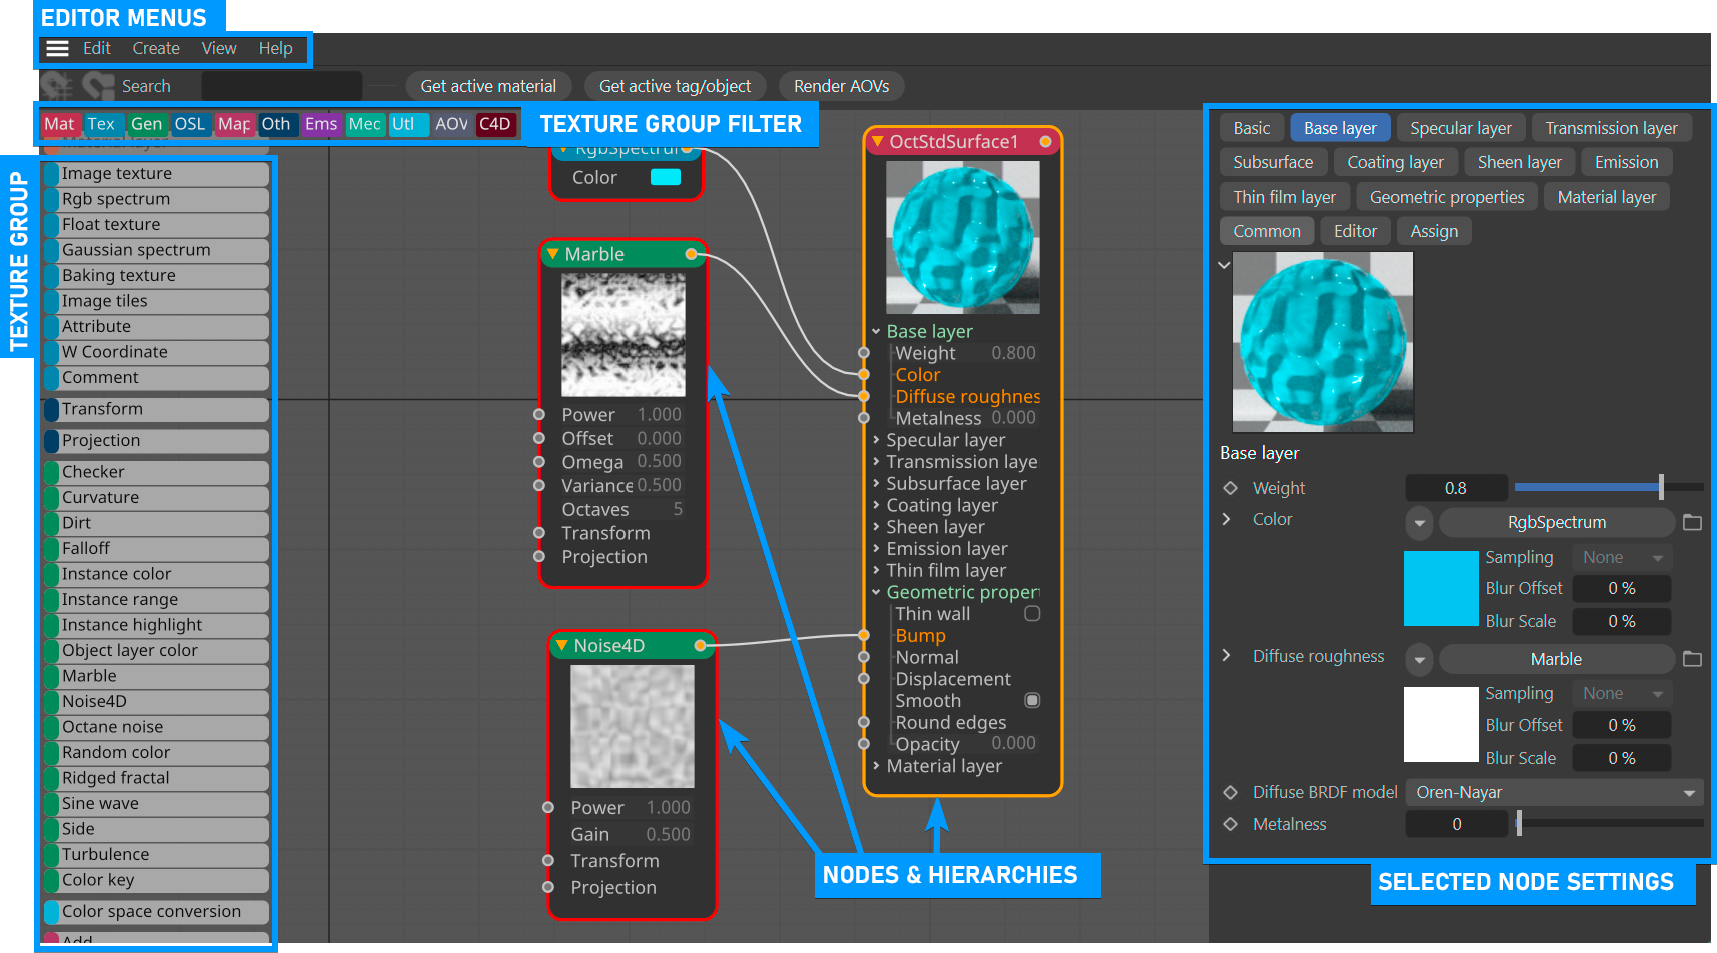
Work Area
This is where you build you materials by creating, dragging, copy/pasting, deleting nodes, connecting and/or disconnecting nodes.
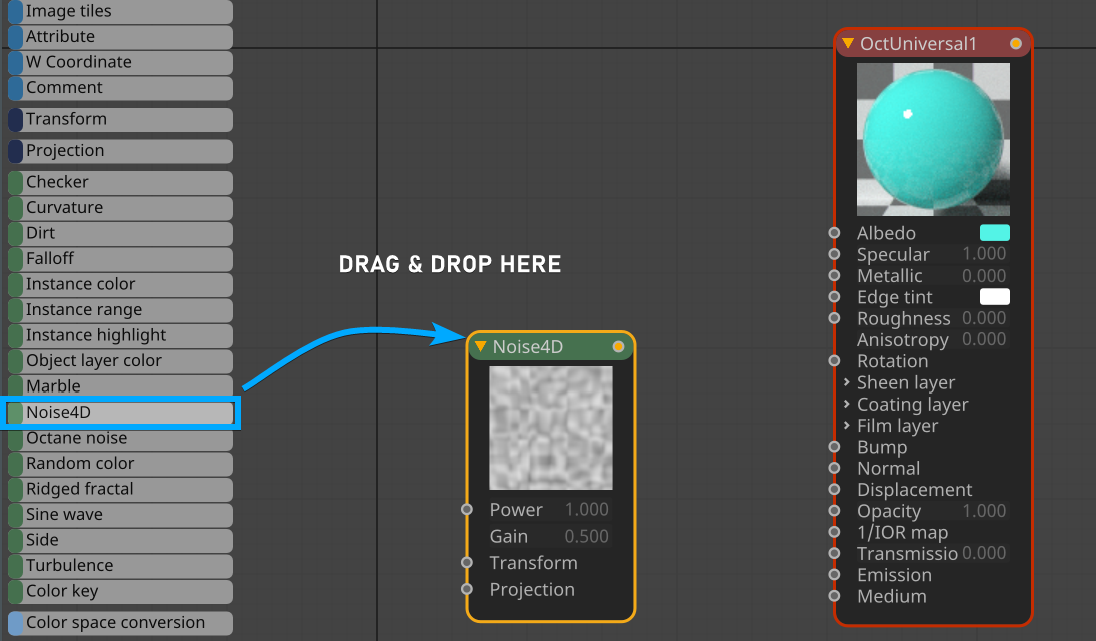
Create Node
To create a node, drag the node you want from the Texture Group menu on the left side and drop it in the Node field. You can also right-click in the Node field and choose the desired node from the popup menu.
|
|
create node
|
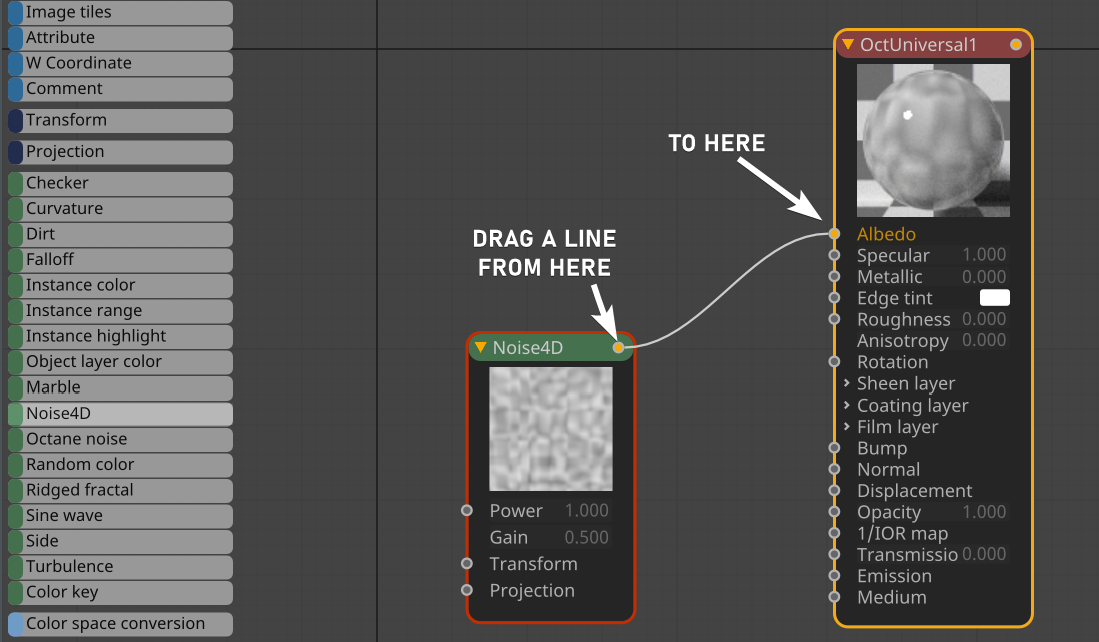
Connect Node to Channels/Other Nodes
From the upper right corner of any node, drag & drop a line to the input channel or pin of the main material node (or any other node) to make a connection. This action is the same for all nodes.
|
|
connect nodes
|
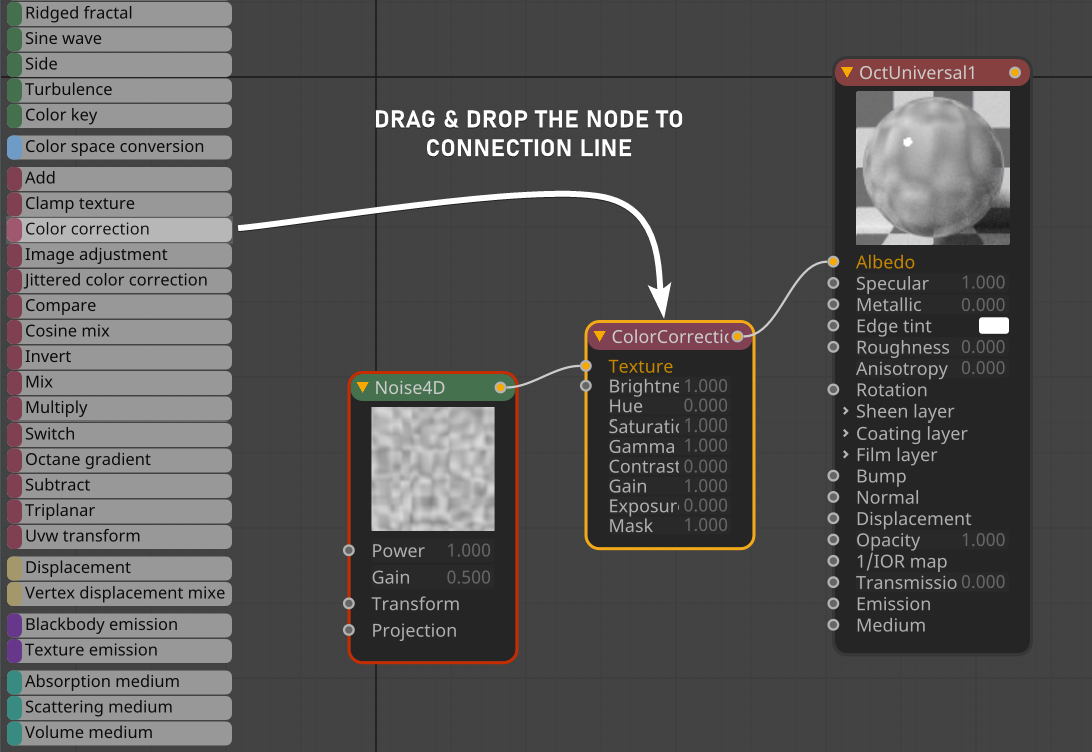
Insert a New Node between two Connected Nodes
To insert another node between two connected nodes, place the new node on the line between the nodes, taken from the texture group menu on the left. The connection line will turn yellow color, indicating that it will accept the new node. Drop the node for the automatic connection. This method is a quick way to add nodes into an existing node flow.
|
|
insert nodes
|
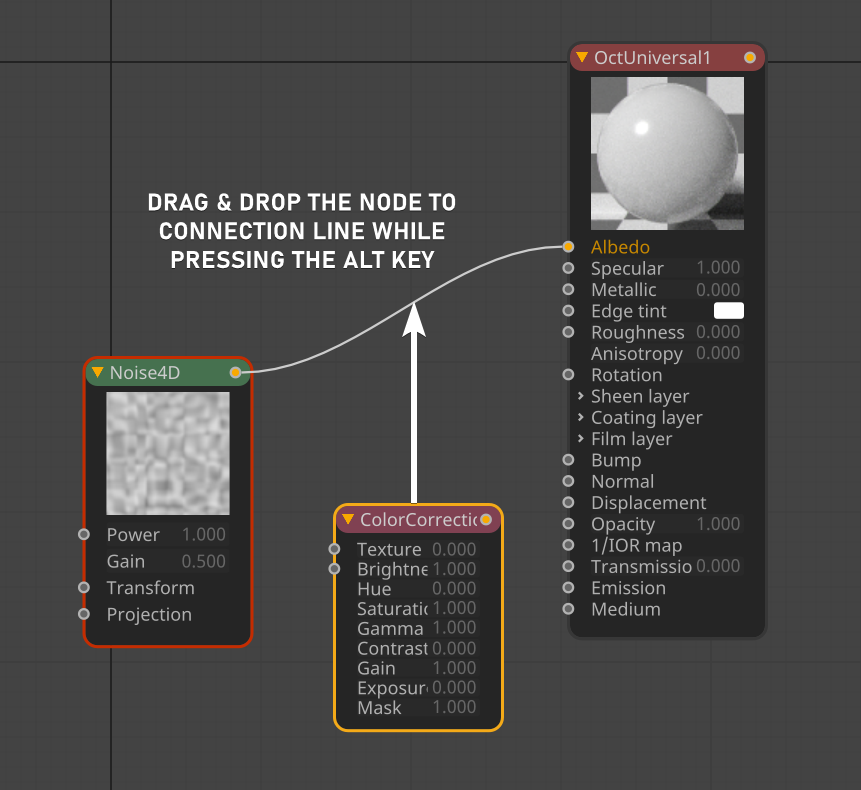
Insert an idle Node between Two Connected Nodes
Select the idle node and ALT+drag it to the connection line between two nodes. The connection line will turn green, previewing the connection. Release the mouse to complete the process.
|
|
insert nodes
|
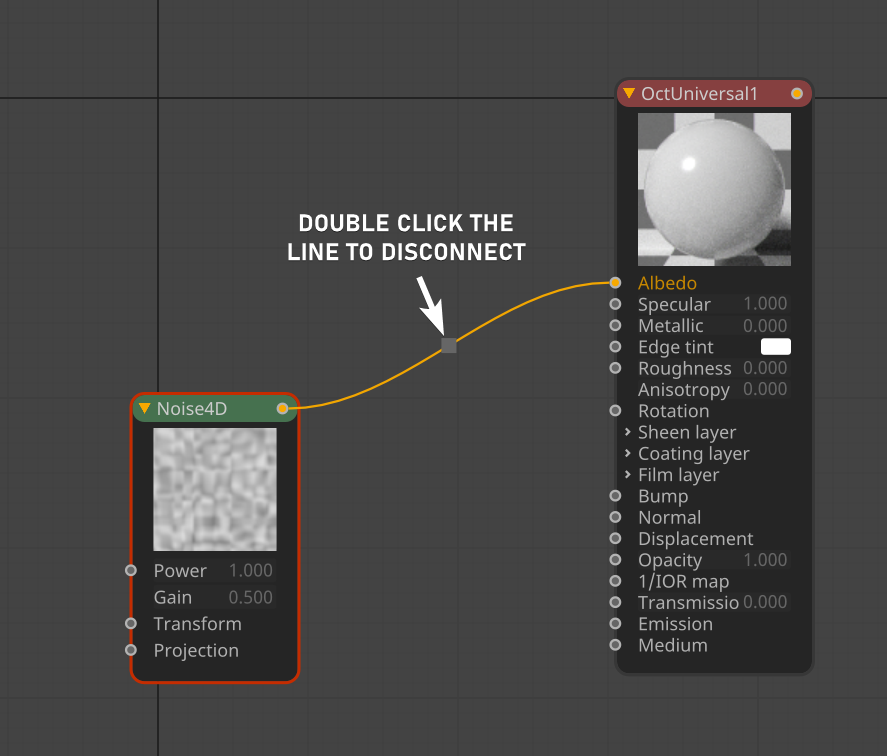
Disconnect Node from Channels/Nodes
There are two ways to disconnect a node:
- Double-click on the connection line to disconnect the node.
or
- Select the node, right-click and select Edit > Detach from the context menu.
|
|
disconnect nodes
|
Disconnect Intermediate Node
To delete a node from an existing node flow, select the node, right-click and choose Edit > Detach from the popup menu, or drag the node up or down by pressing the ALT key. The connection line will turn red. Release the mouse and the selected node will be deleted.
Texture Group
The texture group on the left side contains all the texture types available in Octane. A detailed description of these texture types can be found in the Using Textures section.
Texture Group Filter
Select the texture type to control the display in the Texture Group.
Selected Node Settings
This section is for to change the parameters of the node you selected.
Editor Menus
Node Editor menus are explained in the following sections:
- Edit Menu — Contains some basic editing options.
- Create Menu — Contains menus that duplicate the options found in the Texture Group side bar.
- View Menu — Controls the display of the Node Editor work area.
- Help Menu — Displays this documentation section.
Get Active Mat Button
This button will put the selected Octane material into the Node Editor work area.
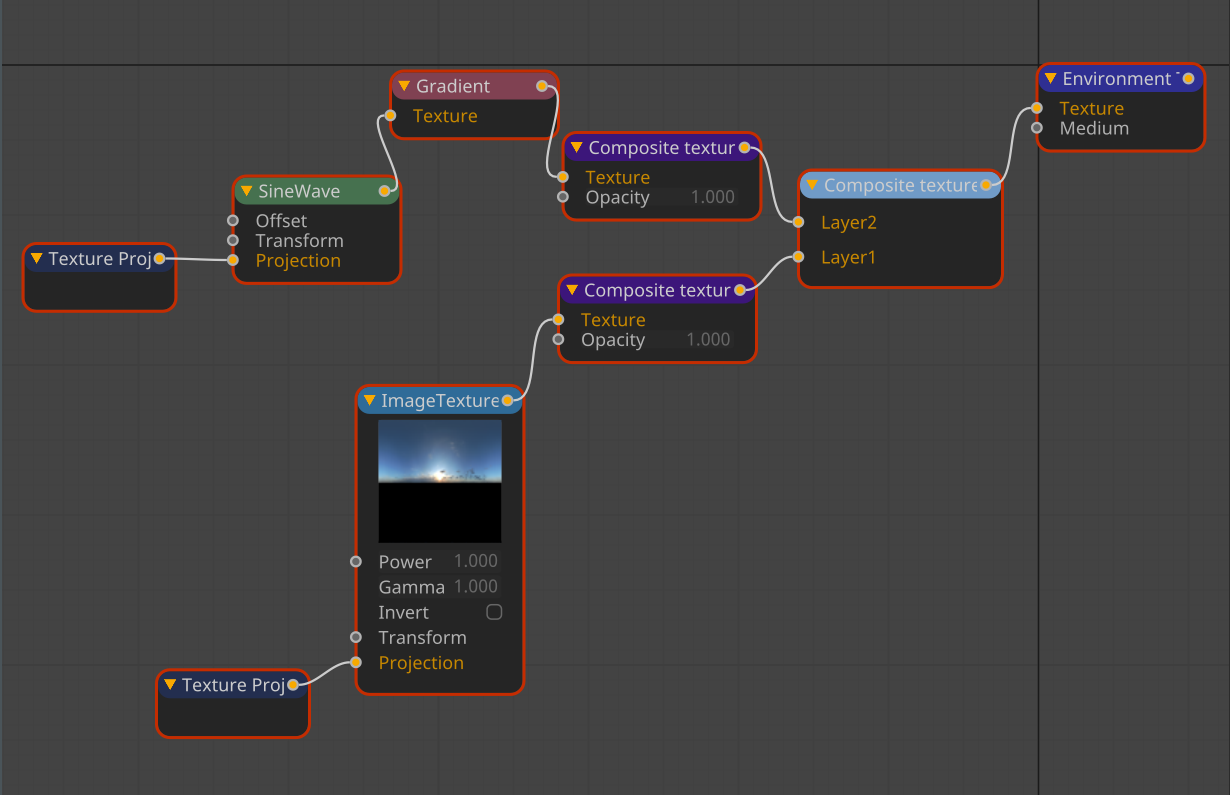
Get Active Tag/Object
This button will access attributes for any Octane Texture or HDR Environment and/or Octane Lights and allow the use of Node Editor components to further modify these items. The illustration below shows how to add a Composite Texture node used to modify an HDRI image used for image-based lighting.
AOV System
This button will activate the AOV Node Editor. Any active AOVs will be presented in the work area.
Search
Search function for the texture types in the Texture Group.