Global Texture AOVs
Global Texture AOVs allow you to apply a texture to the whole scene including or excluding the environment. Global Texture AOVs are rendered as Info AOVs, which means that the info AOV settings are applied to them as well. You can overwrite the alpha channel with your own texture, or use the default behavior which is equal to the alpha channel of the other info AOVs. Render AOV Output nodes can reference Global Texture AOVs in composites as needed.
AOV Composite Example
The images below are the result of three contributing Global Texture AOVs, used to build up the wireframe blend on the first image, and the depth fog on the second image.

The illustration below shows the node graph for the composite images above directly from Octane:
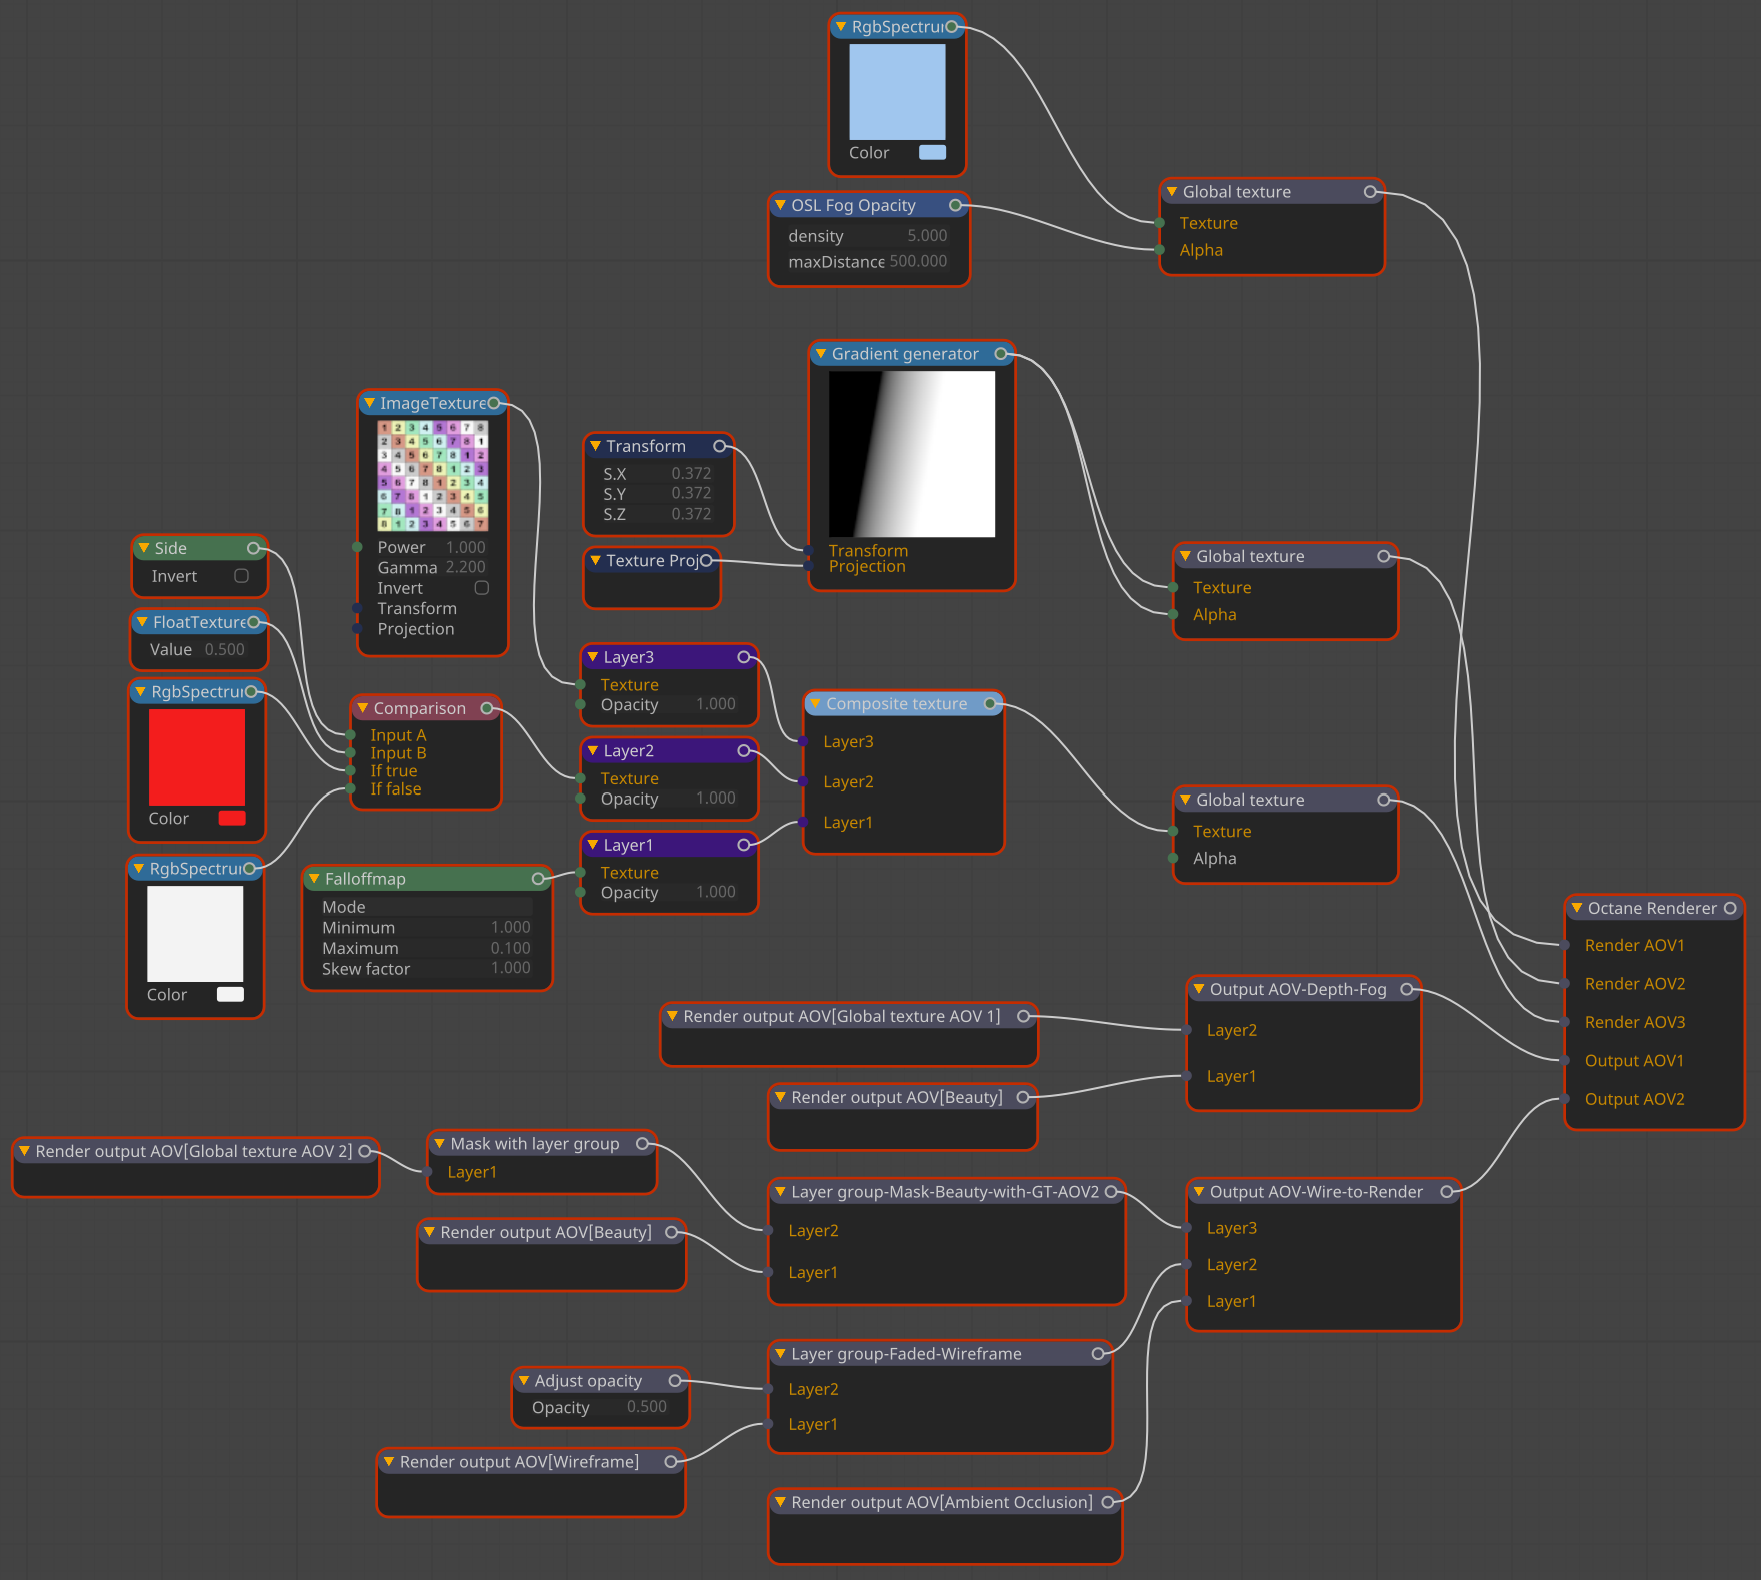
Each of the Global Texture AOVs have standard material nodes as inputs. These nodegraphs are used to build up the effects that are then blended into the Render Pass AOVs connected into Layer Group nodes or Output AOV Layer nodes and then into the Octane Renderer node for final output.
Create a Normal Map with Global AOV Texture
Normal maps can be created with the Global Texture AOV node. The Geometric Normal AOV will generate a normal pass, but these normals are in world space. If the normal map needs to be in camera space, the Global Texture AOV can be used instead:
- Open the AOV Editor — Render Settings > Octane Renderer > Render AOV Manager and click the Node Editor button
- The AOV Node Editor will open, and the Octane Render node will be present. Select the Octane Render node.
- Choose the Add Render AOV button. A drop down menu will appear.
- Choose the desired AOV from the list. In this case, choose Custom > Global Texture AOV. This will create the Global AOV Texture node and connect the node to a new input pin to the Octane Render AOV node.
- We need to add a Custom Normal Texture from the the Custom Texture item, located in the Texture list found the Node Editor. Select the Custom Texture item, and drag out the item called Normal into the workspace area of the Node Editor. To close the list, click on Custom Texture again.
- Connect the output pin of the Normal shader node to the input pin of the Custom AOV node.
- Select the Normal shader node, and set the type to Geometric. Set the Coordinate system drop down to Camera, and enable the Normalize Result toggle.
- In Render Settings > Octane Renderer > Render AOV Manager, activate the Enable toggle.
- Launch Live Viewer and choose the Glob1 button at the bottom of the Live Viewer window to see the result.