Curvature
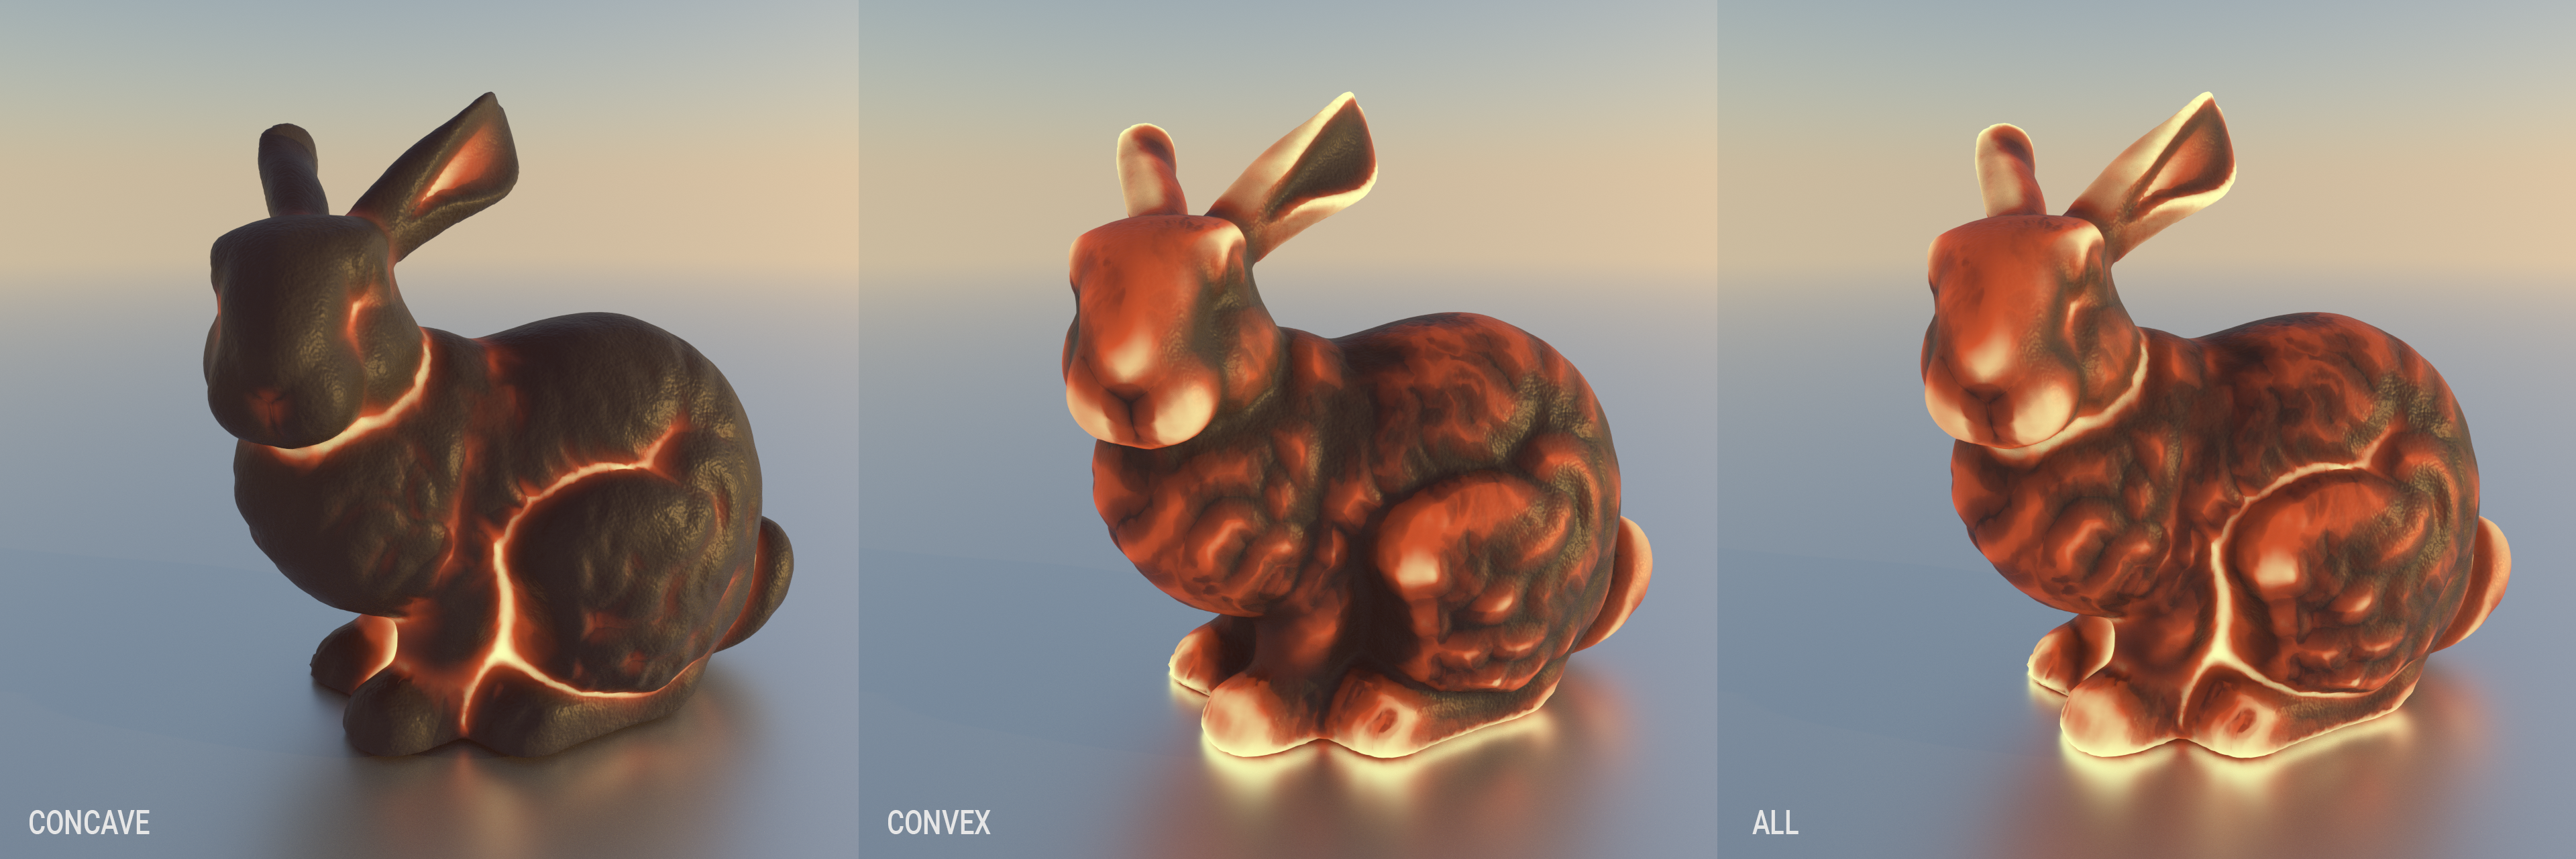
The Curvature Generator node maps the local curvature of a geometry to the range of [0 .. 1]. No curvature results in 0 (black) and high curvature in 1 (white). In comparison to the Dirt texture, explained here, you can limit the curvature detection to convex or concave curves or include both of them. The calculated curvature is also more consistent at small sample counts. You can then use a gradient map node to convert the curvature texture value to into something more exciting, as in the example below.
|
IMPORTANT Vertex Displacement displaces vertices during the geometry compilation phase, before the render even starts. Dirt and Curvature are only calculated during render time. Neither Dirt nor Curvature can be used to influence Vertex Displacement generation, which has already been completed before Dirt and Curvature are considered. |
Add the Curvature Node
To add the Curvature node, go to Octane Node Editor > Texture Group > Curvature (it is in the Generator group tab). Drag the node into the editor workspace and make the desired connection.
|
|
CURVATURE GENERATOR NODE
|
Select the Curvature node to see the options, described below:
- Mode — Determines the type of curvature to sample.There are three options:
- All — All surface conditions will be considered for the Curvature node result.
- Convex — Only the surfaces with an outward curvature will be considered for the Curvature node result.
- Concave — Only the surfaces with an inward curvature will be considered for the Curvature node result.
- Strength — This setting controls the intensity of the curvature effect across the surface of the geometry.
- Radius — This setting controls the spread of the curvature effect across the surface of the geometry. Larger radius settings will result in a more pronounced curvature effect will be across the geometry.
- Radius Map — A texture can be used for finer control of the Radius setting.
- Offset — Specifies the offset from the surface used to sample the neighboring geometry.
- Tolerance — Dials in the precision of the sample used to create the curvature effect. Higher values will limit contributions to surface portions with a greater degree of curvature.
- Spread — The Spread parameter controls the visibility of the curvature effect across the surface. Lower values produce a less noticeable effect, whereas higher values will cause the effect to become more pronounced.
- Include Object Mode — This mode will determine what objects will be considered when calculating the dirt effect for the material. The options are:
- All: All objects will contribute to the Curvature effect for the surface if they fall within the sampling parameters.
- Self: Only the object to which the material is applied will contribute to the dirt effect. No other objects will contribute.
- Others: Only other objects will contribute to the Curvature effect. The object receiving the effect will NOT contribute.
- Invert Normal — This is a toggle which reverses the effect of the Curvature texture based on the normal direction of the surface.


