Composite Material
The OctaneRender® Composite Material is a more advanced version of the Octane Mix Material, which is limited to just two materials. The Composite Material allows you to set how many materials can be composited together for a final output as a single material, while properly conserving energy — for more information on energy conservation, go here. (The composite material is a renamed version of the blend material found in older versions of Octane.)
|
NOTE The composite material must use "sub materials" and will not work with the original material type, for technical reasons. |
Converting Mix Materials to Sub Materials
Select a Mix Material in the Cinema 4D Material Manager, then go to Live Viewer window > Materials > Convert Material and choose Convert Material. A new Composite Material will be created and the contributing materials will be converted to sub-materials.
Creating Sub Materials
To directly create a sub material from scratch, go to Node Editor > Create > Sub material menu option. This action will place a sub material into the workspace. Alternatively, click on the Sub material button in the Octane Node Editor and drag into the workspace.
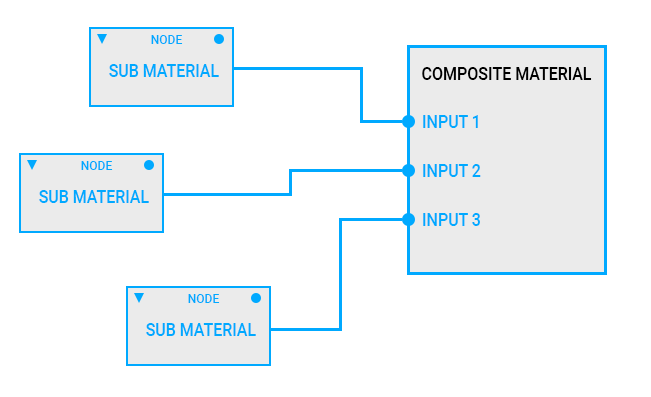
The image below shows a basic Composite Material setup.

In the illustration above, first the "Material 1" and "Material 2" materials are mixed with the "Float 1" texture in the material mask input. If a value is given to the "Float 2" texture, it will be mixed with "Input 1" and "Input 2" and the result will be remixed with "Input 3" material. You can adjust which material will be mixed by "Float" texture nodes assigned to mask slots. Any texture type can be used in the mask slot.
Composite Material Settings
To create a Composite Material, select "Composite Material" from the Live Viewer's Materials menu, which will add a Composite Material to the Cinema 4D Material Manger panel. Toe edit, select that material and in the associated Attribute Panel, click on the Node Editor button, as shown in the illustration below.
|
|
composite material
|

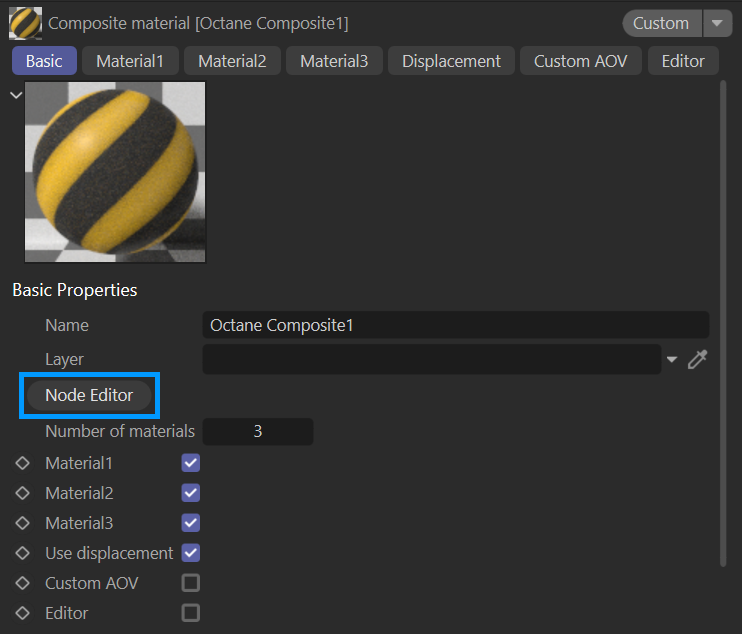
Number of Materials
This option sets the number of materials to mix together.
Material Slots
Enable and disable connected sub materials by using the check boxes to the right of the material slot label. When the Number of materials is increased in the edit box, new material slots will appear in the section below.
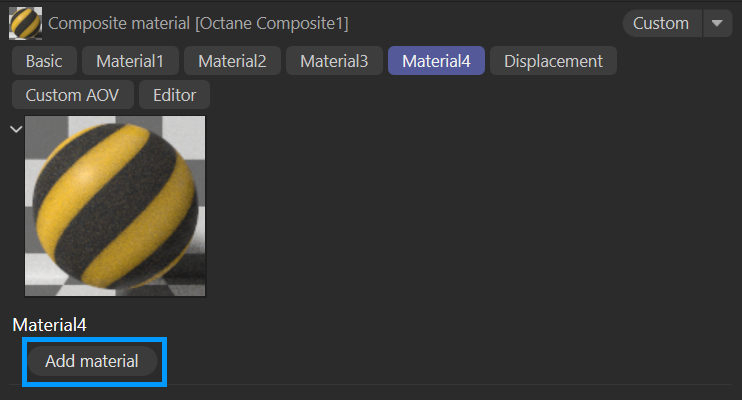
As new material slots are added, tabs will appear above the shader ball. It is necessary to assign sub materials to the slots. When a tab is selected without a currently assigned material, the Add material button will appear, as shown below Click the button to add the sub-material to the scene.
|
|
add material button
|
Use Displacement
Displacement maps can be used with the Blend Material. Any grayscale image or procedural texture can be used from the "Add Displacement" option on the right. Displacements are discussed here.
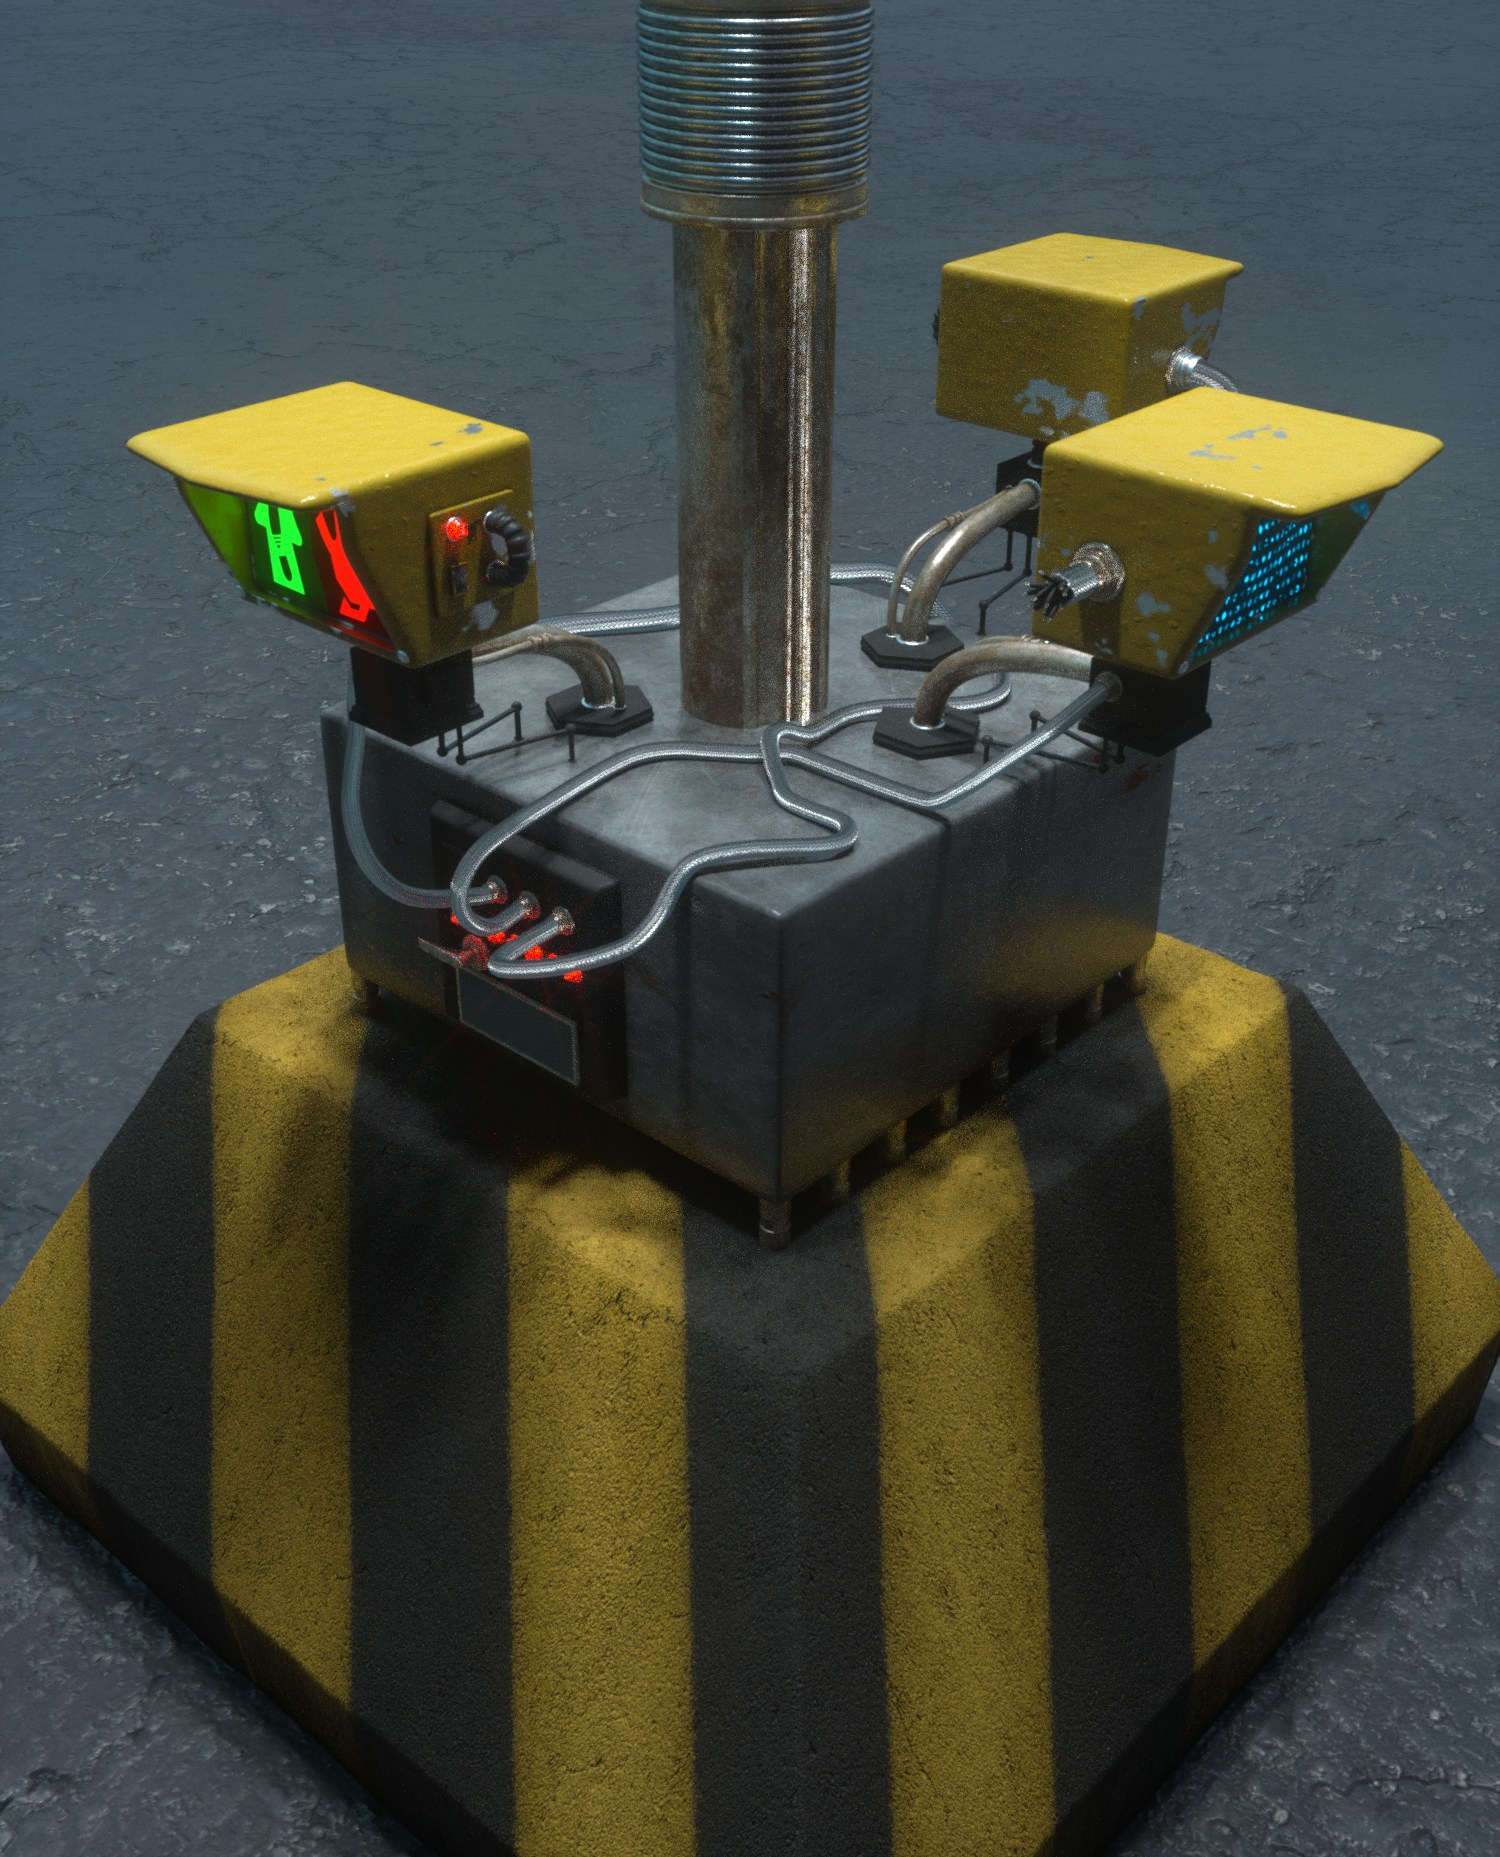
In this image, the yellow and black-striped base has a composite material applied. You can see the nodegraph for the material below:
|
|
composite Material example
|

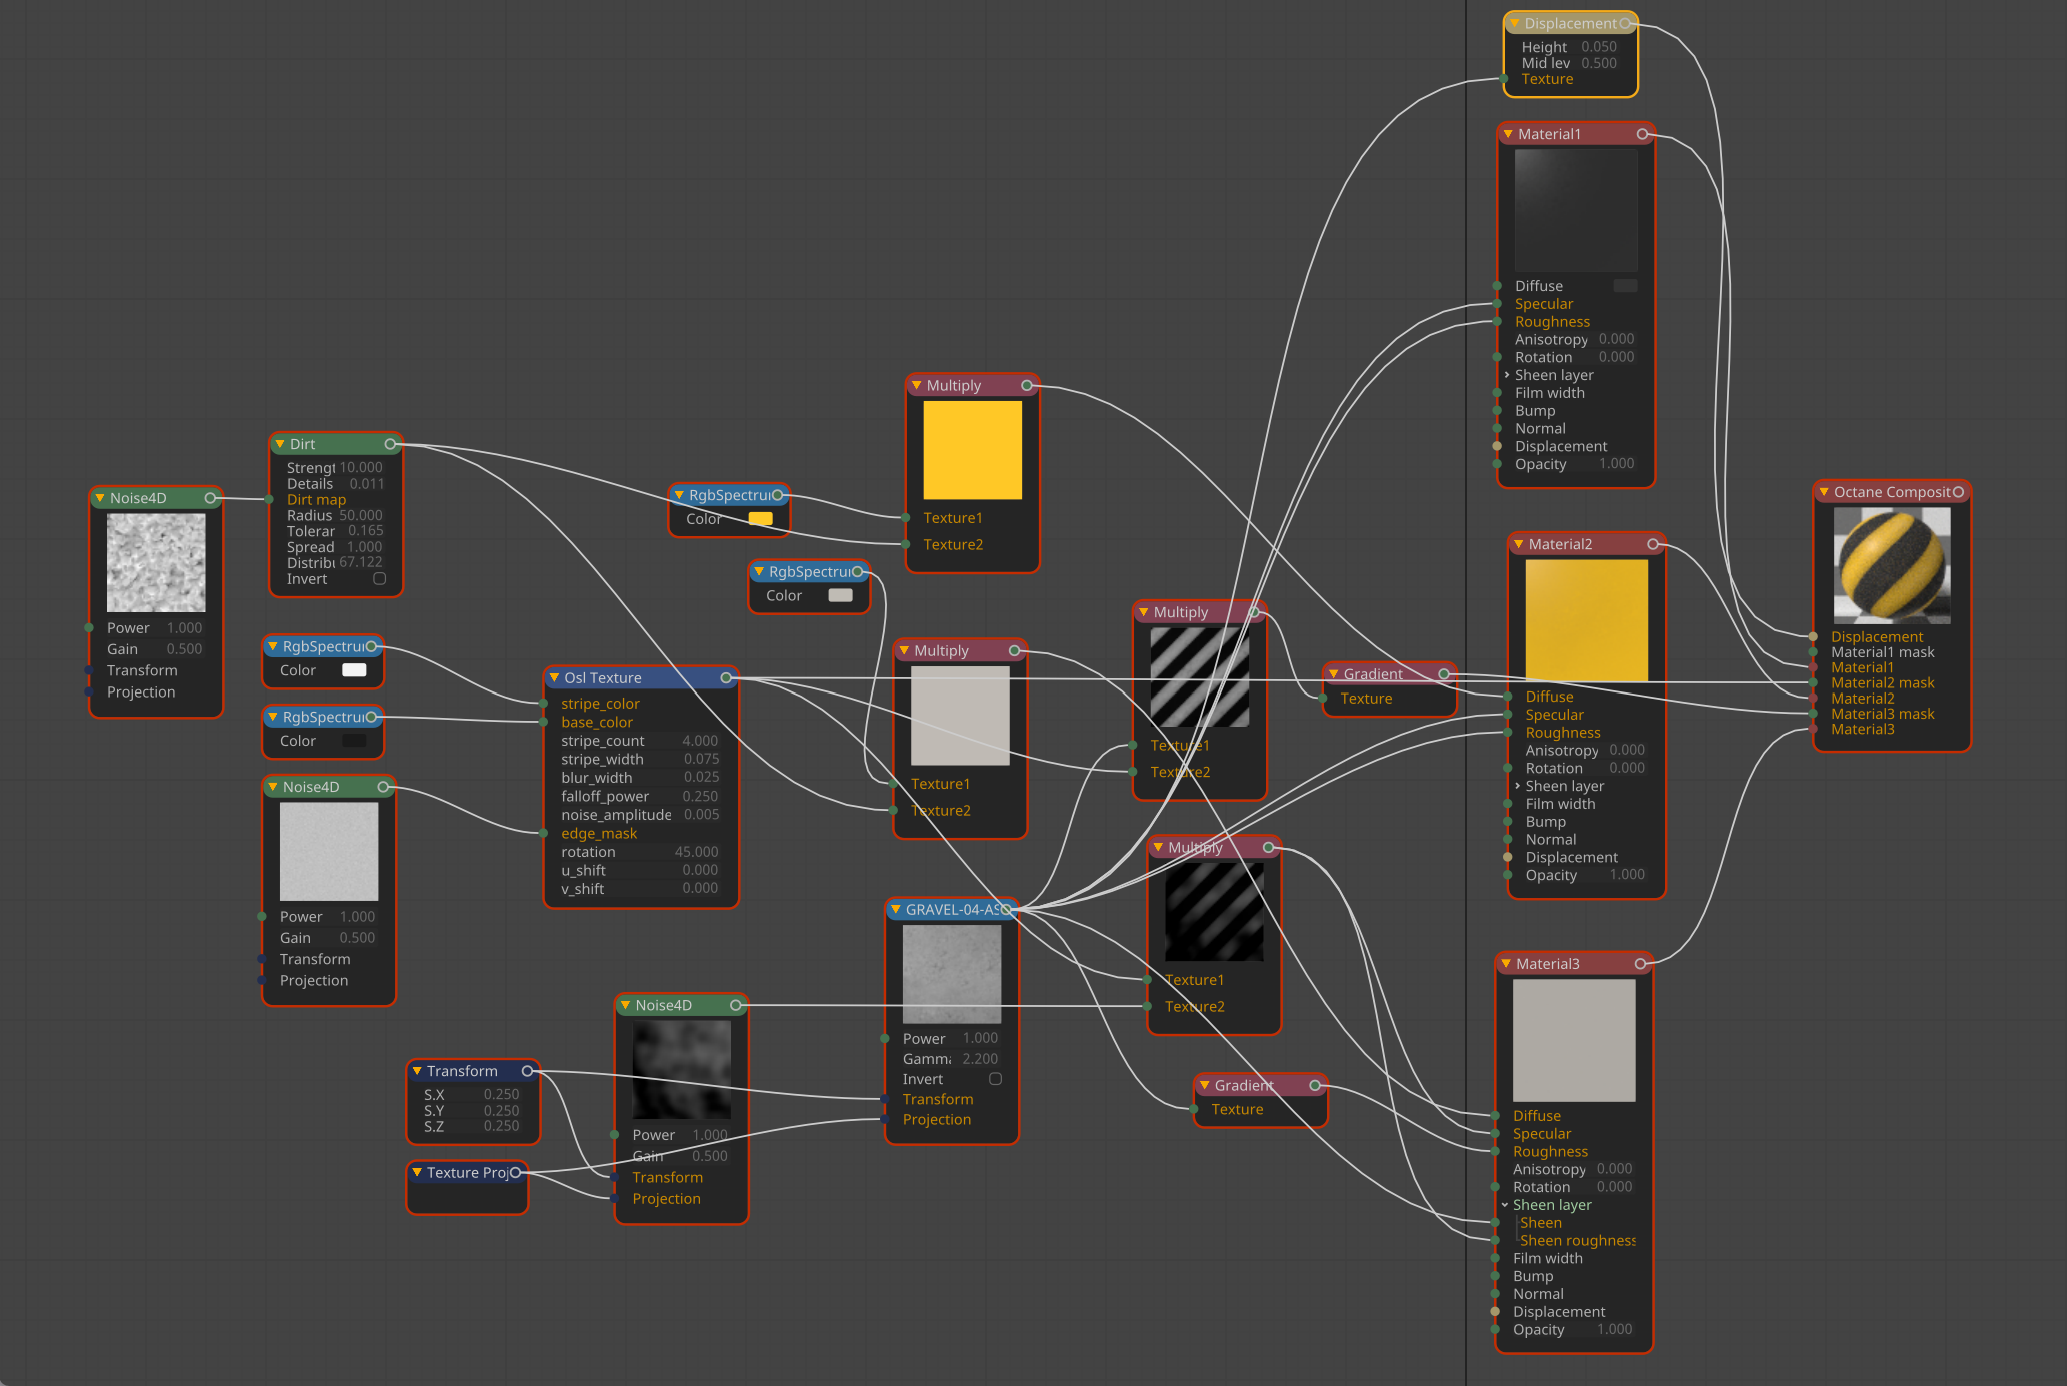
There are three sub-materials, one for the dark strip color, one for the yellow stripe, and an aging layer with a lighter gray color. The actual stripes are just an OSL shader used as a mask, and connected to the material mask input of the second and third materials. A displacement node is connected to the Displacement input of the Composite Material node. FYI, the OSL shader for the stripes was created via Microsoft CoPilot, allowing for customized controls over the stripe characteristics and orientation.
Here is the Microsoft CoPilot OSL output for the stripes shader:
shader soft_stripes_octane_color_pin(
color stripe_color = color(1, 1, 1),
color base_color = color(0, 0, 0),
int stripe_count = 5,
float stripe_width = 0.05,
float blur_width = 0.02,
float falloff_power = 1.0,
float noise_amplitude = 0.01,
color edge_mask = color(0.5) [[ string widget = "null" ]], // Connectable color input
float rotation = 0.0,
float u_shift = 0.0,
float v_shift = 0.0,
output color Cout = 0
)
{
float period = 1.0 / stripe_count;
float clamped_stripe = clamp(stripe_width, 0.0, period * 0.5);
float center_pos = period * 0.5;
float angle = radians(rotation);
float cu = cos(angle);
float su = sin(angle);
float shifted_u = u + u_shift;
float shifted_v = v + v_shift;
float u_local = shifted_u - 0.5;
float v_local = shifted_v - 0.5;
float rotated_u = cu * u_local - su * v_local + 0.5;
float local = mod(rotated_u, period);
float dist = abs(local - center_pos);
float mask_val = luminance(edge_mask); // Use grayscale value from connected texture
float noisy_dist = dist + (mask_val - 0.5) * 2.0 * noise_amplitude;
float feather_zone = clamped_stripe * 0.5 + blur_width;
float t = clamp(noisy_dist / feather_zone, 0.0, 1.0);
float fade = pow(1.0 - t, falloff_power);
Cout = mix(base_color, stripe_color, fade);
}
|
NOTE Unlike the Composite Texture, the Composite Material node does not support transfer modes between sub-materials. Only a basic mask (opacity) is offered. |