Image Texture
The Image Texture node is used to add images to the material and is used to define an external image on any texture channel. These images can be RGB, Alpha or Grayscale and default to linear 32-bit sRGB format color space (RGBA) with a legacy gamma value of 2.2. This matches the behavior of earlier versions of Octane. In cases where the images are actually in a Linear color space, typical of EXR files for example, the gamma value will need to be set to 1.0. In the case of informational data formats, such as normal maps, the gamma value should also be set to 1.0.
|
NOTE Always use the Image Texture node in any Octane material or shader requiring an image map — do not use the Bitmap node for Octane materials or shaders — use the Bitmap node ONLY for native C4D shaders. |
|
|
image texture node
|

How to Use
Open the Node editor and prepare the setup as seen in the image below. In this setup, both grayscale and RGB images are used. It's a standard setup, all you have to do is create the pictures and "Image Texture" nodes you need and connect them to the relevant channels. In this example, "Real Displacement Textures" provided the image textures that give a rocky-sand view. These commercially available textures are very high quality, which you can find here. In the example setup, a single "transform" node is attached to all of the image texture nodes for consistency. This method is not suitable for a mix of images with varying resolutions.
|
|
image texture
|
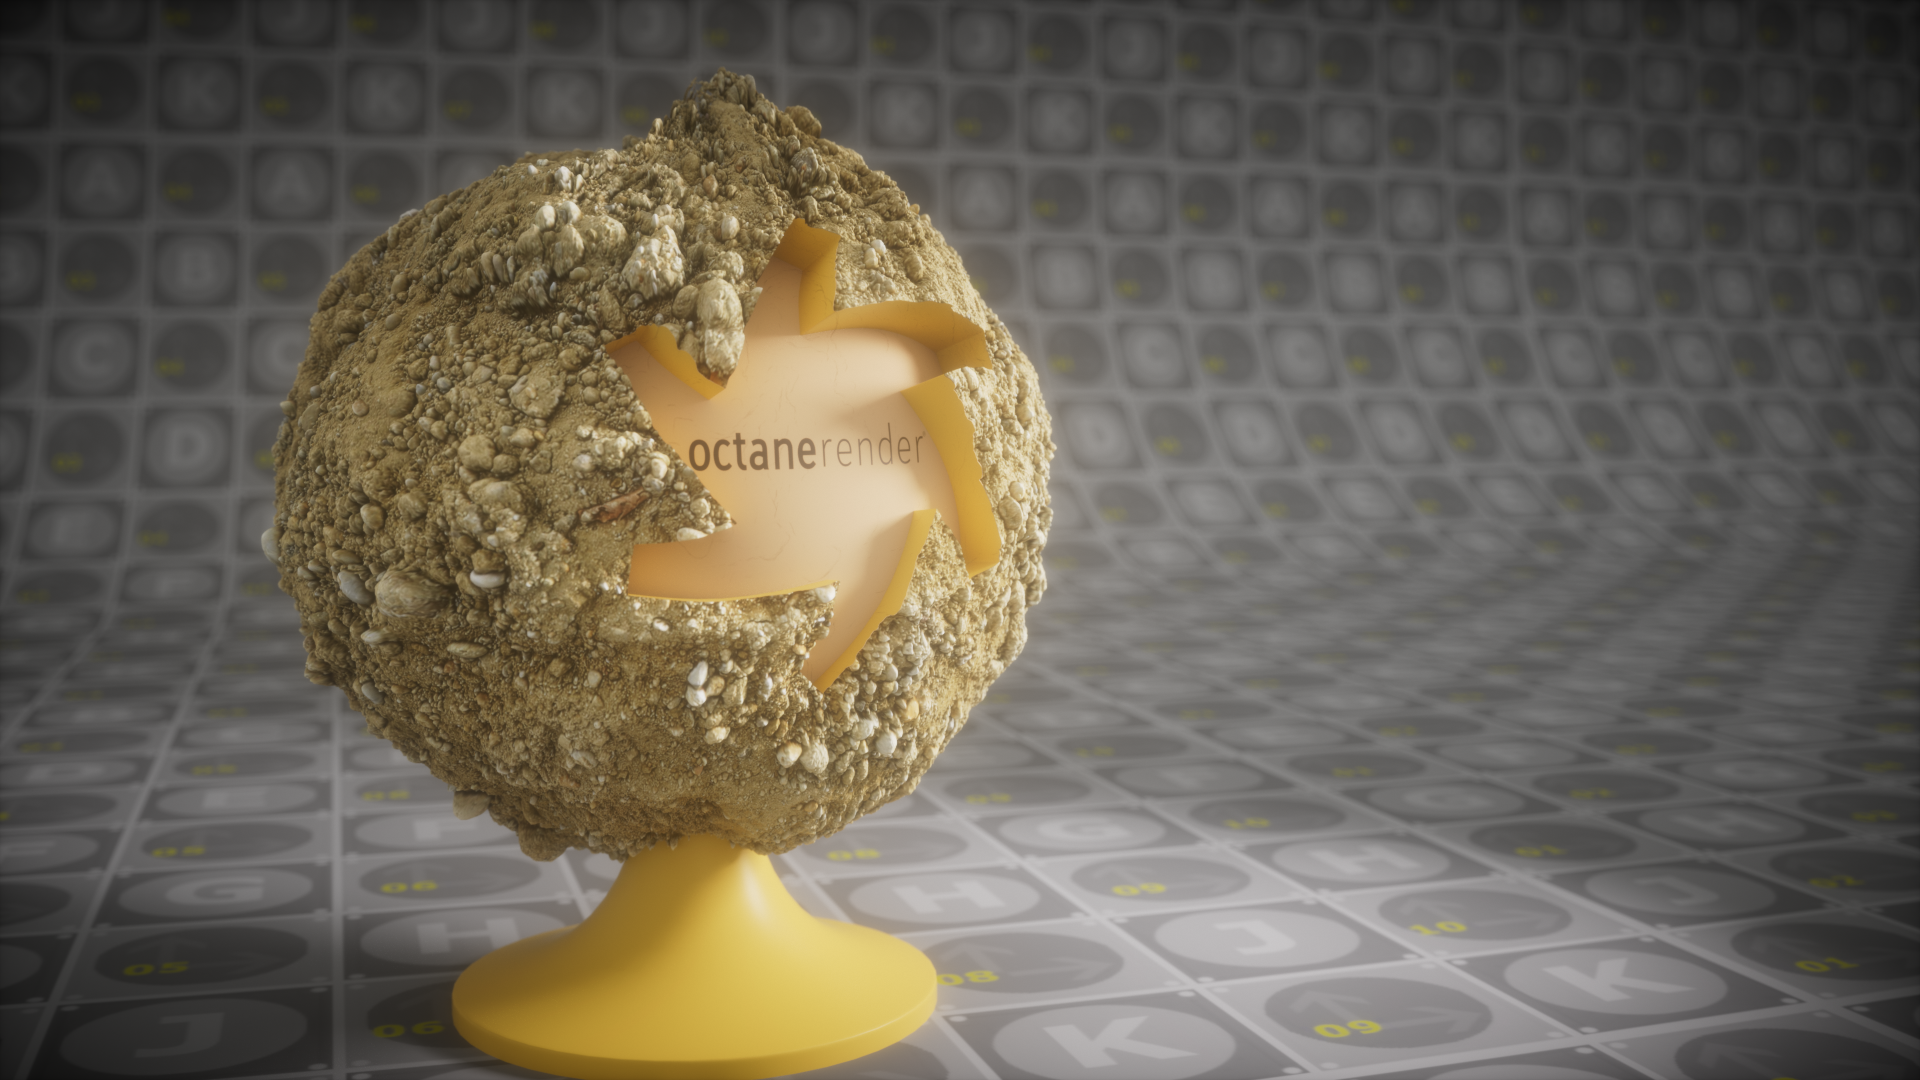


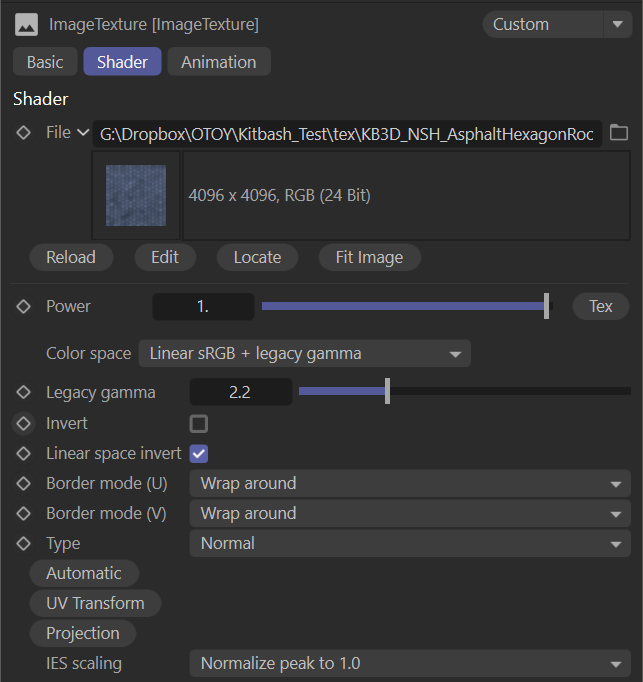
Image Texture Settings
File
This is where you load your image textures. Click on the ellipsis for a file dialog, and select the texture, which will then load the image into an Octane Image Texture node.
Power
Controls the brightness of the image.
Color Space
This menu was added to support the ACES/OCIO color management system and sets the color space of the Image Texture:
- Non-Color Data — Use this option for data maps (such as Normal maps). Any map set to this value will use a gamma value of 1.0.
- sRGB — For any image using the sRGB color space. This option has a non-linear response curve applied, with a gamma of 2.2, per the definition of sRGB. Note that the gamma value is ignored with this setting as a result.
- Linear sRGB + Legacy Gamma — This is the default option, for backwards compatibility with previous versions of Octane. For true linear images, however, make sure that the gamma value is set to 1.0. Use this option if you wish to manually adjust the gamma value of your image.
- ACES2065-1 — The ACES archival color space (widest gamut).
- ACEScg — The ACEScg color space, which is a smaller gamut than ACES2065-1; if you have ACES images coming from outside sources, this may be the best option.
- OCIO: (offers a list of installed OCIO options via an additional Select menu option) — Options here upon the installed Config.OCIO file, and will offer the greatest range of options. In most cases, this setting will be useful only if you are aware of a specific OCIO color space applied to the image.
Legacy Gamma
Controls the luminance of the input image (defaults to 2.2) when set to Linear sRGB + Legacy Gamma.
Invert
Inverts the color values of the image.
Linear Space Invert
This option is used to swap the order of gamma correction and image color inversion.
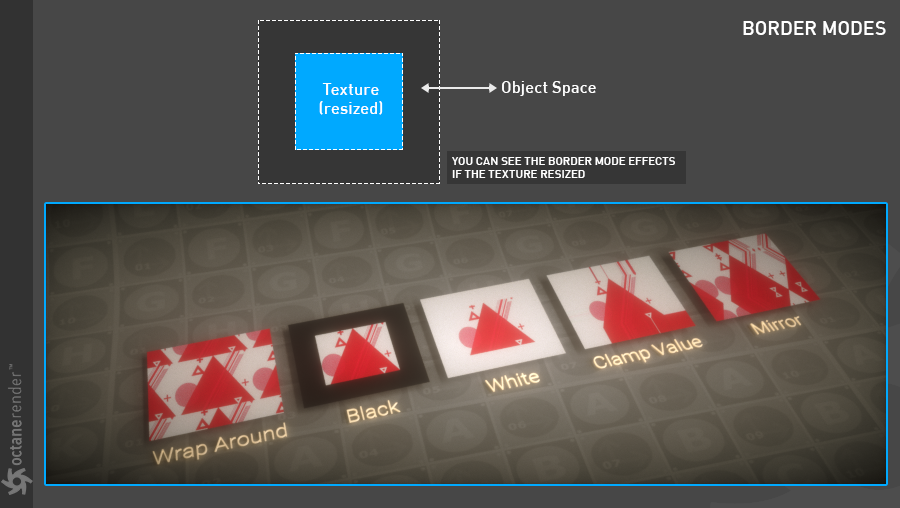
Border Mode (U and V)
This option sets the behavior of the space around the image if the image does not cover the entire geometry. The border mode options are presented in the example below.
|
|
border mode
|

Type
Determines the type of your image. Normally, the entire image is converted to RGB values regardless of the image type you upload — if you upload a grayscale image and leave the this option as "Normal", it will be converted to RGB values, consuming three times more VRAM than necessary. To use GPU VRAM efficiently, choose the type that matches the image, as discussed below:
- Normal — This is the default option and will assume a full color image, allocating the appropriate amount of VRAM. This setting will allocate more VRAM than necessary if the image is a grayscale image, so make sure this setting is correct.
- Float — This option sets the Image type to act as a grayscale image and will convert and RGB image to grayscale. Use this for bump maps, roughness maps and so on, as these images typically do not contain RGB color information. Using this setting properly can conserve VRAM, particularly in scenes with many image textures.
- Alpha — This option sets the Image type to act as an Alpha mask and will use the alpha channel of the image for transparency. It will ignore any color information.
import type
The Import Type button menu allows you to choose from a variety of options to tell Octane how to process your image texture.
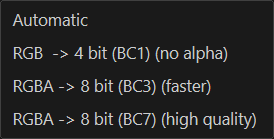
Automatic
This option will attempt to resolve the best settings based upon the image contained within the image texture file.
RGB -> 4bit(BC1)(No alpha)
This option will compress an image quite significantly and will result in a loss of quality. It does not support alpha channels, which will be discarded if present.
RGBA -> 8bit(BC3)(faster)
As reasonable-quality compressor, which supports alpha channels.
RGBA -> 8bit(BC7)(High Quality)
A higher quality compressor, which also supports alpha channels.
For more information about image compression in Octane, a brief explanation, and some links to read are located here.
UV Transform
The UV Transform is somewhat different from the standard Transform, as it offers a Transform Link that will use the transform and the linked object to set the coordinates of the Image Texture. As Image Textures are 2D, the Z axis of the transform is ignored.
|
|
UVW Transform
|
Projection
This node is explained in the Projection section.
IES Scaling
For use with IES image textures, three options are available:
- Normalize peak to 1.0
- Normalize using Lamp Luminance
- Absolute Photometric
Using Image Sequences
You can load image sequences (animations) by choosing the Animation Tab next to the Shader tab of the Image Texture attribute panel. The choices in this tab are based on Cinema 4D. So you can normally use the image sequence as you would in Cinema 4D's Animation tab. The logic is the same, but there are some points you need to be aware of.
- Never use the C4D Bitmap node for single-frame or multi-frame image sequences — the only option you must use is the native Octane Image Texture node.
- MP4 and other movie formats will not work in Octane. Use image sequences only.
- The most efficient formats for using image sequences in Octane are TGA, JPEG, Tiff. PNG will also work, but Octane must perform extra work to uncompress and otherwise prepare PNG images, causing this format to render slower than the other formats mentioned.
- When loading a sequence to the image texture channel, load the first frame and enter the frame rate and frame count correctly in the Animation Tab. The frame range must be manually entered into the appropriate field. The other options in this tab match Cinema 4D.