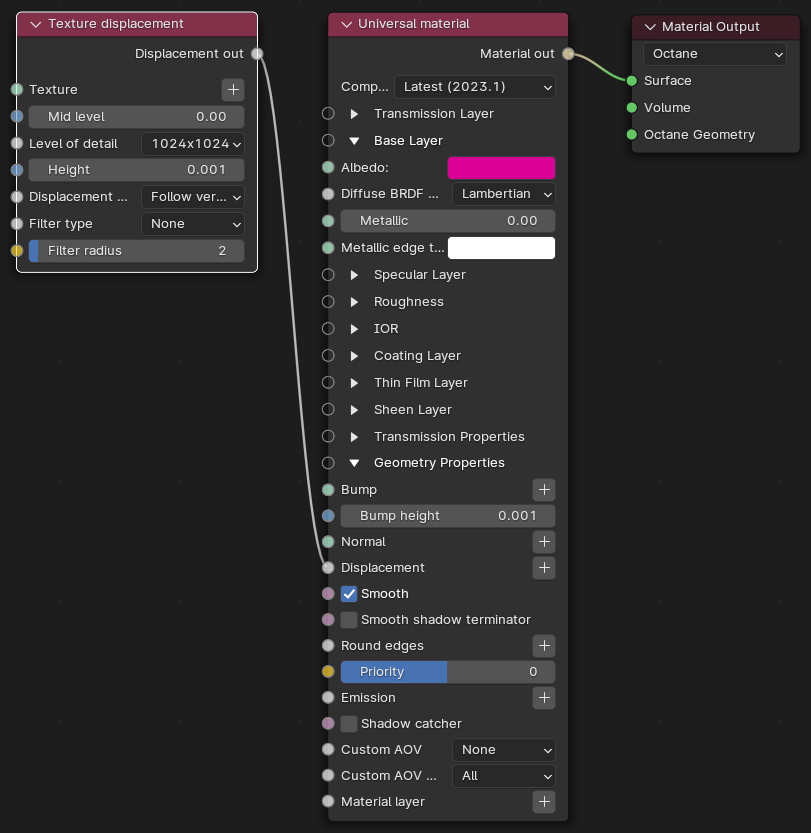
Texture displacement
Utilizes a 2D texture map in order to generate 3D surface relief. This displacement node is fast, but currently have some limitations.

Figure 1: Texture displacement Node connected to Universal Material
Parameters
- Texture - This slot provides the Displacement map path. Displacement maps are Image textures generated in programs like ZBrush®, Substance Designer, or Photoshop®.
- Mid Level - Defines the Displacement shift in texture value range. Set this value to 0.5 for image textures that use 50% to represent no displacement. For images that use black to represent no displacement (such as 32-bit EXRs), set this value to 0. If you use a digital sculpting program like ZBrush® to generate Displacement, you can get the best results by setting Mid Level in the sculpting program to 0.5 when it generates Displacement, and then set the Displacement node's Mid Level value to 0.5.
- Level Of Detail - Adjusts map detail quality. Higher values reduce artifacts seen in shadows cast on the Displacement surface and brings out finer details, but it increases render time.
- Height - Controls Displacement strength.
- Displacement Direction - Lets you choose different Displacement vectors.
- Follow geometric normal
- Follow vertex normal
- Follow smoothed normal
- Filter Type - Selects the Displacement map filter.
- None
- Box
- Gaussian
- Filter Radius - Adjusts the number of nearest pixels to use for filtering. Higher values result in smoother Displacement maps. This parameter is valid if you enable a Box or Gaussian filter.
NoteCalculating displacement geometry places additional load on the GPU. High or low displacement values can cause issues and GPU errors. Displacement mapping emphasizes details in the scene's textures instead of major features that should be modeled into the geometry. You should not use displacement and a normal map together on the same material, as this results in rendering artifacts. The same applies to bump maps, but the digital artifacts are less pronounced. |