
Before delving into complex render setups with OctaneRender, here are the first and very basic steps to setup and render a simple scene in ArchiCAD using the plugin.
Figure 1: Sample scene rendered with OctaneRender for ArchiCAD.
For an initial render, use the default design geometry type of ArchiCAD (i.e. Wall, Slabs and Morphs) and leave the other object types (such as GDL objects, imported Sketchup files, etc) for later.
Note: In this workflow, a GDL object (Wooden Thinker statue) is used throughout, but it is converted to a Morph.

Figure 2: The ArchiCAD Layout with the OctaneRender for ArchiCAD plugin icon at the bottom right.
If the plugin is not installed and running yet, see Installation and Overview section in this manual.
Invoke the plugin through the OctaneRender for ArchiCAD plugin icon, then click the ‘Open Viewport’ on the Rendering Tab (Figure 3) to open the OctaneRender Viewport. You’ll now have two OctaneRender plugin windows on top of the ArchiCAD Layout. The OctaneRender Viewport is initially empty (Figure 4).until GPUs, Render settings and Lighting are set correctly.
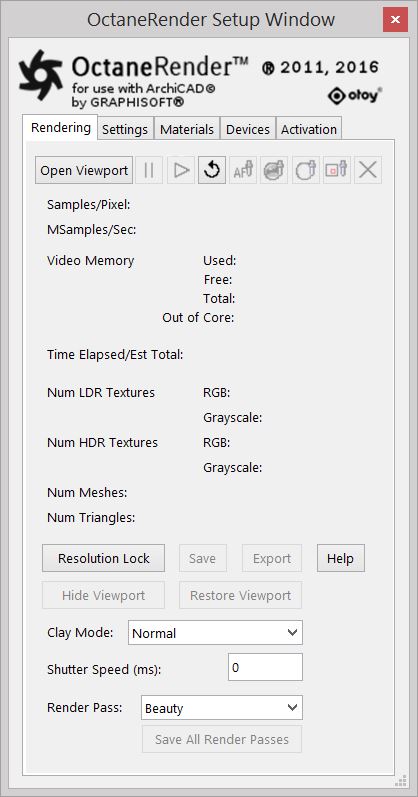
Figure 3: OctaneRender Setup Window with Rendering Tab active
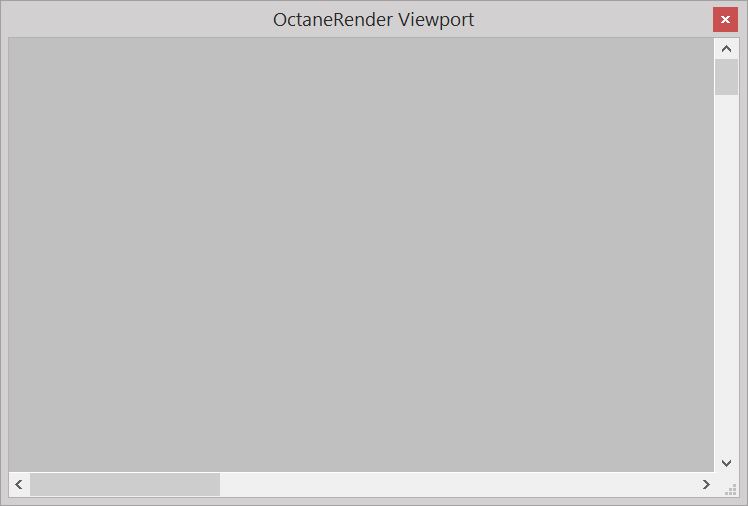
Figure 4: The OctaneRender Viewport
Go to the ‘Devices’ tab and click on the Open Device Settings button. This opens the OctaneRender Devices Preferences window where you can select and enable the GPUs for rendering (Figure 6).
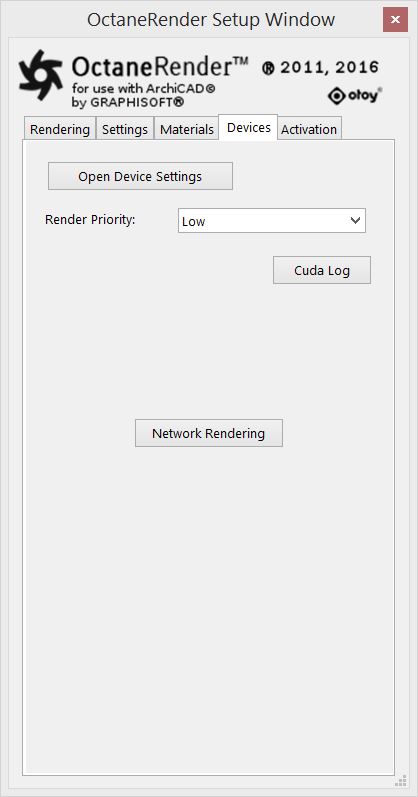
Figure 5: The Devices Tab
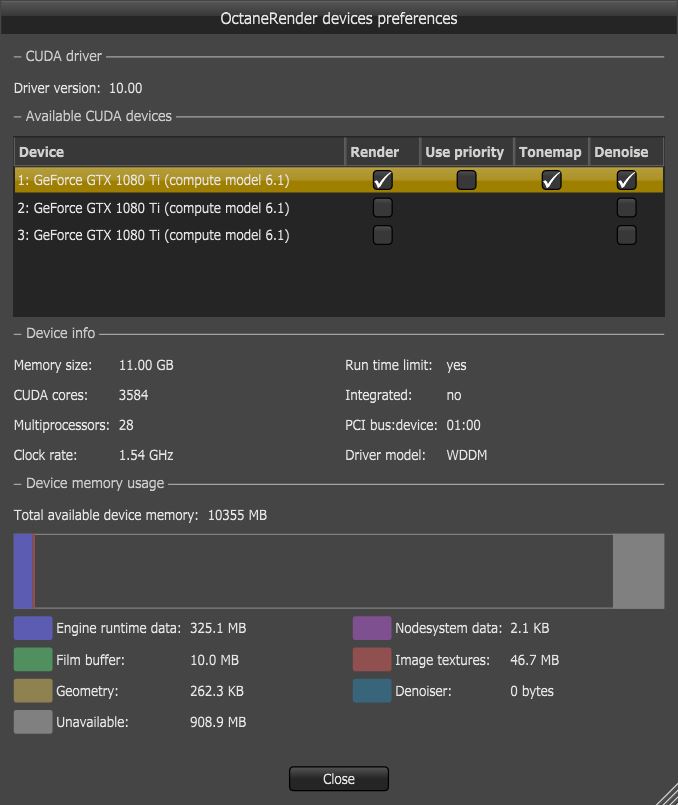
Figure 6: Select and enable the GPUs through theOctaneRender devices preferences window.
Device settings and preferences are discussed in greater detail in the ‘Devices’ section of this manual.
Make sure your ArchiCAD Layout is easy to work with in combination with the plugin open. It is obviously easier to use multiple monitor screens. The OctaneRender Setup Window and the OctaneRender Viewport may float on top of the ArchiCAD Window and these can also be placed respectively on other connected monitors.
In Figure 7, the OctaneRender Setup Window is placed randomly over the ArchiCAD Window.
The OctaneRender Viewport is not visible, but theoretically could be on the second monitor screen (Figure 8).
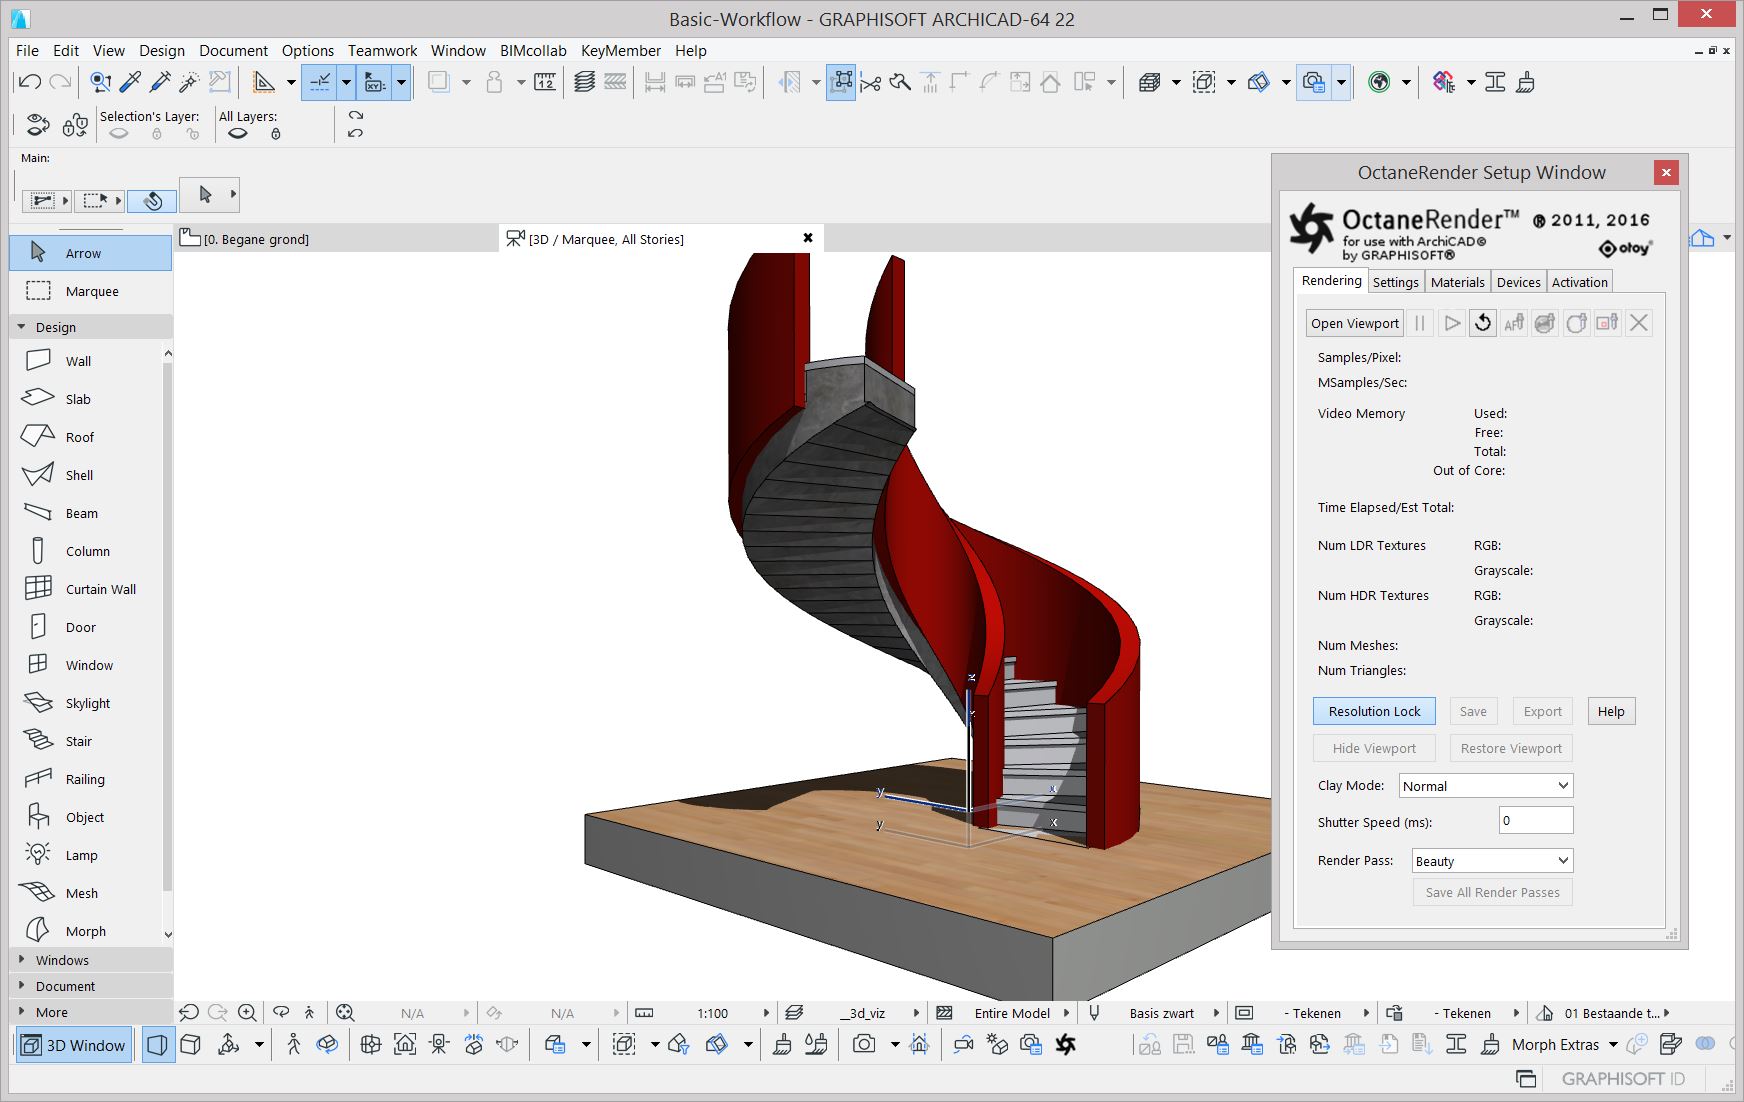
Figure 7: The OctaneRender Setup Window on top of the ArchiCAD user interface
Figure 8: The OctaneRender Viewport can be placed on a second monitor screen.
Figure 9 shows an example of a one-monitor Layout which allows a minimal view of the plugin minimally so that it does not overpower the ArchiCAD Layout. The Toolbox on the left is wider than normal in order to create a place for the OctaneRender Setup Window with equally enough space to open the invidual Tools.
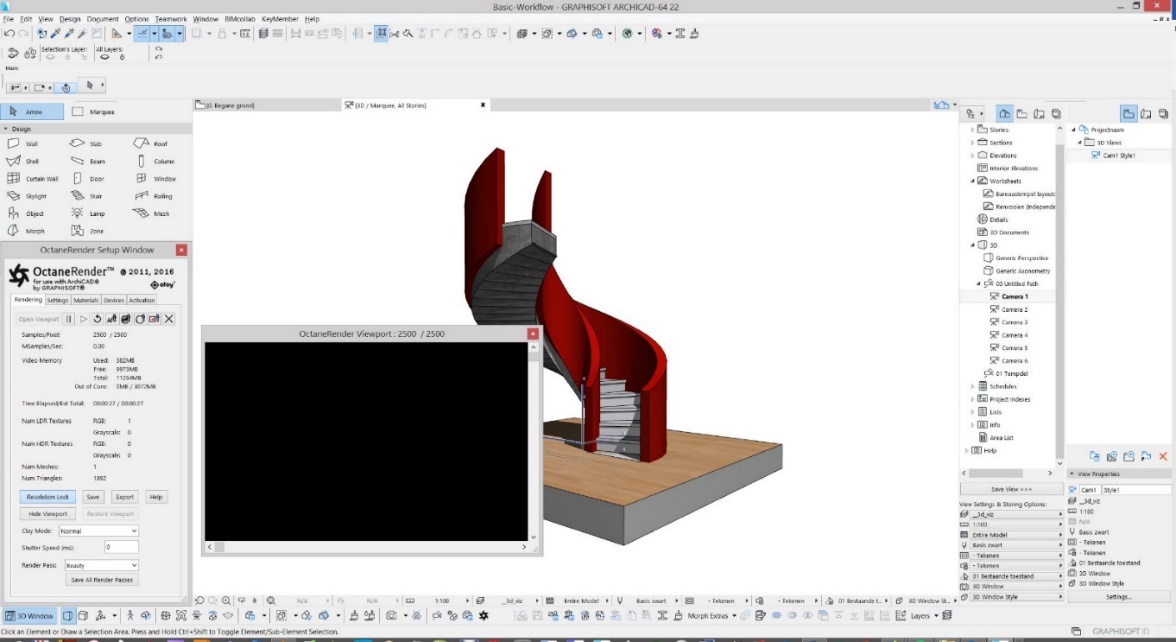
Figure 9: Example of a one-monitor Layout
You can easily resize and move both OctaneRender windows when working on the scene (Figure 10). You can also Hide and Unhide the OctaneRender Viewport when convenient.
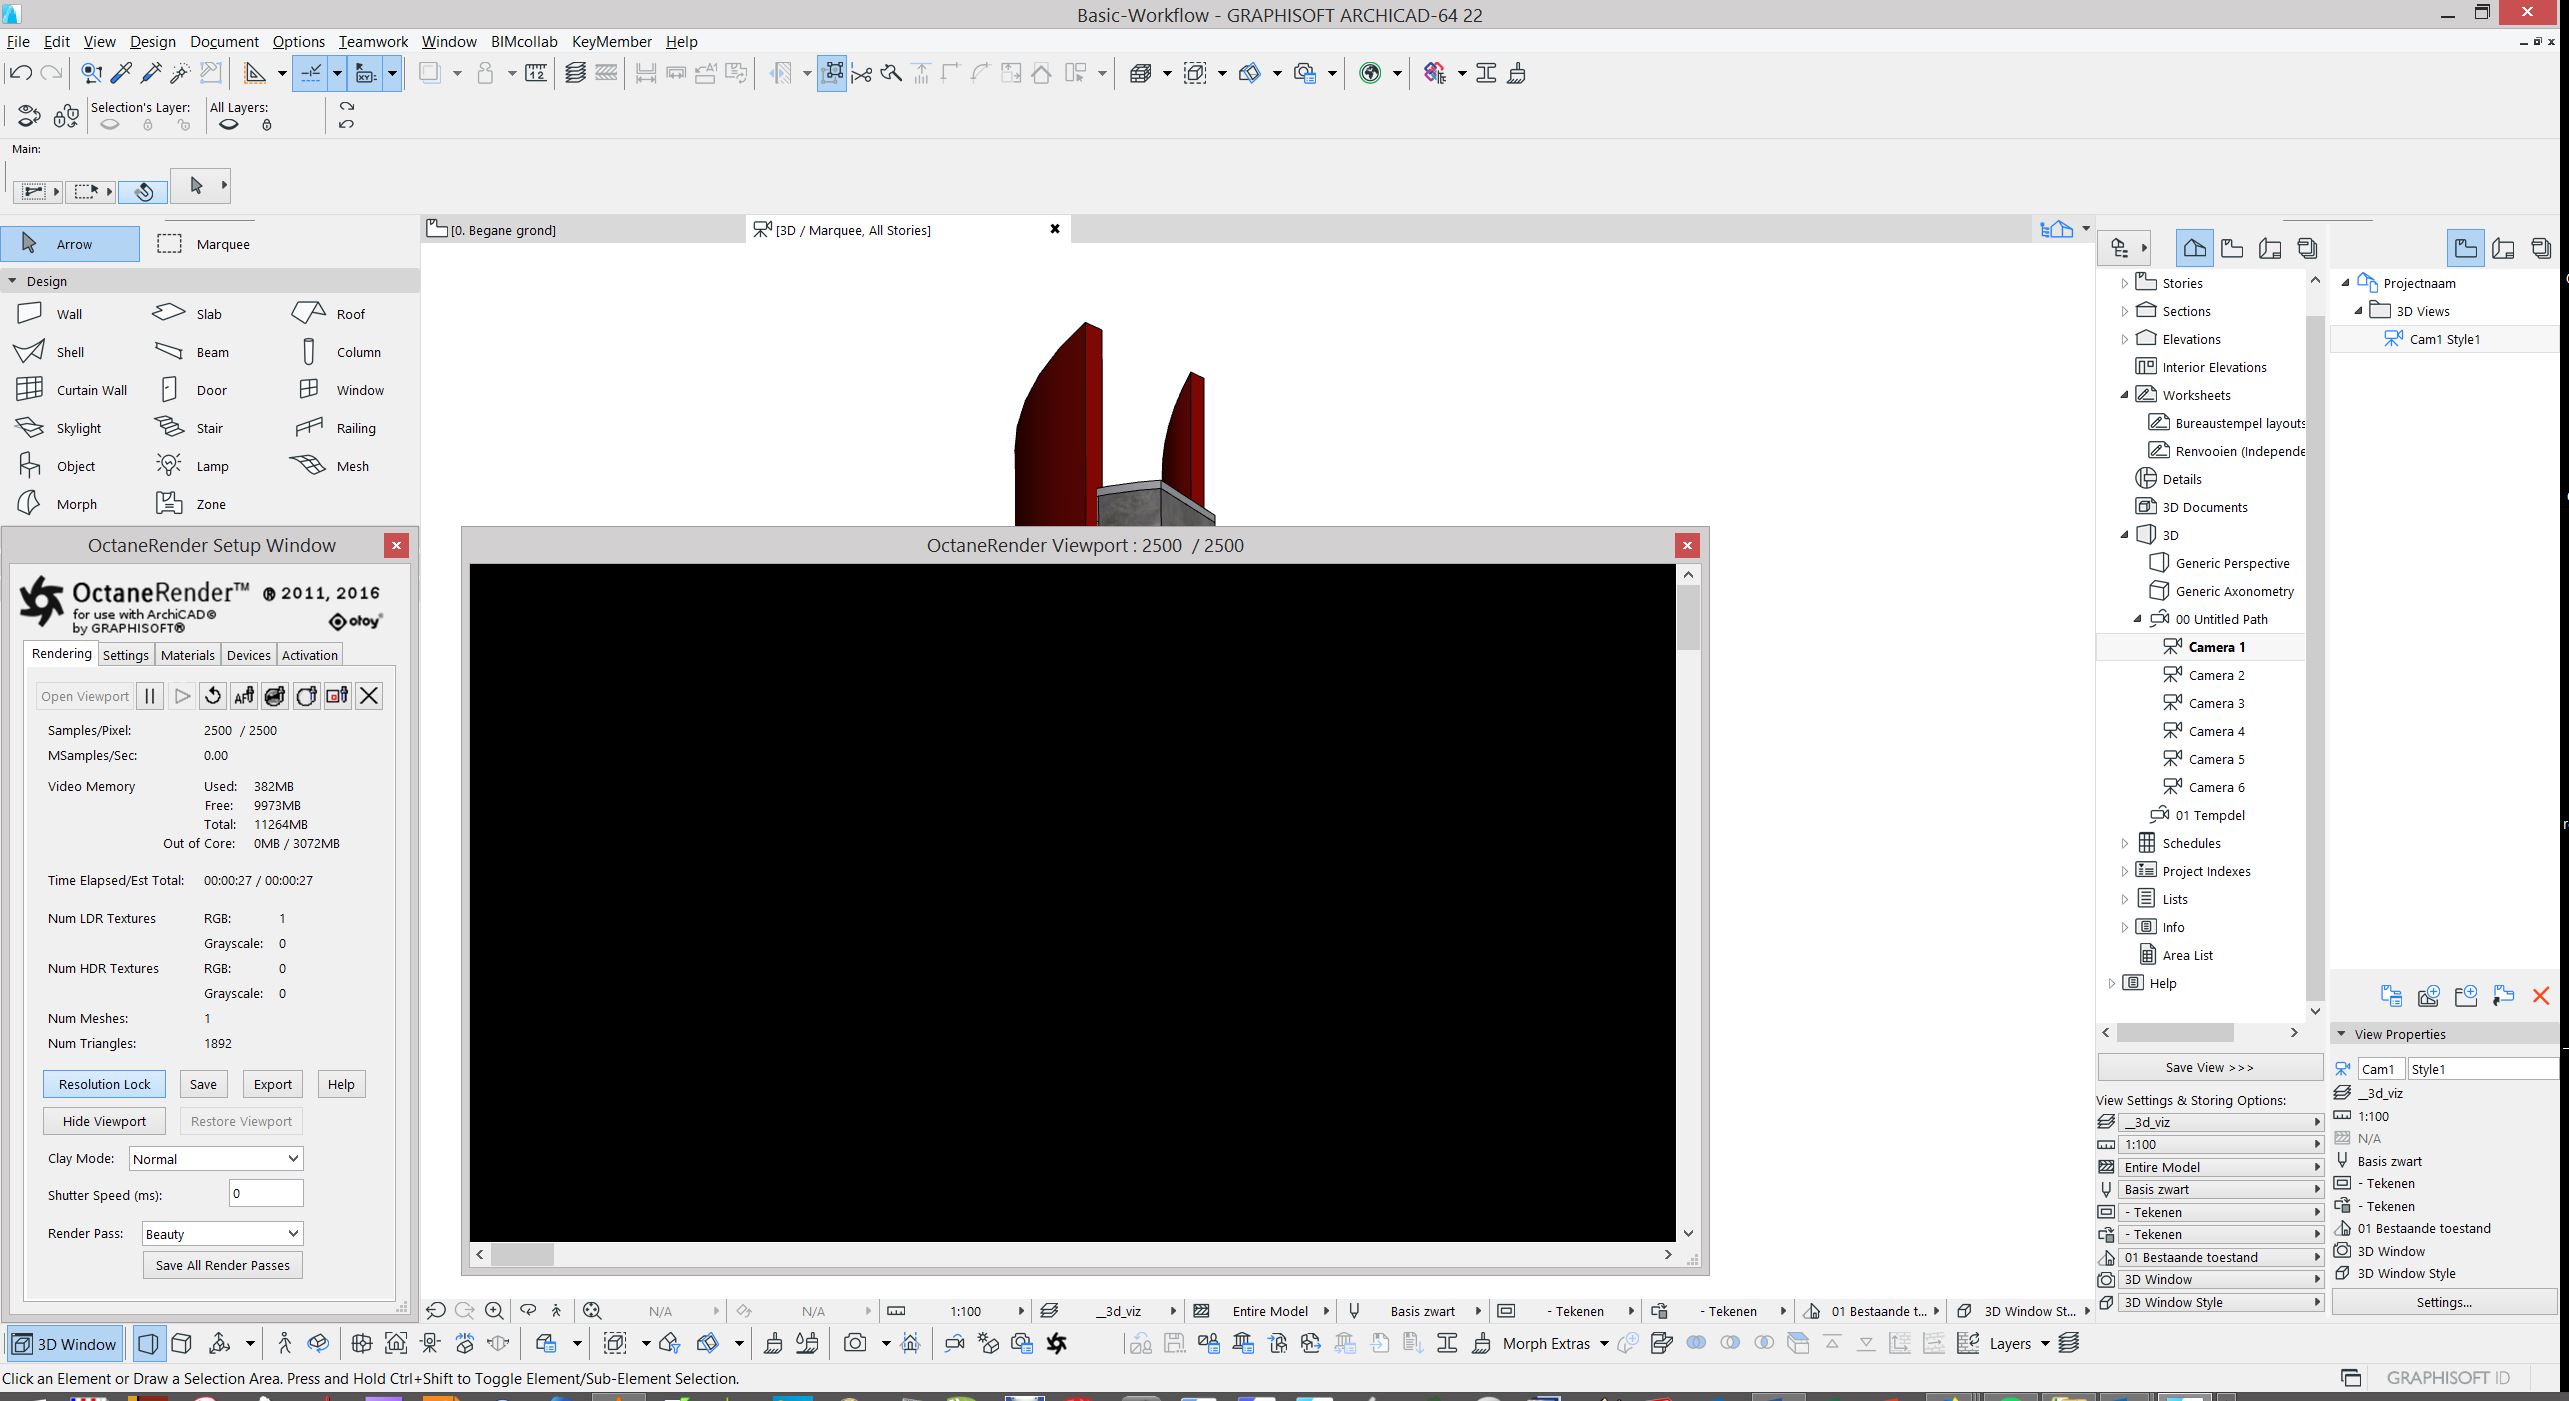
Figure 10: Resizing the OctaneRender Viewport window
Under the Settings tab in the OctaneRender Setup Window, scroll down to ‘Film Settings’ and select ‘Resolution’. This invokes the Film Settings’ Node Parameters and allow you to specify the resolution of the rendered image. Type the dimensions of the image in the Node Parameters section to set the Resolution (Figure 11).
You can set your OctaneRender Viewport resolution to the size that you feel most comfortable with while working at your scene and later adjust the resolution for your final Render. If the Resolution is larger than the size of the OctaneRender Viewport, you can resize the viewport or use the sliders to see part of the total Resolution.
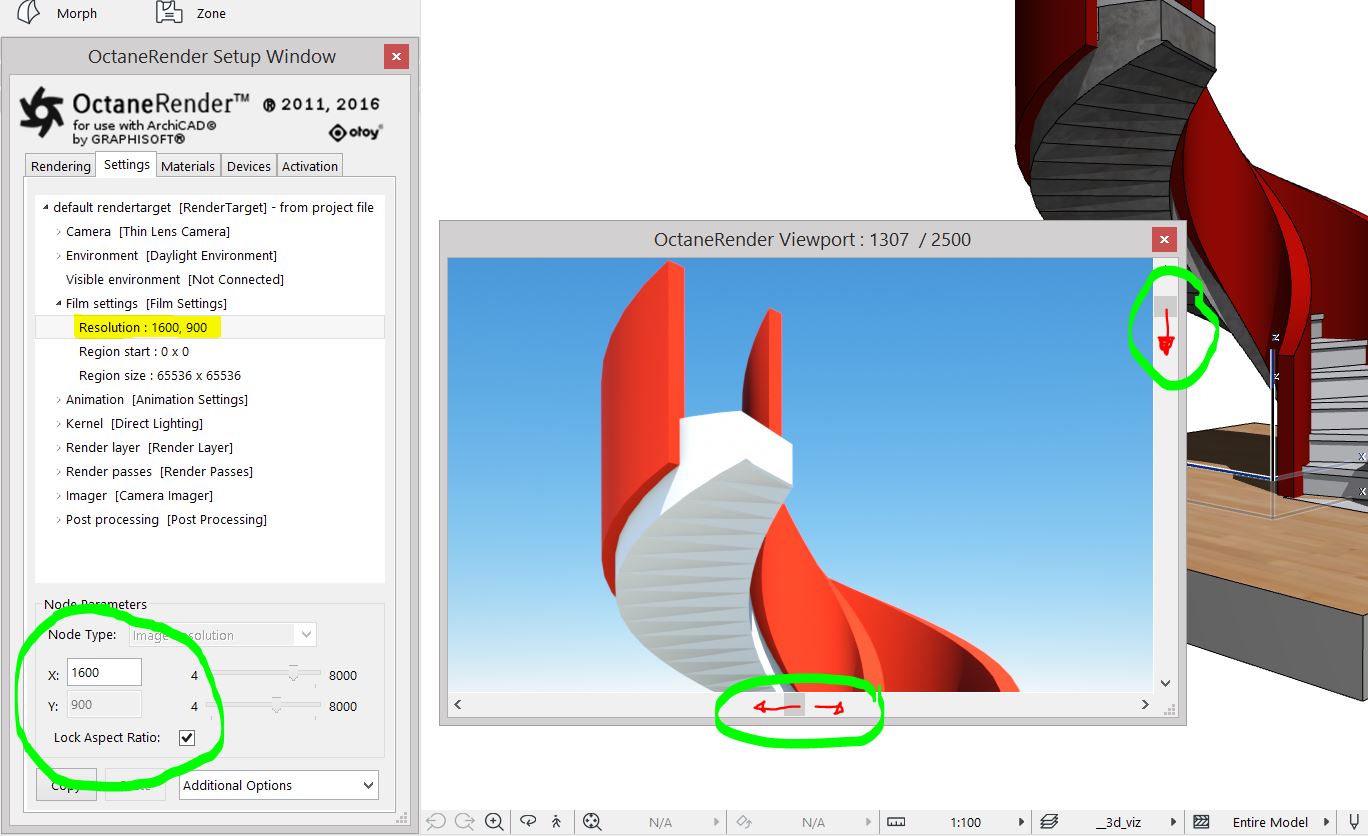
Figure 11: Setting the scene resolution
Note: You can set a lower resolution while you are working on the scene and set it larger later for final rendering.
Under the Settings tab in the OctaneRender Setup Window, go to the Kernel Settings (Figure 12) and set the Max. Samples to render. This sets the maximum number of samples per pixel before the rendering process stops. The higher the number of samples per pixel, the cleaner the render. There is no rule as to how many samples per pixel are required for a good render, it is subjective and may vary depending on the content and complexity of the scene being rendered.
In the example in Figure 12, the ‘Max. Samples’ set to 2500, however a much lower number will be sufficient while working on the scene to see how it evolves. A noise free rendering is not necessary during content creation and the set resolution will most likely be lower than your final render.
Under the Rendering tab in the OctaneRender Setup Window, use the Viewport buttons to control the rendering process (Figure 13).
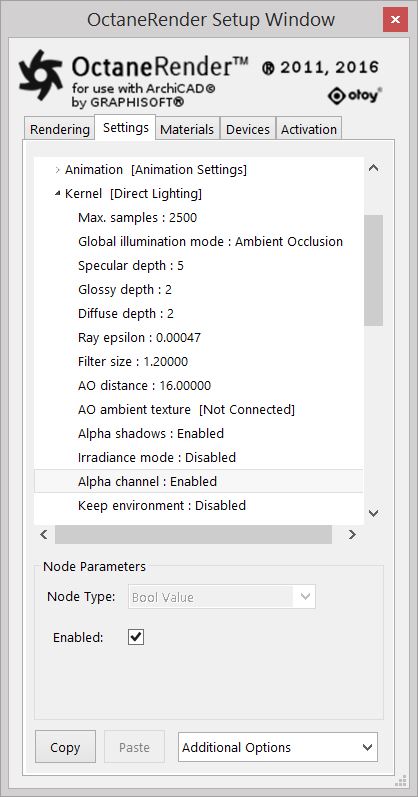
Figure 12: The Kernel Settings
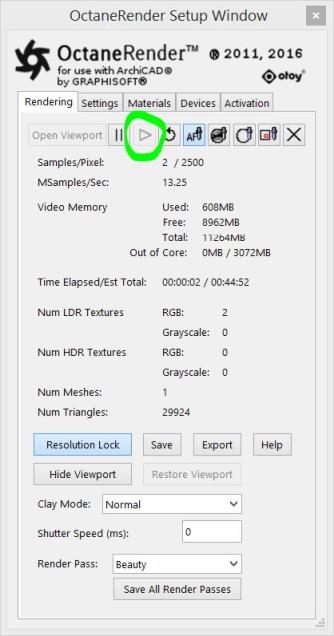
Figure 13: The Start button in the Rendering Tab
Under the Settings tab in the OctaneRender Setup Window, select ‘Environment’ and proceed to the Node Parameters section to set the Node Type to’Daylight Environment’ (Figure 14). If you like experimenting with an HDR image for lighting and background, you can select Texture Environment instead.
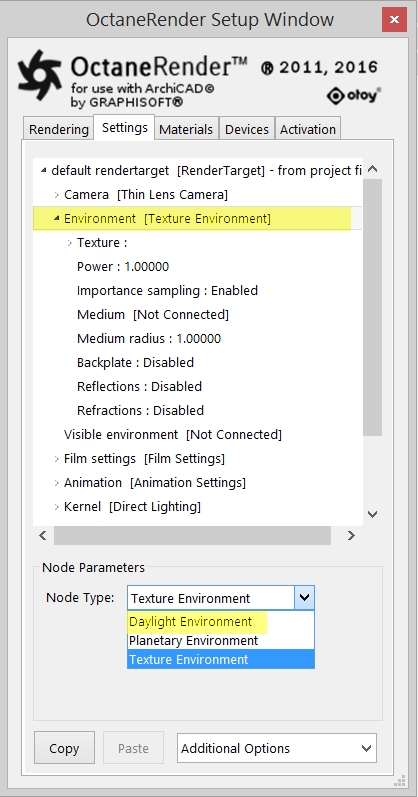
Figure 14: Setting the Environement
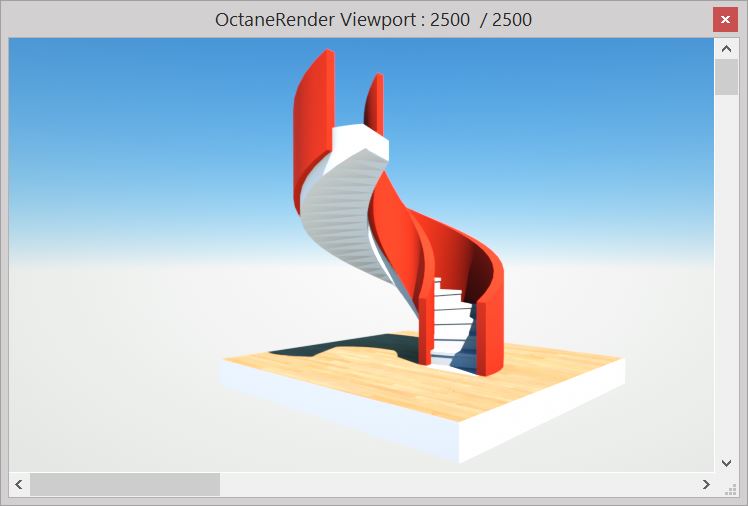
Figure 15: Example scene with a Daylight Environement rendered in the OctaneRender Viewport
Once the Environment Lighting is set, the ArchiCAD scene becomes visible in the OctaneRender Viewport.
In addition to the Environment Lighting, you can add Lamps or Emitters to light the scene.
When ArchiCAD Lamps from the ArchiCAD Library are used in the scene, ArchiCAD’s General Light Sources (Area Light, General Light, IESAn IES light is the lighting information representing the real-world lighting values for specific light fixtures. For more information, visit http://www.ies.org/lighting/. Lights, etc.) cannot be used directly as Octane Lighting (Figure 16). Select the GDL Lamp in the OctaneRender Setup Window and in the Node Parameter section, replace its node type with a Diffuse materialUsed for dull, non-reflecting materials or mesh emitters. type. Then connect an Octane emission to the material’s Emission node (Figure 17).
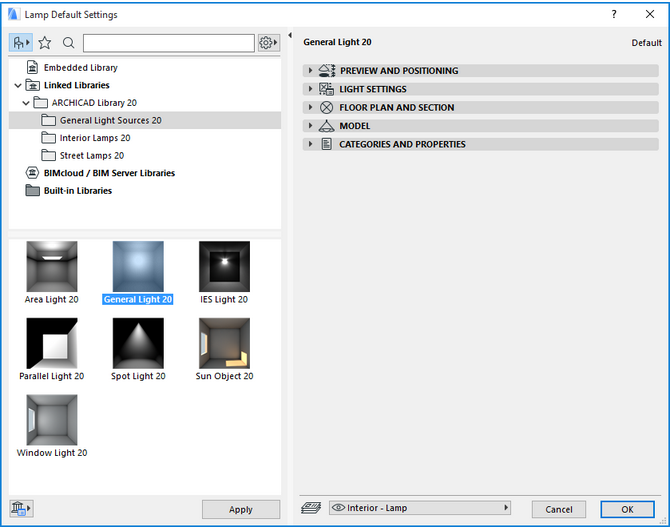
Figure 16: General ArchiCAD Light Sources
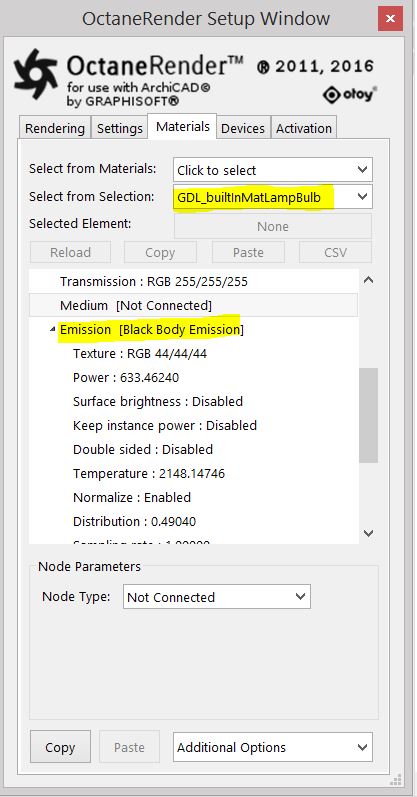
Figure 17
The GDL Lamp Objects (i.e. Interior Lamps and Street Lamps) may have a material for the lamp bulb as the light source, it can then can be used in the plugin as an emitter material (Figure 18).
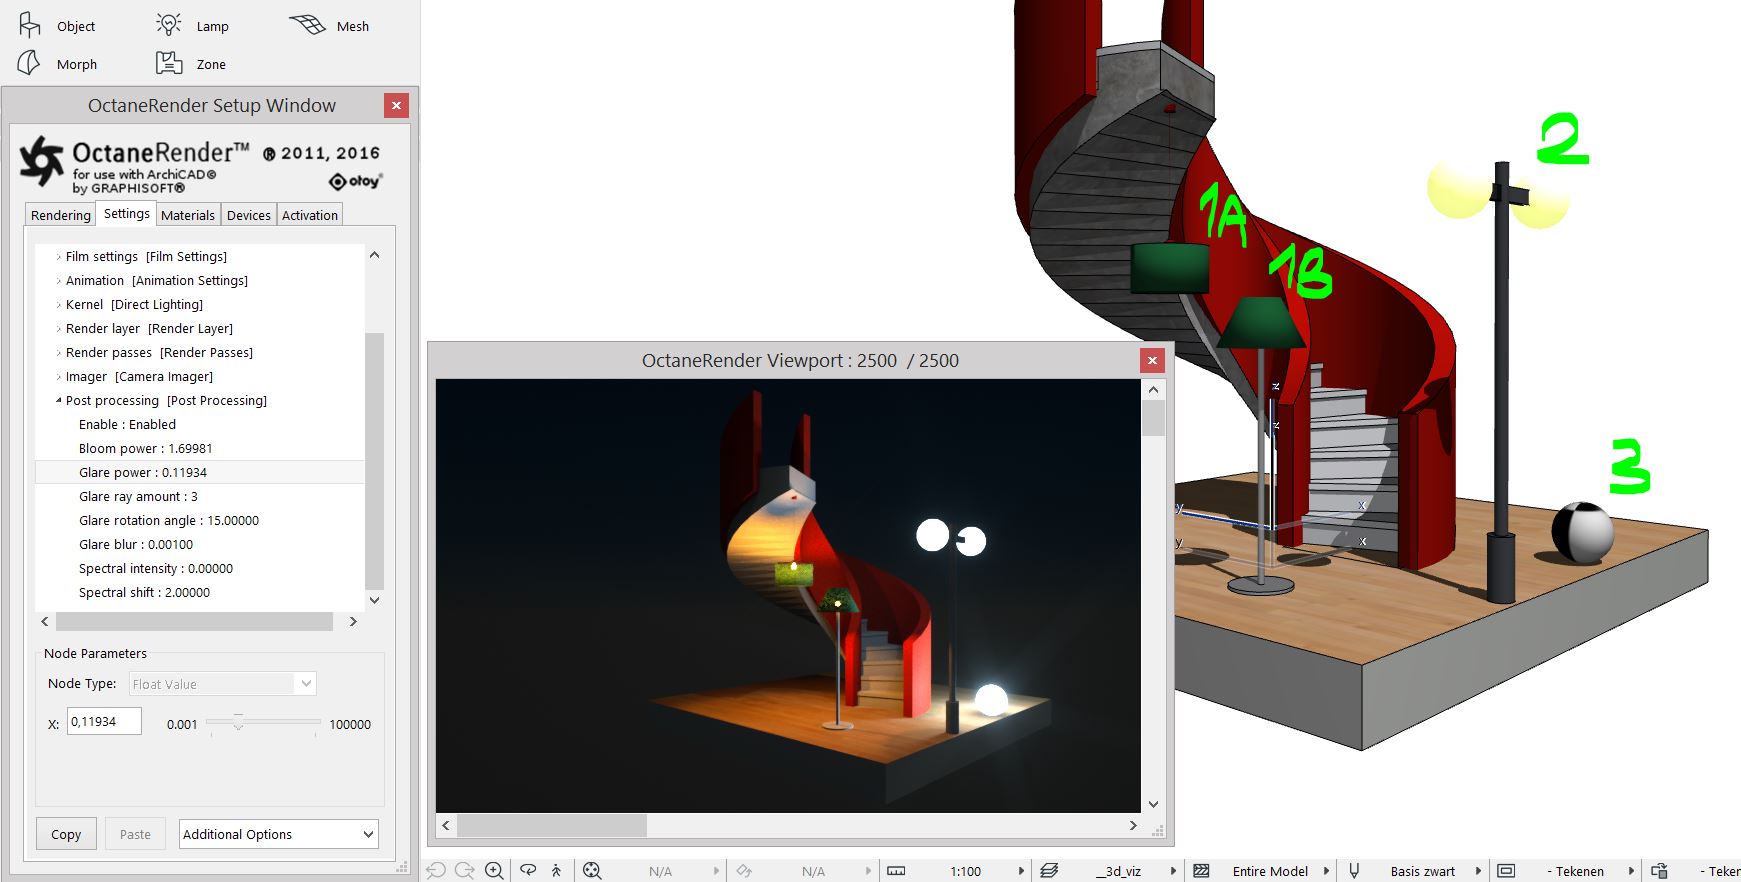
Figure 18: The emitter material of Lamps 1A and 1B are drawn from the GDL Lamp Objects’ light sources.
When the lamp bulbs of the Objects have the same material name, adjusting the material has effect on both.
Alternatively, you can assign an Octane emitter material to a part of the Lamp Object, i.e. the glass globes of a street lamp (Figure 18, Lamp 2).
Or you can add a new object (i.e. a small globe) to the scene to use as a light ball and place it strategically with the an ArchiCAD Object or use it as a separate Lamp Object (Figure 18, Lamp 3).
Figure 19: ArchiCAD scene with ArchiCAD Lamps and Octane emitters
For more about complex Lighting the scene, refer to the Lighting topic.
The Octane MaterialsA set of attributes or parameters that describe surface characteristics. are converted from the ArchiCAD materials by default.
You can select the ArchiCAD object and then change the MaterialThe representation of the surface or volume properties of an object. setting in the third Tab ‘Materials’.
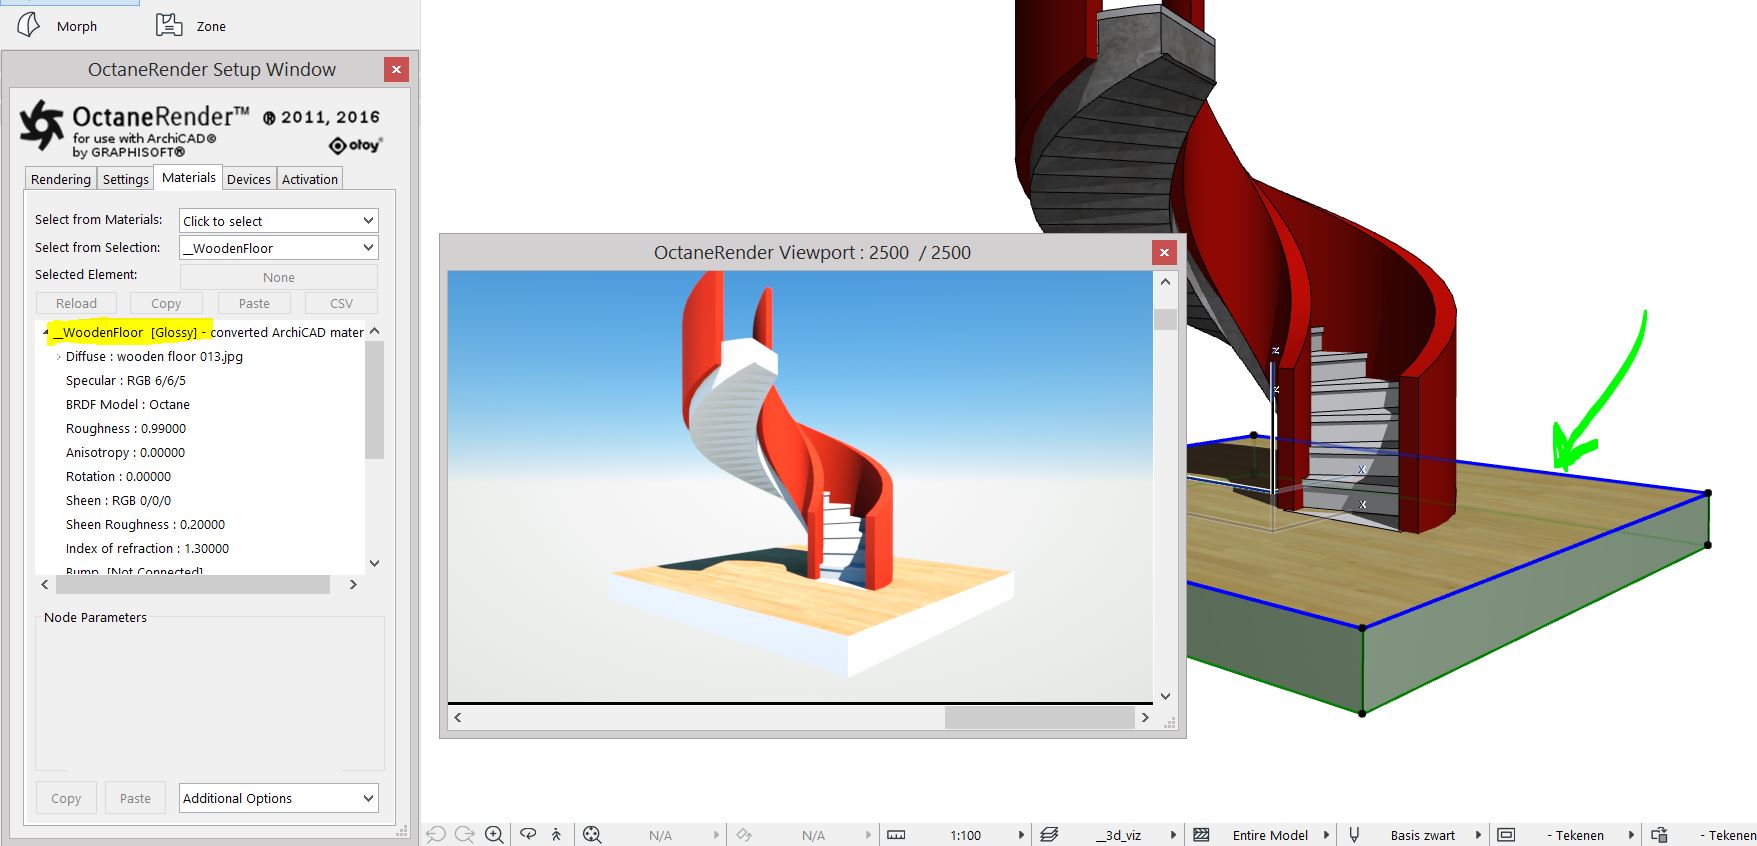
Figure 20: Select the ArchiCAD object to adjust the Octane Material assigned to it.
You can also use the ‘Select from Materials’ select box to edit Materials without selecting an Object.
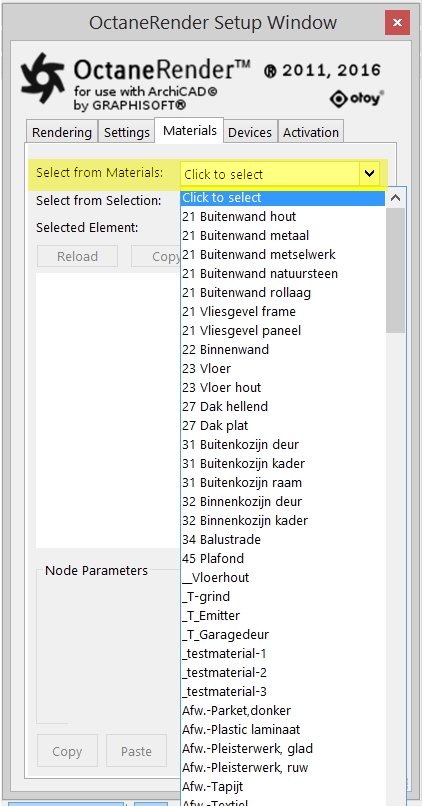
Figure 21: Selecting materials via the Materials tab under the OctaneRender Setup Window
A third option is to use the Material Picker (from the Tab ‘Rendering’) and to select a material via the OctaneRender Viewport (Figure 22). The Tab will automatically switch to the Materials Tab after picking a Material.
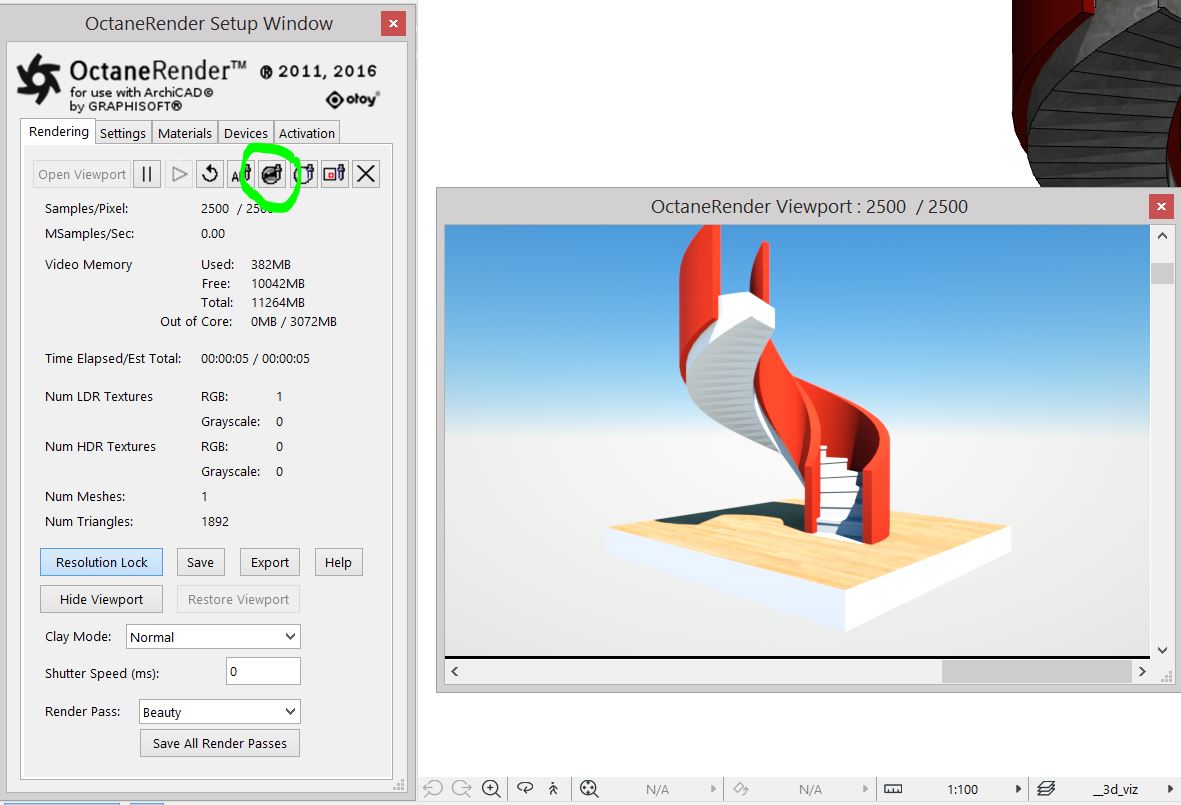
Figure 22: Enable the Material Picker
For more about complex materials, refer to the Materials and TexturesTextures are used to add details to a surface. Textures can be procedural or imported raster files. topics.
Under the Settings tab in the OctaneRender Setup Window, scroll and select ‘Camera’ to set camera attributes. For settings like the Field Of ViewThe area that is visible to a camera lens usually measured in millimeters. A wide angle lens provides a larger field of view and a telephoto lens provides a narrow field of view. (FOVThe area that is visible to a camera lens usually measured in millimeters. A wide angle lens provides a larger field of view and a telephoto lens provides a narrow field of view.) which are changed through the ArchiCAD interface, the Octane Camera node settings adjust accordingly.
Note: The ‘Roll angle’ of the ArchiCAD camera cannot be translated by the plugin.
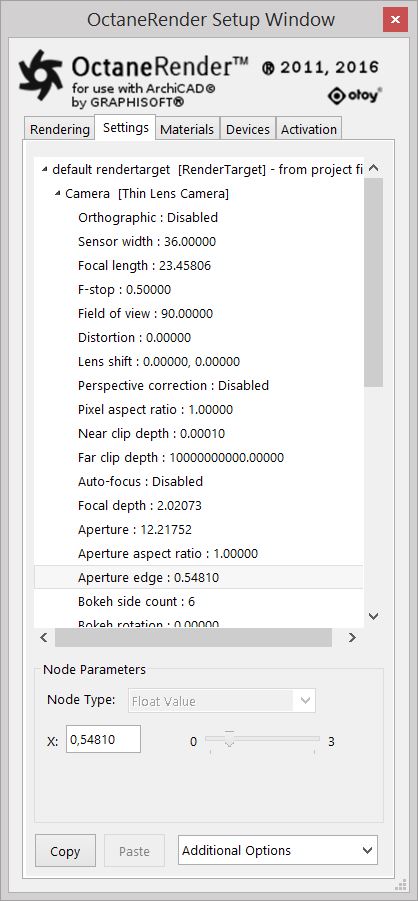
Figure 23: Camera attributes in OctaneRender Setup Window > Settings Tab
Enable the Auto Focus Picker from the Rendering tab to select a focus area in the OctaneRender Viewport. When the area is selected, the ApertureDetermines how much light enters a camera lens. A large aperture produces a narrow depth of field and a small aperture produces a wide depth of field. settings of the Octane Camera node is automatically adjusted. Figure 24 shows the rendered image with ‘Aperture’ settings set by selecting an area using the Auto Focus Picker.
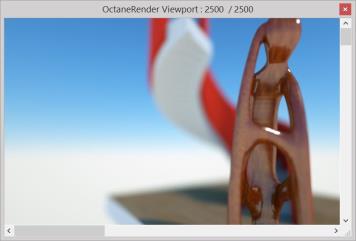
Figure 24: The Auto Focus Picker
Additional information regarding the Octane Cameras and their features, please refer to the Cameras topic.
There are four Kernel types under the Settings tab in the OctaneRender Setup Window. The default is Direct Lighting. Set the Max. Samples to render. This sets the maximum number of samples per pixel before the rendering process stops. The higher the number of samples per pixel, the cleaner the render. There is no rule as to how many samples per pixel are required for a good render, it is subjective and may vary depending on the content and complexity of the scene being rendered.
In Figure 25, the ‘Alpha channel’ is enabled so the saved png has a transparent background which makes adding custom background in postproduction easier.
Figure 25: An example of the Kernel settings with Alpha ChannelA greyscale image used to determine which areas of a texture map are opaque and which areas are transparent. enabled
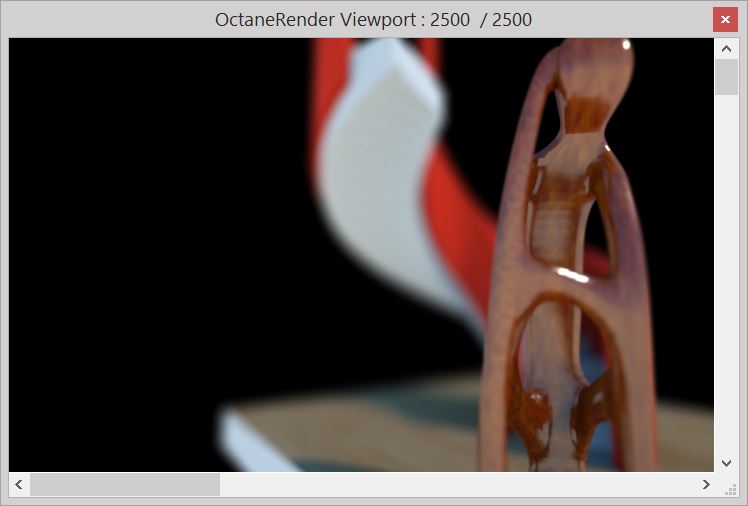
Figure 26: Example of a rendered image showing focused area.
For more information about each Render Kernel types and settings, refer to the Kernels topic.
Under the Settings tab in the OctaneRender Setup Window, scroll and select Film Settings to set the resolution of the final rendered image. You can also adjust the Max. Samples of the Kernel at this stage. The higher the number of samples per pixel, the cleaner the render.
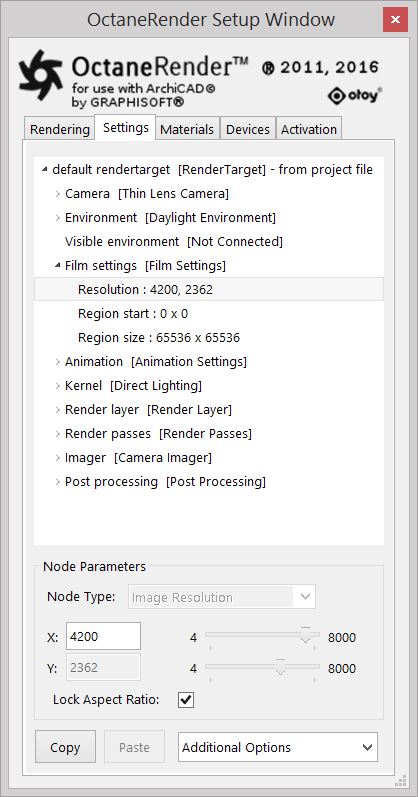
Figure 27: Set the Resolution for the final rendering
Figure 28: Adjust the maximum samples that the final image will be rendered up to.
When satisfied with all settings, you can start rendering the final image. While rendering you can enlarge the ‘Max. samples’. You can monitor the progress by Samples/Pixel rendered.
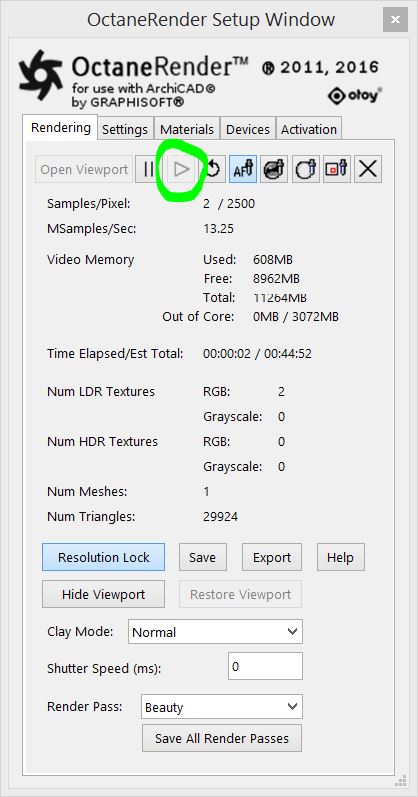
Figure 29: The Resume Render button in the OctaneRender Setup Window > Rendering tab
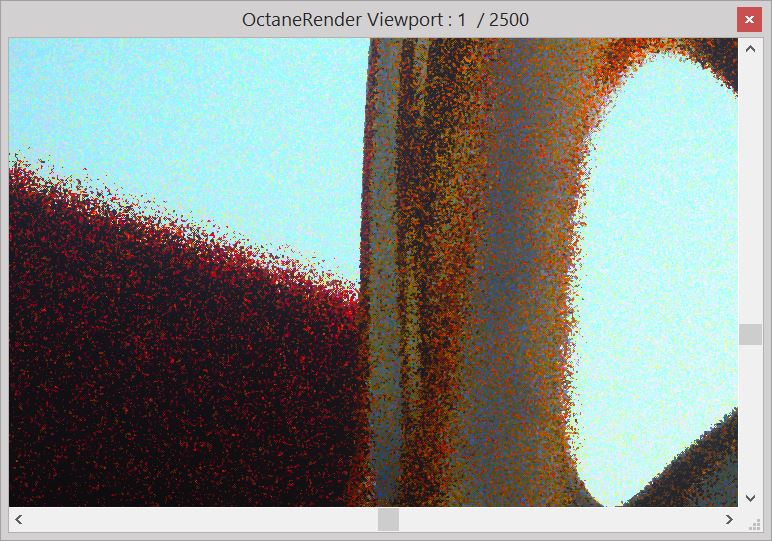
Figure 30: OctaneRender Viewport at 1 s/px

Figure 30: OctaneRender Viewport at 2500 s/px
Figure 29 and Figure 30 shows how the rendered image looks in the OctaneRender Viewport with the samples-per-pixels indicated at the start (1 sample) and the end (2500 samples) of the rendering.
Imager and Post processing features of the plugin are applied separately from the rendering process. Making adjustments through these features will not restart the render process, the effects however, are visible in the OctaneRender Viewport during and after the render process ends.
You can adjust Exposure and other features in the Imager settings. You can add Bloom and glare in the Post processing node.
You can adjust both node settings while rendering. The rendering will not stop, and the result will be shown in the OctaneRender Viewport while rendering.
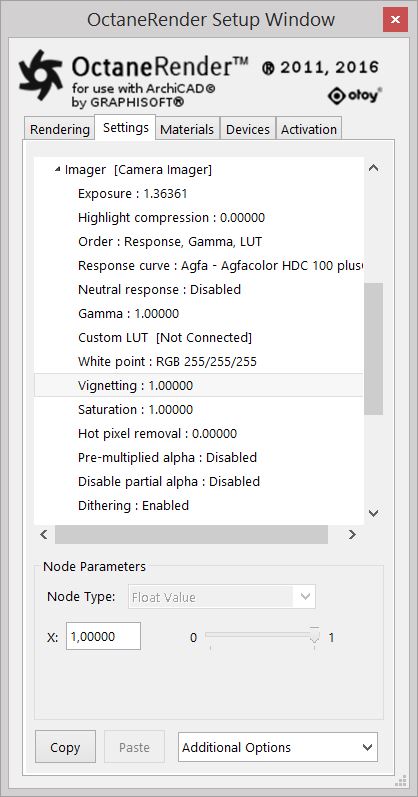
Figure 31: The Imager settings under the OctaneRender Setup Window > Settings tab
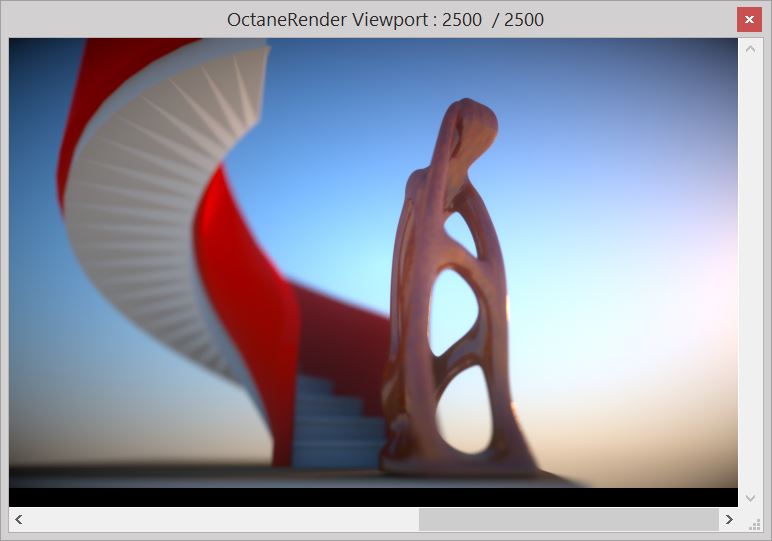
Figure 32: A rendered image Vignetting set to 1.0 in the Imager Settings of the plugin
You do not have to wait until all Max. samples are rendered. If you think your image is good enough and noise free, you can save your image to a folder by clicking the ‘Save’ button (Figure 33). The Rendering will continue, and you can stop rendering or wait until Max. samples are rendered and save the image again.

Figure 33: The Save button under the OctaneRender Setup Window > Settings tab
You can adjust your final render in post-production in Photoshop, Gimp or other software.
The Beauty Pass is enabled by default in the Render Passes. Rendering and saving more Render Passes is often useful for postproduction processes in the pipeline. For example, the Material ID can help you select certain parts of the rendered image when these are being processed using another application (i.e. compositing software). You can enable the Render Passes in the Settings Tab and then select them in the Rendering Tab for Saving the image.

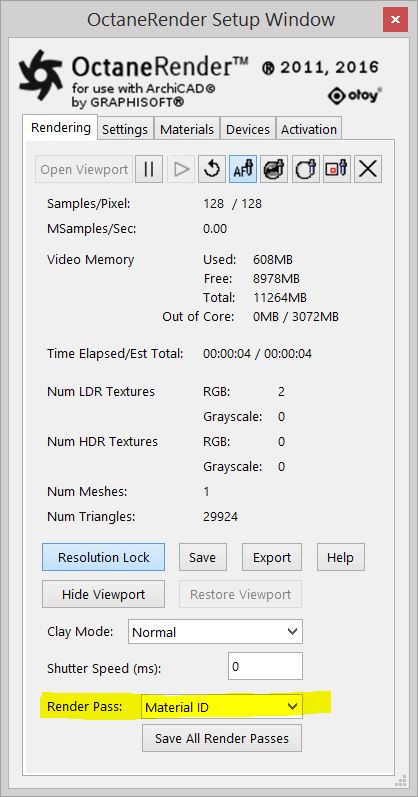
Figure 34: Selecting the pass through the Rendering tab for output
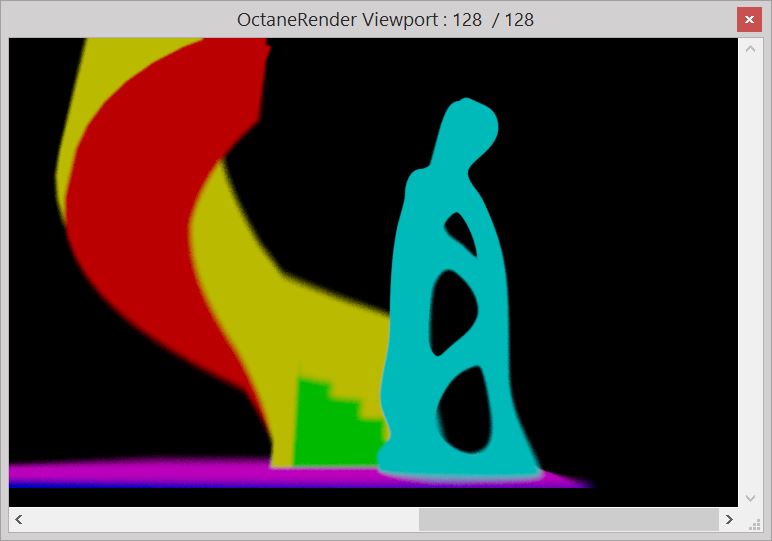
Figure 35: A rendering of the ‘Material ID’pass.
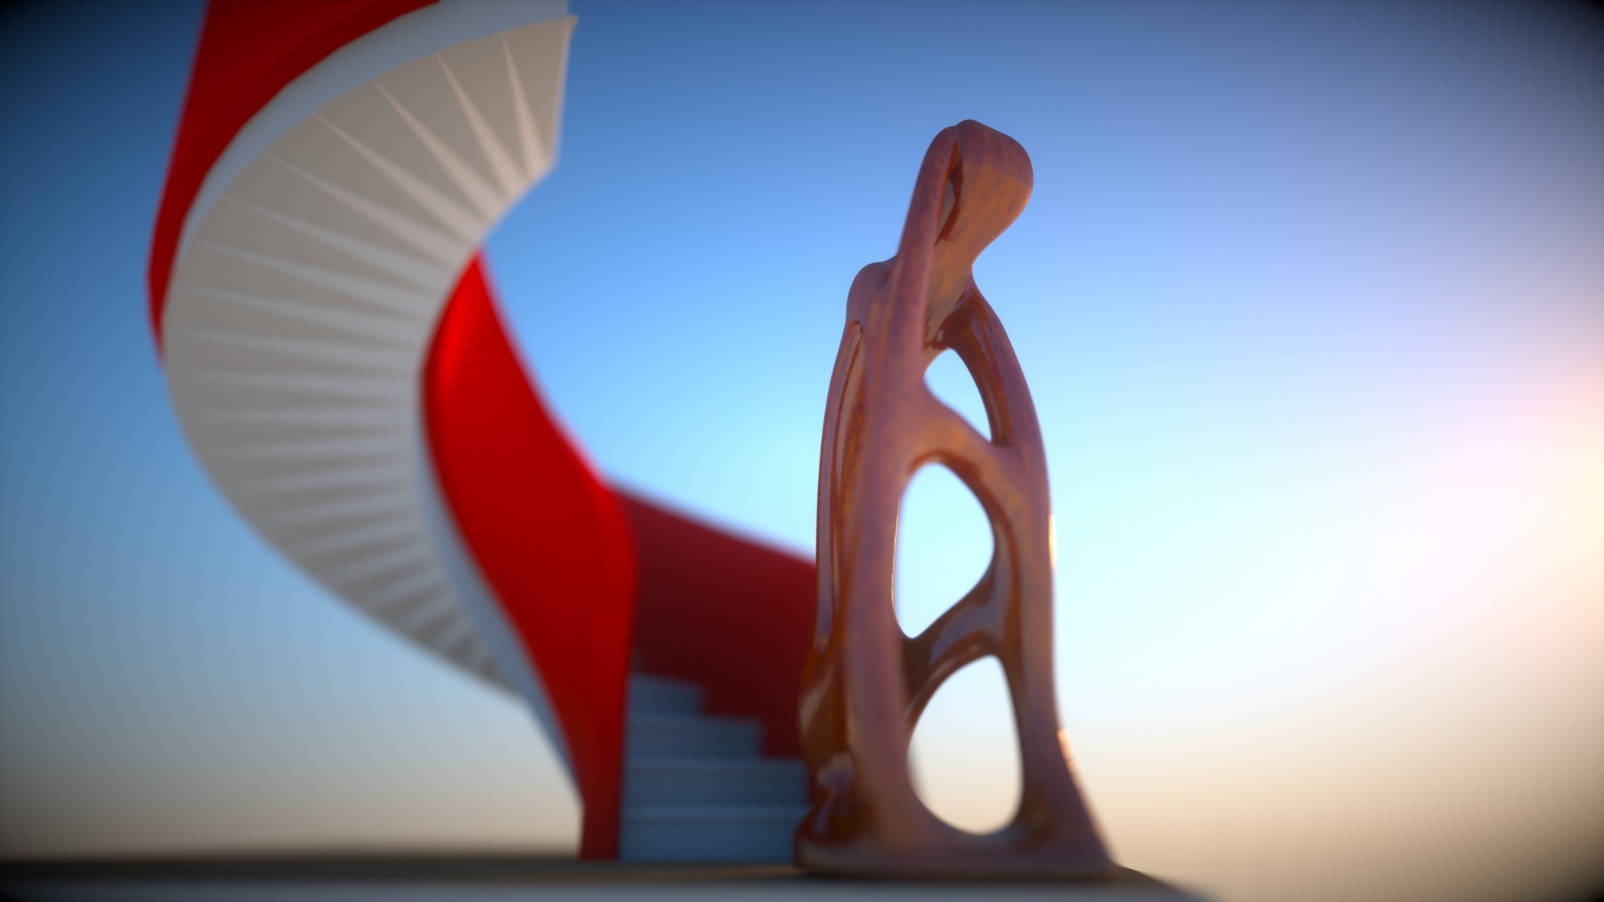
Figure 36: Image rendered with Daylight Environment.
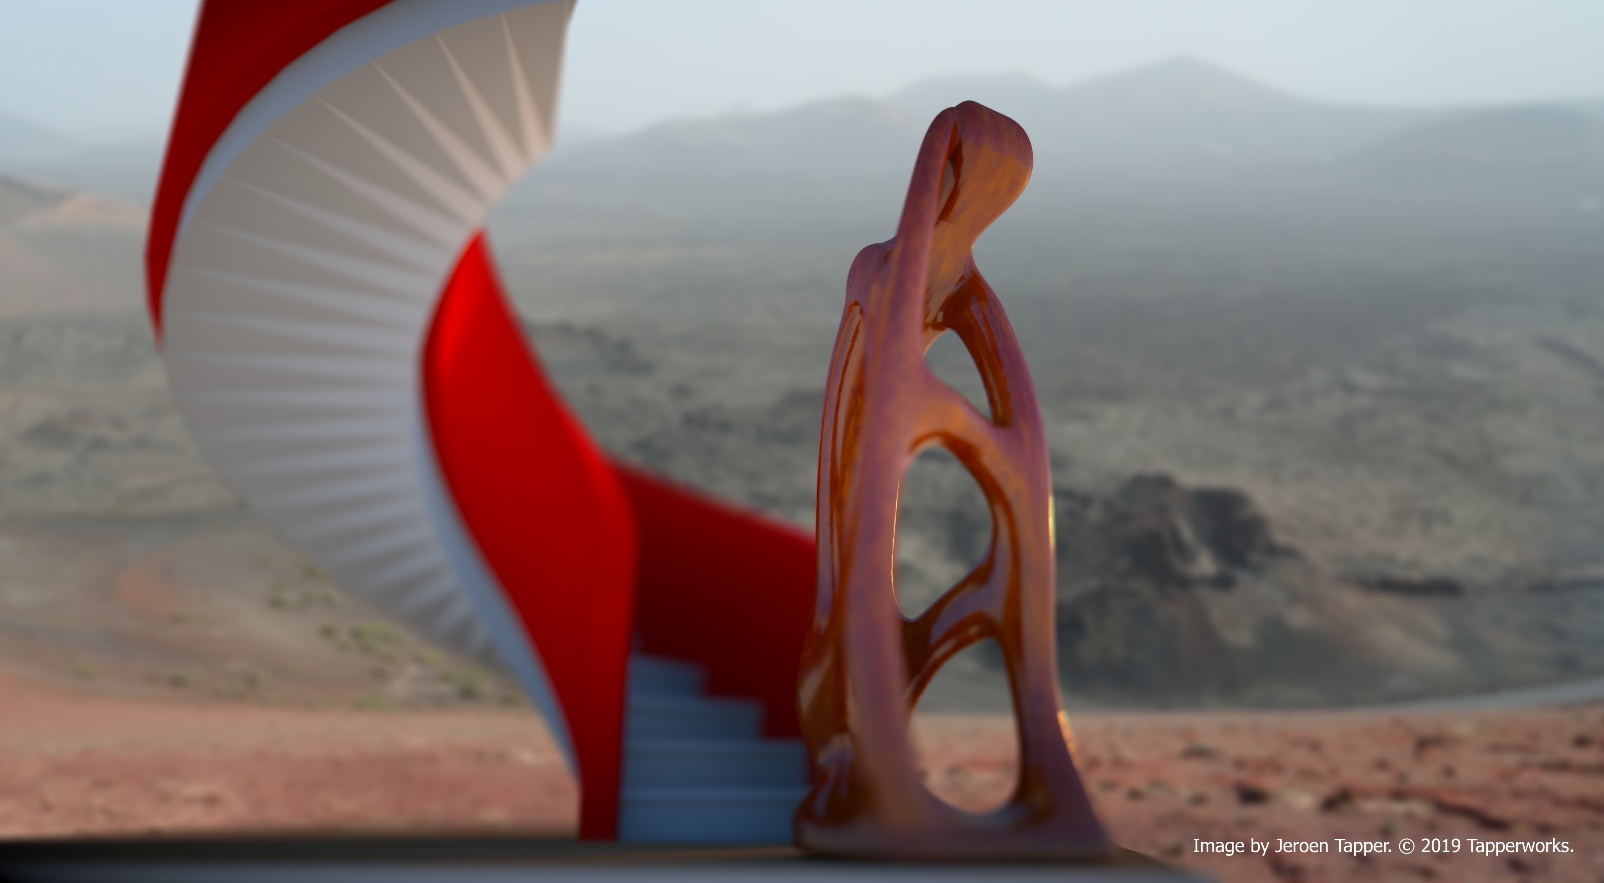
Figure 37: Image rendered with the ‘Alpha channel’ enabled and then a background was added in postproduction.