The Packager and the ORBX File
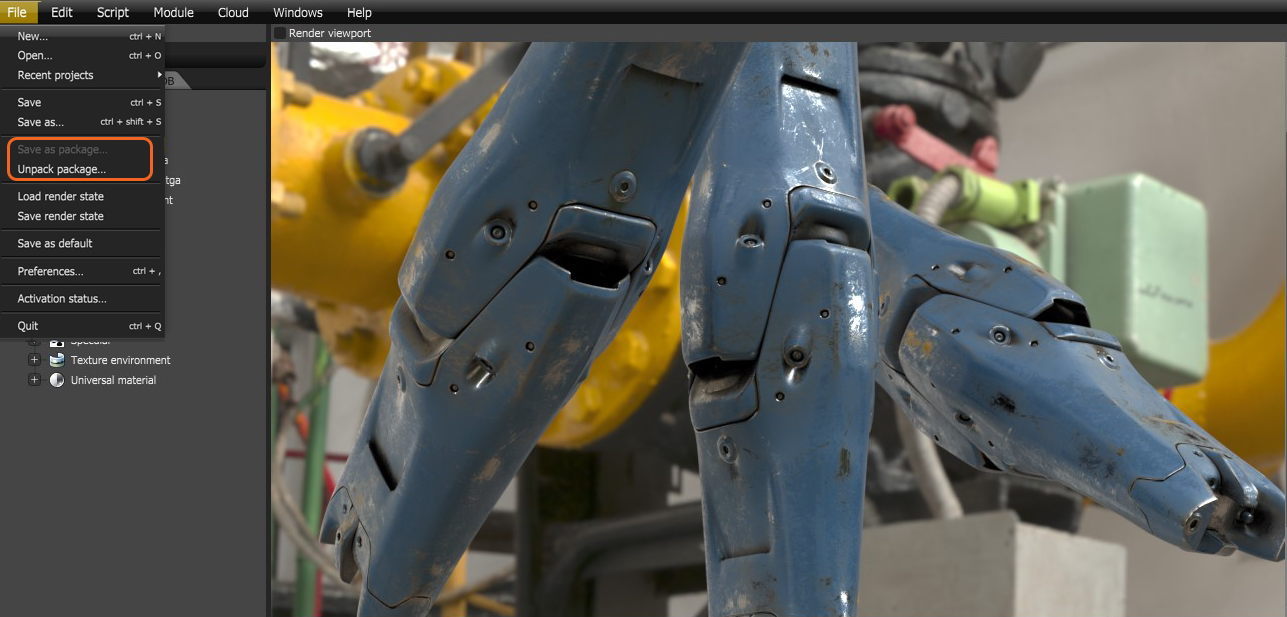
ORBX® packages can be created and unpacked from the File menu (Figure 1).
|
|
saving orbx package
|
Figure 1: Saving the Node Graph as an ORBX package
The packager stores selected Node Graphs into an ORBX archive. The node graph can be an entire scene, an individual material or texture node setup, or a group of selected nodes. The ORBX archive is not compressed, so the files can get large.
Creating A Node Graph And Storing It As A Package
To create a Node Graph:
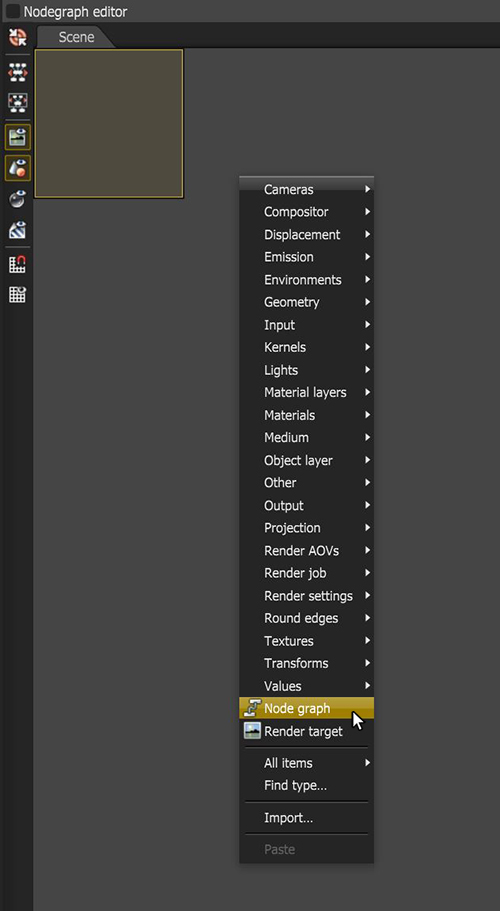
- Right-click on the Node Graph Editor and click on Node Graph.
|
|
creating a node graph
|
Figure 2: The Node Graph option
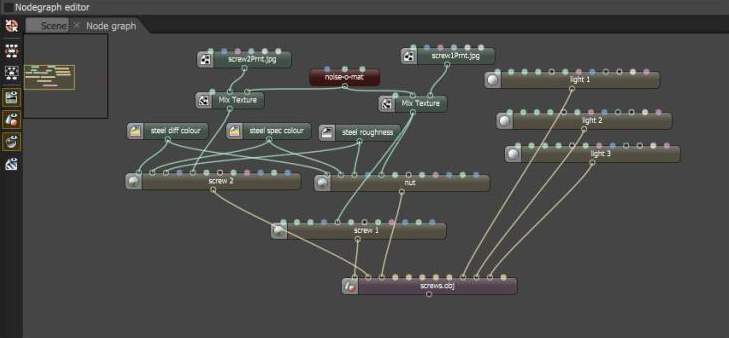
- Build the scene inside the Node Graph Editor by double-clicking the Node Graph node to open up the new tab labeled Node Graph. Build the scene on the Node Graph within this tab. Figure 3 shows the Node Graph of the screws scene shown in Figure 1. You can rename the Node Graph by selecting it and double-clicking on its label in the Node Inspector, then entering a descriptive name. The Node Graph you want to package can contain any type of OctaneRender® node or Node Graph.
|
|
node graph layout
|
Figure 3: The node graph for the screws scene is built within the Node Graph tab
- When you want to export the Node Graph, click on the File menu, then click Save As Package. Use the dialog box to select where you want to store the ORBX file on your local drive.
- You can save all types of nodes and node groups to the hard disk as packages, including the connections between them. The packaged Node Graph can be an entire scene made up of connected Nodes, or a lighting setup that you'd like to use in other OctaneRender scenes, or your favorite OctaneRender materials. You can also combine Nodes and create a Node Graph node by selecting the Nodes to group in the Nodegraph Editor, then right-click on one of the selected nodes and click on Group Items.


