Vertex Map
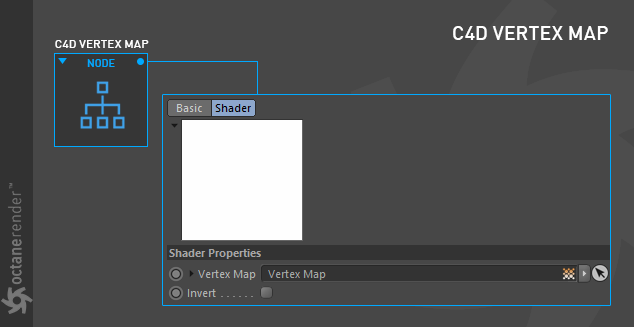
The Vertex Map node is for using vertex maps to create texture effects or using restriction for deformation objects. This node is reliant upon the Cinema 4D vertex map feature, described here.
|
IMPORTANT This node directly uses vertex maps; if you build materials directly with this node, these materials cannot be copied to other scenes with the vertex map included. Instead, use the Attribute node, discussed here, to reference the location of the vertex map instead. |
How to Use
Below you will see a few examples of using Vertex Map with Octane. You can download and examine all the scenes from here
Simple Usage for Texturing
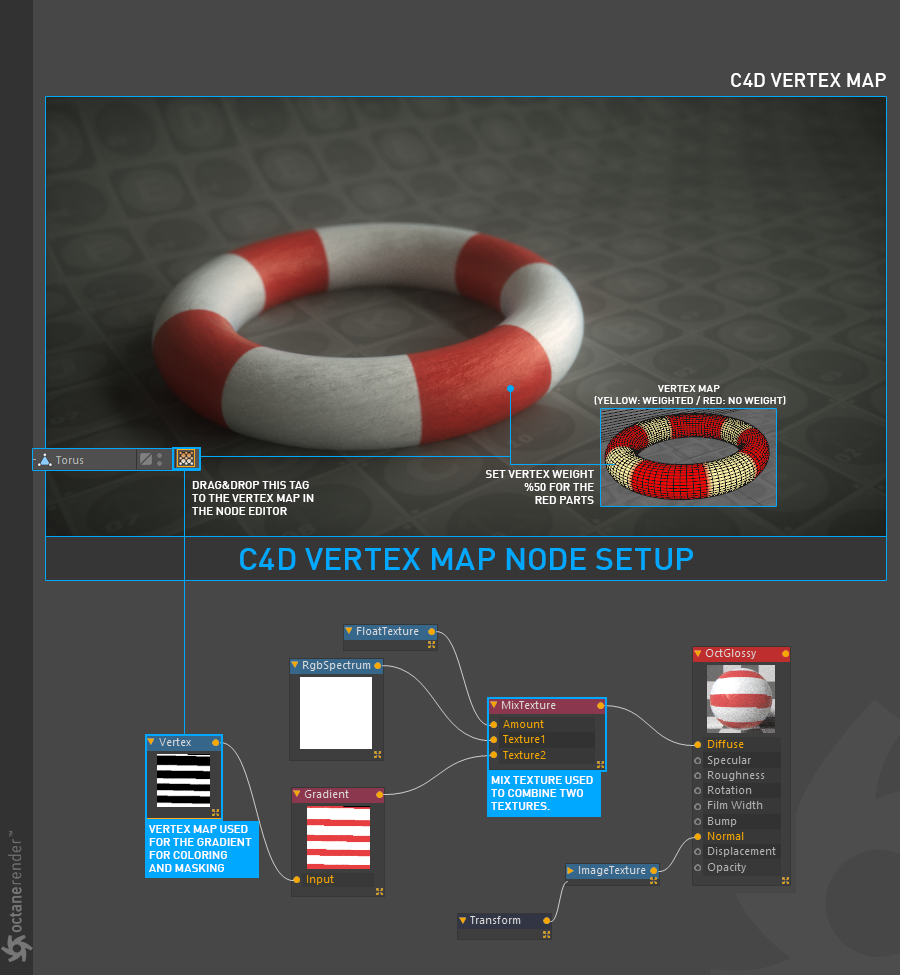
Open the Node Editor and prepare the setup as seen in the image below. Here, a vertex map has been prepared for portions of the Torus object, and the associated vertex tag appears in the Object Manager. This tag is then assigned to the Vertex Map node in the Node Editor.
Vertex Map on Octane Scatter with Random Effector
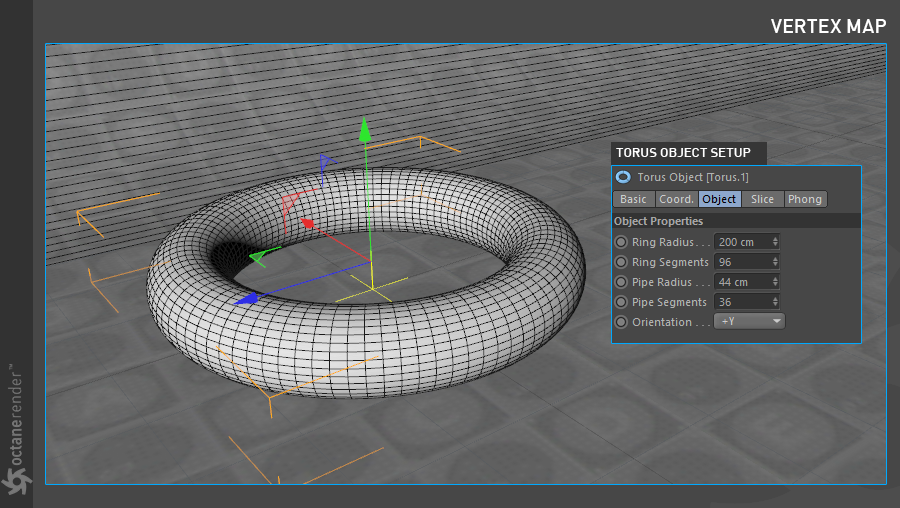
1- Create a "Torus" object and change the options as shown in the image below.
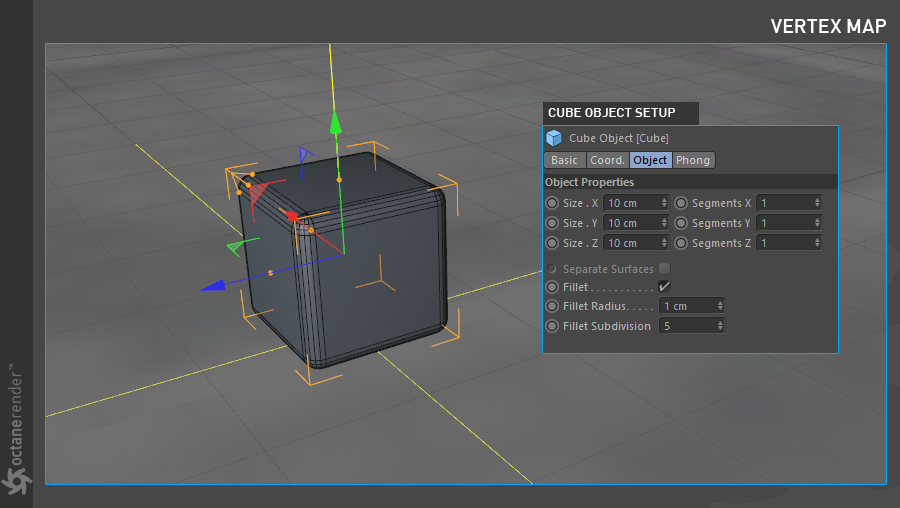
2- Then create a "Cube" object and change the options as shown in the image below.
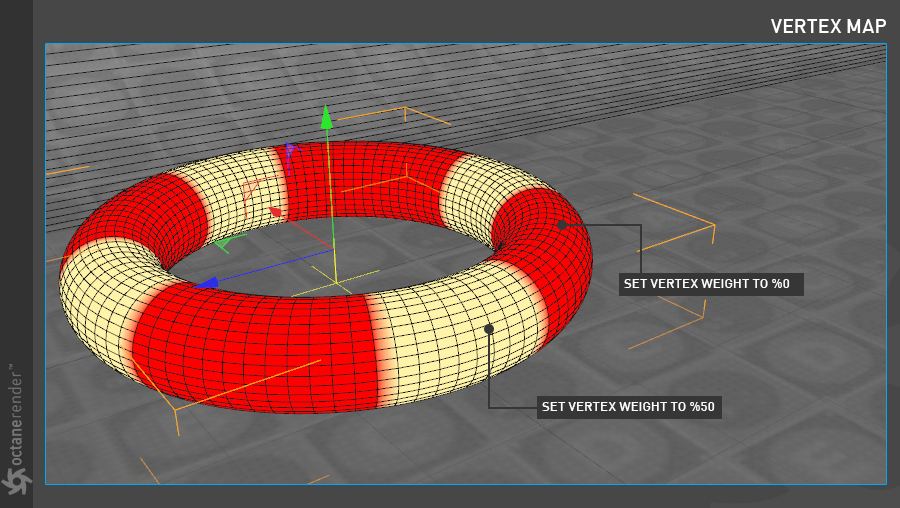
3- Create a vertex map for the Torus object as in the image below. A Vertex tag will appear next to the Torus object in the Object Manager. We will use this tag in Octane Scatter Object.
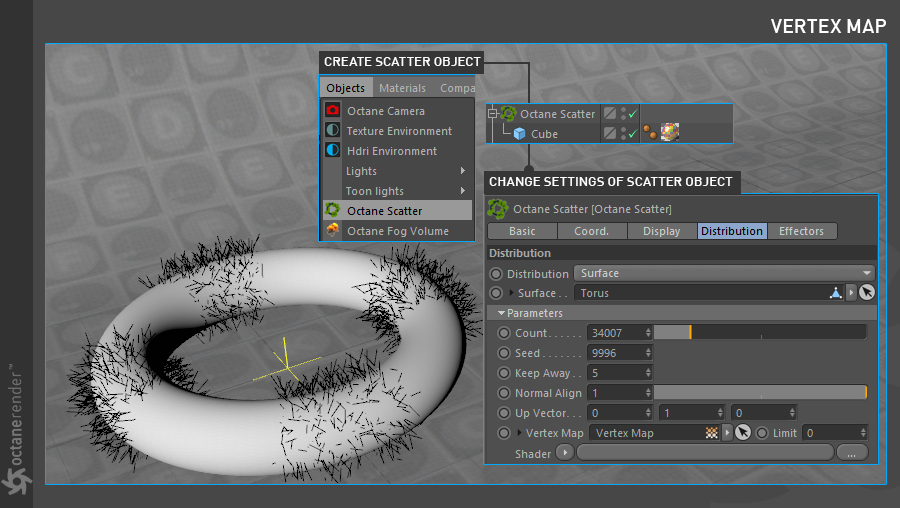
4- Create a "Scatter Object" from the Octane Live Viewer menu. Create a Cube and make the Cube object a child of the scatter object. Then select Scatter Object and change the settings as you see in the image below. Drag and drop the torus object into the surface slot of the Octane Scatter object. Drag and drop the Vertex tag into the "Vertex Map" area.
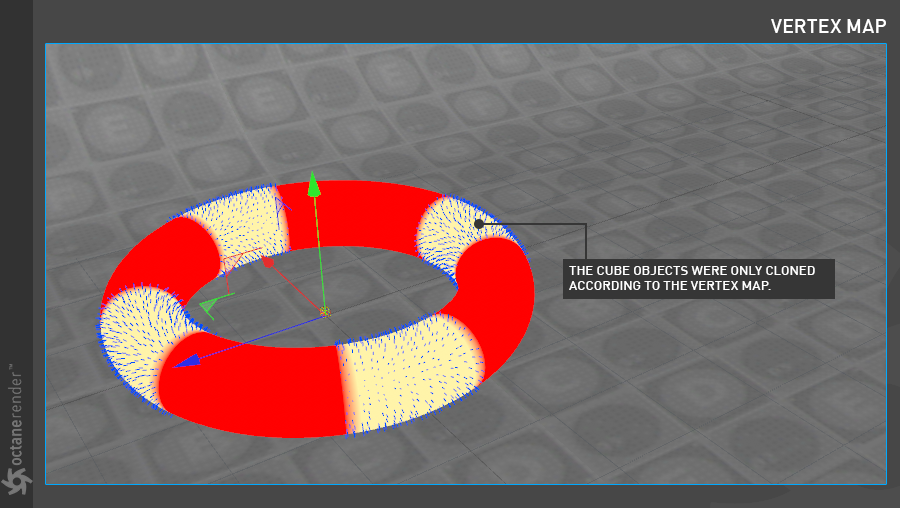
5- You can see in the image below the Vertex Map tag that you have defined, with the clones distributed across the surface of the Torus according to the vertex map. The Scatter object will clone the cube objects in the yellow regions. In this image, the clones are drawn as lines to conserve resources and improve interactive performance.
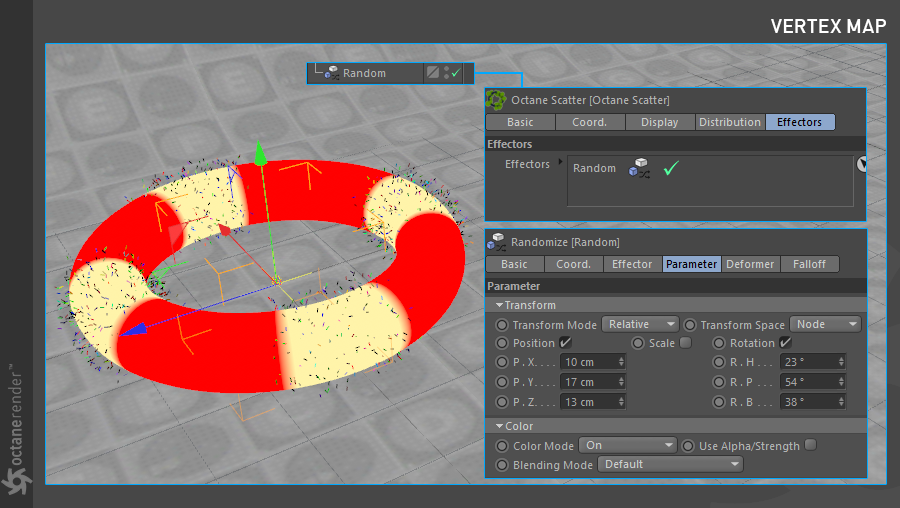
6- Use the "Random Effector" to generate some variation to the clones. Create a Random Effector from the Cinema 4D Mograph menu and drag and drop this effector into the "Effectors" section of the Octane Scatter object. This section allows you to define any Effector on the Scatter object. Change the settings you see in the picture below for the Random Effector.
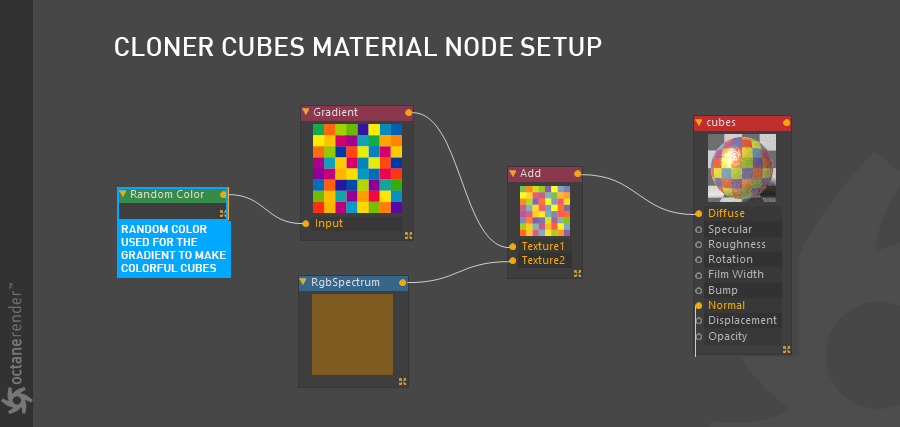
7- Create and assign a material to the clone cubes. Open the Node Editor for this and prepare the setup as you see below. After completing the setup, assign the material to the cube object.
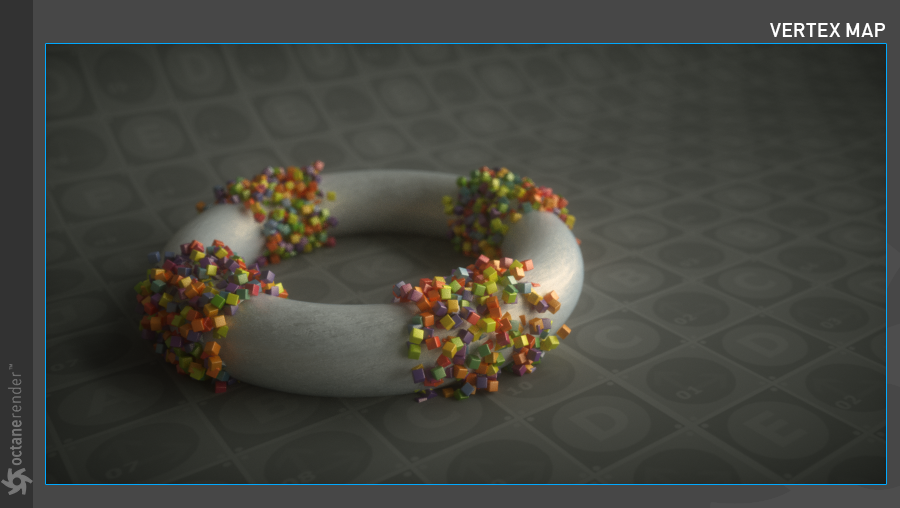
8- Run the Live Viewer. You should see a render like the image below. Of course other cosmetic factors (Lights, colors, post process etc.) may need to be created according to your own taste. As you can see, with the vertex map we have defined in the octane scatter object, the cubes have only been cloned according to the vertex map. You can easily use this technique in many scenarios.
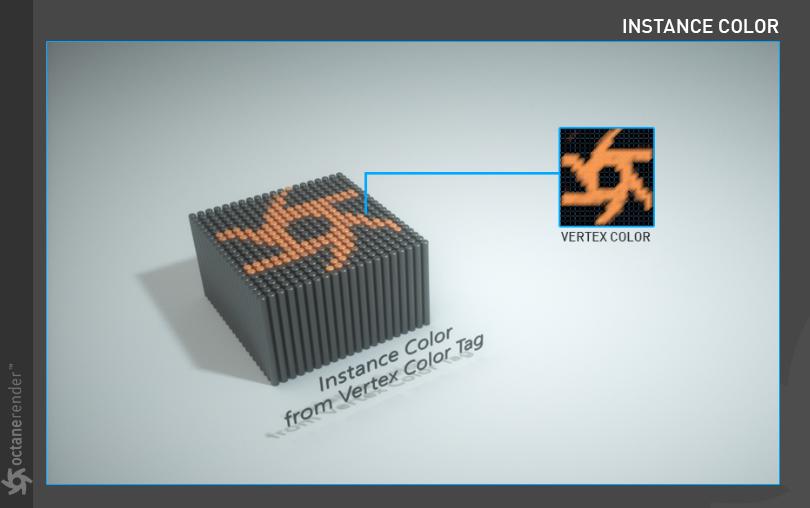
Instance Color from Vertex Color
This option has been discussed in detail in the "Instance Color" section.