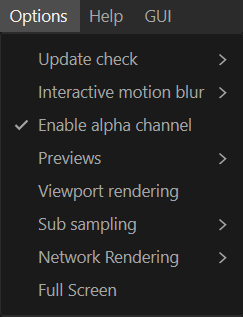
Options Menu
The Options Menu offers a variety of settings for working with Live Viewer:
|
|
Options Menu
|

Update Check
The Update Check sub-menu can be used to enable/disable certain element updates which affect Live Viewer performance (active items are preceded by a "✓" character). The menu contains the following items (keyboard shortcuts are listed next to each item):
|
|
Object Layer Color
|


Hold Updates — this option will prevent updates to Live Viewer on a global basis, if enabled (defaults to OFF).
Camera — when enabled, the viewing camera will immediately update the Live Viewer as the camera is modified (defaults to ON).
Materials — when enabled, materials will update in the Live Viewer if an Octane material is modified (defaults to ON).
Lights — the Live Viewer will update as any Octane Lights are modified (defaults to ON).
Geometry — the Live Viewer will immediately update when objects with Octane Object tags are modified. Objects without the Octane Object tag will not be drawn at all when this option is enabled (defaults to OFF).
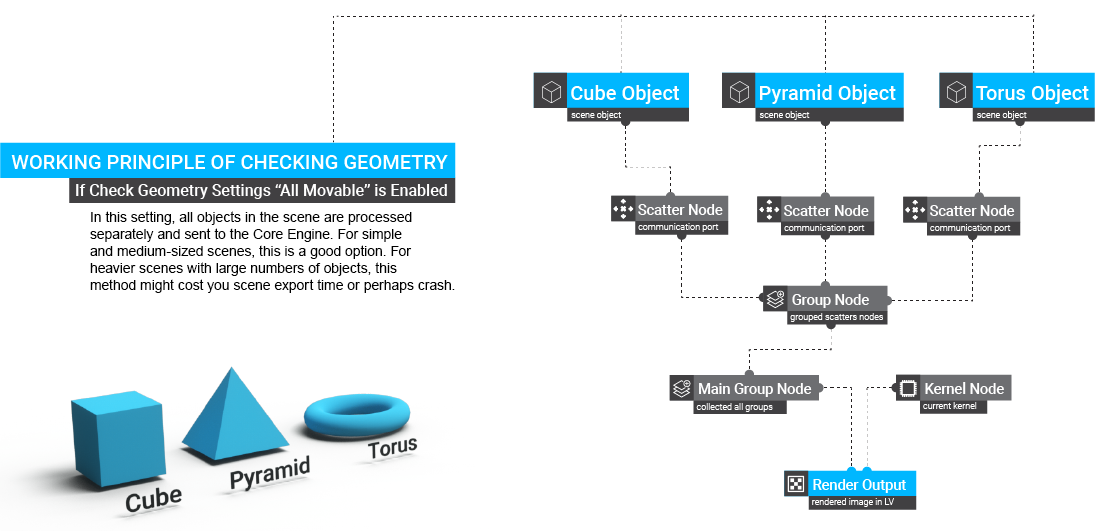
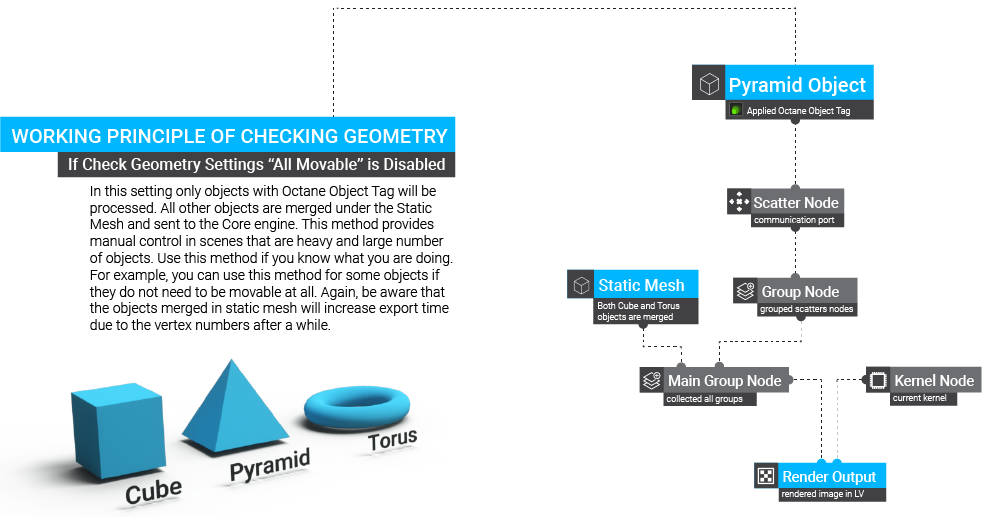
All Geometry Movable — Review the diagrams below to understand how this mechanism works (defaults to ON).
Check Paint Textures — When this option is active, any paint/texture action you make in the Body paint, Polygon paint or Vertex paint of Cinema 4D (or other 3rd party texture painting tools) will be reflected in the Live Viewer real time (defaults to OFF).
Interactive Motion Blur
The Interactive Motion Blur sub-menu is used to enable or disable the display of motion blur in the Live Viewer menu, per object type. The options are listed below:
|
|
interactive motion blur
|

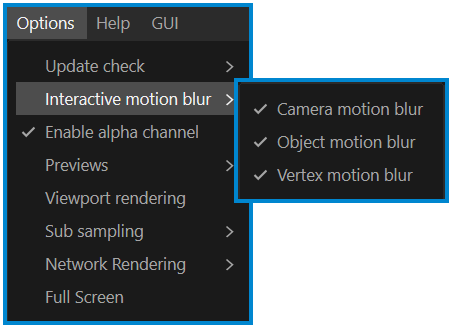
Camera Motion Blur — this option controls the display of camera motion blur in the Live Viewer (defaults to ON).\
Object Motion Blur — this option controls the display of object motion blur in the Live Viewer (defaults to ON).
Vertex Motion Blur — this option controls the display of vertex motion blur (deformations) in the Live Viewer (defaults to ON).
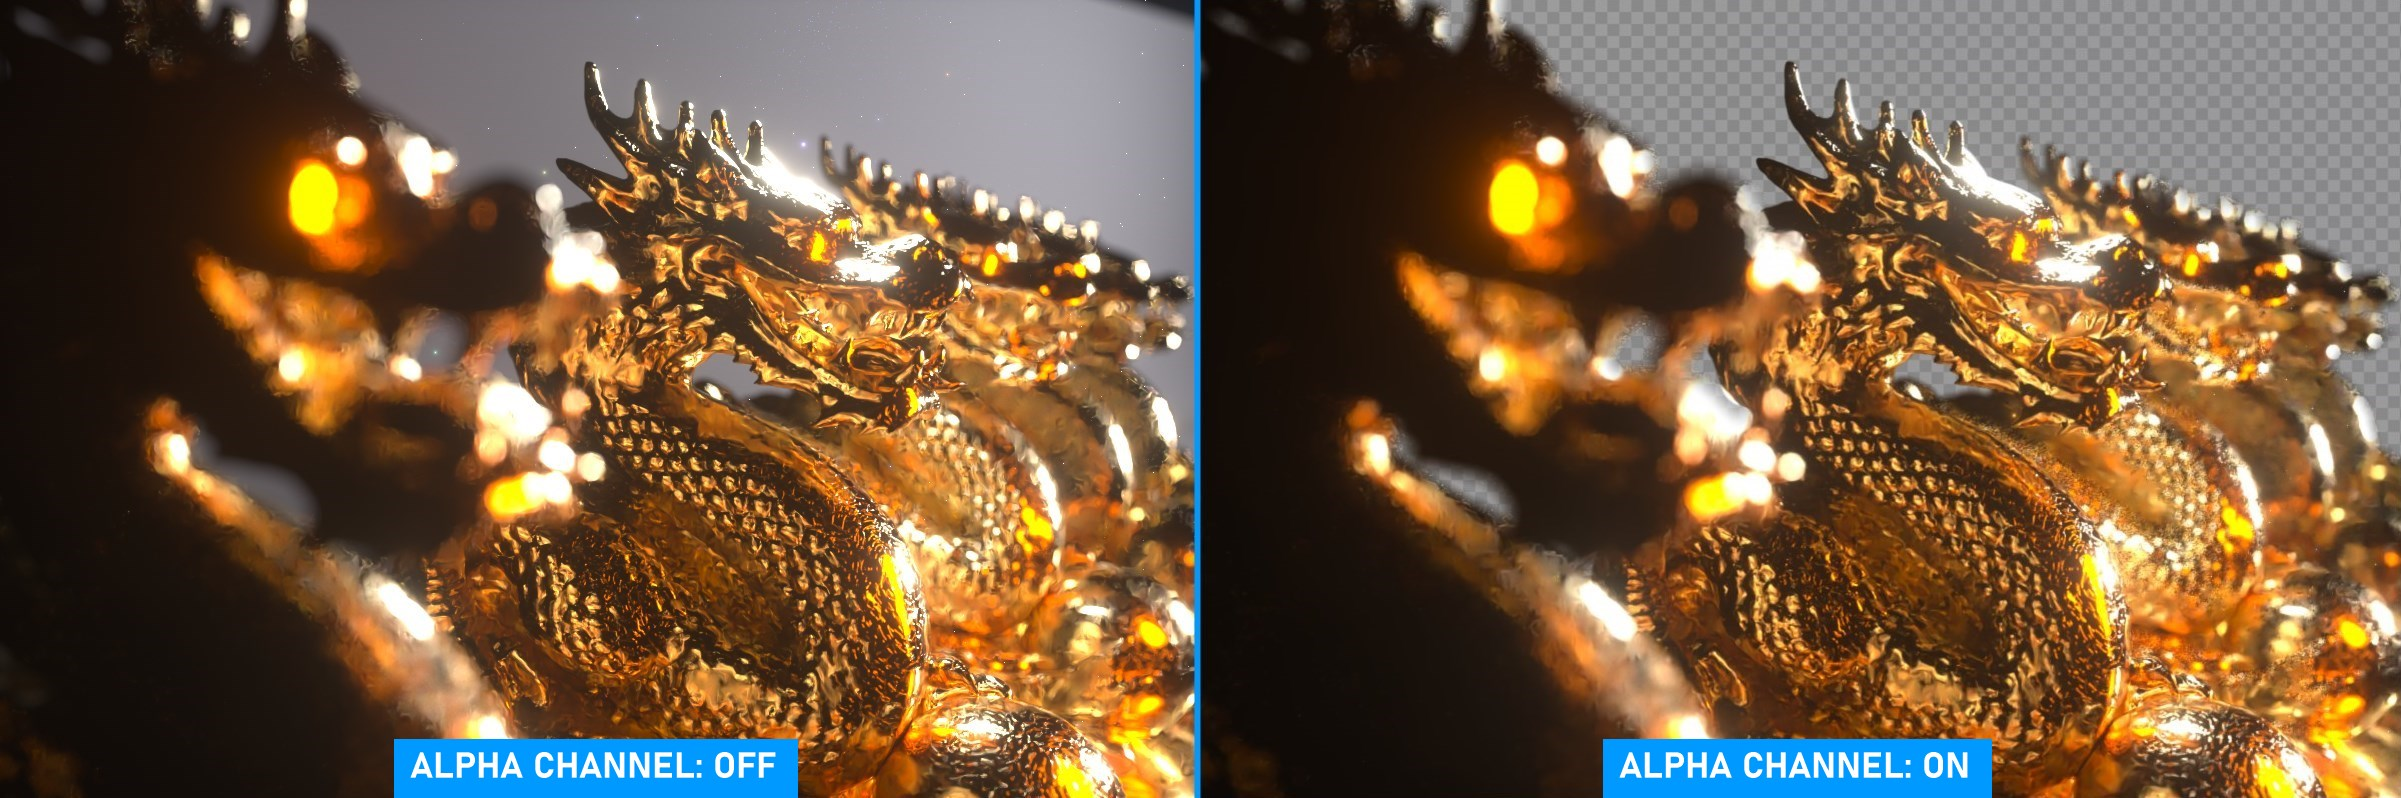
Enable Alpha Channel
This option controls the display of the Alpha channel in the Live Viewer. Requires enabling Live Viewer Settings > Kernels > Alpha Channel. Defaults to ON.
|
|
alpha CHANNEL DISPLAY
|

Previews
The Previews sub-menu determines if Materials are going to be updated in the 3D Views and Cinema 4D windows.
|
|
previews
|

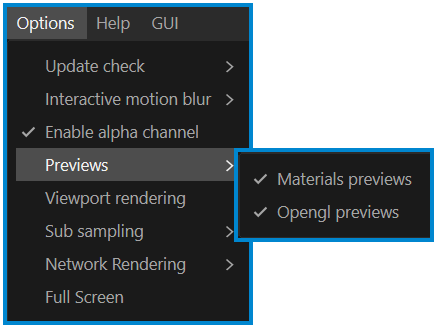
Materials Previews — this option controls the preview generation and display of Octane materials in the Cinema 4D windows and panels such as the Attribute manager (defaults to ON).
OpenGL Previews — this option controls the preview generation and display of Octane materials in the 3D viewports (defaults to ON).
Viewport Rendering
Viewport rendering enables or disables the Live Viewer display in the Cinema 4D viewport (as opposed to the Live Viewer window). This option defaults to OFF.
Sub-Sampling
The Sub-sampling sub-menu controls the amount of sub-sampling in the Live Viewer display. This option can provide smoother scene interaction by reducing the render resolution when navigating within the scene, creating a pixelated preview effect. Once navigation ceases, the display returns to full resolution. The options are discussed below:
|
|
sub-sampling
|


None — The Live Viewer display will be minimally sampled at 1x1 during navigation (defaults to ON).
2x2 Sub-sampling — this option uses 2x2 sub-sampling during navigation (defaults to OFF).
4x4 Sub-sampling — this option uses 4x4 sub-sampling during navigation (defaults to OFF).
Network Rendering
The Network Rendering menu is used to enable/disable and manage network rendering. The options are described below:
|
|
network rendering
|


Enabled — this option enables network rendering (defaults to OFF).
Settings — this option will present the OctaneRender Network Preferences dialog as it would appear in the Octane Standalone application. For more information on network rendering with Octane, see the Network Rendering topic.
Full Screen
The Full Screen option will close down the Live Viewer and ask you to restart it. Upon restart of Live Viewer, the menus associated with Live Viewer will not be visible, and that portion of the Live Viewer window will instead be used to provide a larger image size. Several of the menu item options are available as right-click context menus.
To return to normal Live Viewer behavior, go to the Octane item in the Cinema 4D main menu bar and choose Octane Dialog or Octane Live Viewer and follow the prompts.