Make a Spotlight
Unlike current versions of OctaneRender®, older versions of Octane did not include a spotlight by default — but there were ways to make your own. This technique is useful both for spotlights and other things, and so it is included for reference purposes. Download the example scene from here.
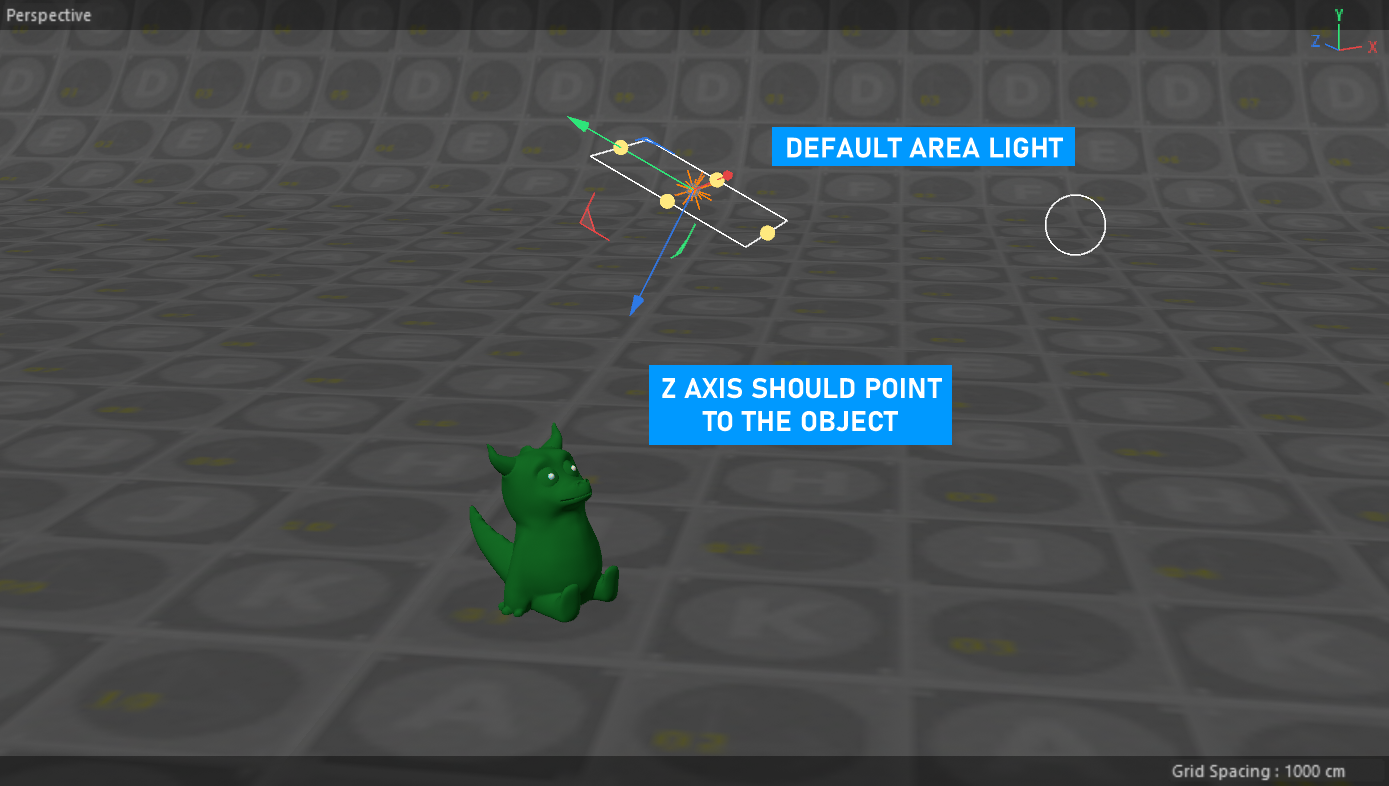
1- Open the scene from the link provided. Create a light by selecting Objects > Lights > Octane Area Light from the Live Viewer menu. Place this light somewhere above your subject and rotate the Z axis towards the object.
|
|
create the area light
|

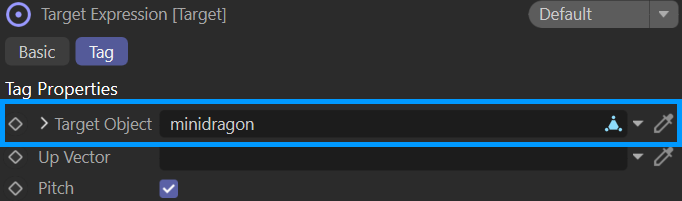
2- With the light selected in the Object manager, choose Cinema4D Tags > Target with the right mouse button. Go to the Target tag and drag and drop the desired object into the Target Object field. This option will lock the orientation of the light to a fixed point when it is moved.
|
|
set object as target
|

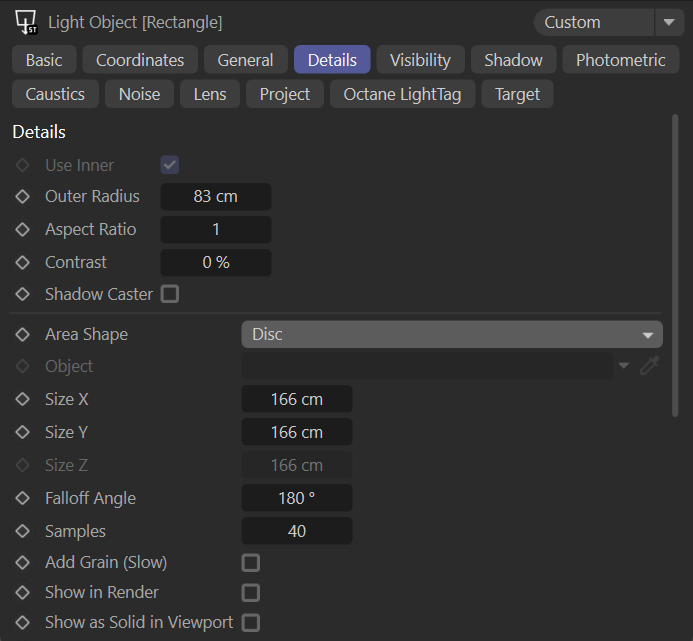
3- From the Object Manager, select the light and go to the Details tab. Change Area Shape to Disc.
|
|
set area shape to disc
|

4- Now select Octane Light tag. We will create a spotlight by defining a procedural texture in the Distribution section. For this, assign an Octane Gradient or a Cinema 4D gradient to the Distribution channel. Change the options as you see in the image below.
|
|
distribution channel settings
|

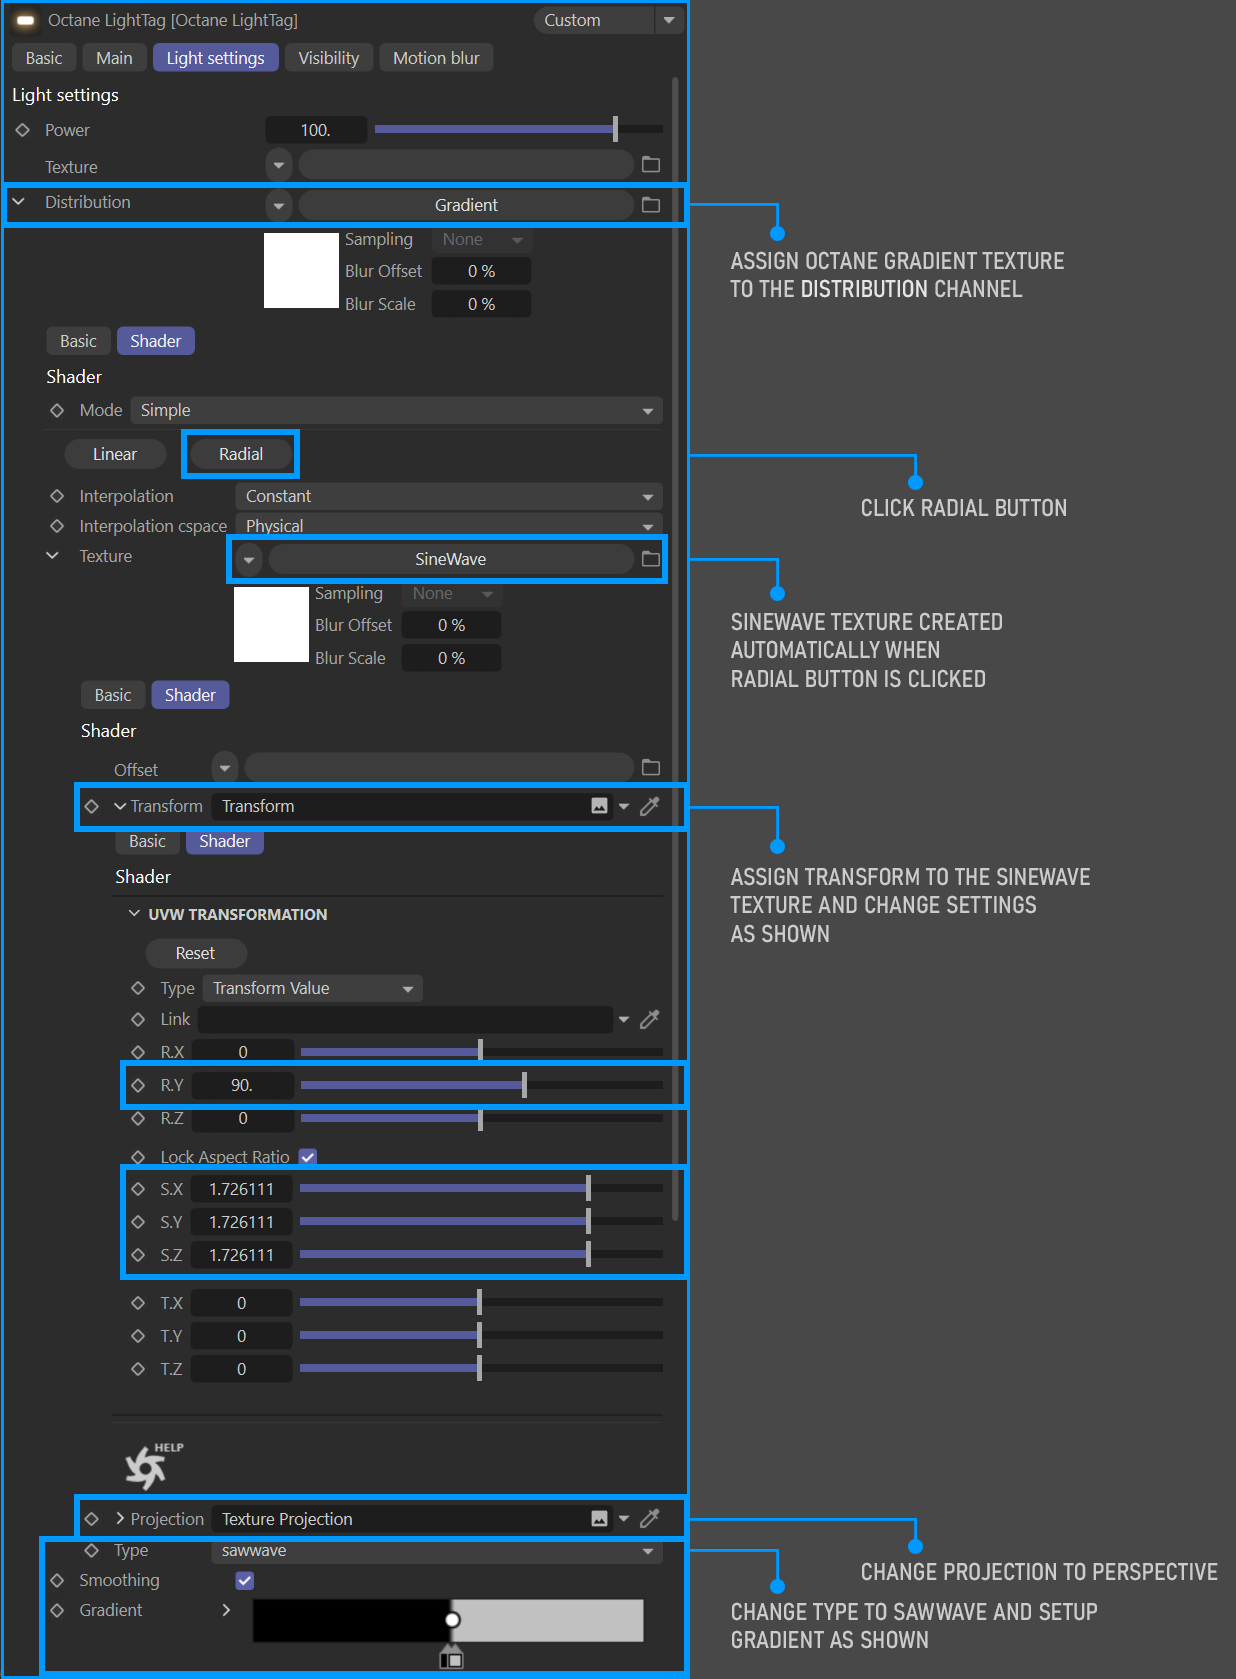
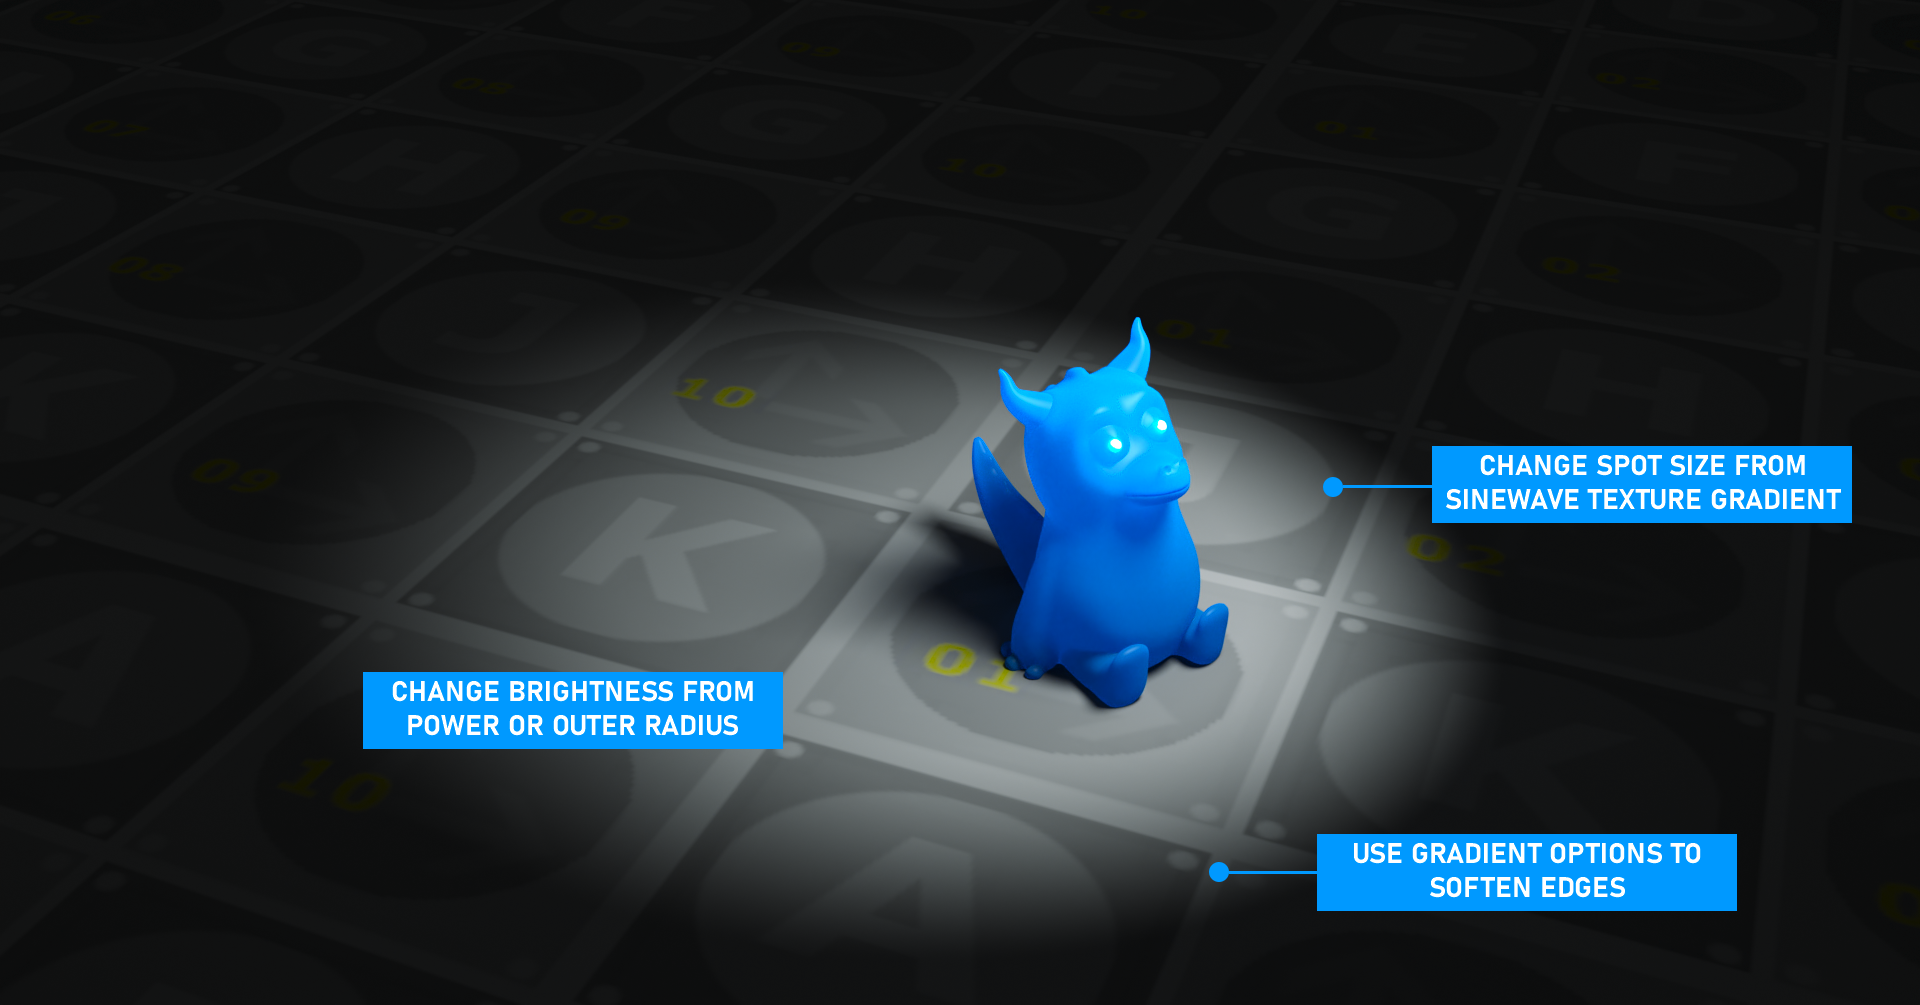
5- The custom-made Octane spotlight is now ready. The spotlight was easily created with the gradient texture defined in Distribution channel (a grayscale image in the Image Texture node can be used instead of the gradient, though at a loss of some control.) The brightness of the spotlight can be adjusted by using the Power attribute from Light settings. The same can be done by selecting the light from the object manager and adjusting the Outer Radius from the details tab. Adjust the edge softness of the spot by playing with the position of the gradient colors.
|
|
spotlight
|