Make a Light Projector
This topic will explore the combination of an Octane Area Light and Texture Environment and, alternatively, using Analytic Light Beams to create an old-style movie projector and screen, much like you would have seen back before large format LED monitors became available. The area light will project the image onto the screen, just like in the old days. Either the Texture Environment or the Analytic Light option will create the light beams coming from the projector lens to be visible. The Texture Environment will use a volumetric volume for the light beam, while the Analytic Option in the Area Light will create the light beams as a real-time Post Effect (by enabling the Post Volume in the Octane Camera tag). Both methods have strengths and weaknesses and slightly differ from each other in appearance.
This topic discusses the creation of a custom-made Projection Light in OctaneRender®. There are two sample scenes to download from here.
|
INFO This example scene contains a projection screen object with a retro-reflector material applied, as in the same manner as actual projection screens are made. This material was graciously supplied by Raphael Rau, AKA Silverwing (www.silverwing-vfx.de). A tutorial for this material is viewable here. |
The Basic Setup
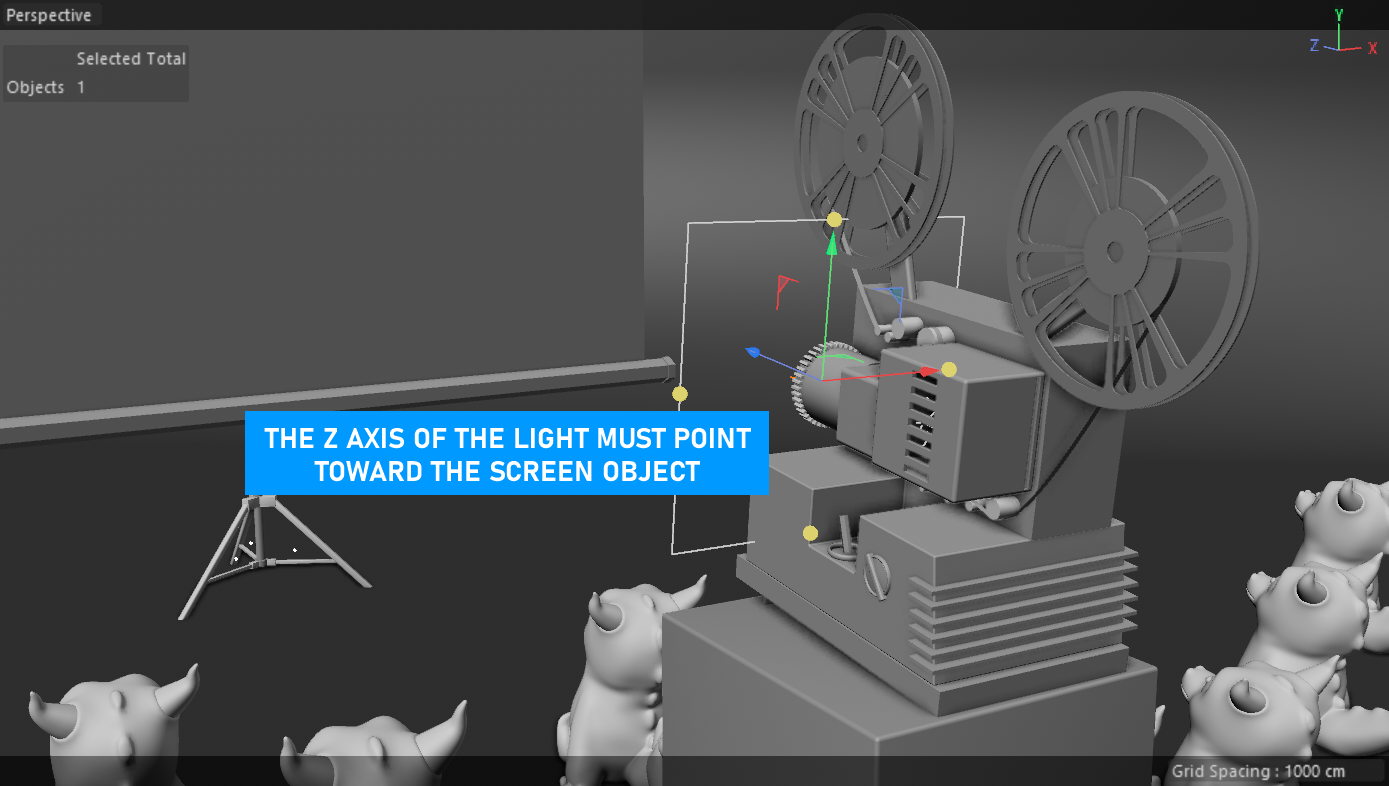
1- Open the scene. Create an Area Light from Live Viewer > Objects > Lights > Octane Targeted Area Light. In the Object Manager, drag the light under the Lens object, making it a child of the Lens. In any 3D view, right click and choose Reset Transform. This action will locate the light to the same position as the Projector Lens object. Select the Target tag for the Targeted Area Light and assign the Screen Surface object to the Target Object slot. This will align the light so that it is pointing towards the front surface of the projection screen. This light is used to project the image(s) onto the screen.
|
|
light projection — set up
|

2- Time to load in the projection image — select the Light Tag of the Octane Area Light in the Object Manager. Add an Octane ImageTexture node to the Distribution slot of the tag. Next, load an image into the ImageTexture node itself. The image will not be properly lined up when first loaded — it is necessary to use the UVW Transform to adjust the position, scale and rotation of the image as it is projected from the Octane Area Light. First, disable the Surface Brightness option — this will keep the Power value unaffected by the light size, which allows use of the Scale tool to size the image as desired. To start, set Power to 200.
|
|
Light projection — scale/align the area light
|

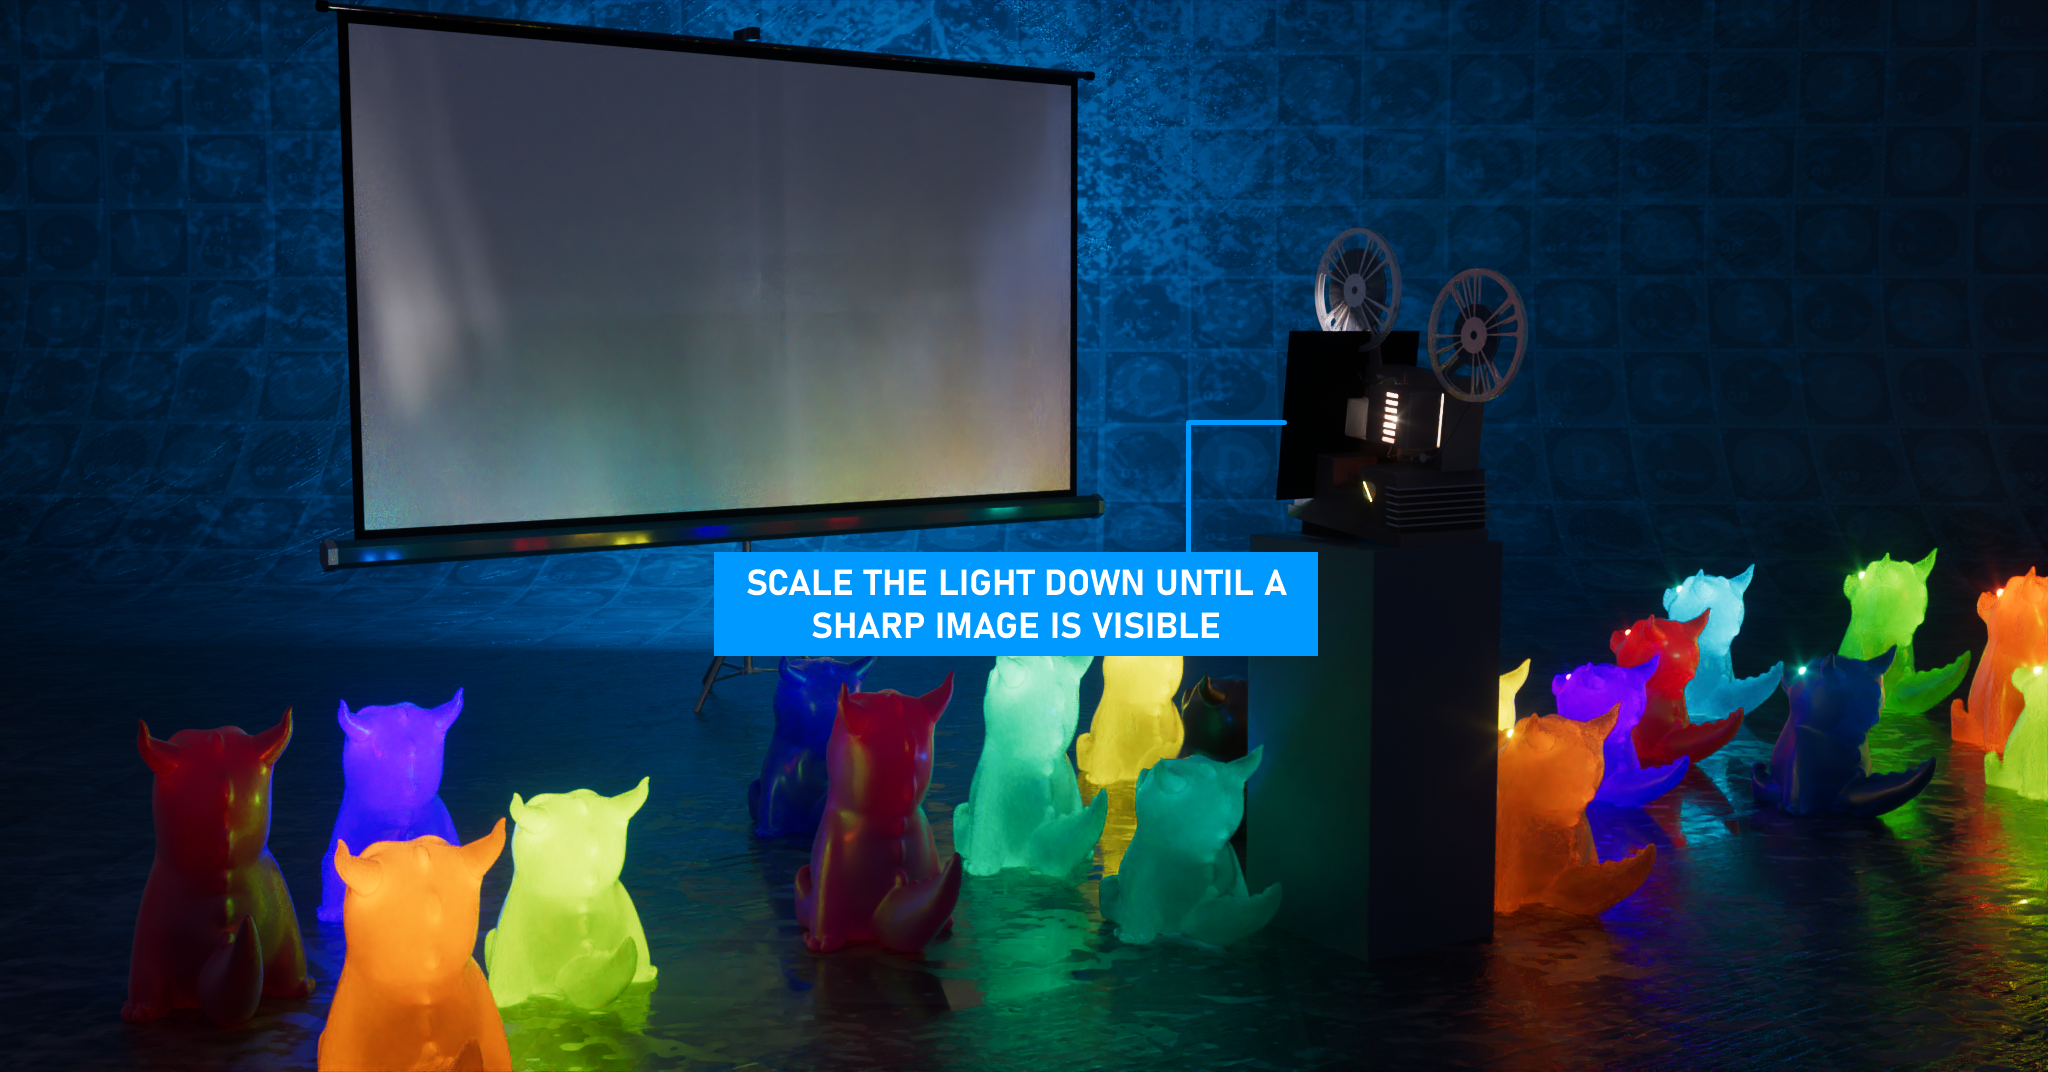
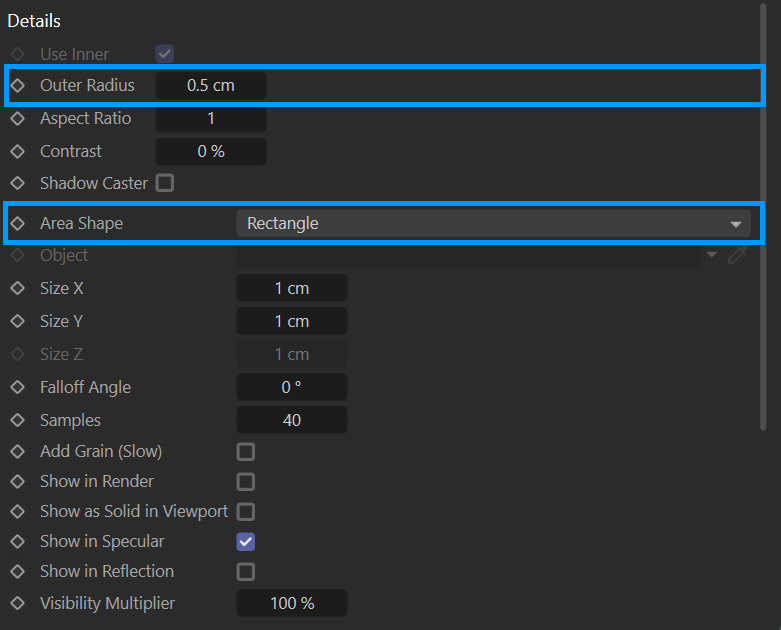
The projected image needs more work — set the Area Shape of the light to Rectangle. Use the Outer Radius value to size the image down to fit the screen.
|
|
outer radius & area shape
|

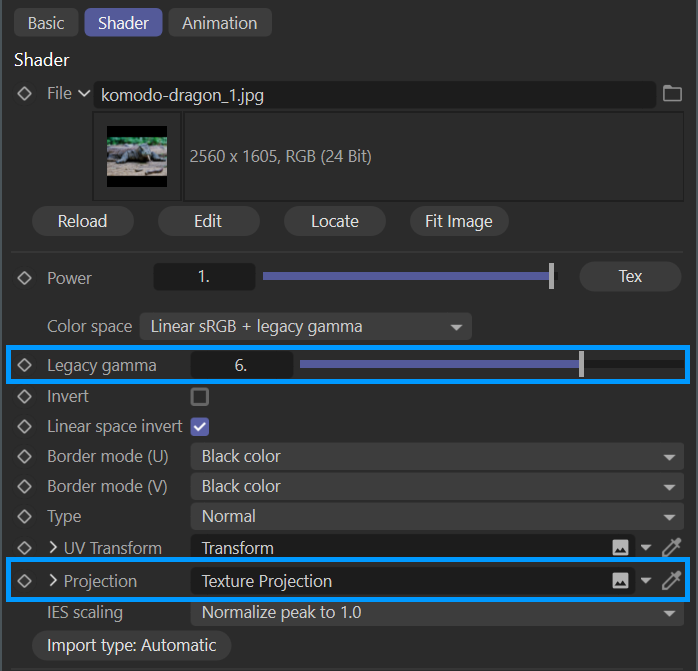
3- Ensure the Projection is set to Texture Projection and use Legacy Gamma for brightness control. (Later, balance the Power and Legacy Gamma settings when enabling the Analytic Light Beams.)
|
|
light projection — projection and gamma
|

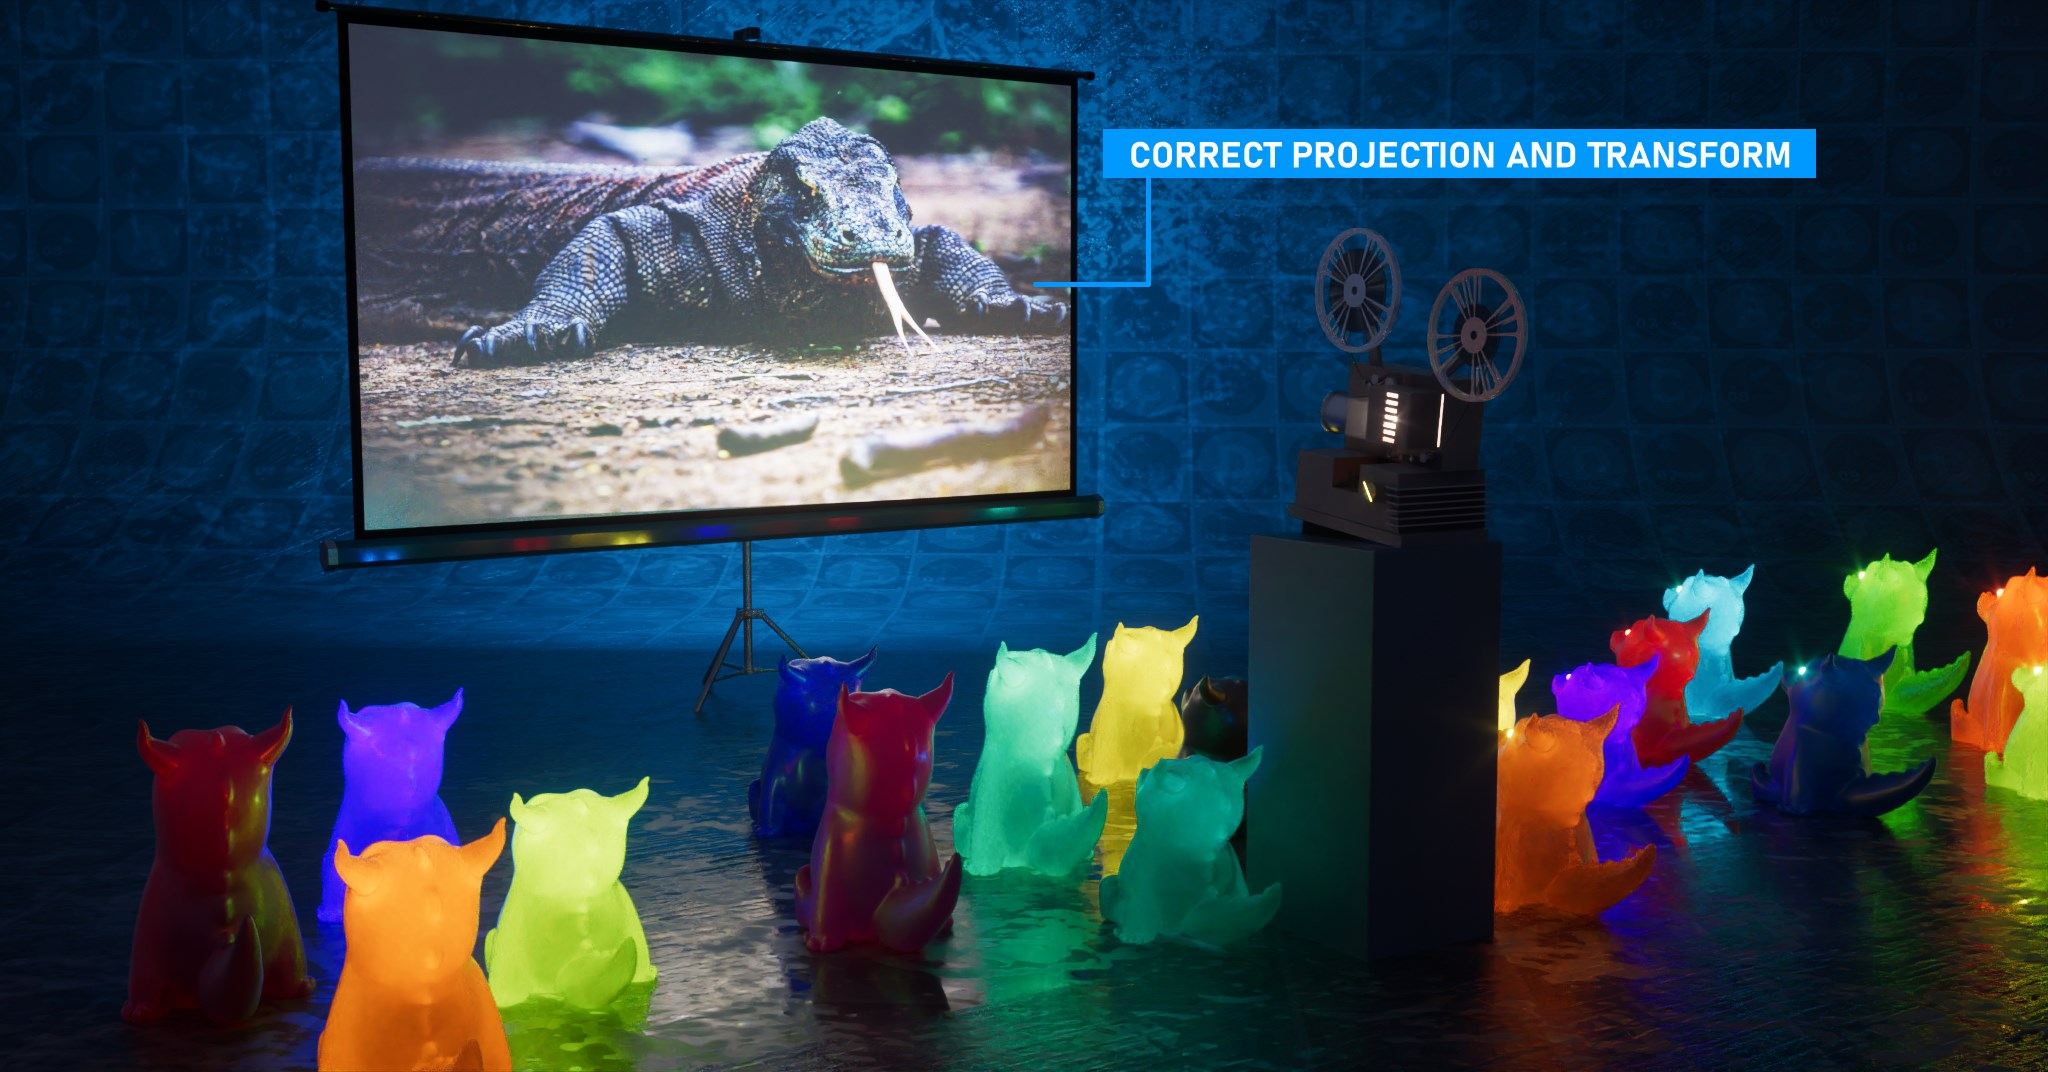
4- After this setup, the Light Projection should now be correct as seen in the image below.
|
|
LIGHT PROJECTION — FINAL
|

Plussing Up the Scene with light beams
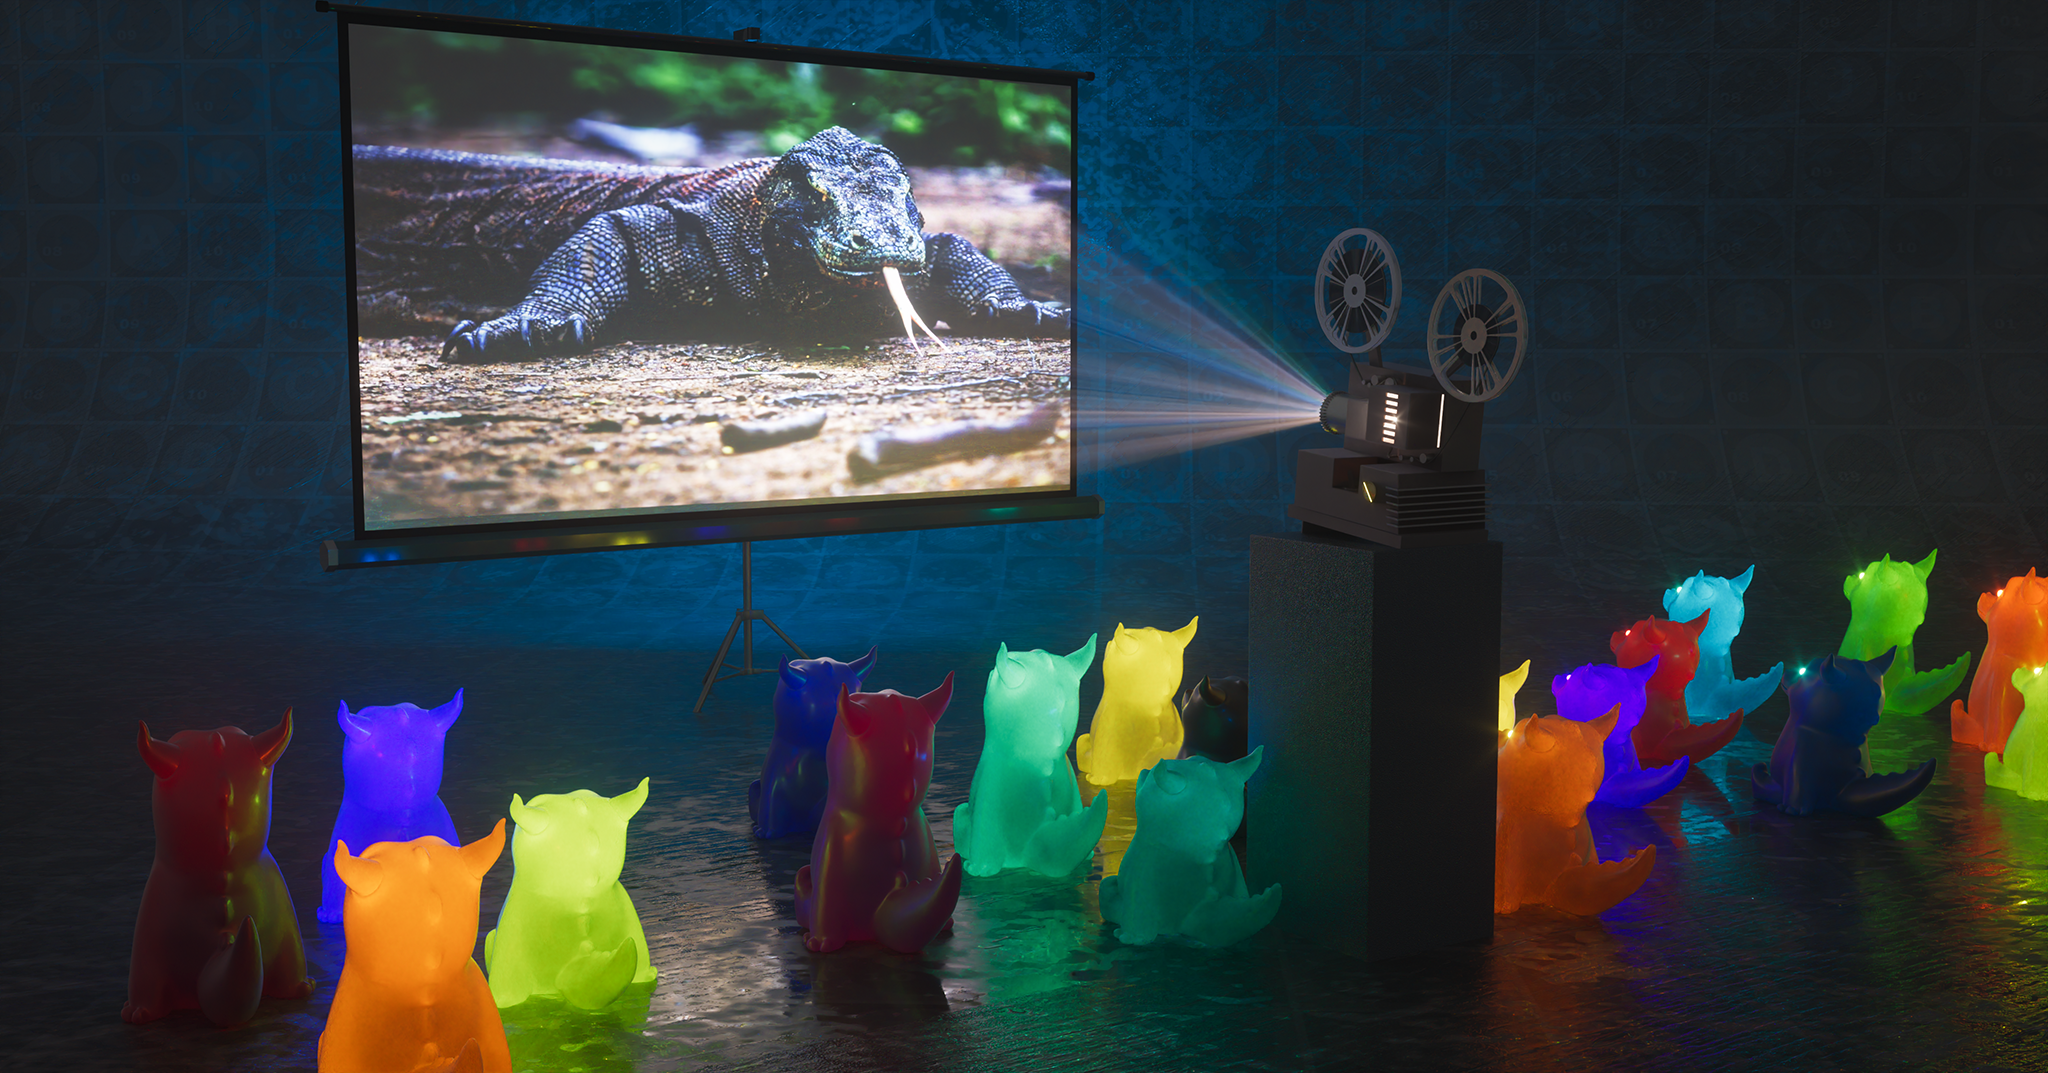
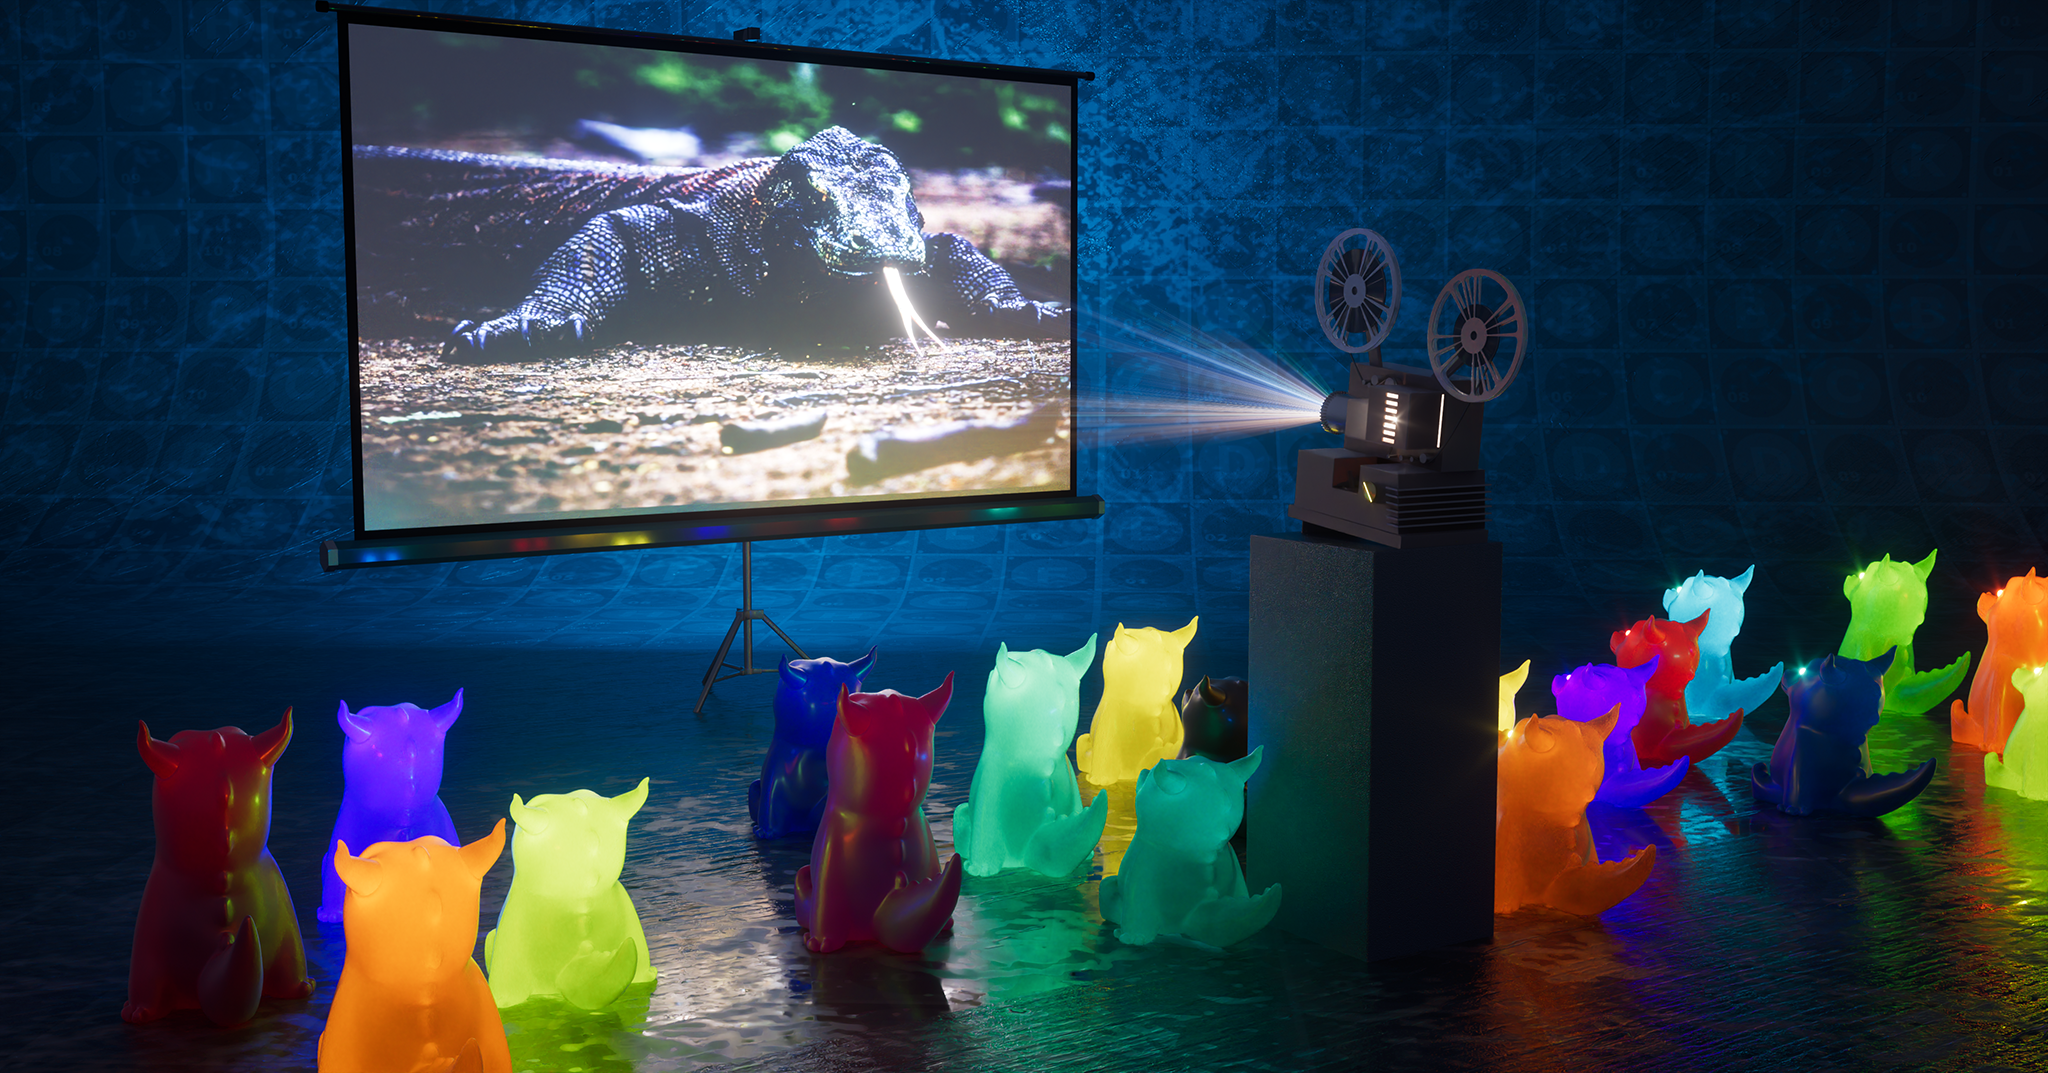
The image below shows a comparison between the use of a Texture Environment for volume rays and Analytic light beams. In some cases, Analytic Light Beams will render faster, but not in all (such as the images used in this topic). There are other limitations to Analytic light beams, such as they cannot be viewed through transparent materials, as they are generated by a post effect process.
|
|
light projector BEAM comparison |
|
|
|
|
|
|
Texture Environment Light Beams |
Analytic Light Beams |
|

Adding Light Beams with a Volumetric Medium
Improve on this result and add visual appeal to render by adding a "volume effect" to the projection light. For this, apply this method from the previous section Making Volume Lights.
Adding Light Beams with Post Effects and Analytic Lights
As mentioned, Analytic Light Beams is a Post Effect, making use of the Post Volume — this volume must be enabled in order for the beams (and other analytic effects like fog) to be visible. Post Effects can be immediate, and are often tune able in real time. There are cases, however, where Post Effects are not any faster than the use of a Volumetric Medium (such as the illustrations in this topic). Also, Post Effects are not visible through transparent materials or on reflective materials. For these you will need to use the Environment/Volumetric Medium approach (or the Octane Spotlight).
Octane Camera Tag
Post Effects require that the Octane Camera Tag > Post Processing >Post Processing and Volume Effects (Light Beams/Fog) toggles be enabled to be used for rendering as shown in the following illustration.
|
|
post processing tab
|

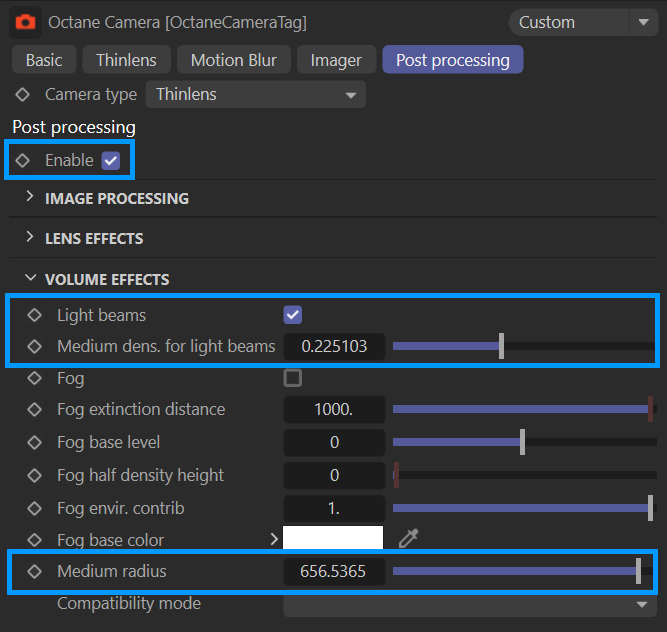
The look of the light beams are controlled by both the Medium Density and Medium Radius controls. Adjust as desired, the results are displayed in Live Viewer.
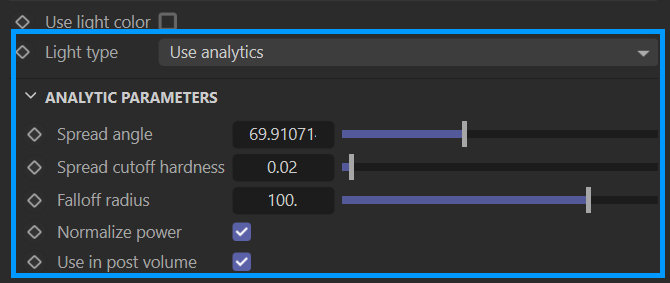
Octane Light Tag
The Octane Light Tag > Light Settings tab contains the Analytic Parameters. The Light Type must be set to Use Analytics. Use the parameters to adjust Spread Angle, Cutoff Hardness and Falloff Radius. Use in Post Volume must be enabled.
|
|
light settings — analytic parameters
|