Image Tiles (UDIMs)
The Image Tiles node allows you to define UDIM-like offsets in OctaneRender. Also known as U-Dimension, the primary reason for UDIMs is image texture resolution, where you can have specific grids with close ups of specific parts of an object, such as an eye or engine in the same overall UV and texture set. By creating multiple UDIMs tiles in the grid, you can specifically tailor image maps to a needed use. The Image Tiles node will reference UDIMs as a sequentially numbered image sequence, making working with said maps in applications like Nuke or After Effects a very simple process, since these maps are treated like typical rendered frames in these applications.
Cinema 4D does not currently support UDIMs directly, so the Image Tiles node offers a great way to work around this restriction. It helps to follow a few simple rules:
- The Image Tile grid is arranged per U and V directions, just as UDIMs are arranged.
- UDIMs have a limit of 10 grids in the U axis, though Image Tiles does not have that restriction.
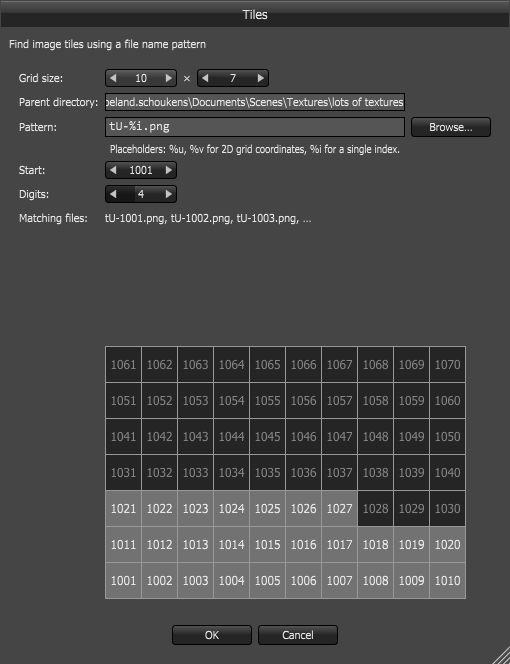
- Naming conventions must be adhered to. The following illustration shows how the grid is arranged numerically:
To use the Image Tiles node, go to the Octane Node Editor (Live Viewer > Materials > Node Editor) and choose Image Tiles from the Texture items in the left menu bar. Then do the following:
- Select first image of the UDIM image series from the file dialog of the Image Tiles node.
- Adjust 'Grid size' for width and height — the UDIM specification is designed for a maximum of 10 UV grids on the U axis; additional grids move up. There is no limit on V grids. Therefore, if you have more than 10 UDIM grids or Image Tiles, make sure that your images are named appropriately (see below).
- Press the button 'Setup the Image Tiles'. This will check images and give you a proper pattern(syntax) to find rest of images. It can modify the 'start' and 'digits' parameter if it's necessary.
- Check resulting file names in 'Files' text list and see the textures in your object.
|
IMPORTANT |
|
|
The Setup Image Tiles button will work properly only with UDIM images that are properly named. It will always set the start value to 1001. |
Make sure to manually set the Start value after using to the desired beginning UDIM value. |
Two different naming syntaxes are possible:
1- name_%u_%v.ext (U is the row and V is the column number — they can start from 1. )
or
2- name_%i.ext (i is an index of images and should start at 1001.) Note that file naming is depending to row size and not restricted to 10 UDIM images per row.
Basic Image Tile Example
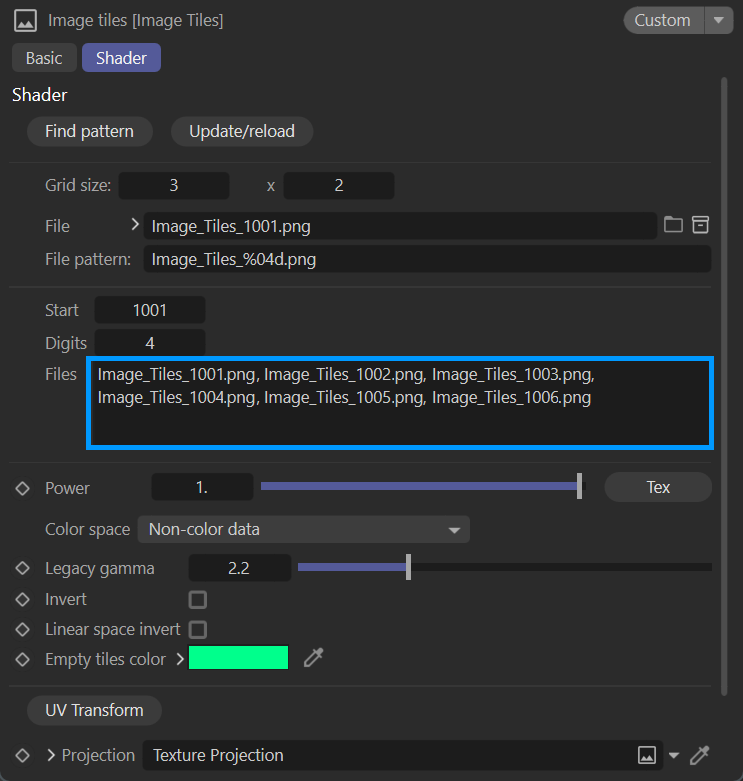
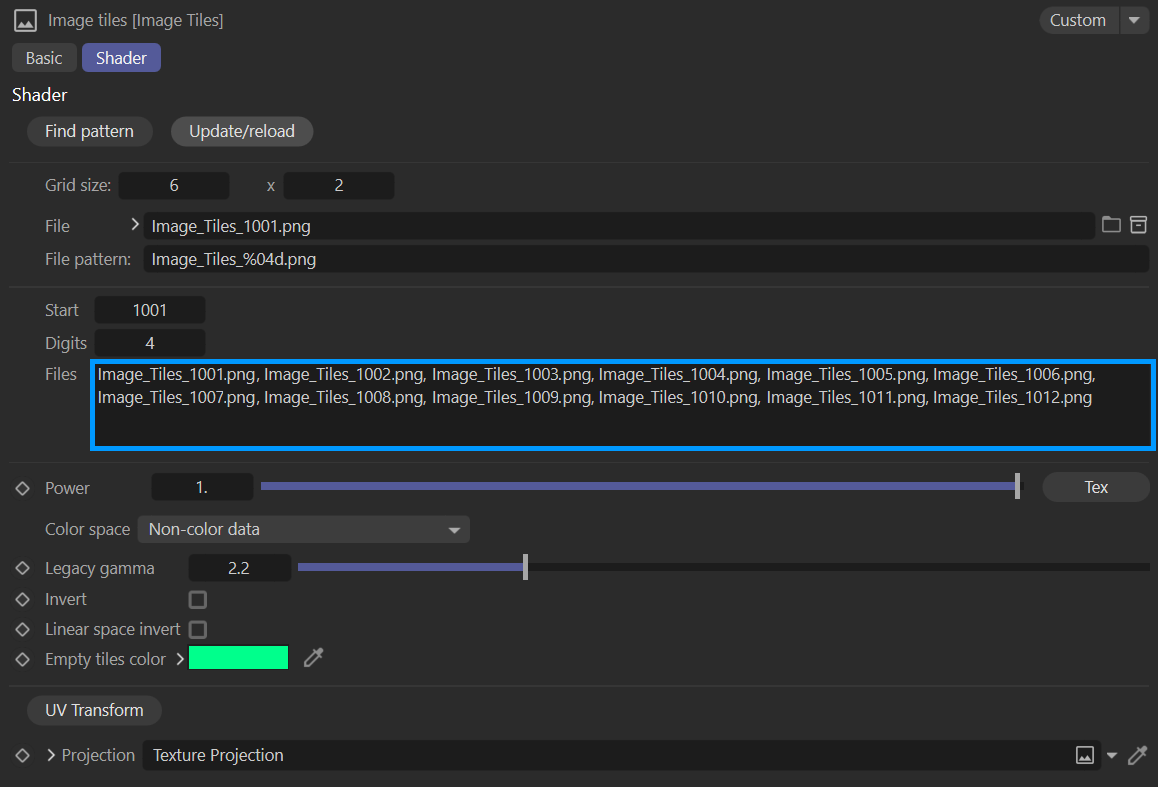
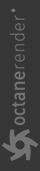
The actual UVs in the grid layout can be placed as in a few different ways, as long as they are referenced in a sequence. In the example below, the upper rectangle UVs were arranged as a 6x1 grid. The lower rectangle UVs were arranged as a 3x2 grid. The end result is identical. In each rectangle, the colored portion represents a missing UDIM image. Only five images were supplied, leaving the sixth spot empty. The color is determined by the Empty Tiles color.
|
|
image tiles layout example
|
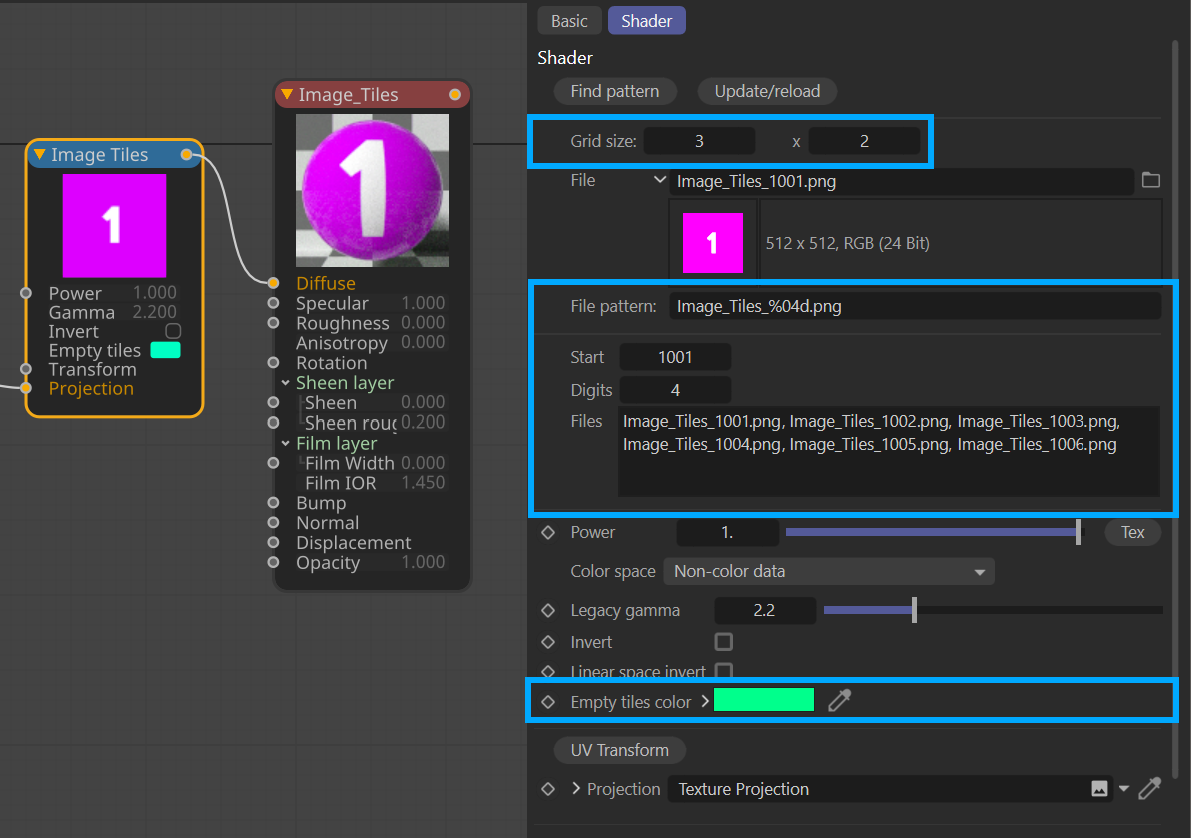
The image below illustrates the Image Tiles node as seen in the OctaneRender® node editor. You can set the grid size (the image above used these particular settings) as well as set the Empty tiles color The files to be used by the Image Tiles node are presented in the Files list. In cases where the Start UDIM number is something other than 1001, the files in the Files list may not conform, but the Image Tiles will properly render from the Start UDIM specified.
|
|
image tiles node
|