Download & Upload Material
Download Selected Material from Live DB
There are three ways to download material from the LiveDB:
- Click the Download button in the upper left of the LiveDB window. The material will appear in the material editor of Cinema 4D after the download is complete.
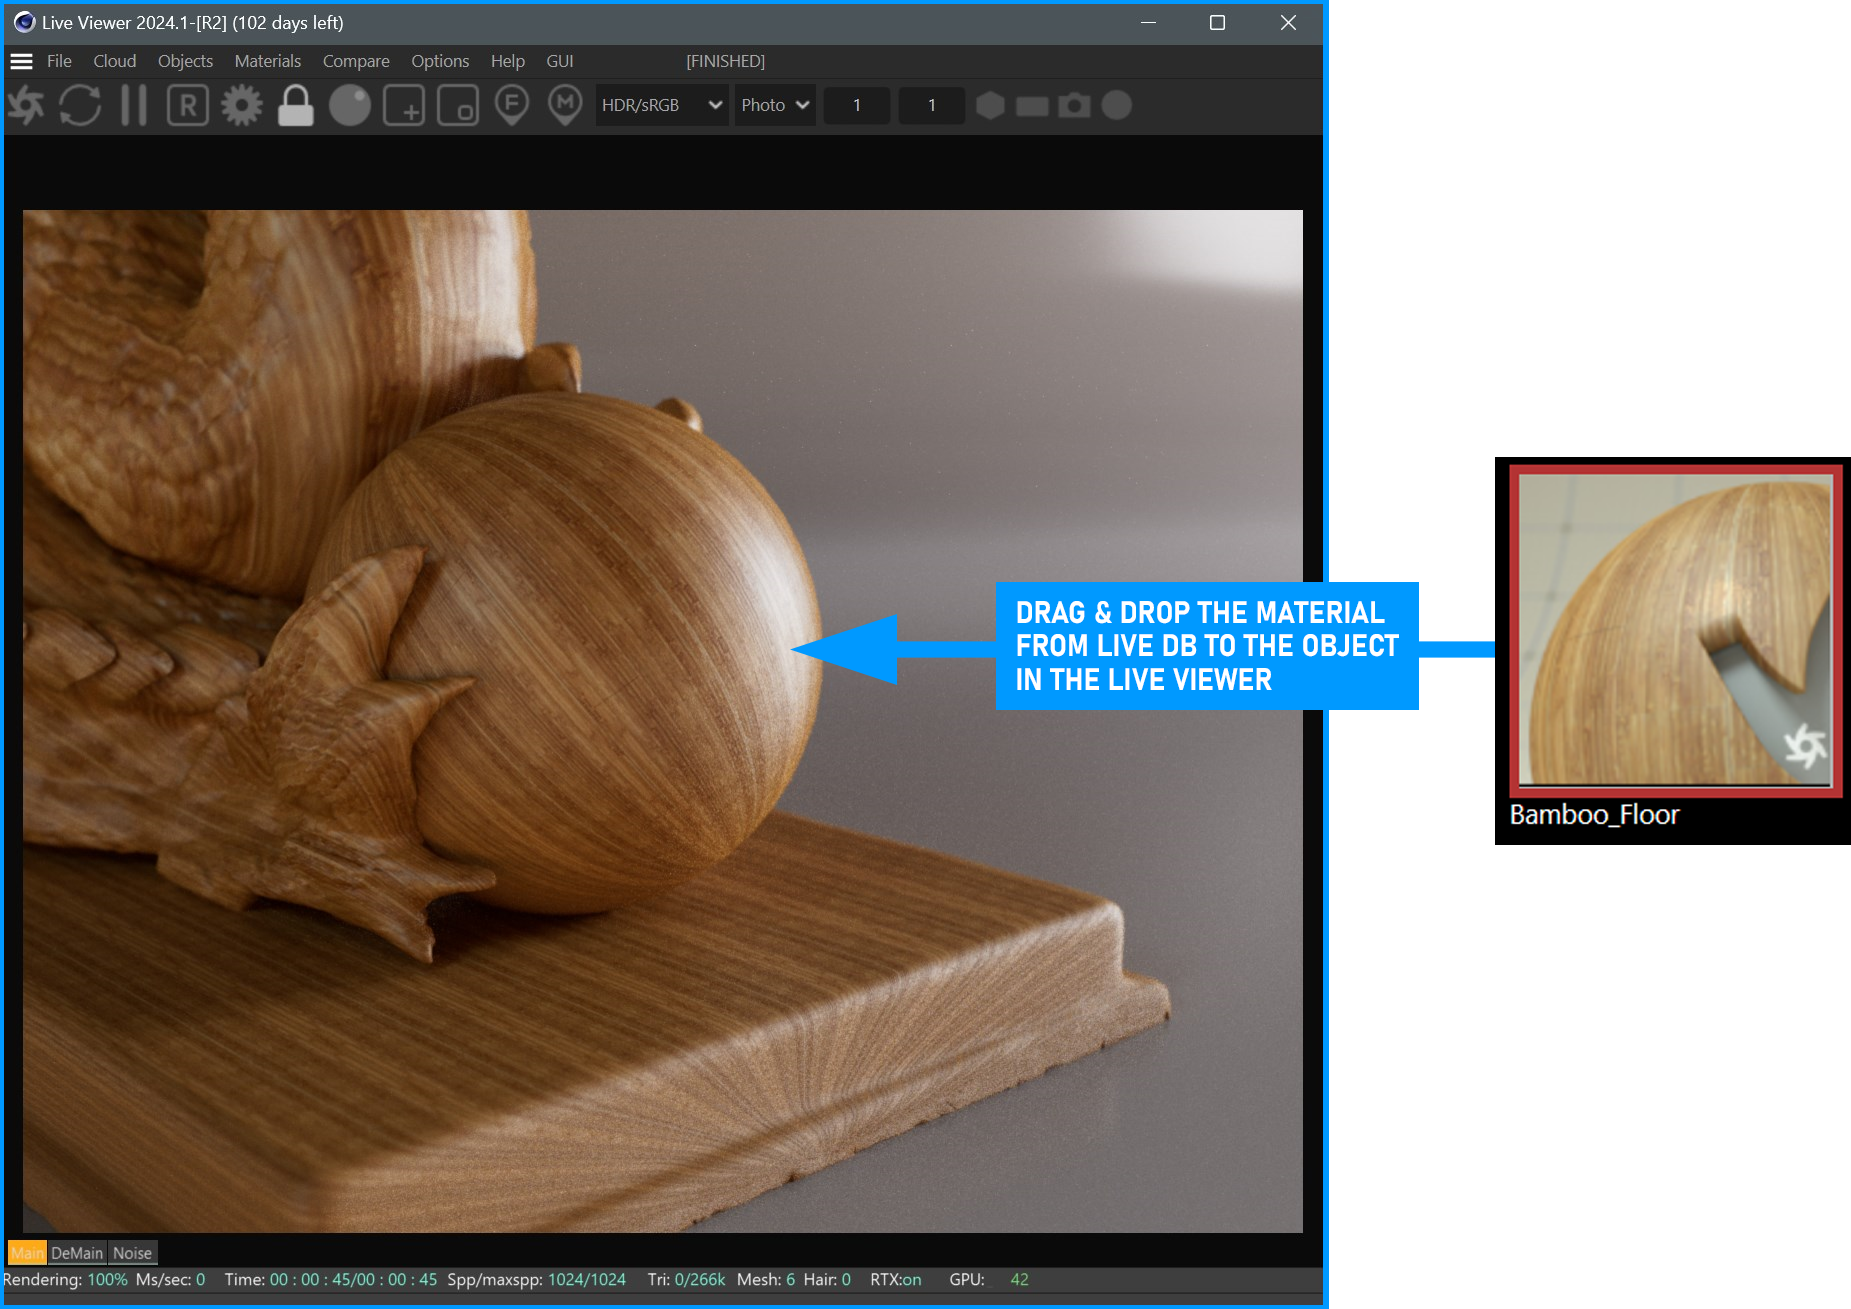
- Drag and drop the selected material directly onto any object rendered in the Live Viewer. The material will appear in the material editor of Cinema 4D and will be assigned the material to that object at the same time.
- Right-click on the material and select Download from the context menu.
|
|
live database
|

Save Material to Local DB
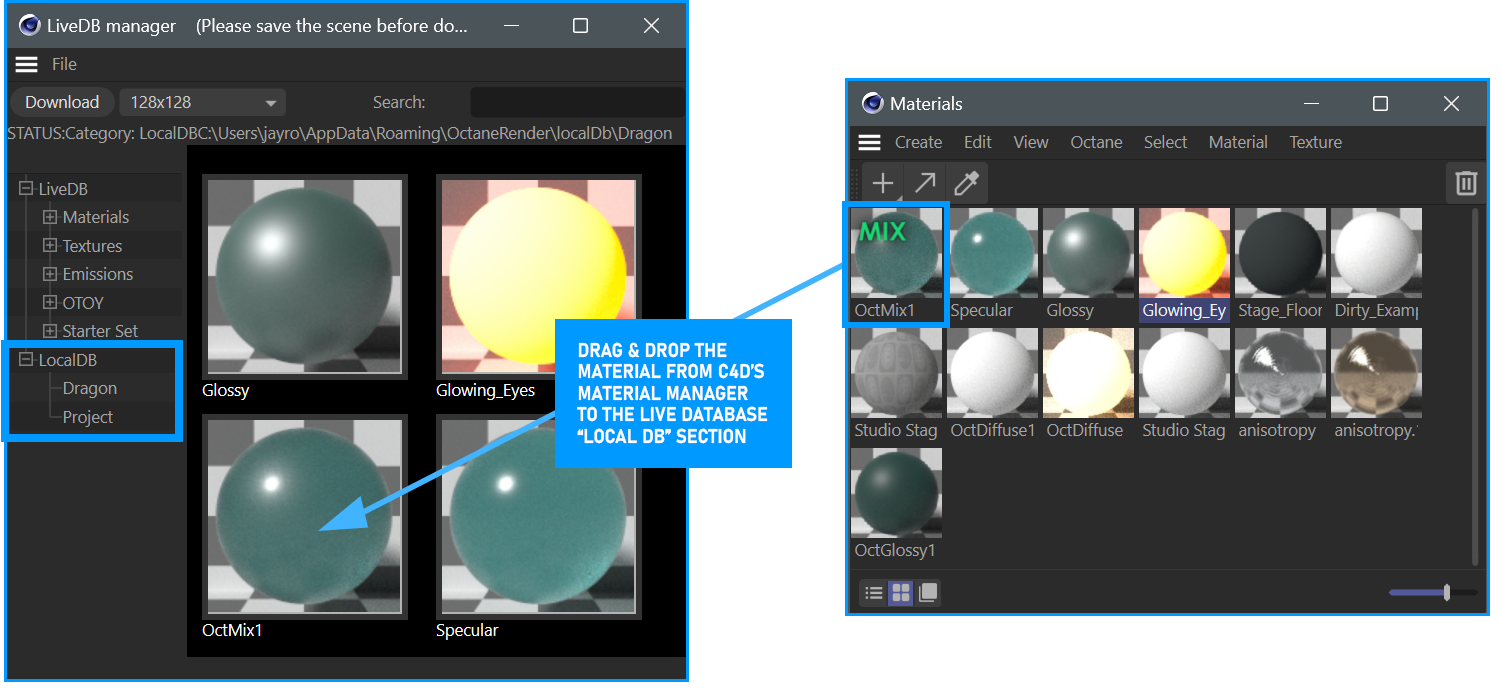
Once you have created a material in Octane, you may want to use it again for other projects. In such cases, you can save your material to Local DB. Once you have created your material, select the Octane material from the material manager of Cinema 4D. Then select Live Viewer > Materials > LiveDB > Local DB and drag and drop your material into the preview area. Your material will now be placed in the Local DB section. If you check the local DB path, you will see that your material is saved in ORBX format. You can also use this material in Octane Standalone.
|
|
save material to local db
|

Upload Selected Material to Live DB
To upload your material to Live DB using Octane Standalone, following these steps:
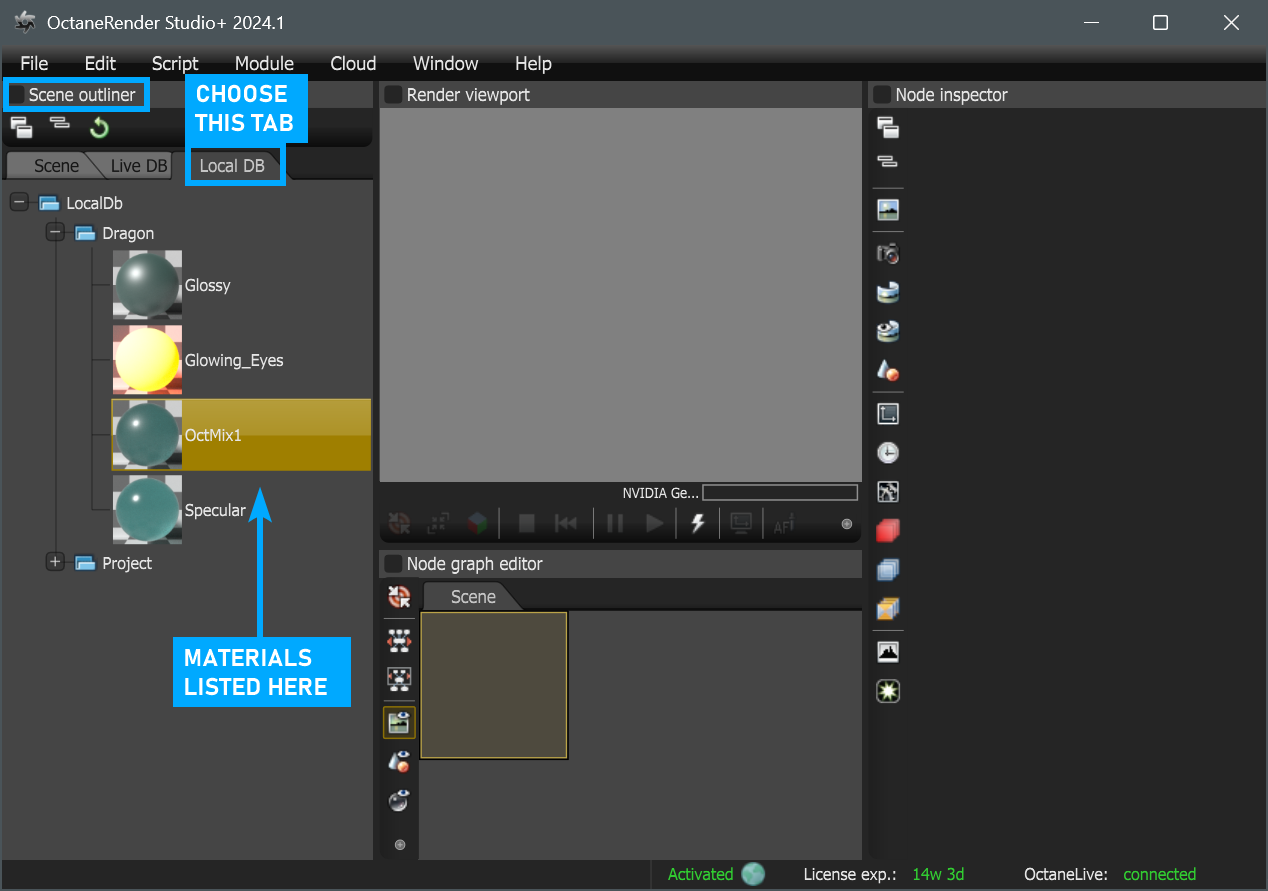
1- First, run Octane Standalone (usually located at C: \Program Files\OTOY\OctaneRender V.xxx ) If you have selected another path in the setup, you can run it from there. Once the software is open, click on the Local DB tab in the Scene Outliner window on the left. You will see the material you have saved in the list below. Remember to place the material you created in the Octane Plugin into the Local DB. You can read the topic Save Material to Local DB.
|
|
upload material to live db
|

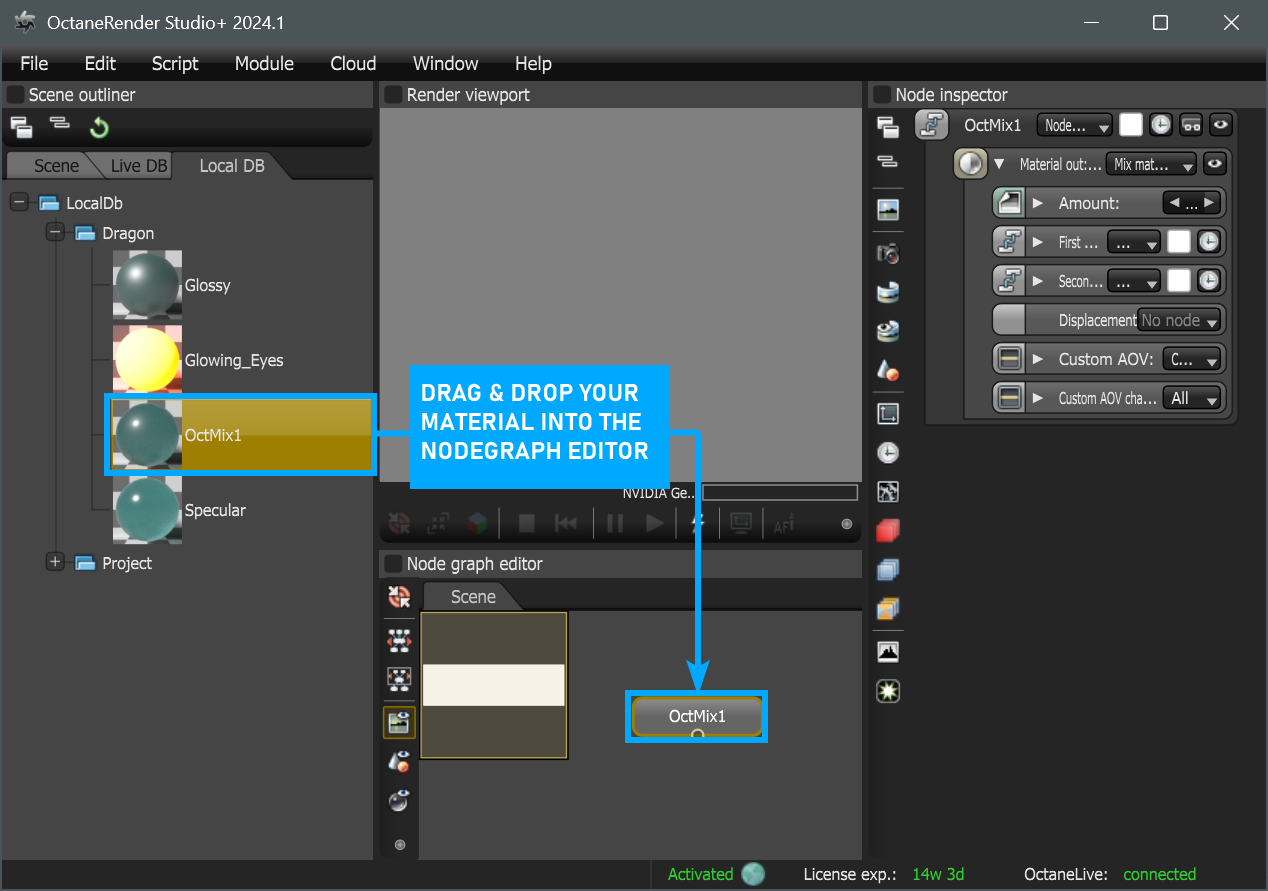
2- Select the material you want to upload and drag and drop it into the Nodegraph editor.
|
|
drag material to nodegraph editor
|

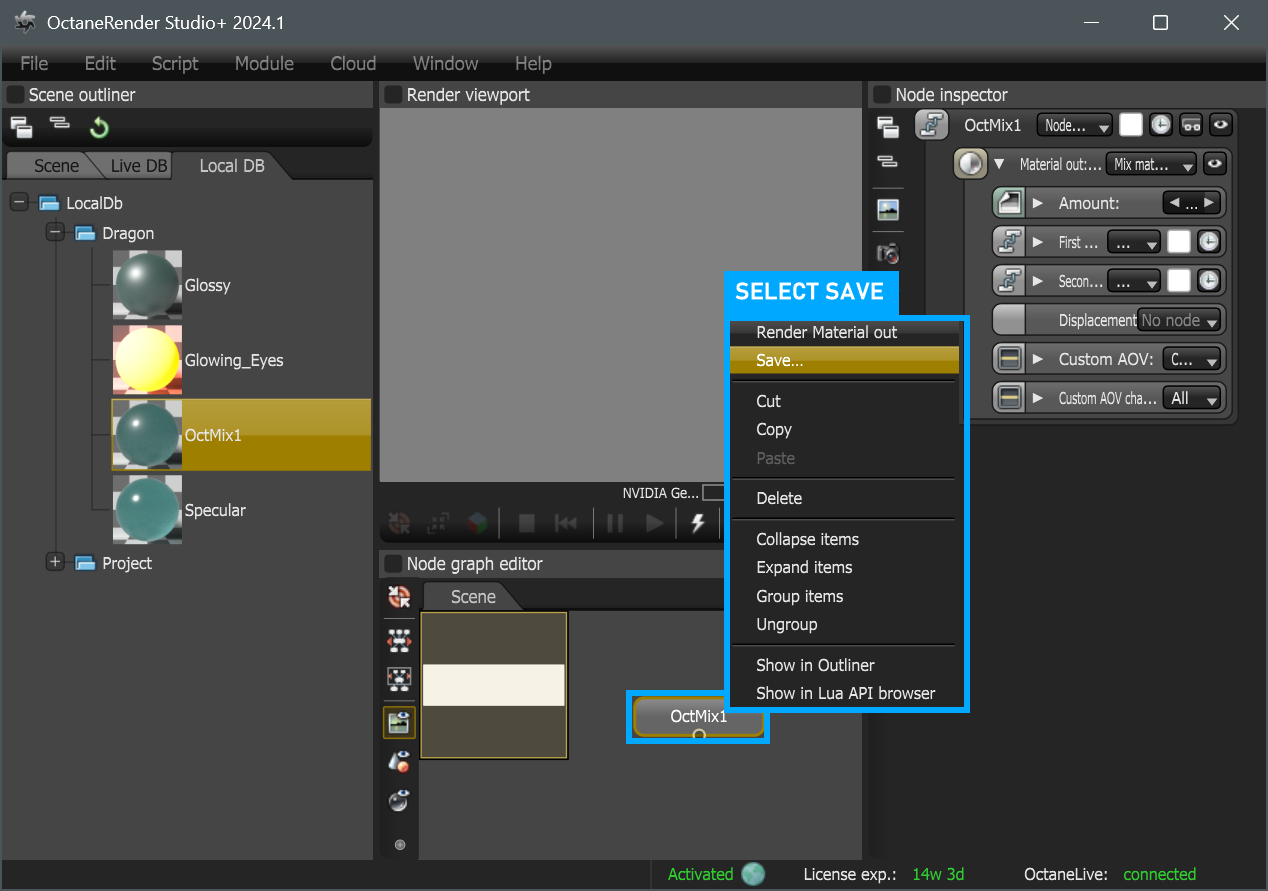
3. Select your material in the Nodegraph editor and Right Click. Select Save from the context menu.
|
|
Save the material...
|

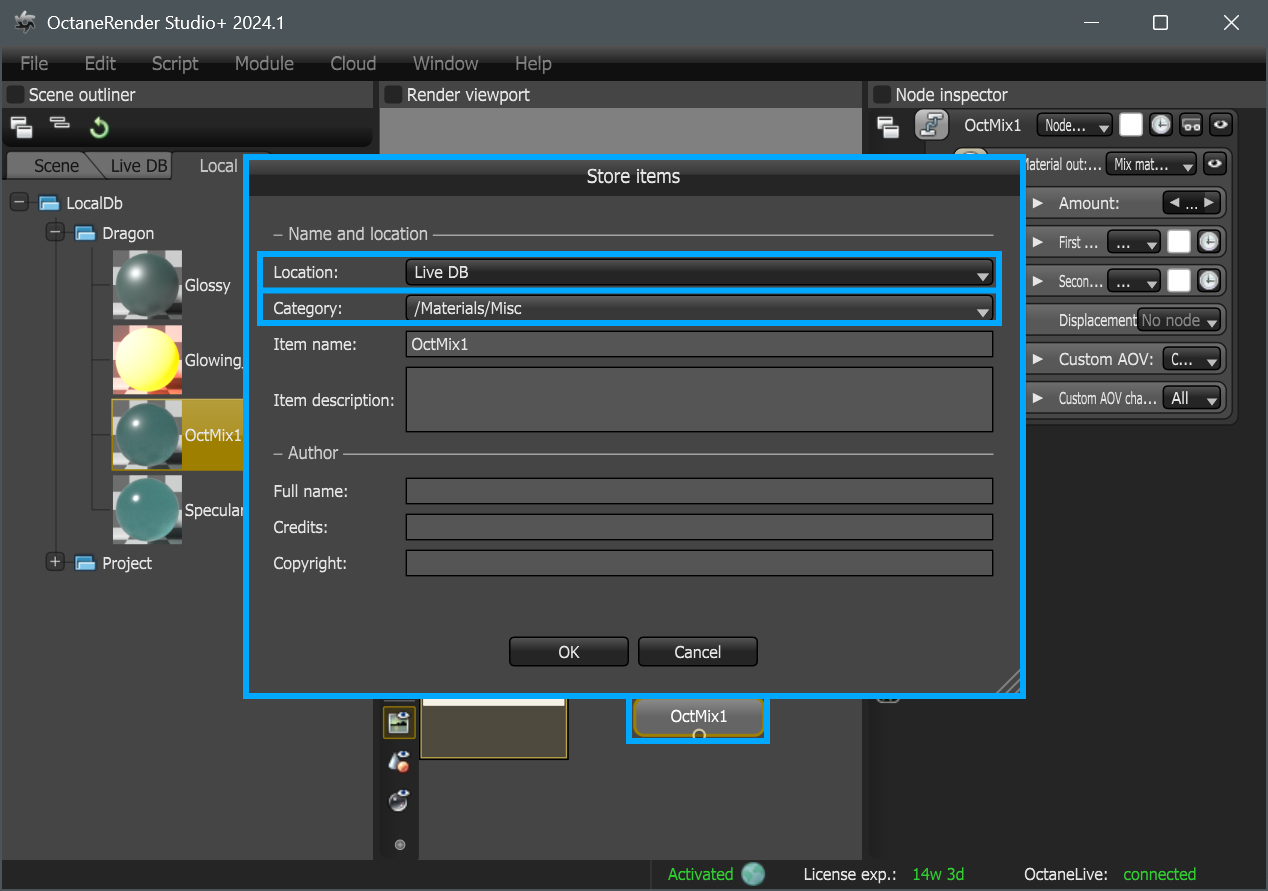
4. In the Save window, select Location as Live Db. Press the OK button after specifying the category and other information.
|
|
... to upload material to the live DB
|