Context Menu
The Context Menu will appear whenever you right click in the OctaneRender® Node Editor. The items in the Context Menu will be determined by what is selected when right clicking. The topics below refer to the result when right clicking on a node.
|
|
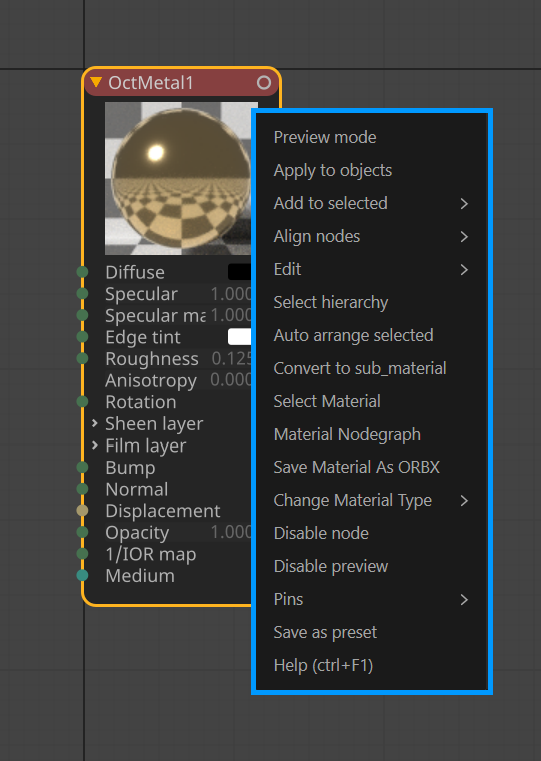
context menu
|

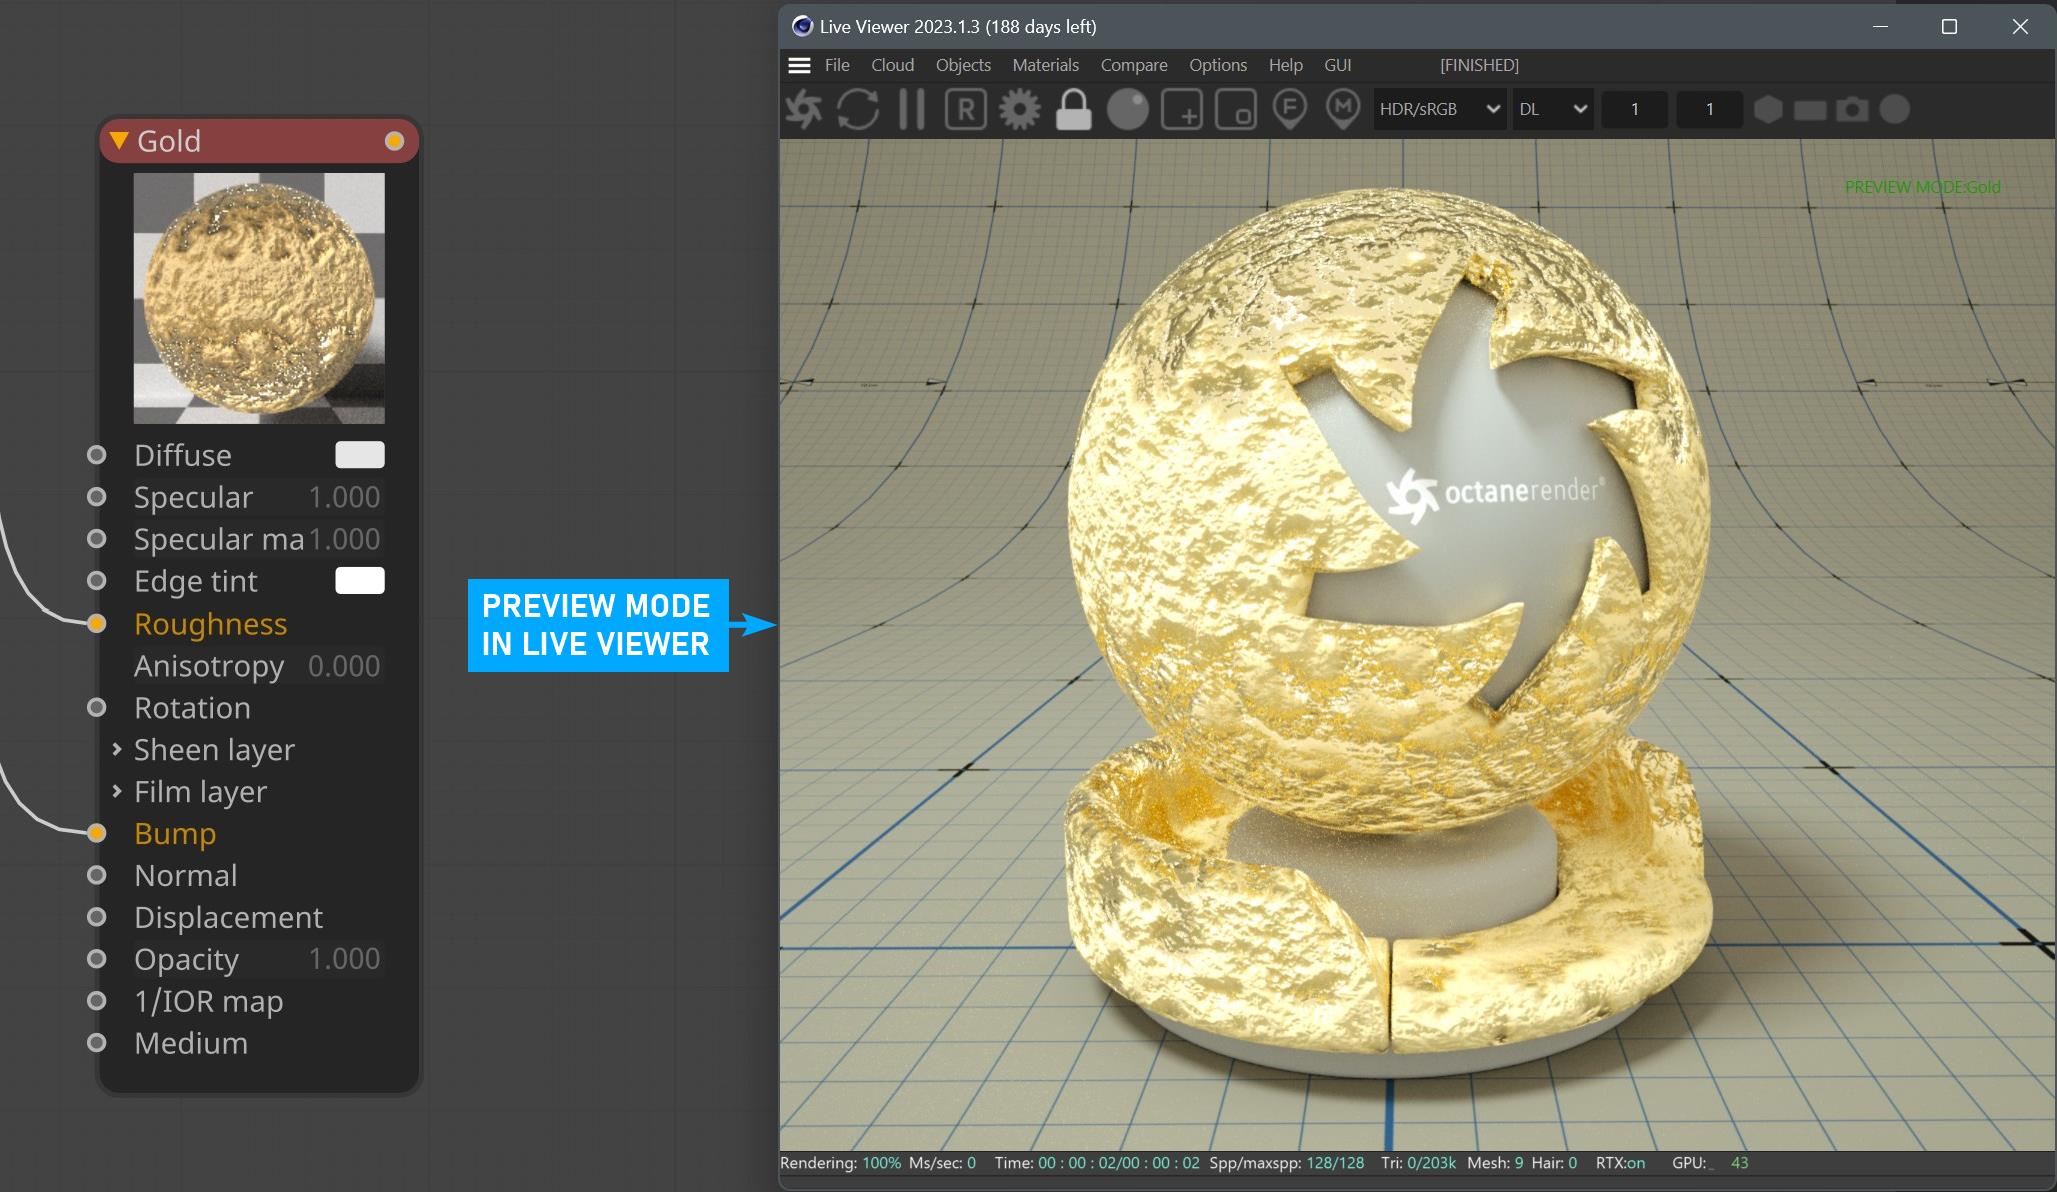
Preview Mode
You can see the preview render of the selected material in Live Viewer. To return to normal mode, right-click on the material and select "Disable Preview Node". It has the same function as the material preview in the Live Viewer options mentioned earlier. Preview mode does NOT affect camera placement in the scene.
|
|
context menu — preview mode
|
Apply to Objects
This option allows you to assign the selected material to an object that is selected in the scene. You can also see the Octane material tag in the Object Manager of Cinema 4D.
Add to selected
This option will add one of the following nodes to the selected node (assuming the selection has a suitable input pin).
Transform — Adds a Transform node to the Transform pin of the selected node (if present).
Projection — Adds a Projection node to the Projection pin of the selected node (if present).
Composite Texture — Adds both a Composite Texture and Composite Texture Layer node.
Align Nodes
This option will align selected nodes to to either of the following axes in the Node Editor:
Horizontal
Vertical
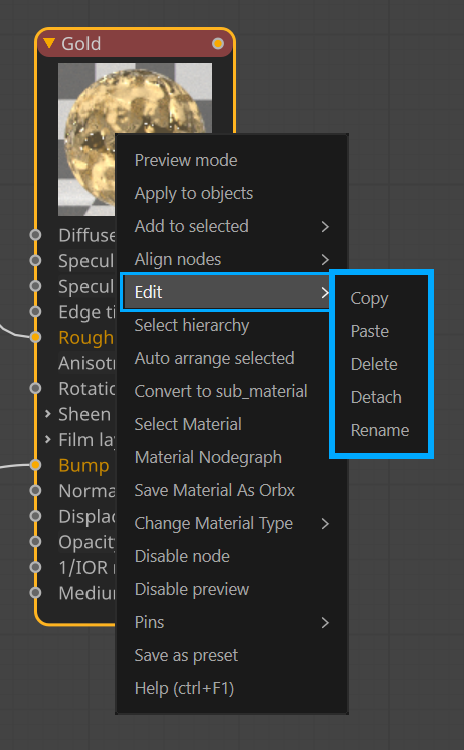
Edit
Edit has its own context menu, allowing for easy management operations of the selected node (Copy, Paste, Delete, Detach and Rename).
|
|
context menu edit
|
Select Hierarchy
Used to select all hierarchical connections of the selected node. It has a similar function to "Child Selection" in the View menu.
Auto Arrange Selected
This option will automatically arrange the nodes you select, as in the View Menu option of the same name.
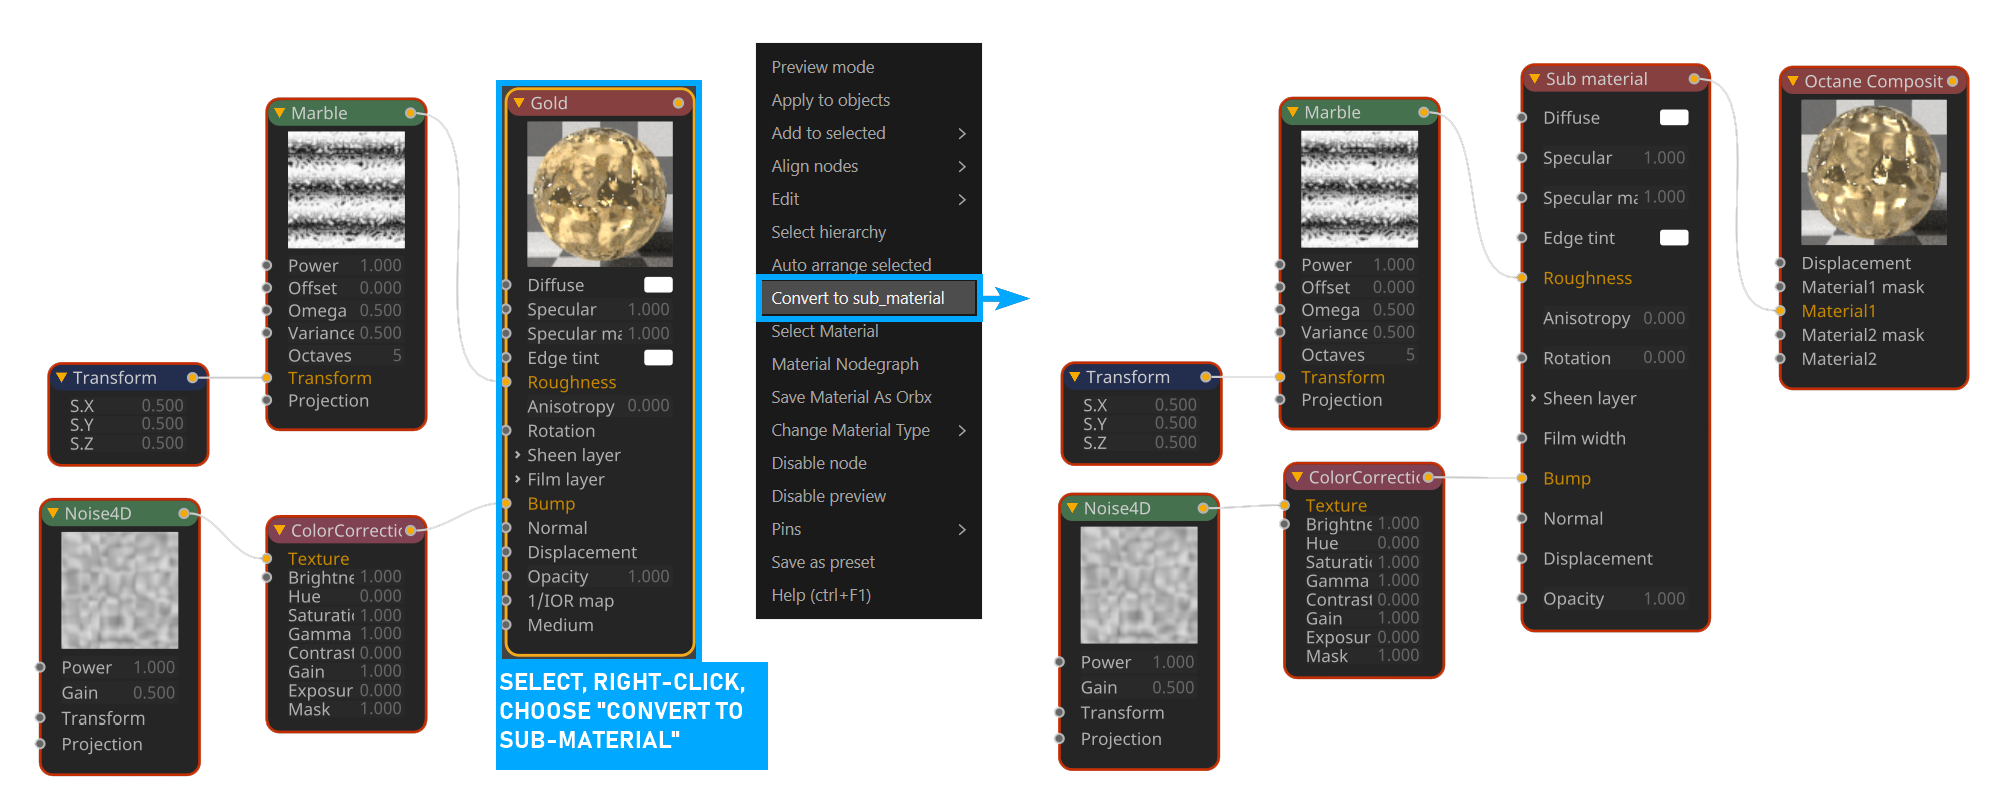
Convert to Sub-Material
Select the desired material to convert in the Node editor, right click on the material and select "Convert to sub-material" from the context menu.
|
|
convert materials
|
Select Material
Shows which material belongs to the selected node. It only appears when you select the parent node.
Material Node Graph
This option displays the selected node in a Octane Standalone version of the "Node graph" window. This may be helpful for debugging Octane Standalone and The Render Network materials.
Save Material as ORBX
This option will save the selected material in ORBX format and for use in Octane Standalone. This option appears only when you select the parent node.
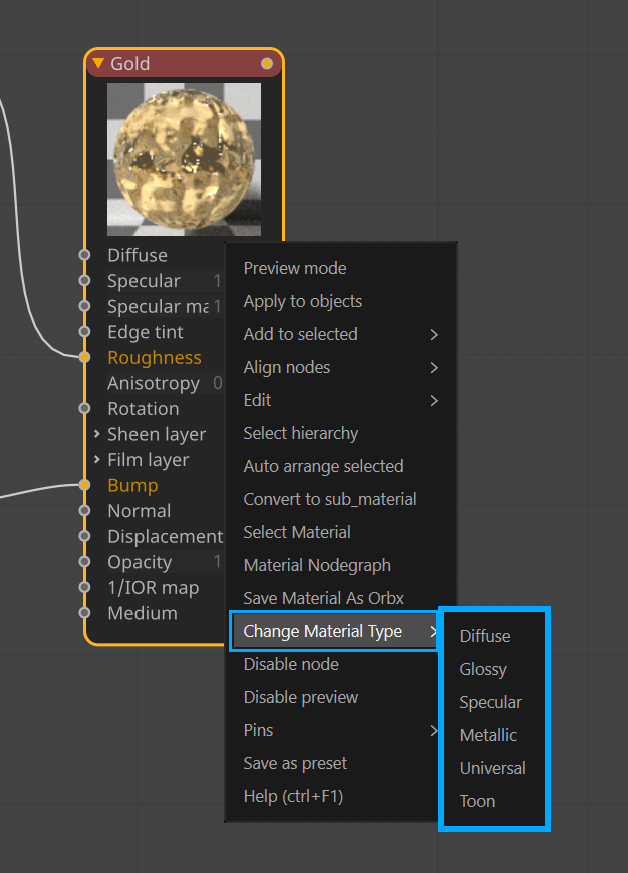
Change Material Type
This option has its own context menu. Here you can change the material type of the node you selected.
|
|
context menu — change material type
|
Disable Node
This option will "disable" any node. In some cases, you may want to turn off the nodes for a while in the editor. To activate again, right-click on the same node and select "Enable Node".
Disable Preview
This option is used to "disable" the current node preview. You can enable again from the same option.
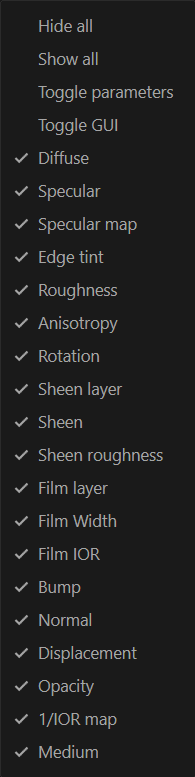
Pins
The Pins sub-menu contains a list of options to control the display of the pins presented for the selected node. You can choose to show just a subset of the pins available to the node, hide or show them all. This menu will also let you toggle the parameters and user interface for the nodes.
Save as Preset
You can save the material as a preset. To access this preset material, you can go to the material manager window of the C4D and select Create/Load Material Preset/Octane directory.
Help (CTRL+F1)
You can access the help file for any specific node you choose. It works in a similar way to the "show help" function of Cinema 4D.