Clouds
This section discusses how to make clouds with open VDB files, as well as a quick, lighter weight alternative using a variation of the Volume object as covered in the previous section. Download the "Cloud_01" scene from here
Making Volumetric Clouds from VDB File
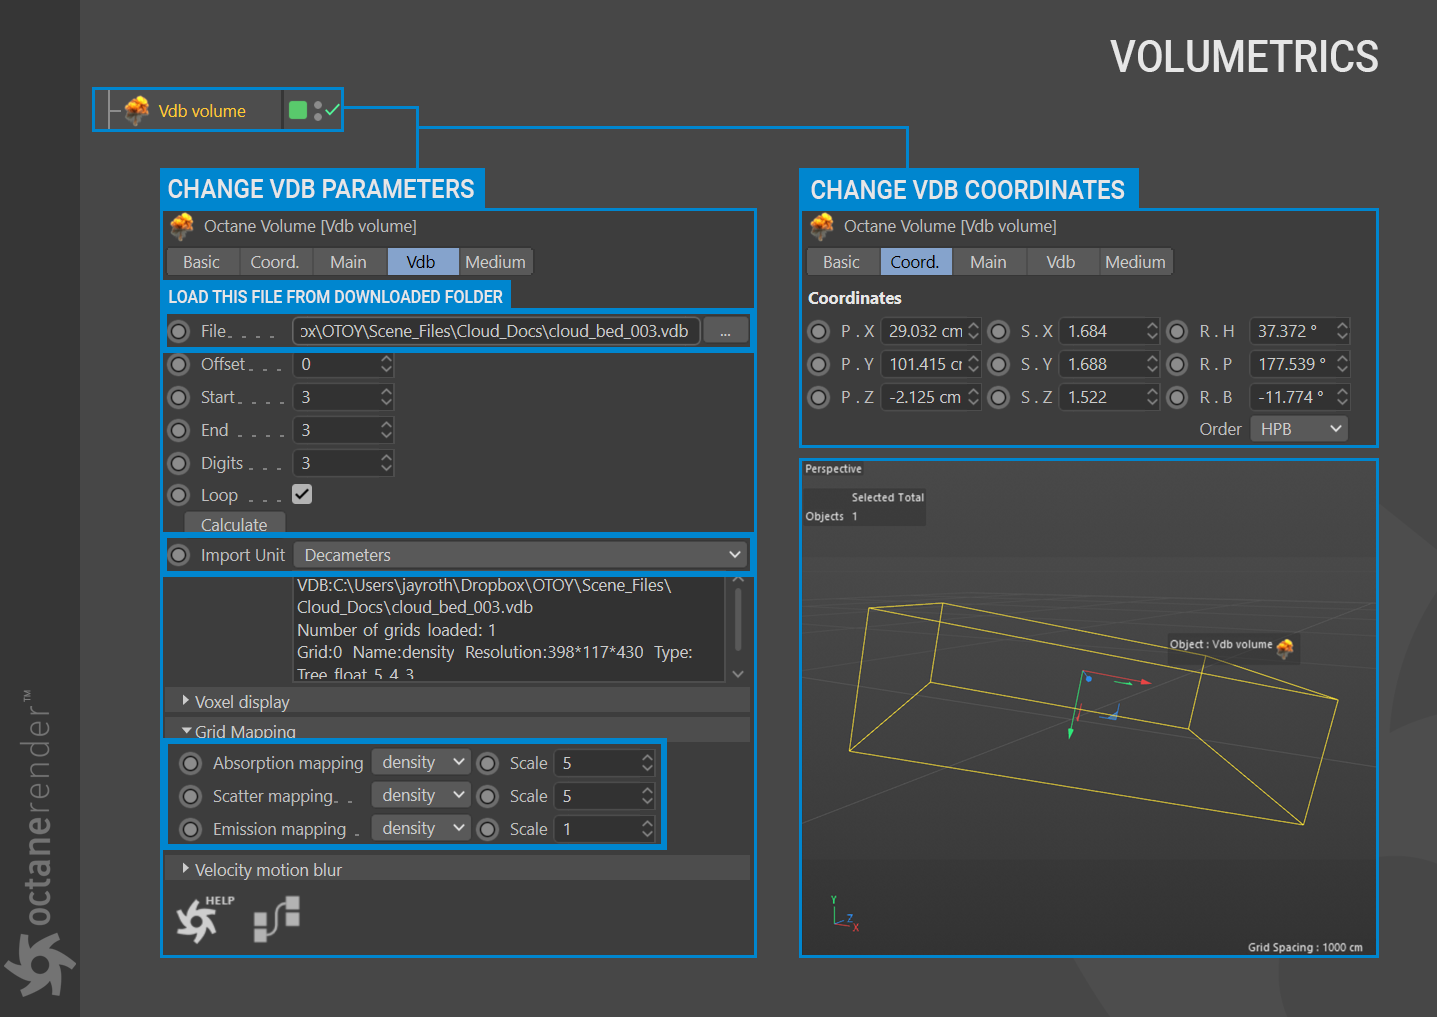
1- Open the "Cloud_01" scene. This scene will contain only the Octane Camera upon loading. Leave the camera settings as they are for now. Create an "Octane VDB Volume" from the Live Viewer Object menu. Load the "cloud_bed_003.vdb" file into the File slot. This VDB file should be in the same directory as the scene you downloaded.
Change the parameters as seen in the image below. Review the info box after loading the VDB file, and note that the "Density" channel is used when creating the cloud. Adjust this volume reference for absorption and scatter in the Volume Medium. The Emission channel is ignored for this example, as the cloud will not be emitting any light.
|
The VDB file in this scene is from Travis Davids' "Free VDB cloud Package". |
2- Now create an Octane Daylight and change the settings and coordinates as shown in the image below.

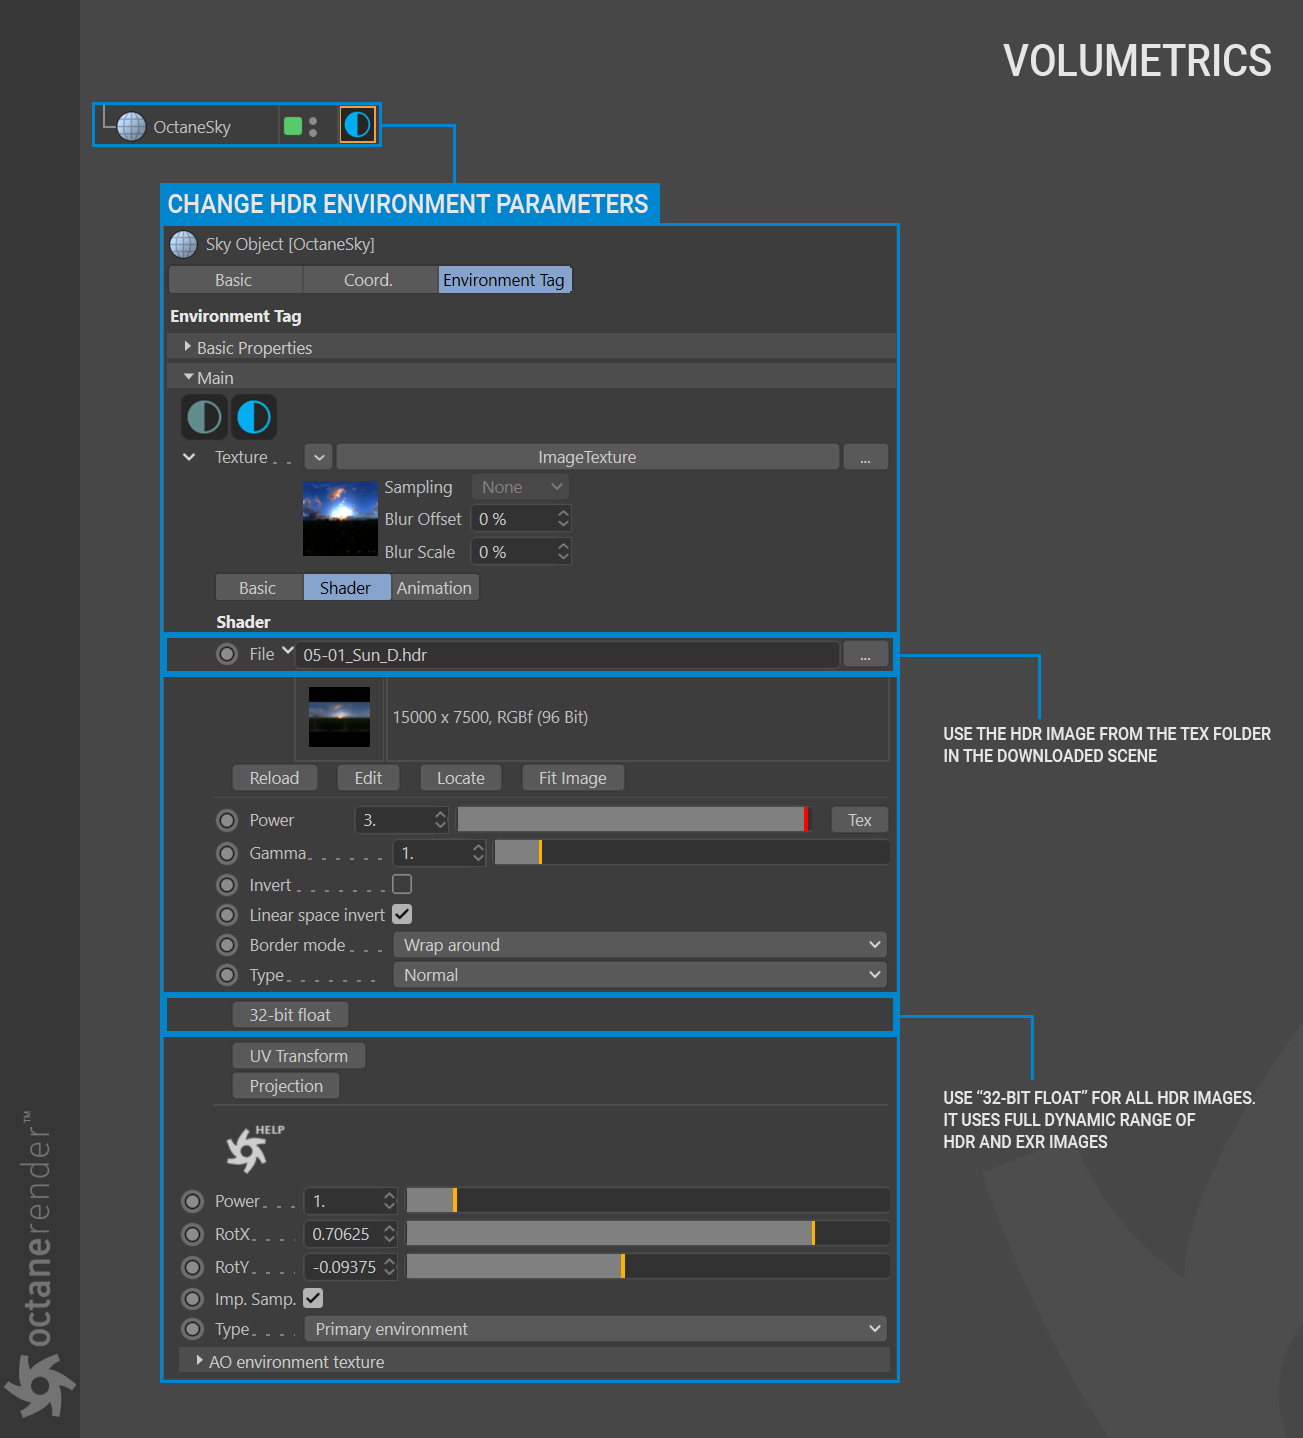
3- Create an HDR environment from Live Viewer/Objects menu. Load the "05-01_Sun_D.hdr" picture in the "Tex" folder of the downloaded scene file and change the settings as presented in the image below.
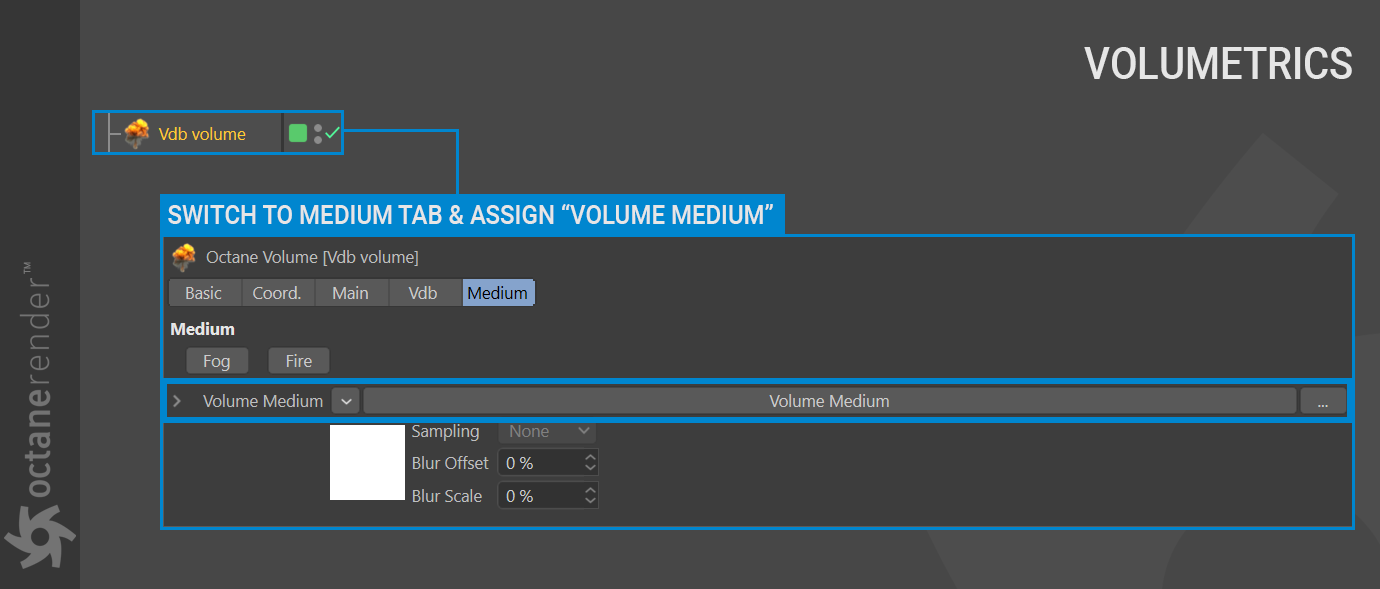
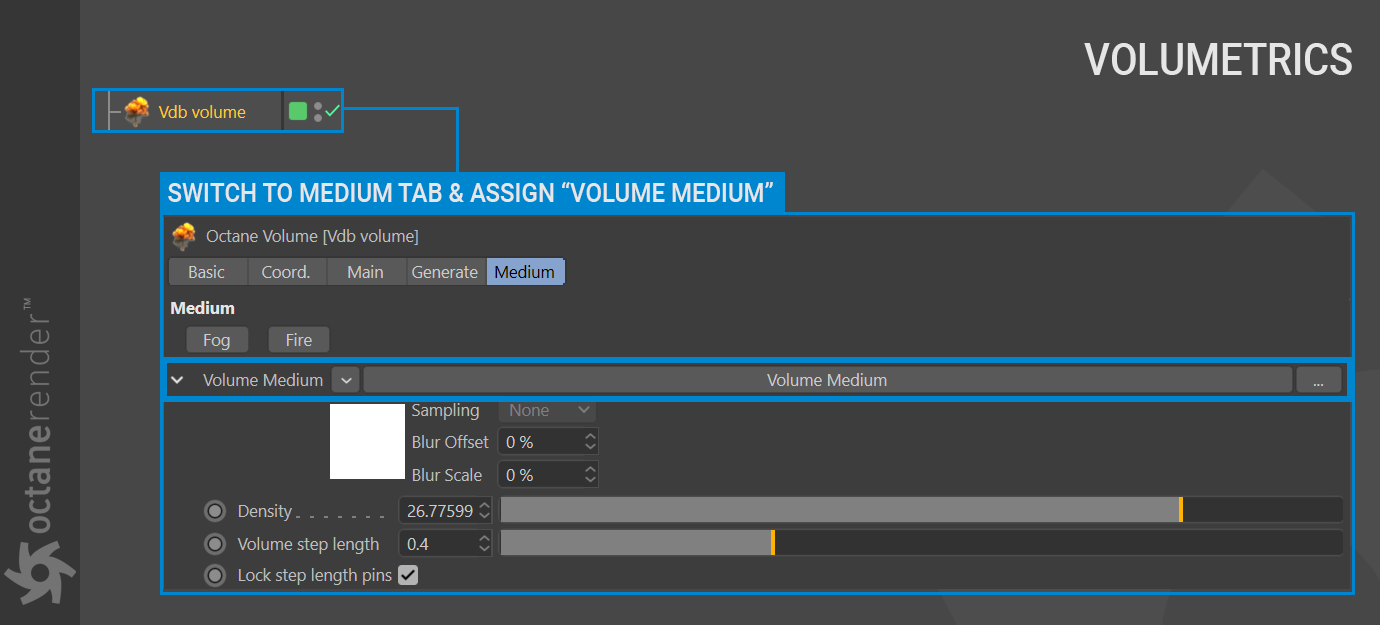
4- Select the VDB Volume from object manager and go to the Medium Tab. Click on the drop-down menu icon next to the texture slot and add a "Volume medium" from plugs > c4doctane to the Volume Medium slot.
5- Click on to the Volume Medium and change the volume parameters as shown in the image below.

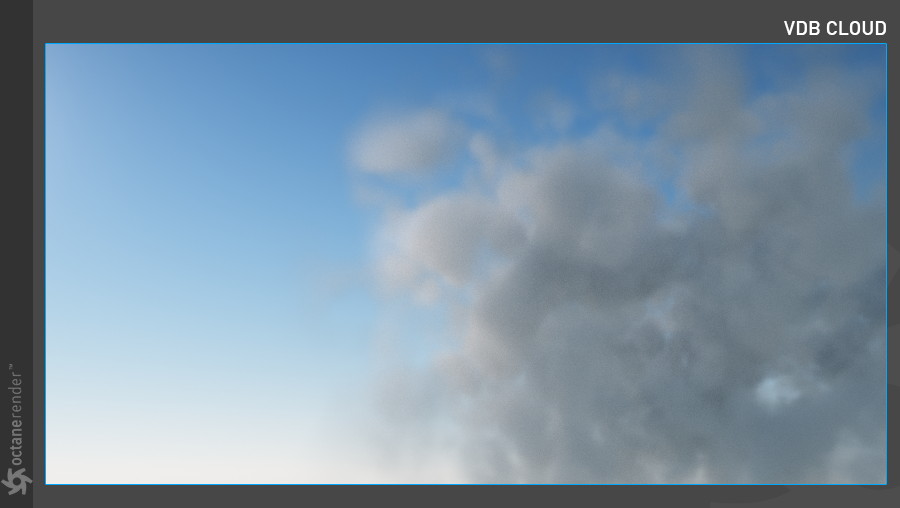
6- Now run Live Viewer. The image should match the illustration below. As shown in the picture, there is a fairly massive cloud in the foreground, and it is matched to the HDR image. For such a cloud mass we kept the density high while we decreased Step Length. The important thing here is the Scattering parameter. In reality, even if they are very small, the clouds are optically thick. This will cause the clouds to scatter a significant amount of sunlight; in other words, the probability that the sun will pass through the cloud without being scattered is very weak. Clouds are also weak absorbers of sunlight at the same time. As a cloud grows, the percentage of sunlight that it reflects increases.
The cloud in the picture absorbs little light. By changing this value, you can make the cloud darker (you can, for example, make a rain cloud). Octane Daylight was set up to provide the necessary illumination to the cloud balanced with the HDR image.
Making Volumetric Clouds using Generate (Unrealistic but Fast)
In this mini tutorial we will produce a volumetric cloud that is not so realistic but yields fast results, using Cinema 4D noise in the "Generate Tab" section. As this section is intended to be created from scratch, there is no file to download.
1- Create Objects/Octane Fog Volume from the Live Viewer menu. Then select the volume from the object manager and go to the "Generate" tab. From there, assign Cinema 4D noise to the texture section and change the settings as you see in the image below.
|
INFO: You can increase your Voxel size (editor) to work comfortably (e.g., 5). Then you can decrease to 2 or 3 in final render. Be very careful if you enter a voxel size fewer than 2 -- small steps increase the number of voxels considerably, rapidly consuming VRAM. |

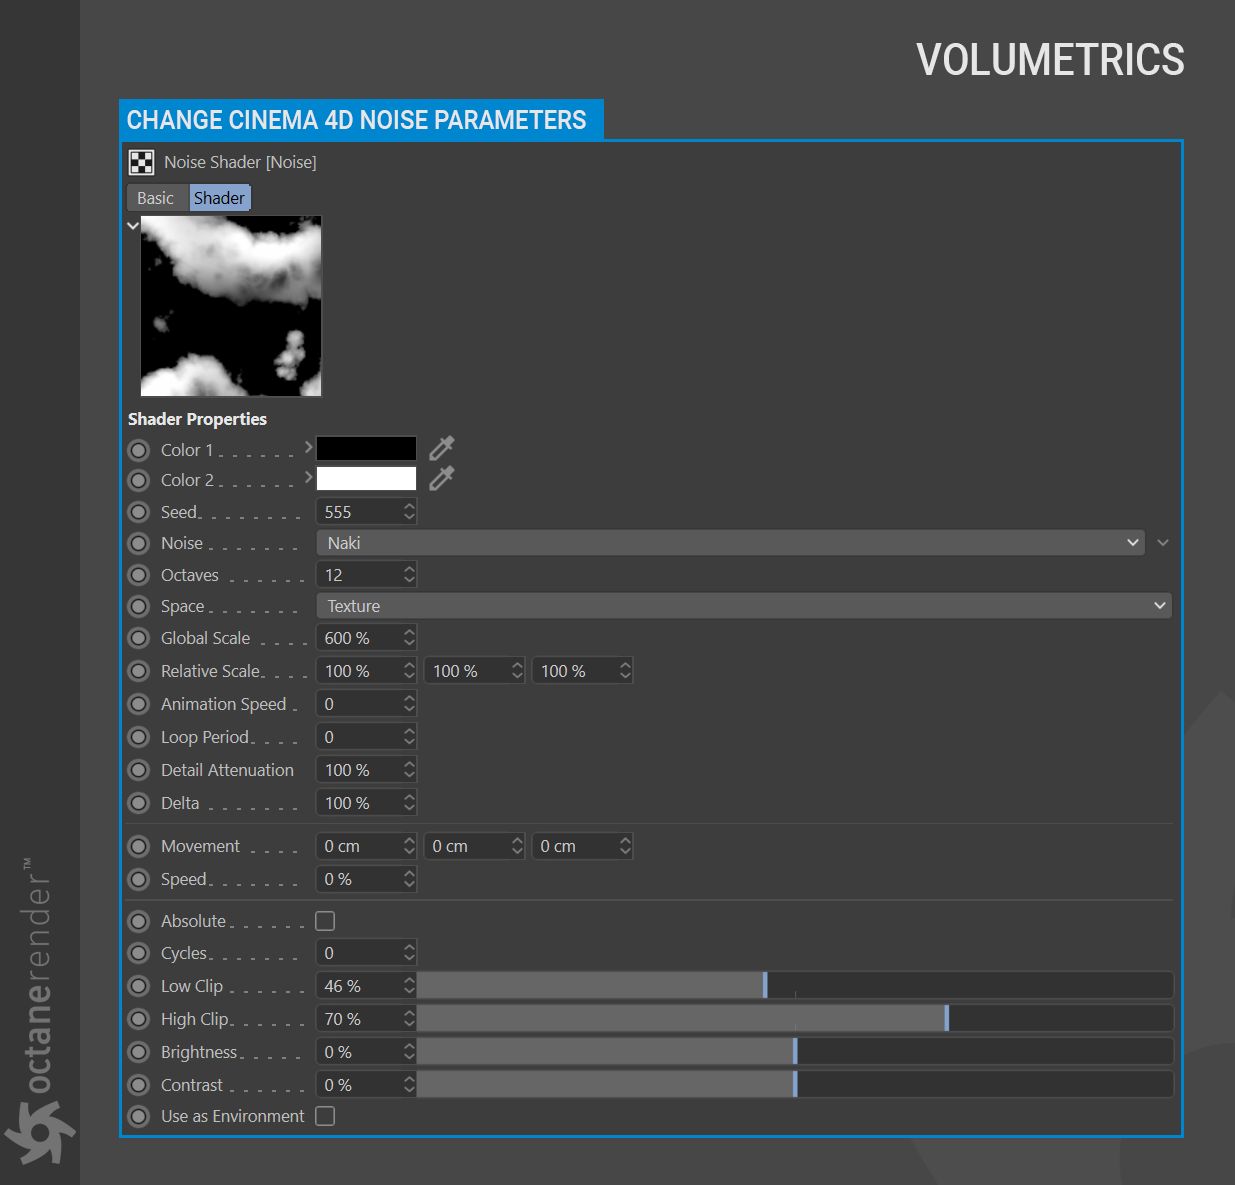
2- Click on Cinema 4D Noise in the Texture slot and change the settings as you see in the image below. The cloud voxel will be generated by this noise texture.
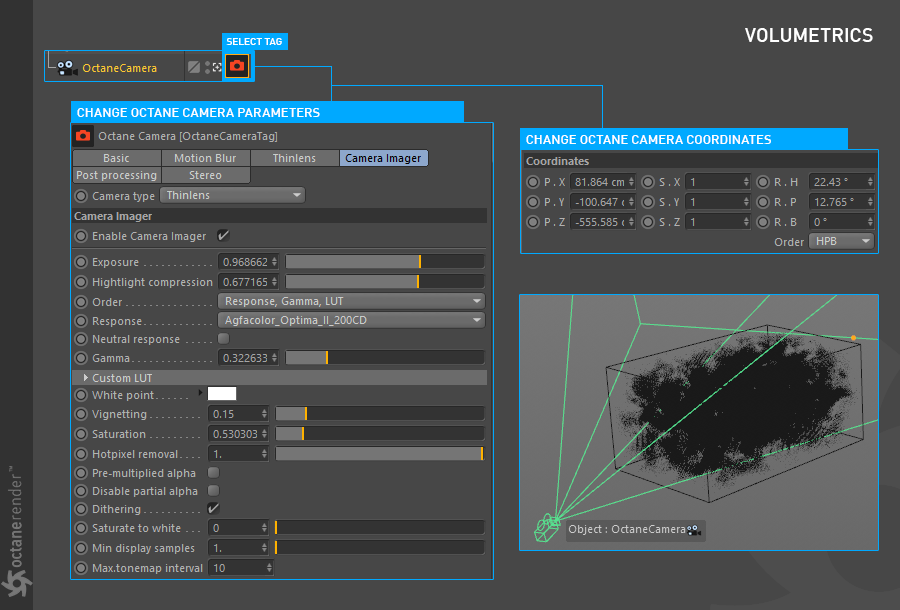
3- Now create an Octane Camera and change both the coordinates and parameters as shown in the image below.
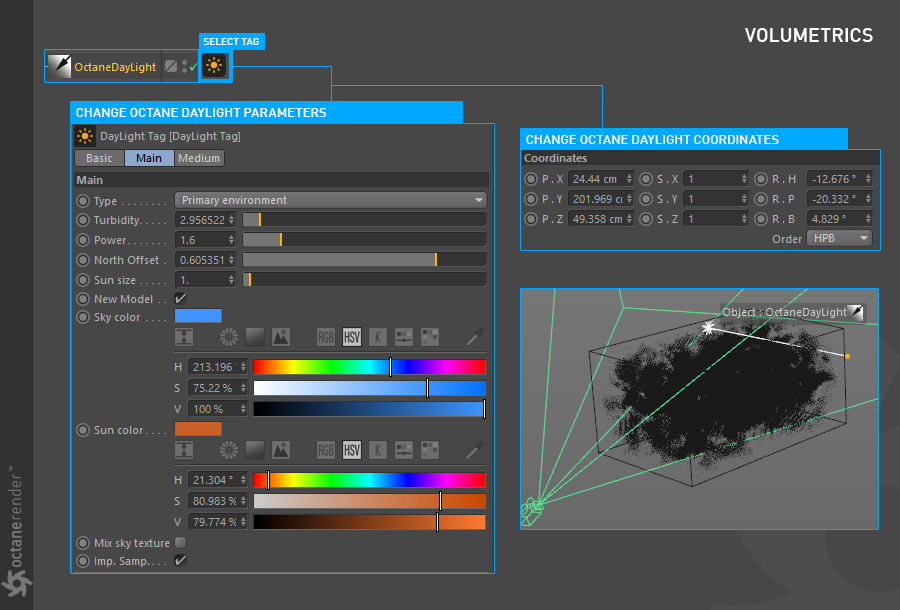
4- Time to light the cloud. To do this, choose Objects/Lights/Octane Daylight from the Live Viewer menu and change both the parameters and the coordinates as illustrated in the image below.
5- From the Object Manager, select the "Volume" object and go to the Medium Tab. Add "Volume medium" from the-drop down menu > plugins > c4doctane > Volume Medium.
6- Click on "Volume Medium" and change the volume parameters as shown in the image below.

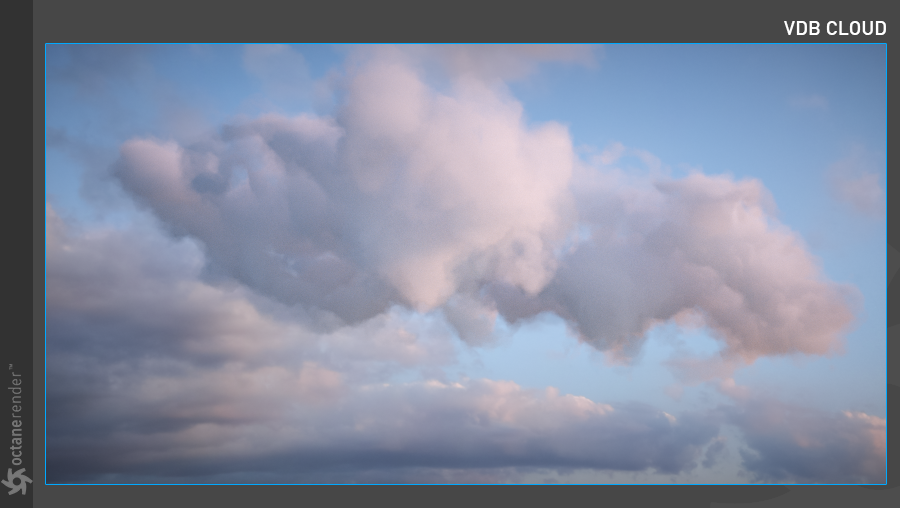
7- Now run Live Viewer. A result similar to the image below should be shown. This cloud can be animated by a value in the entering "Animation Speed" found in the noise settings. Or create another type of cloud by changing the Noise Type. Keep the voxel size at reasonable levels (above 2) for faster quick renders.