The Daemons that comes with every Octane Standalone Edition applications must be installed in all the networked machines that are to be used as render slaves.
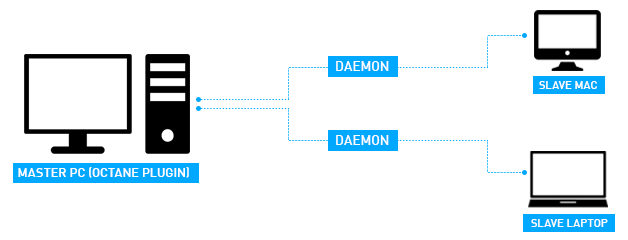
To demonstrate how simple it is to setup Octane's Network Render feature via the plugin's interface, here is an example scenario. Although there can be different numbers of machines in a network, the setup exemplified here contains one Master computer and two Slave computers in the network. One of the slave machines is a MAC and the other slave Machine is a laptop.
Note: To benefit from Network RenderingThe utilization of multiple CPUs or GPUs over a network to complete the rendering process., the master machine must have the Combo license (Octane Standalone + C4D Plugin) and only the Octane Standalone License on slave machines.
Note: Ensure that the master and the slave are not blocked by the Operating System firewall or any firewalls in the network. This can be done, for example, by turning off the firewall for home/work networks on the master. If that does not help, also try switching off the firewall on the slave computer for home/work networks.
Figure 1: An example of one Master computer and two Slave computers in the network.
Installing the Daemons
Install daemon utility into the slave machines. The daemon is a script that starts a slave process on the slave machine. It communicates with a Master machine and receives requests from that Master to monitor a slave process or stop a slave process. The daemon monitors the slave process by doing the following:
- The Daemon makes sure that a running slave sends a regular “heartbeat”
- If the Daemon does not detect a heartbeat it will try to stop the slave process gracefully
- if the Daemon is not able to stop the slave process, it kills the process.
The Daemon runs all the time and starts/stops a slave process if a master requests it. It also listens for the “heartbeat” of the slave to check if the slave process is still running at all. The slave Daemon eliminates the need to launch the slave process manually on each computer each time rendering is required on the slave.
To install the Slave Daemon, go to the Standalone install folder of the slave machine and run the command line utility named
_install_daemon.bat. The Command line window should appear with some options.
Note: The Daemon Install process described below must be performed for each slave machine separately.
Port Setting
From here you can specify which port the Daemon will listen to. If you are a good network specialist enter the required port here, but leave it as default if you have regular network knowledge. The default port is 48000. Use this default value by pressing Enter.

Figure 2: Daemon Port Settings during the Daemon Installation.
This part lists the GPUs that are on the slave machine prior to letting you choose which of these to use for network rendering. For example, if the slave machine has two GPUs and you want to use only one of these for rendering over the network, specify that GPU by typing in its corresponding number.
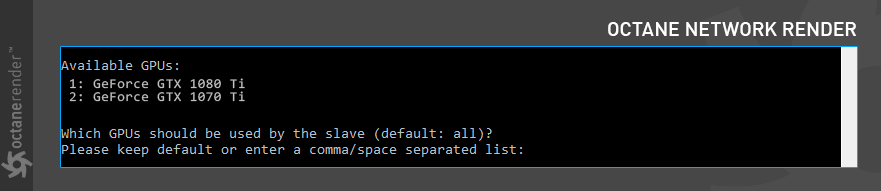
Figure 3: GPU Settings during the Daemon Installation.
Out of Core TexturesTextures are used to add details to a surface. Textures can be procedural or imported raster files. Setup
This part provides the option to use the Octane out of Core texture on the slave machine.
For more detailed information about the Out of Core feature, refer to the Out-Of-Core section in this document.
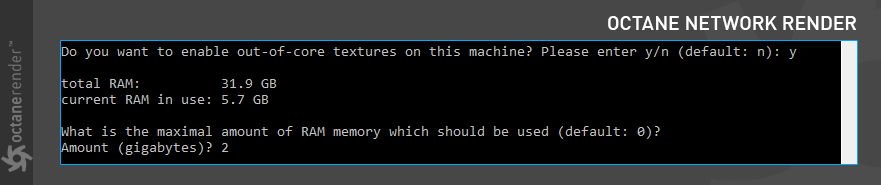
Figure 4: Out Of Core Settings during the Daemon Installation.
Confirmation
This part allows users to review all the settings the Daemon will use. If all your settings are correct, confirm it to complete the installation. After completion, exit the command line utility by pressing any key.

Figure 5: Setup confirmation during the Daemon Installation.
Starting the Daemons
After installing the Daemons in the slave machines, proceed to run the Daemons by going to the Standalone installation folder in each of the slave machines and invoking a file called
_run_installed_daemon.bat. The Daemon will run as a background process in the Slave machines and will be listening in the network at all times for any rendering requests from a Master machine. Running the daemon will invoke a command line window in the slave machine and this signifies that the slave machine is ready for rendering over the netowrk.Note: This Daemon window must be open at the slave machine at all times if the slave machine is to be used for network rendering. Unless manually uninstalled, the Daemon will run automatically when the computer is restarted.
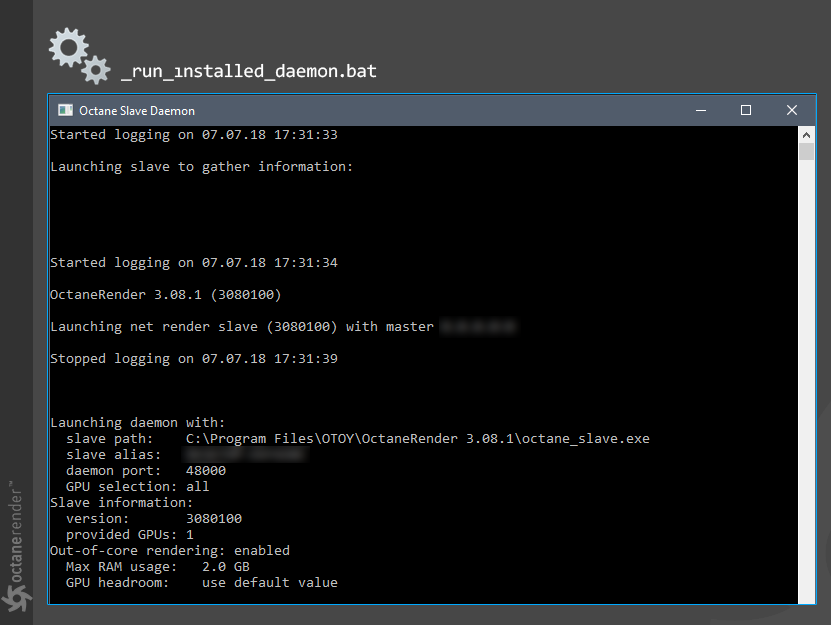
Figure 6: The Octane Slave Daemon window.
Using Network Render In the Live Viewer
With the Daemons correctly installed in the slave machines, proceed to enable Octane's Network Render feature in the Master machine.
To do this, open Cinema 4D, upload any project, and launch Live Viewer (Figure 7). From the Live Viewer menu go to Options>Network Rendering>Enabled.
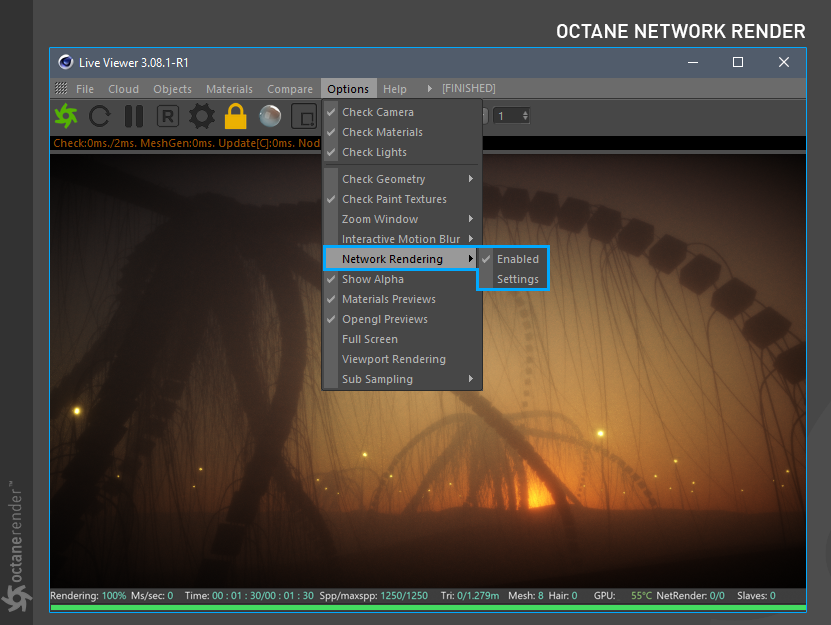
Figure 7: Enabling Octane's Network Rendering feature.
After enabling the feature, proceed to Options>Network Rendering>Settings to adjust the Master machine's Network Port Settings which the master uses to send signals to the Daemon hosts and its Daemon Network Port settings from where signals are received from Daemon hosts (Figure 8). Provided that your network has been correctly configured by you or your network administrator, your network's subnet IPs should appear under the "Daemon config" section and a list of the active Daemons running in the slave machines in the network should appear under the "Active Network Daemons" section.
Each Daemon is listed as a slave with a status. The status "slave is available" means the slave machines are ready for network rendering. Check the boxes next to these machines to send a signal that the Master machine wants to use the particular Slave machine. This changes the status to "slave is running". Alternatively, click the "Bind all" button to activate all slave machines.
After correctly adjusting these settings, close the OctaneRender Network Preferences window and proceed to modeling or rendering in Cinema 4D.

Figure 8: The Octane Network Rendering Setup window in the Master machine.
If all the settings have been placed correctly, the Live Viewer window should show that "NetRender" and "Slaves" are active (Figure 9). This will continuously update the log info for the slave machines in the Daemon Command Line window. If a more advanced log is necessary, choose "Console (Shift + F10)" from the Script menu of Cinema 4D.
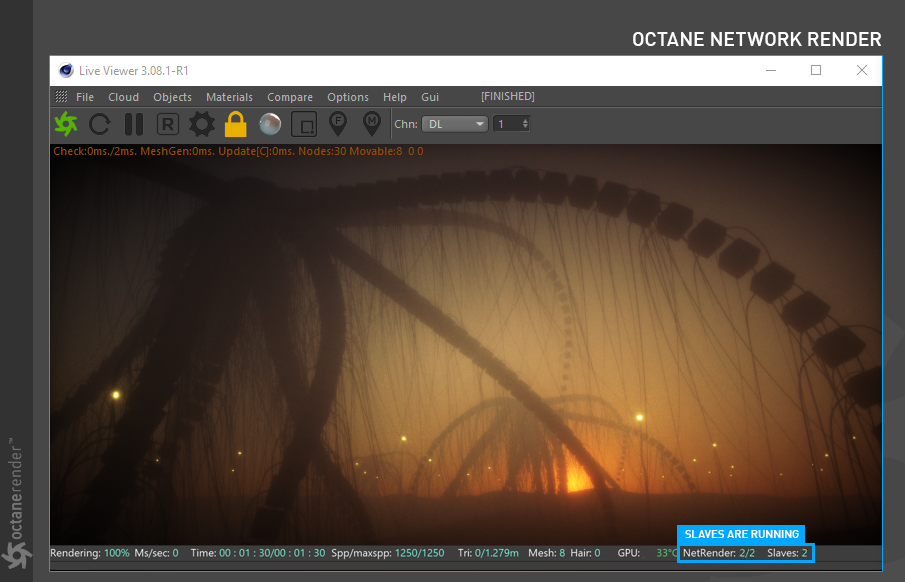
Figure 9: The network rendering indicator as seen from the master machine's Live Viewer window.
Using Network Render In the Picture Viewer
If using network render for the picture viewer is preferred, open the Cinema 4D Render Settings (CTRL + B) and go to the Network Render in the Octane Render Main settings. Place a Check mark on the Enable Network Rendering and Bind all options. You may switch or change these network settings again by through the "Network Preferences" button.
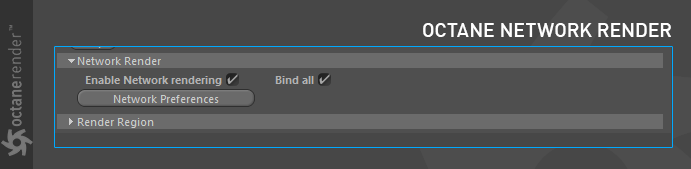
Figure 10: The network rendering setup though Cinema 4D Render Settings (CTRL + B) on the master machine.
Start Picture Viewer render after adjusting these settings. The network render usage in the picture viewer should be indicated in the Picture Viewer window.
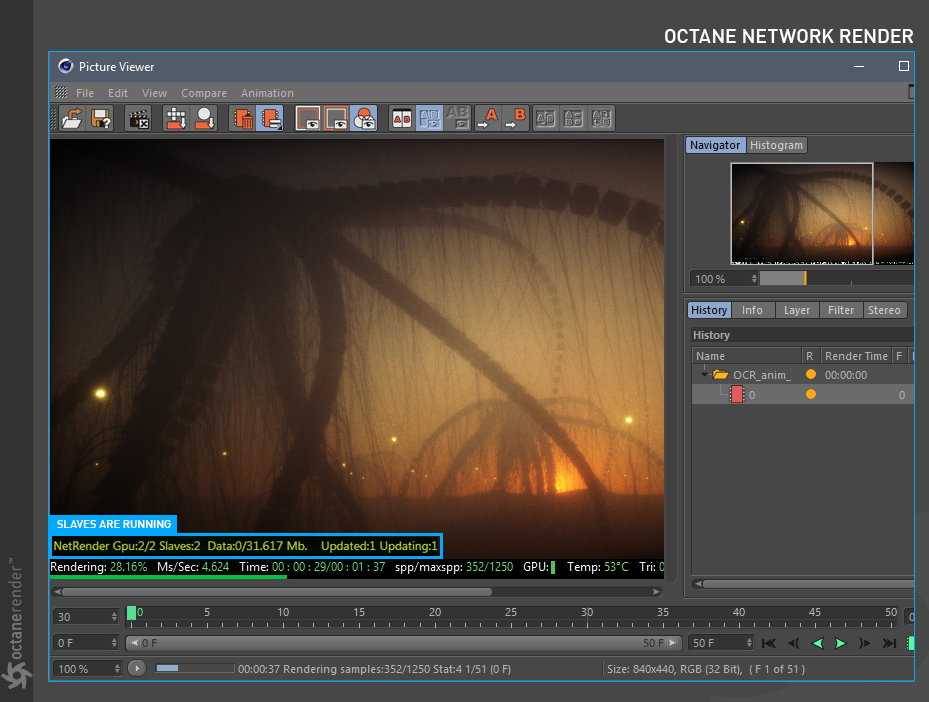
Figure 11: The network rendering indicator as seen from the master machine's Picture Viewer window.