Render Layers
Render layers separate scene geometry into parts, where one part is meant to be visible and the other parts capture the side effects of the visible geometry. The layers allow different Objects to render into separate images where you can apply render passes. The render layers are meant for compositing, not hiding parts of the scene.
To set up a scene for rendering in layers, assign an Octane Layer ID for the scene's objects, and set the object geometry type to be Movable Proxy (Figure 1). You can find this option by right-clicking on the object in the Viewport and selecting Octane Properties from the Quad menu (Figure 2).
|
|
Render Layers
|

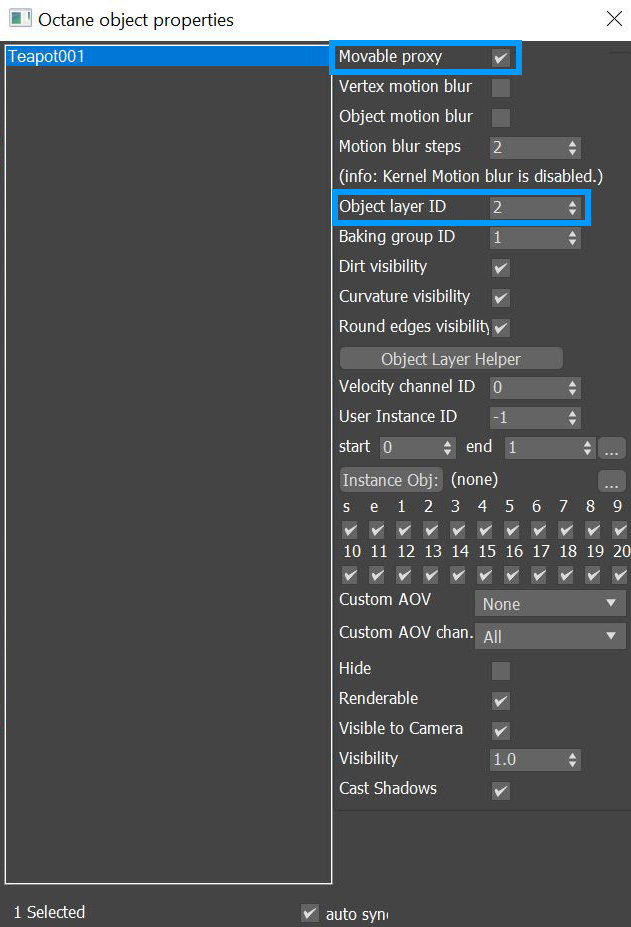
Figure 1: Assigning Object Layer IDs and Movable Proxy in the Octane Object Properties window
|
|
Render Layers
|

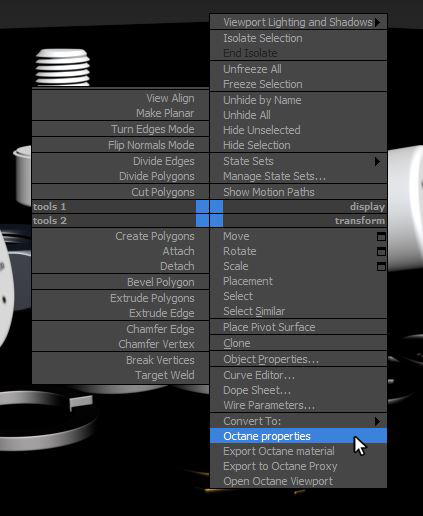
Figure 2: Accessing the Octane Properties
Finally, enable the Render Layers feature in Render Setup from the Kernel tab. If the Object Layer IDs are set up for each object, OctaneRender® can render separate passes for those objects that share an ID.
|
|
Render Layers
|
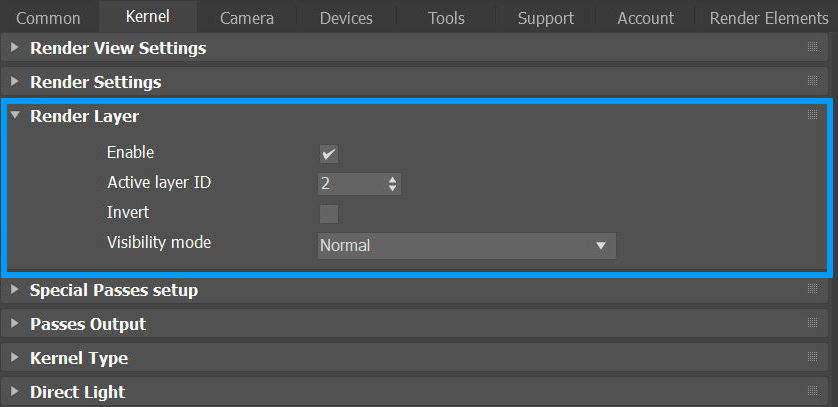
Figure 3: Enabling the Render Layers feature from the Render Setup window
The main beauty pass renders the Object IDs that correspond to the Active Layer ID, and cuts out everything else. You can also choose to invert everything by toggling Invert in the Render Layer rollout.
|
|
Render Layers
|
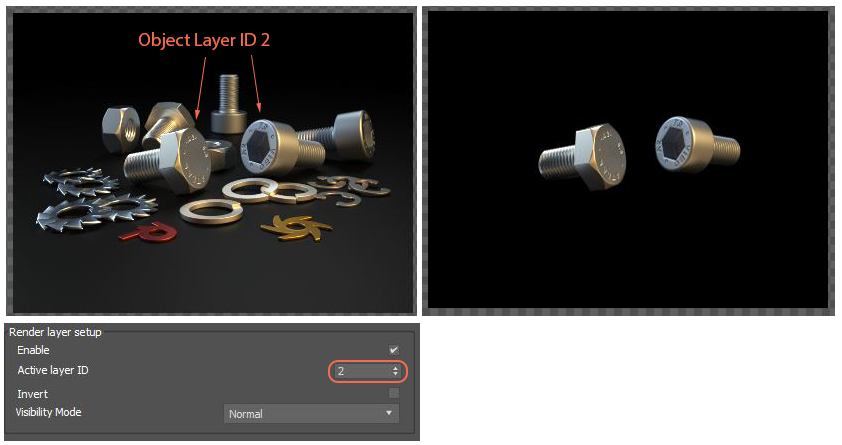
Figure 4: Rendering objects with an Object Layer ID of 2
Visibility Mode has four options:
- Normal - Objects on the specified Active Layer ID are rendered, and objects with other Object Layer IDs rendered as cutouts.
- Hide Inactive Layers - Make objects on the inactive layers invisible in the rendering, without rendering cutouts.
- Only Side Effects - Similar to Normal, except the active layer is invisible to the camera, but its side effects are still captured without obstructing the active layer.
- Hide From Camera - Renders inactive layer shadow contributions, but keeps the objects invisible in the rendering.