Camera
You can also access OctaneRender’s camera settings from the Camera tab in the Render Setup window when no OctaneRender® cameras are present in the scene. These parameters provide camera controls for the active Viewport.
A detailed explanation can be found in the Lights and Cameras > Camera section of the documentation.
|
|
Camera Settings
|
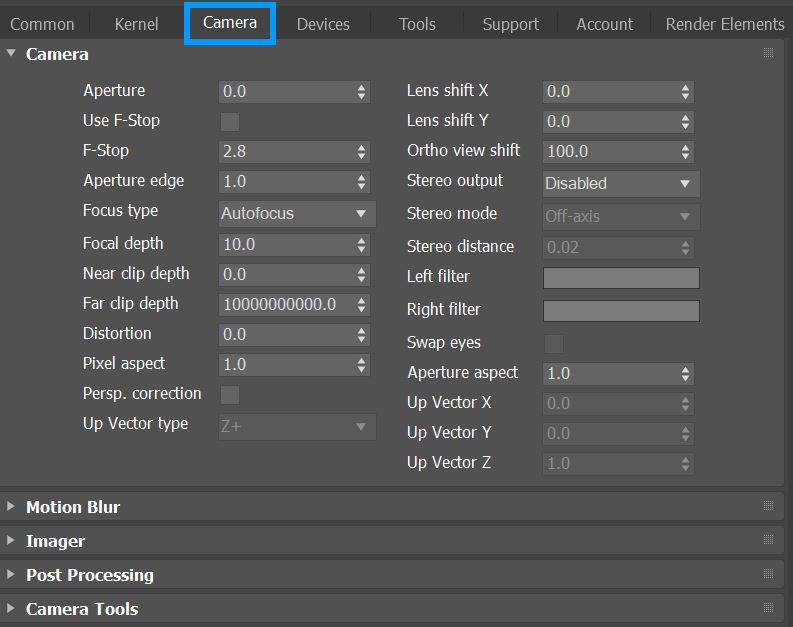
Figure 1: The Camera Tab from the Render Setup window
Camera Parameters
Aperture - The camera lens opening's radius, measured in centimeters. Low values create a deep depth-of-field, where everything is in focus. High values create a shallow depth-of-field, where objects in the foreground or background are out-of-focus.
Use F-Stop and F-Stop - Controls the field-of-view and depth-of-field, similar to a real-world camera. The F-Stop value is the aperture-to-focal-length ratio.
Aperture Edge - Controls aperture edge detection at all points within the aperture. Lower values give more pronounced edges to out-of-focus objects affected by a shallow depth-of-field. Aperture Edge modifies the depth-of-field's bokeh effect. High values increase the contrast towards the edge.
Focus Type - Select the type of focus to use for the camera. If AutoFocus is enabled, the focus is kept on the closest visible surface at the center of the image, regardless of the Aperture, Aperture Edge, or the Focal Depth values.
Focal Depth - The depth of the plane in focus, measured in meters.
Near Clip Depth - Distance from the camera to the near clipping plane, measured in meters. The main purpose is for interior scenes, where you can get a good shot of the whole room but not without a very large field of view, because the camera needs to stay inside the room.
With camera clipping (near plane), you can position the camera outside the room - lower the field of view and increase the clipping plane distance in front until the closest walls are clipped out. The geometry is not altered, but the camera clipping is altered, which means that shadows, reflections, and refractions are still affected by the clipped geometry.
Far Clip Depth - The distance from the camera, where objects farther than the specified distance aren't seen from the camera.
Distortion - Adjusts the spherical and cylindrical distortion. The rendered image displays the entire sphere and uses equidistant cylindrical projection.
Pixel Aspect - This makes the pixel ratio non-square to accommodate older formats like NTSC or PAL.
Perspective Correction - If the up-vector is vertical, enabling this option keeps vertical lines parallel. This is useful for architectural rendering, when you want to render images of tall buildings from a similar height as the human eye, but keep the vertical lines parallel.
Up Vector Type - Sets one of the 3ds Max axis or custom axis to define a special Up vector, or None to use 3ds Max view matrix Up vector. Axis Z+ is the standard Up vector.
Lens Shift X/Y- This is useful for architectural rendering, where you want to render images of tall buildings or structures from a similar height as the human eye, but keeping the vertical lines parallel.
Ortho View Shift - Additional distance of camera in orthographic viewport.
Stereo - This specifies the output rendered in stereo.
- Left - Renders the image for the left eye.
- Right - Renders the image for the right eye.
- Side-By-Side - Renders the scene as a pair of two-dimensional images.
- Anaglyphic - Makes the render viewable with red/blue 3D glasses.
- Over-Under - The pair of two-dimensional images is placed one above the other for special viewers.
Mode - When you choose a Stereo mode, you can choose Off-Axis or Parallel stereo camera projections.
Stereo Distance - The distance between the left and the right eye in Stereo mode, measured in meters. The stereo distance is also referred to the IPD (Inter Pupillary Distance), and is often exchanged with terms like stereo interocular distance or eye distance. For realistic depth, use values between 0.055 and 0.075.
Stereo Distance Falloff - Controls how fast the eye distance reduces towards the poles. This reduces eye strain at the poles when the panorama is viewed through a head-mounted display. A value of 1 reduces the eye distance from equator to the poles, which creates a relaxed viewing experience. This also causes flat surfaces to appear curved. A value smaller than 1 keeps the eye distance constant for a larger latitude range above and below the horizon, but it rapidly reduces the eye distance near the poles. This keeps a flat surface, but causes more eye strain near the poles, which you can reduce again by setting the pano cutoff latitude to a value less than 90 degrees.
Left/Right Stereo Filter - The left and right filter colors adjust the colors for the anaglyphic stereo effect in the render.
Swap Eyes - Swaps the left and right eye images.
Aperture Aspect - Stretches or squashes the depth-of-field disc.