Quick Startup - Setup a Scene and Render
The goal of this section is to quickly introduce you to the use of the OctaneRender for Cinema 4D plugin. In this tutorial, you will quickly learn how to create Octane materials, Octane lights and light tags, camera tags, and, of course, creating a final render. Subsequent sections will go into more detailed information.
We have provided a starter file that you can open Cinema 4D, so that you can follow along. Download the sample scene from here:
Let's get started!
STARTING THE LIVE VIEWER
Step 1: Open the sample scene
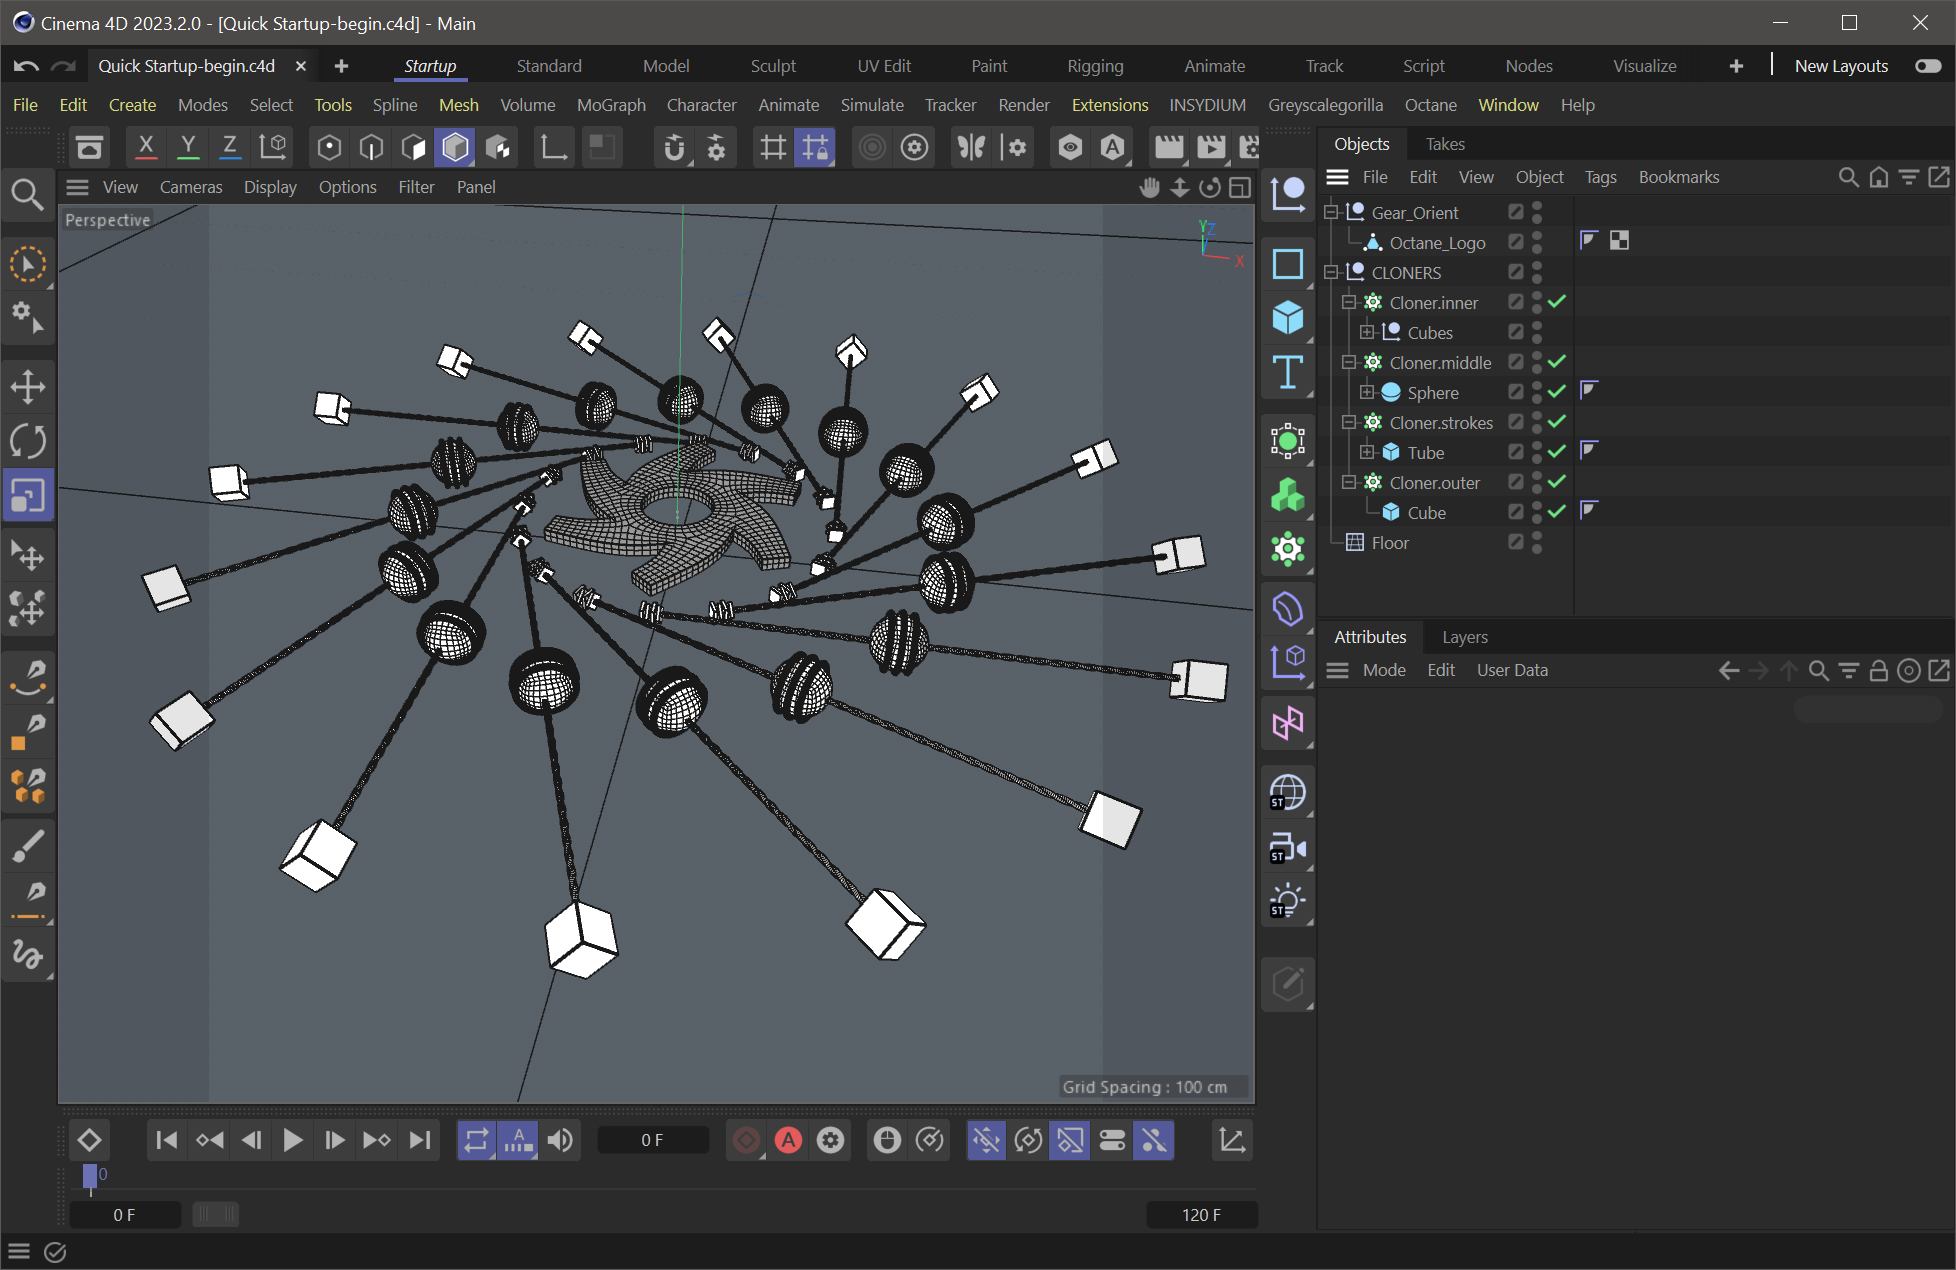
Open the Cinema 4D file you downloaded. This simple scene contains a mesh of the Octane Logo in the middle with a few cloner objects, along with some animation.
|
|
sCENE sTRUCTURE
|

Step 2: Activate the Live Viewer window
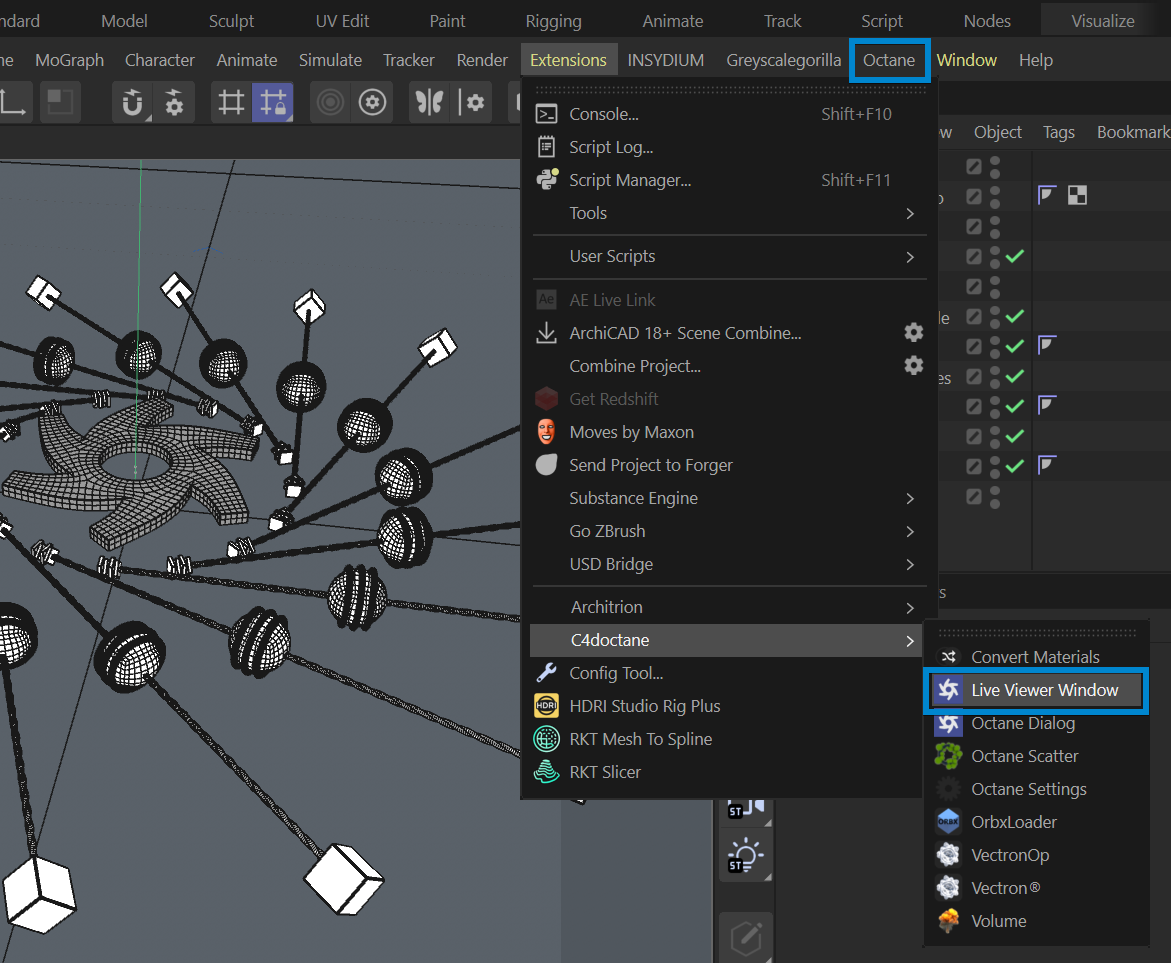
Go to the Cinema 4D Main Menu bar and choose Extensions > C4Octane > Live Viewer Window or Octane > Live Viewer Window from the Main Menu.
|
|
START the PLUGIN
|
Step 3: Start the Live Viewer
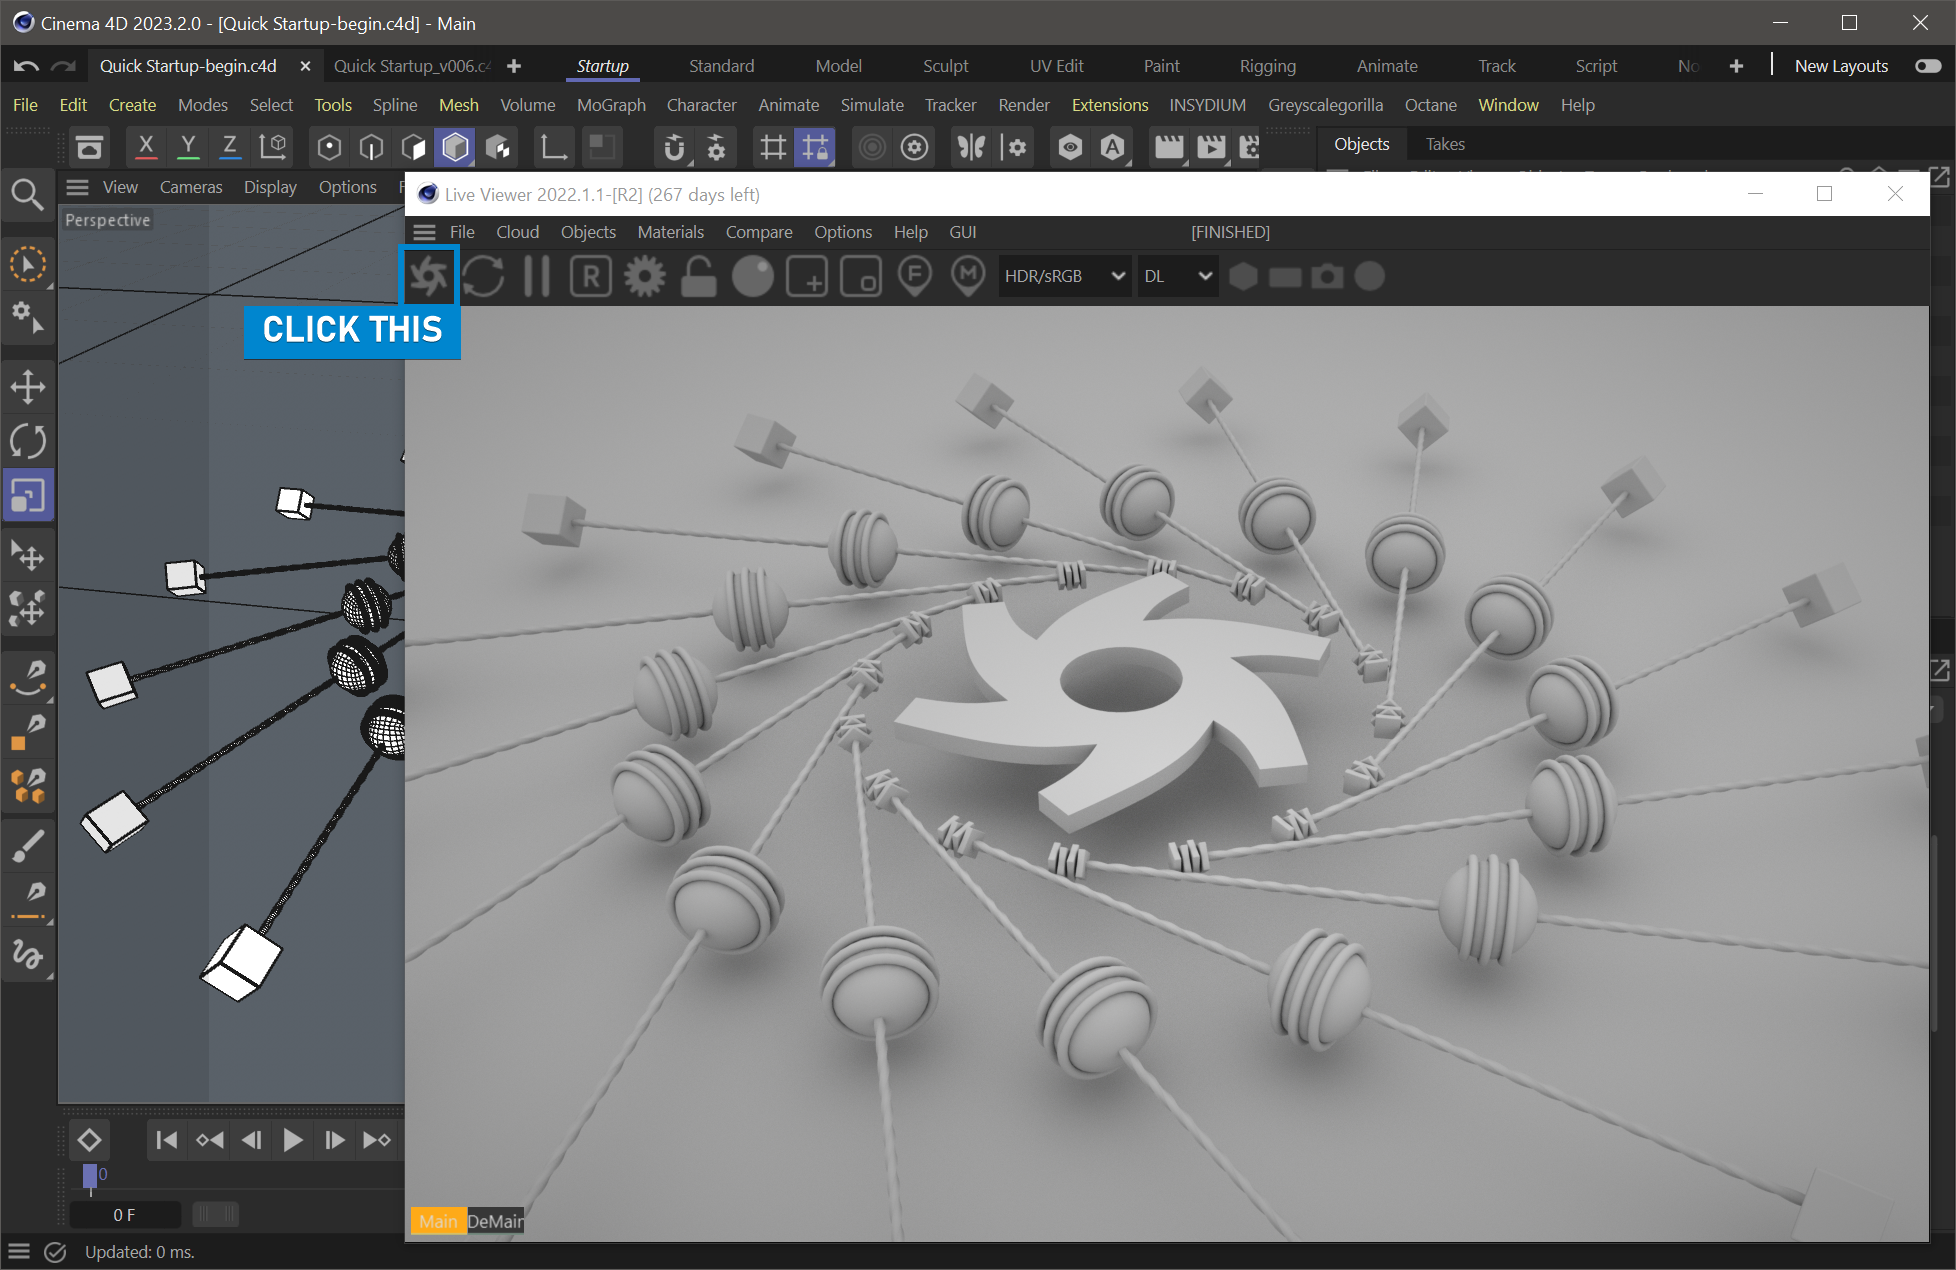
In the Live Viewer, click on the gear shaped icon as you see in the image to start rendering in the Live Viewer — this is the heart of Octane. The first thing to notice here is that the Live Viewer updates the scene in real time. Every move you make in Cinema 4D's viewport will be updated in real time in the Live Viewer.
|
NOTE More complex materials and lighting, as well as object count, cloners and other operators, do have an impact on the real-time performance of the Live Viewer. |
Navigation within the Live Viewer is the same as it is in Cinema 4D's 3D viewports. Use the same shortcuts to move around the environment.
|
|
Live Viewer
|
CREATING OCTANE MATERIALS
Step 4: Create a Standard Surface Material
Time to add some materials to shade and add some lighting to illuminate the scene. Octane offers many different types of materials, each with their own strengths. You can read more about materials in the Using Materials section.
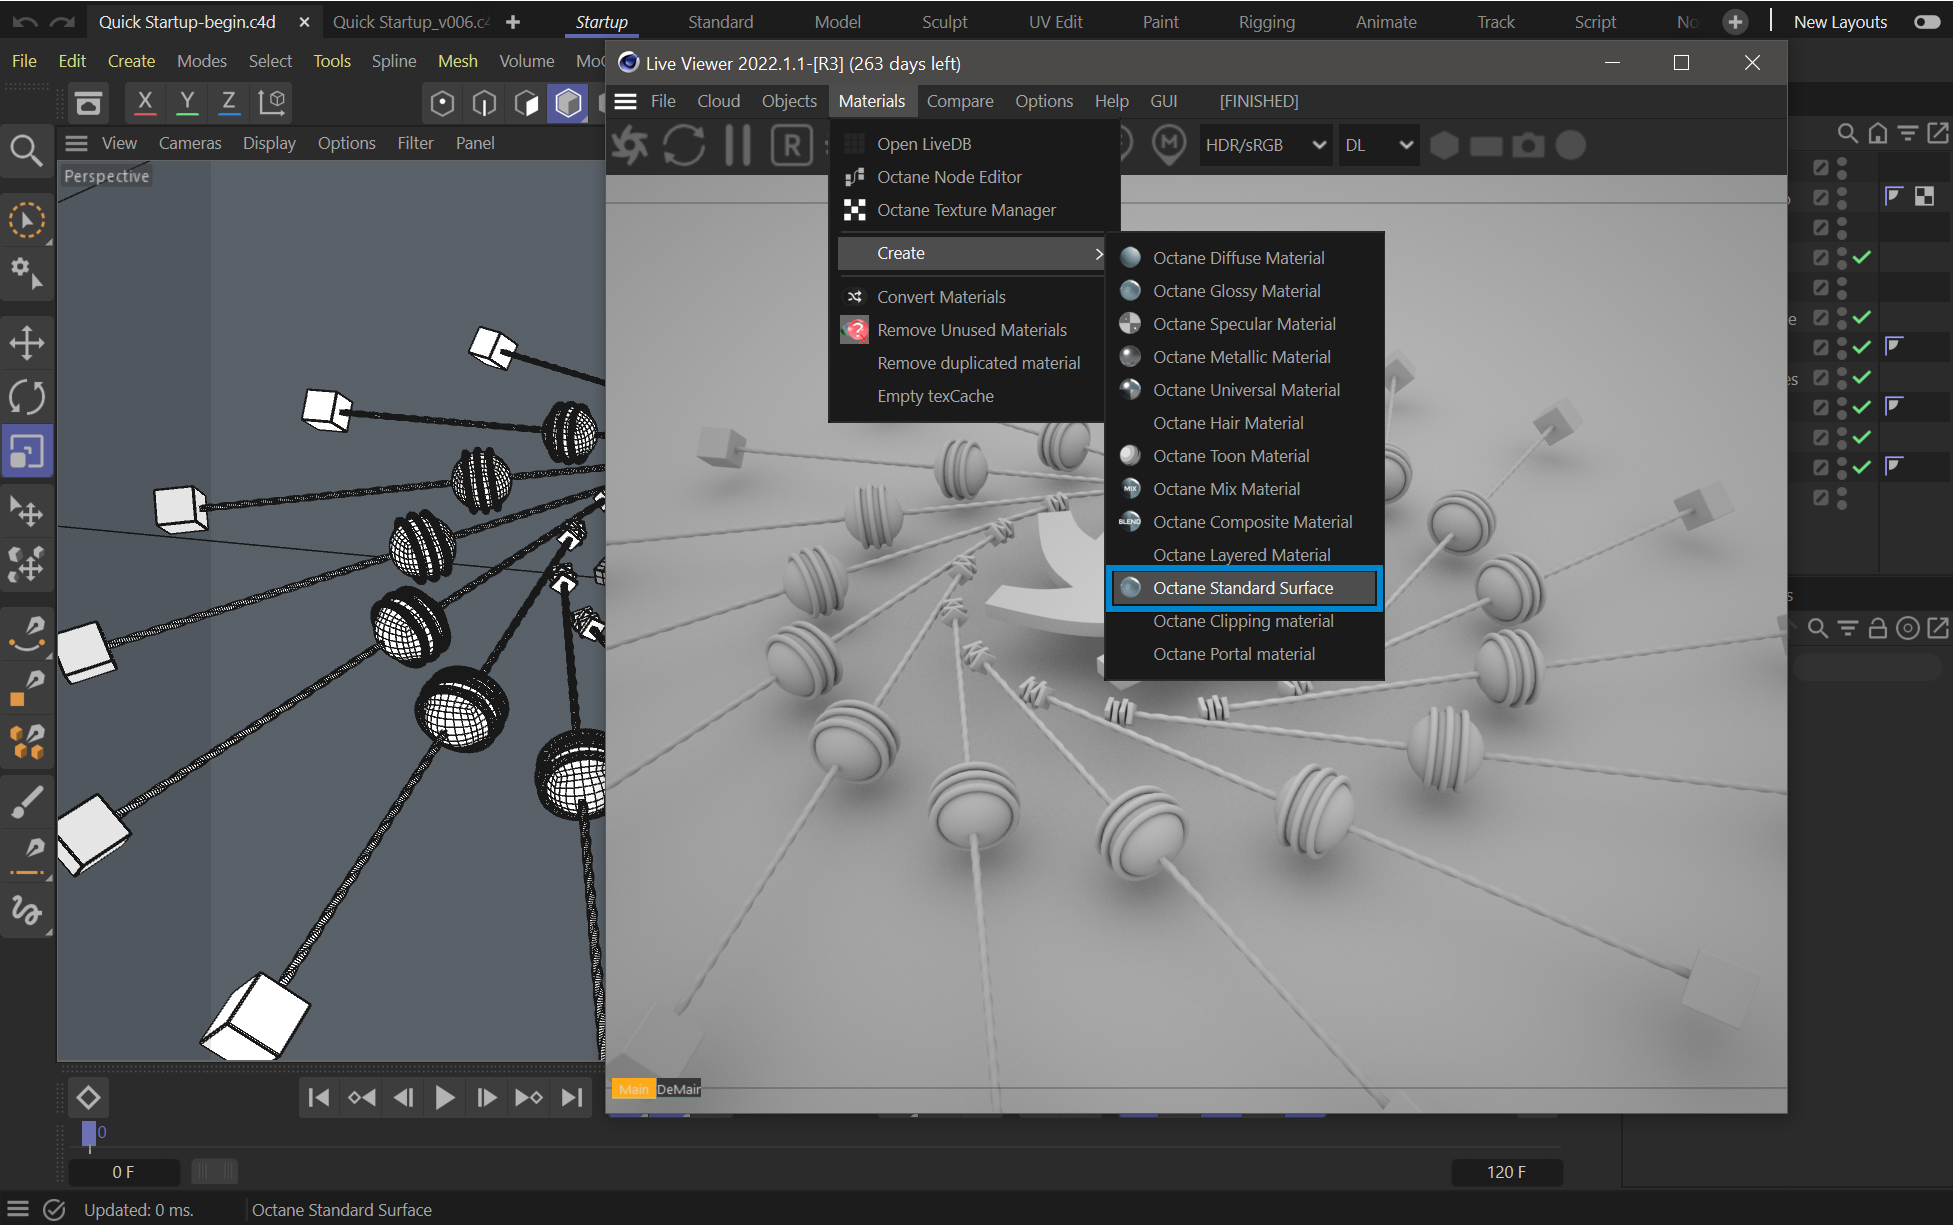
In Live Viewer, and choose Materials > Standard Surface Material (you can also create Octane materials from Cinema 4D material window). This will create a new Standard Surface Material and place it in the Cinema 4D Material Manager. Change the material name to "Inner.Cubes" (double click the materials icons to change names). For more information on the Standard Surface Material, see here.
|
|
Create a standard surface Material
|
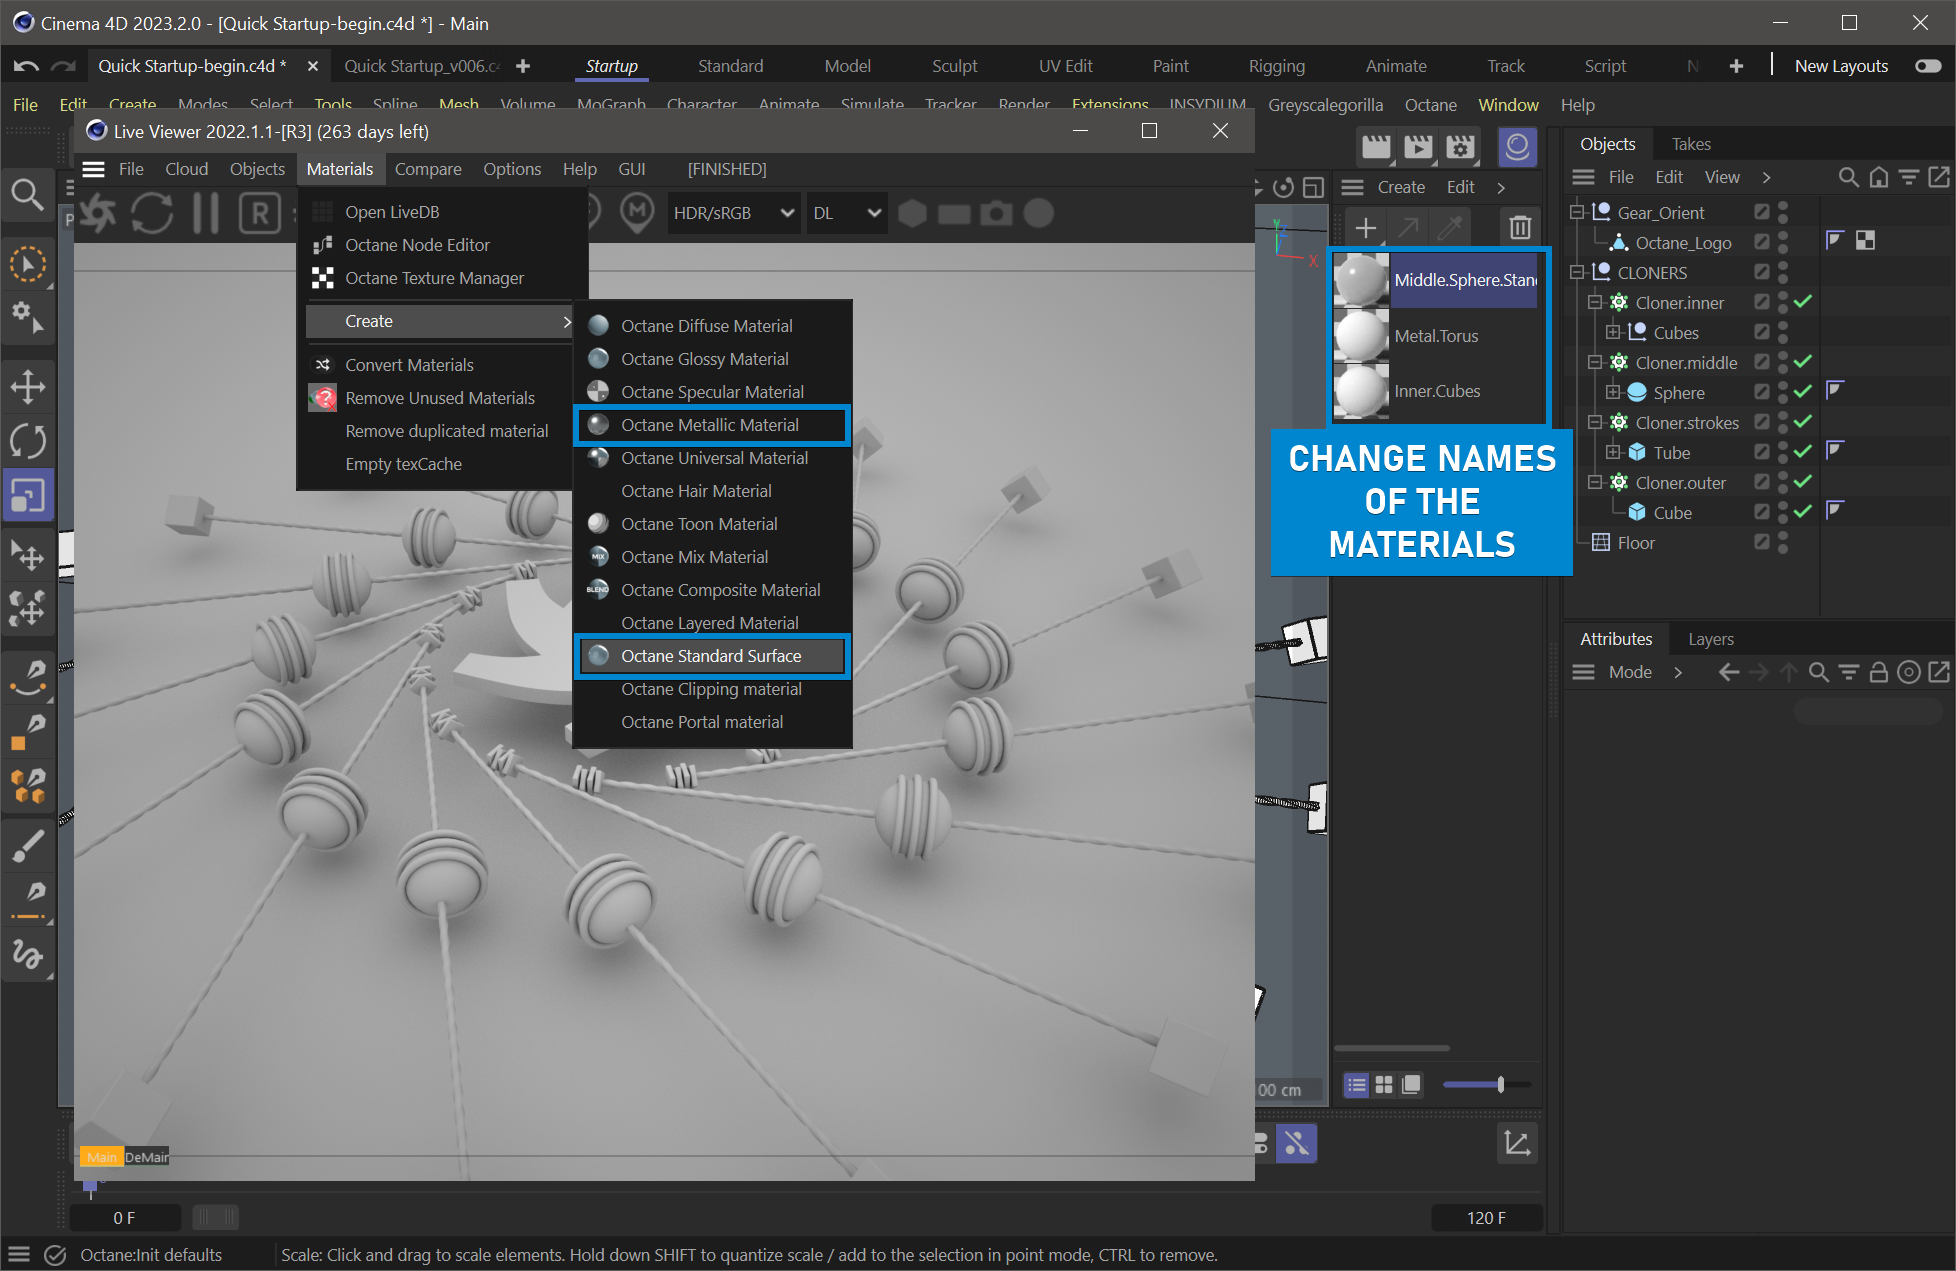
Step 5: Create another Standard Surface material and a Metallic material
Create another Standard Surface material and a Metallic material. Change the names to "Middle.Sphere.Standard" and "Metal.Torus."
|
|
Change Material Names
|
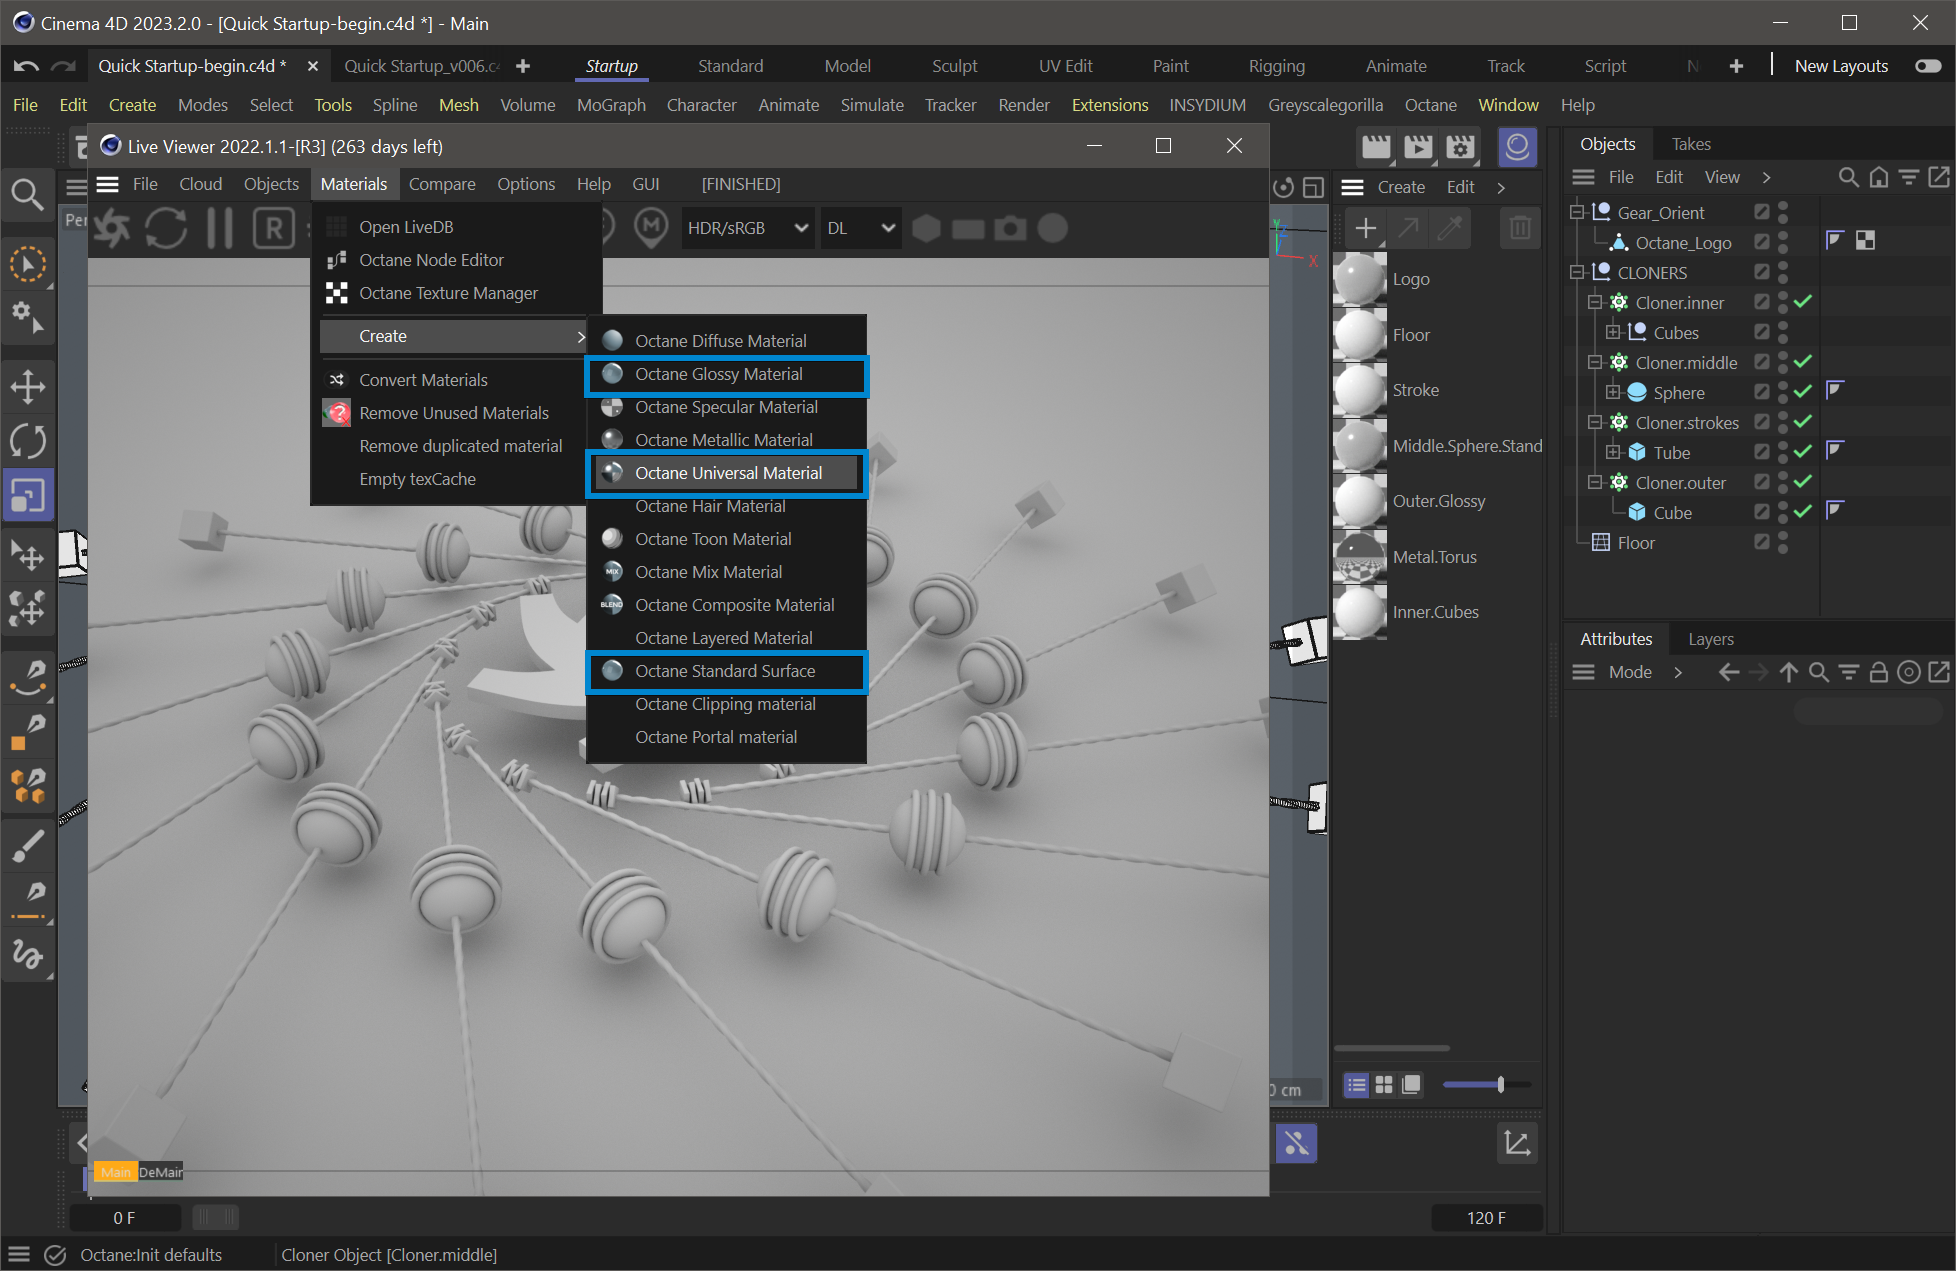
Step 6: Create More Materials
Time for more materials. Go to the Materials menu again from the Live Viewer window and create another Universal, Standard Surface, and Glossy material. Change the names to "Stroke", "Floor" and "Logo" respectively.
|
|
MOre Materials
|
ADJUSTING MATERIAL PROPERTIES
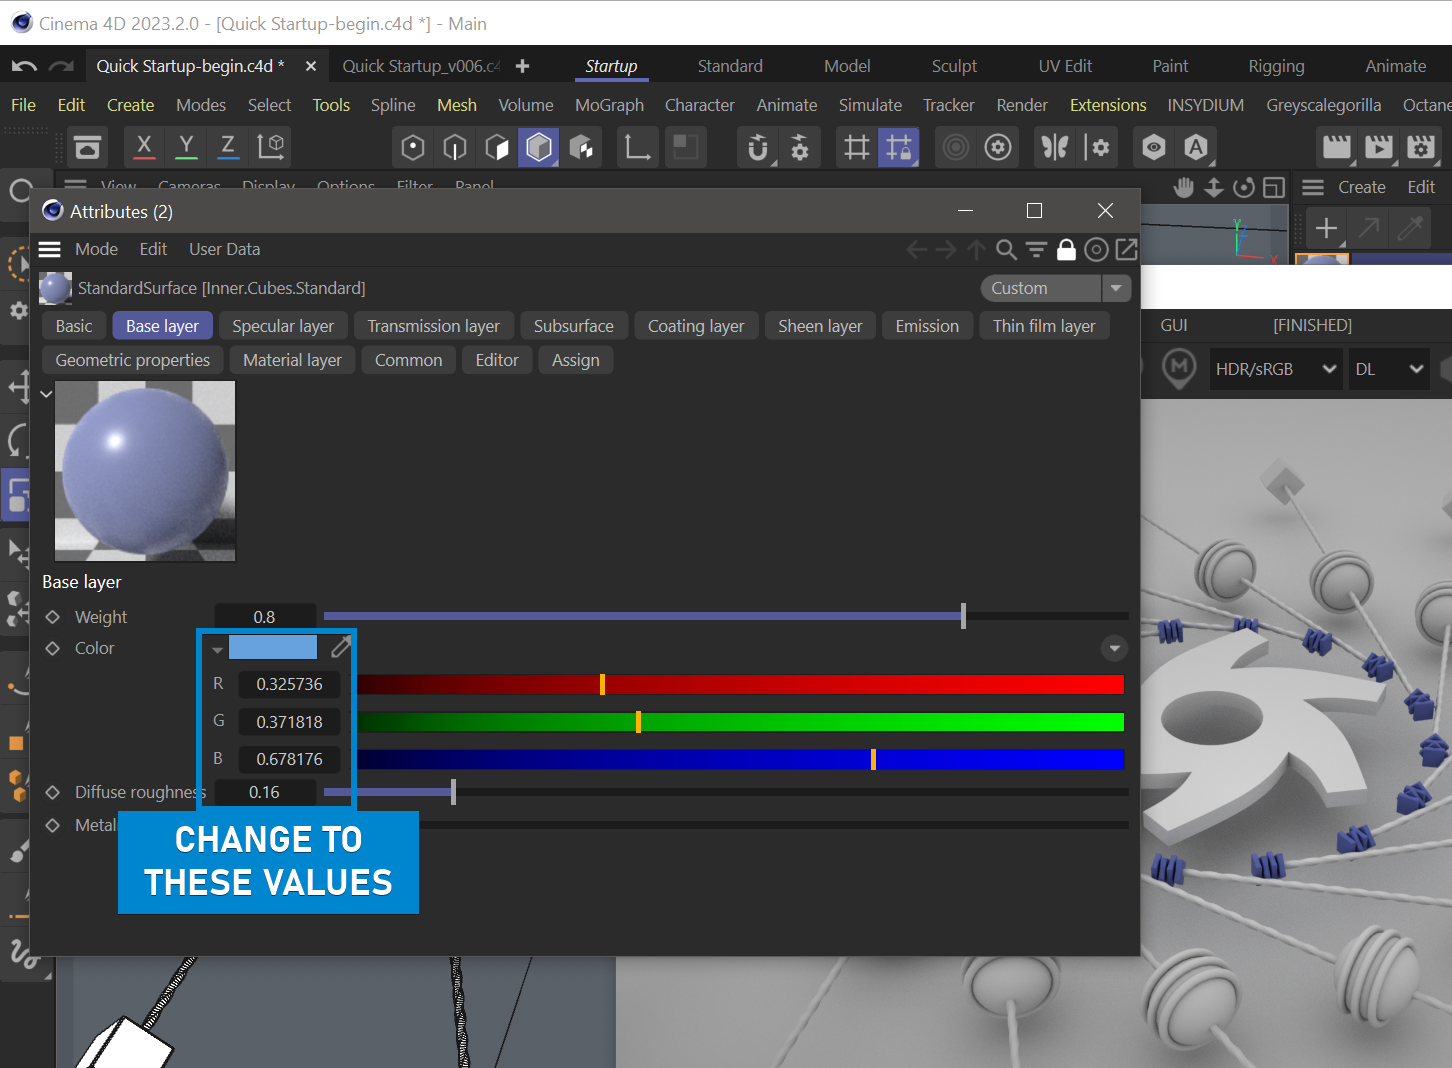
Step 7: Edit Inner.Cubes material
We have finished creating the materials; now we need to edit the properties of these materials to get the looks we want. First, start with the Inner.Cubes material. Double-click to open the material. You will see the properties of the Standard Surface material in the opened window. We will explore these items in more depth in subsequent topics, but for now, click on the Base layer tab and change the properties of the material as you see in the image below.
|
|
EDit inner.Cubes Material
|
Step 8: Adjust the Outer.Glossy material
Now double-click the "Outer.Glossy" material and change its properties as you see in the image below.
|
|
EDit outer.glossy Material
|

Step 9: Edit the remaining materials
Now do the same procedure for the remaining four materials. These materials are "Middle.Sphere.Standard", "GEAR", "STROKES" and "FLOOR". The following image shows the properties of each. Change these properties from the relevant parts of the material.
|
|
|
Set up the rest of the materials |
|||
|
|
MIDDLE SPHERE |
|
Logo |
|
|
|
|
standard surface material Base Layer — Weight: 0.8 Color: R-0.56; G-0.9; B-0.98 Transmission Layer — Weight: 0.685 Color: Same as Base Layer Depth: 0.08 Dispersion Abbe: 10 Extra Roughness: 0.333 |
|
standard surface material Base Layer — Weight: 0.8 Color: R-0.36; G-0.11; B-0.31 Coating Layer — Weight 1 Roughness: 0.1; IOR: 1.5 Anisotropy: 0.679; Normal: Flakes OSL Size: 0.5; Variance:0.5; Blend: 0.5 |
||
|
|
stroke |
|
Floor |
|
|
|
|
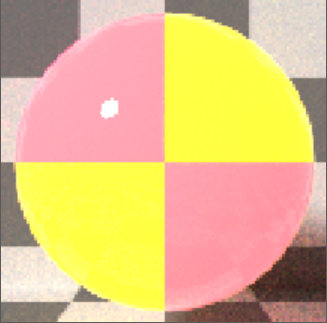
Universal material Albedo — Gradient Texture: Checks Gradient Colors: Tab 1 R-255; G-0; B-109 Tab 2 R-255; G-201; B-0 Texture Emission Power 2.0 Same Gradient Colors |
|
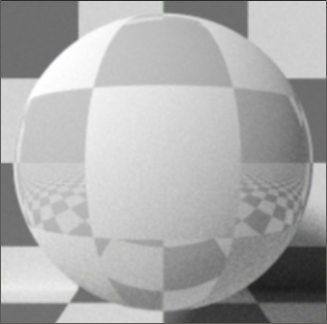
glossy material Diffuse Gradient Texture: Checks Scaled to 0.25 Gradient Colors: Tab 1 V-89.11; Tab 2 V-96.4 Roughness Gradient Texture: Checks Scaled to 0.25 Gradient Colors: Tab 1 V-0.0; Tab 2 V-96.4 Index: 4.0 |
||
|
|
|
|
|
||
|
This tutorial uses the familiar Cinema 4D Materials Editor to make changes using the Attributes Manager as well. This method is very limiting, however, and the Octane Node Editor is a better way to create and edit materials. Learn more about the Octane Node Editor here. Have a look at these materials with the Node Editor to start learning about it. |
APPLY MATERIALS TO THE OBJECTS
Step 10:
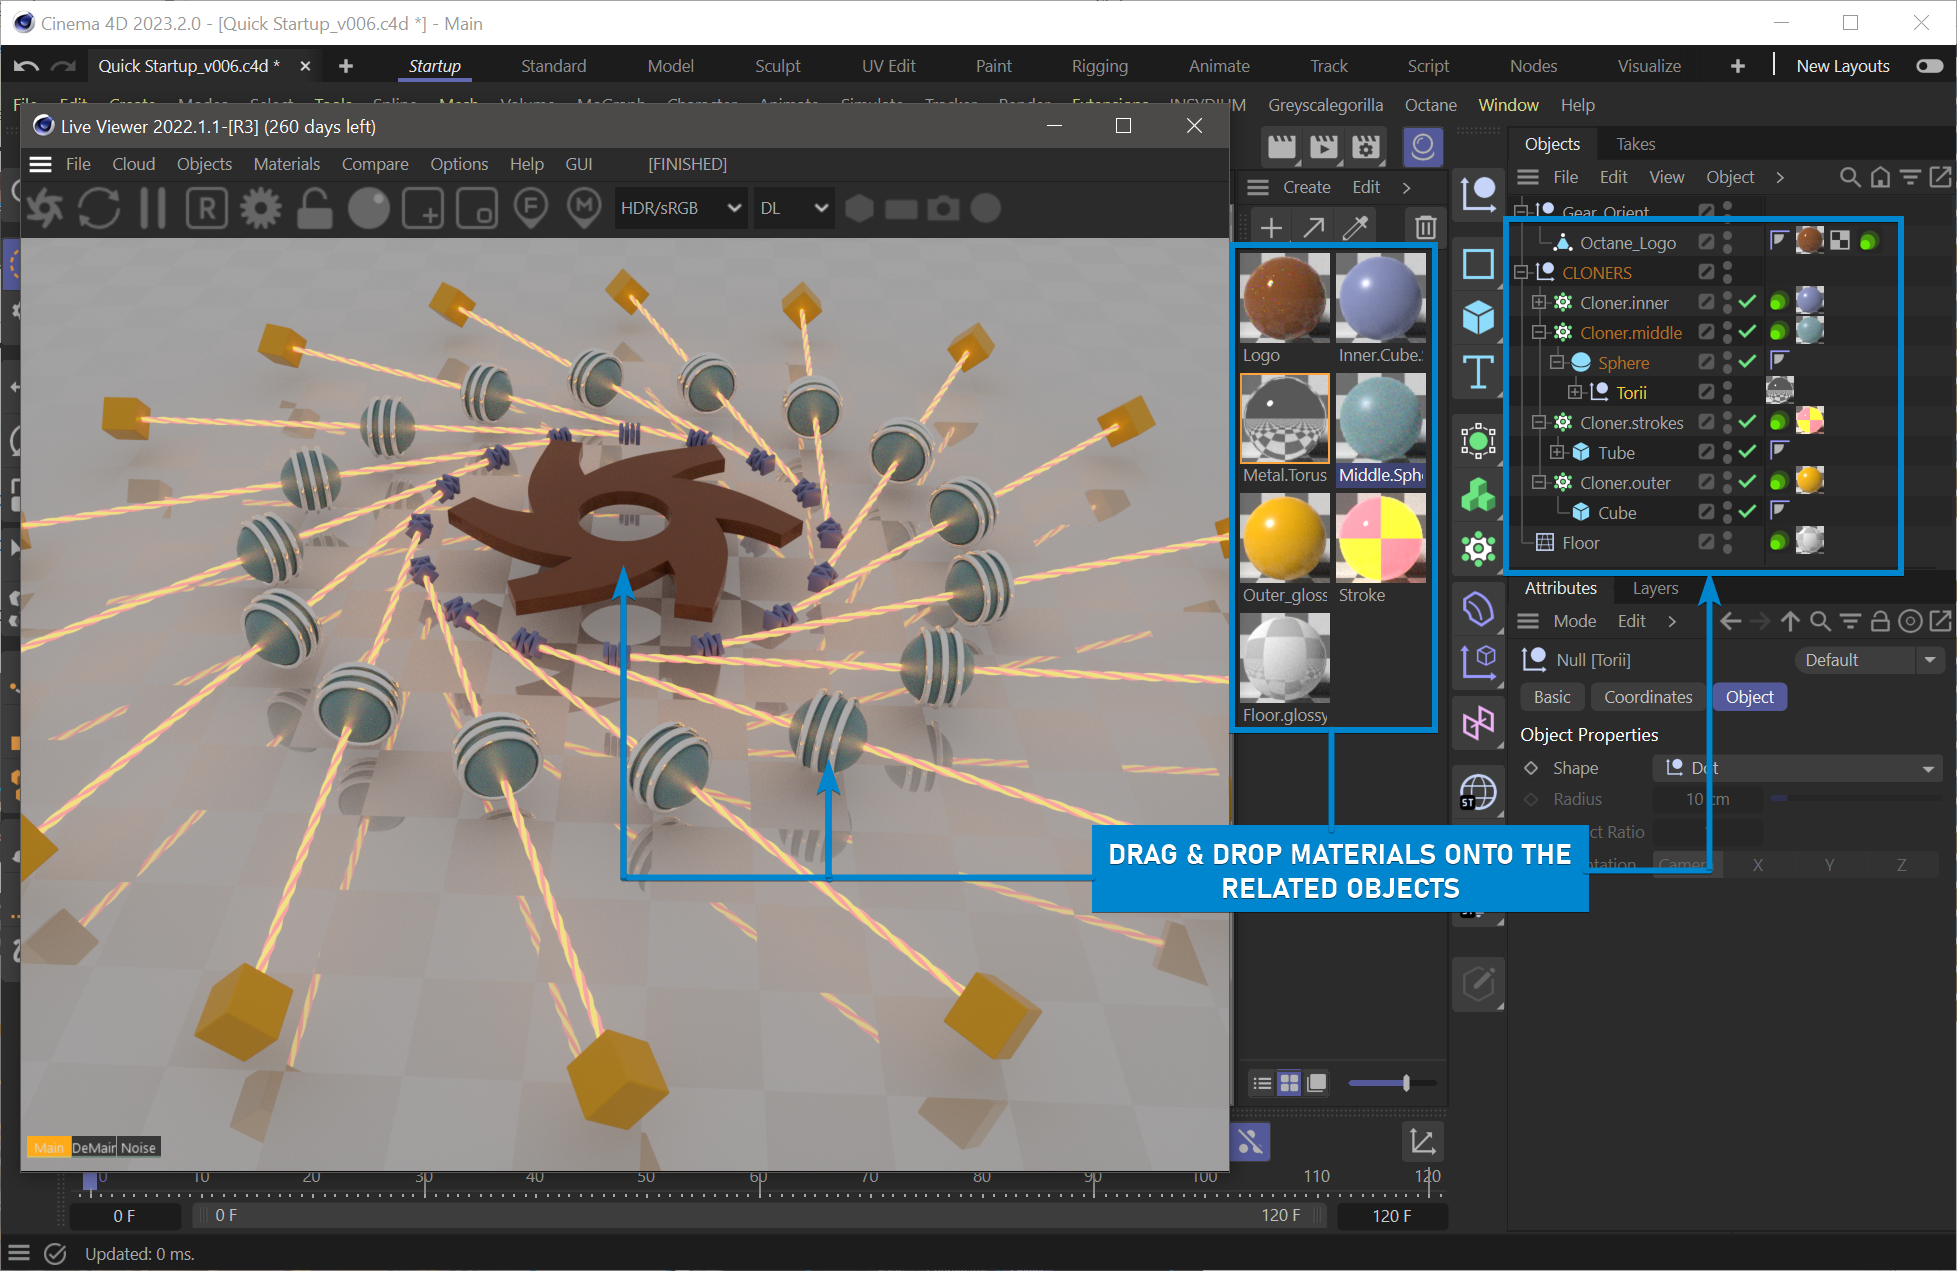
After setting the properties of our materials, it's time to assign them to the corresponding objects. There are two ways to do this:
1) drag and drop the material onto the object in the object manager window,
or
2) drag and drop the material onto the object in the Live Viewer window.
Assign the materials to the objects as you see in the image.
|
|
Apply THE Materials
|
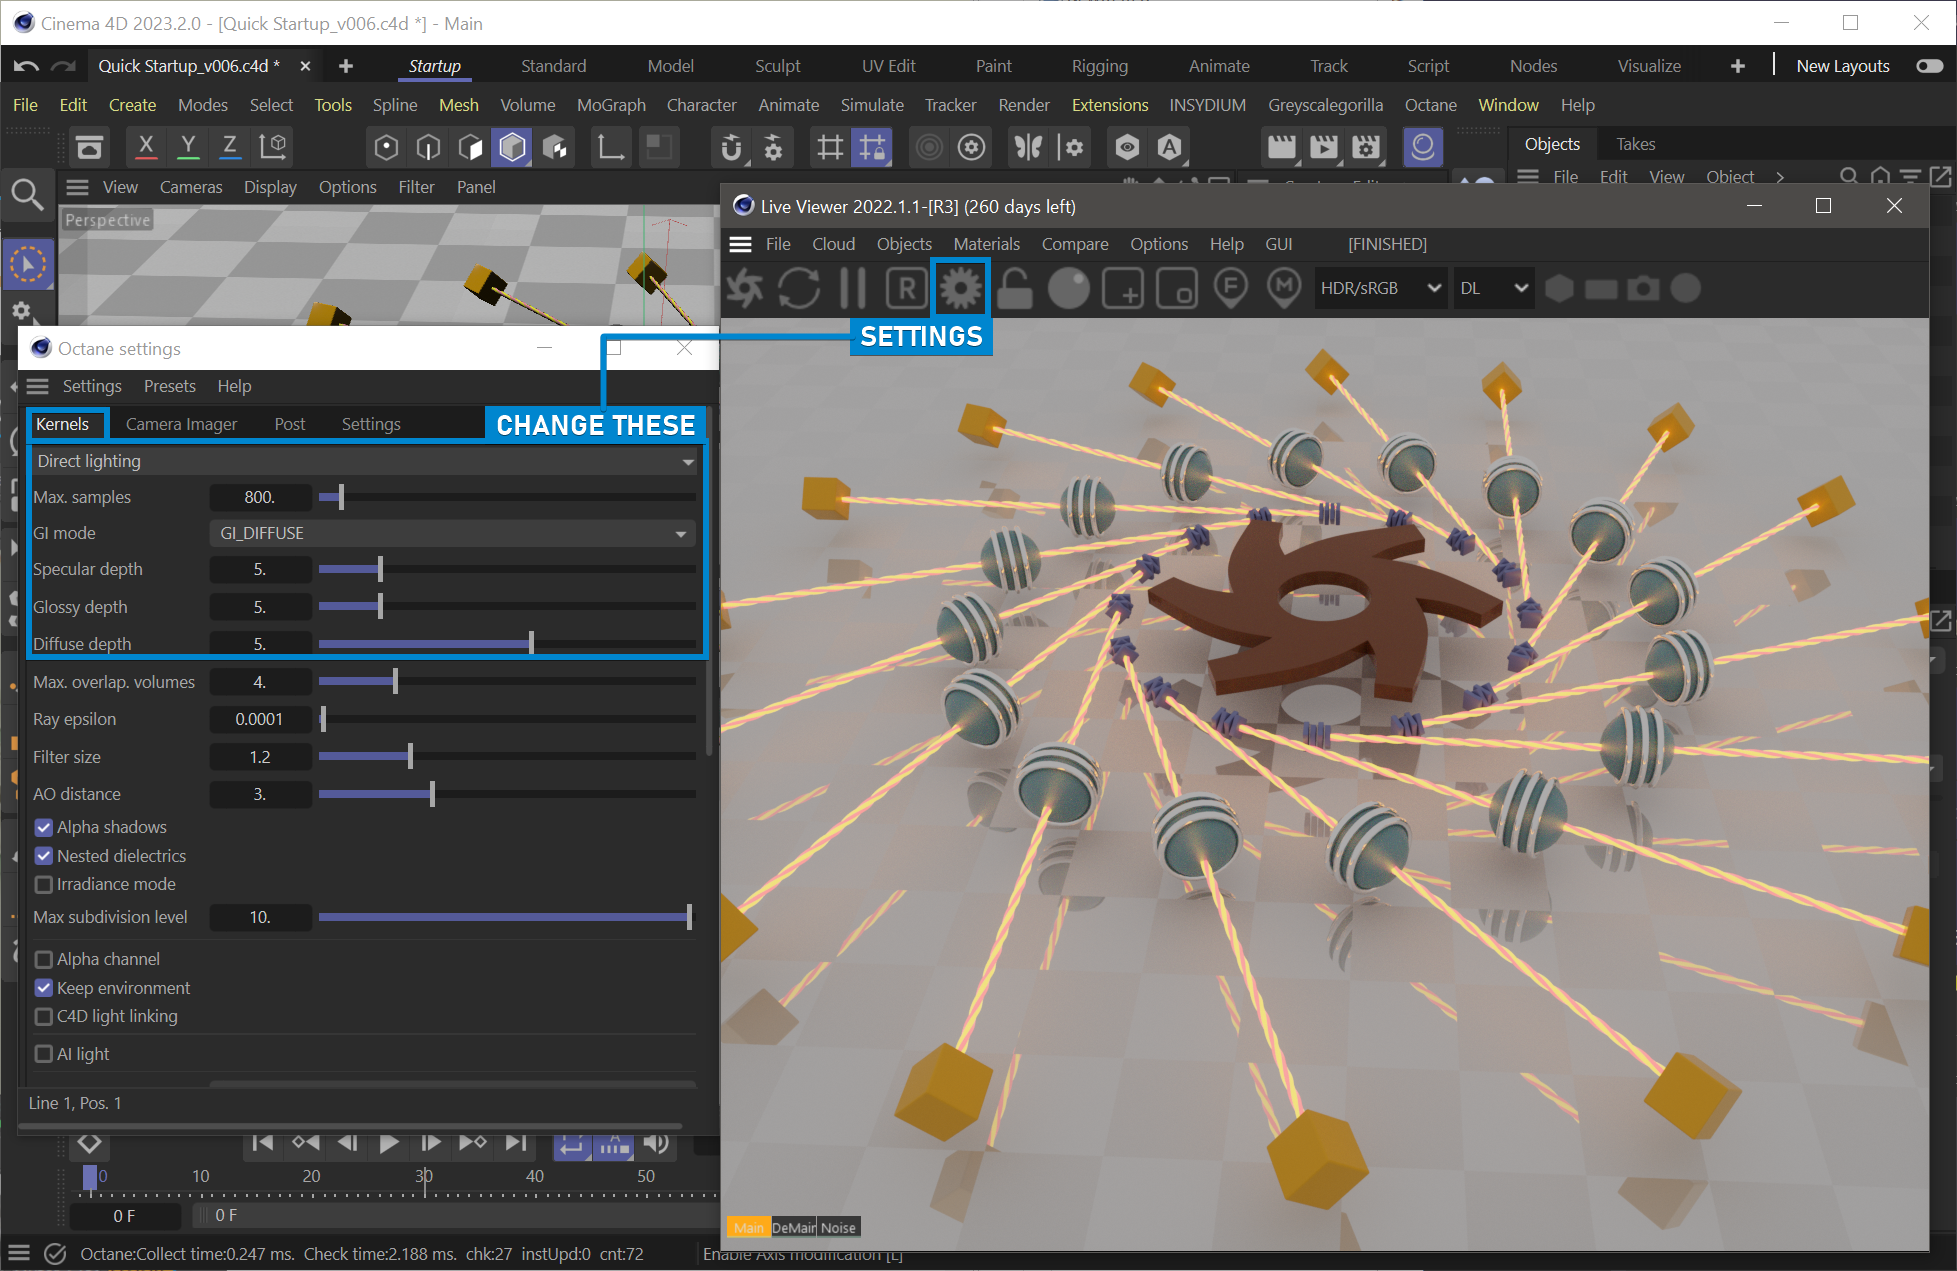
Before finishing this section, go to Settings in the Live Viewer window and change the settings in the Kernels section as shown in the image below.
|
|
change kernel settings
|
ADD OCTANE LIGHTS TO THE SCENE
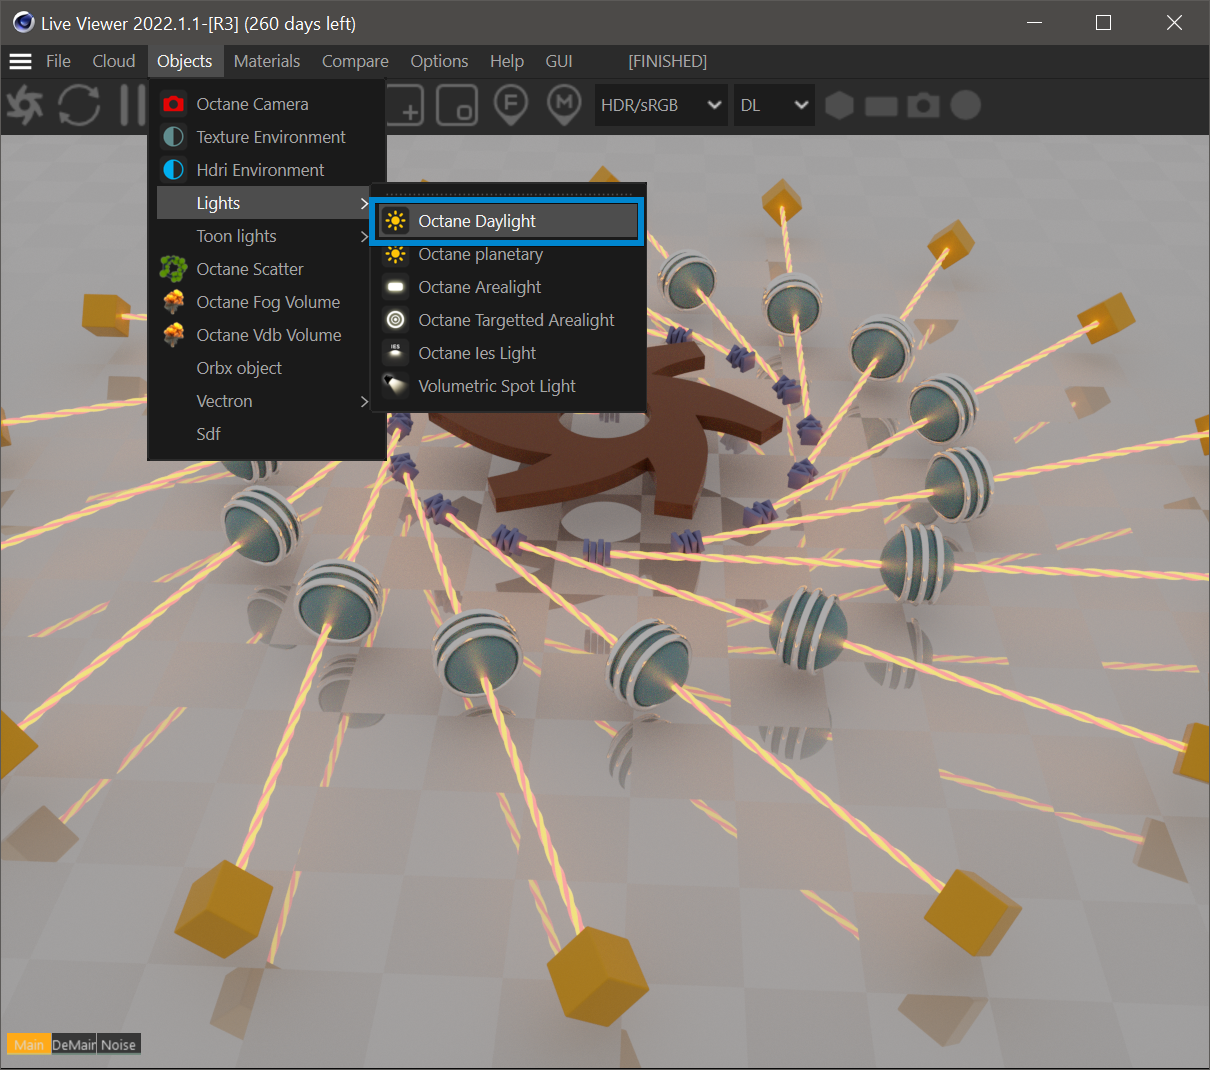
Although we have finished with the materials, the scene still needs work. The lighting for this scene is coming from the default light, which is just the default environment color (more information here). Relying exclusively on the default lighting is too limiting; we are going to shed some Octane Daylight on this scene. Go to the Live Viewer > Objects > Lights and select Octane Daylight.
|
|
Add Octane Daylight
|
Step 12:
As you can see, two things happened in our scene: 1) Our picture in Live Viewer has changed and became darker and 2), an "Octane Daylight" object has been added to the Object Manager. But the current picture is darker than the previous one. Why? This is due to the default settings of Octane Daylight. Let's change those settings now.
|
|
With Octane Daylight
|
Step 13:
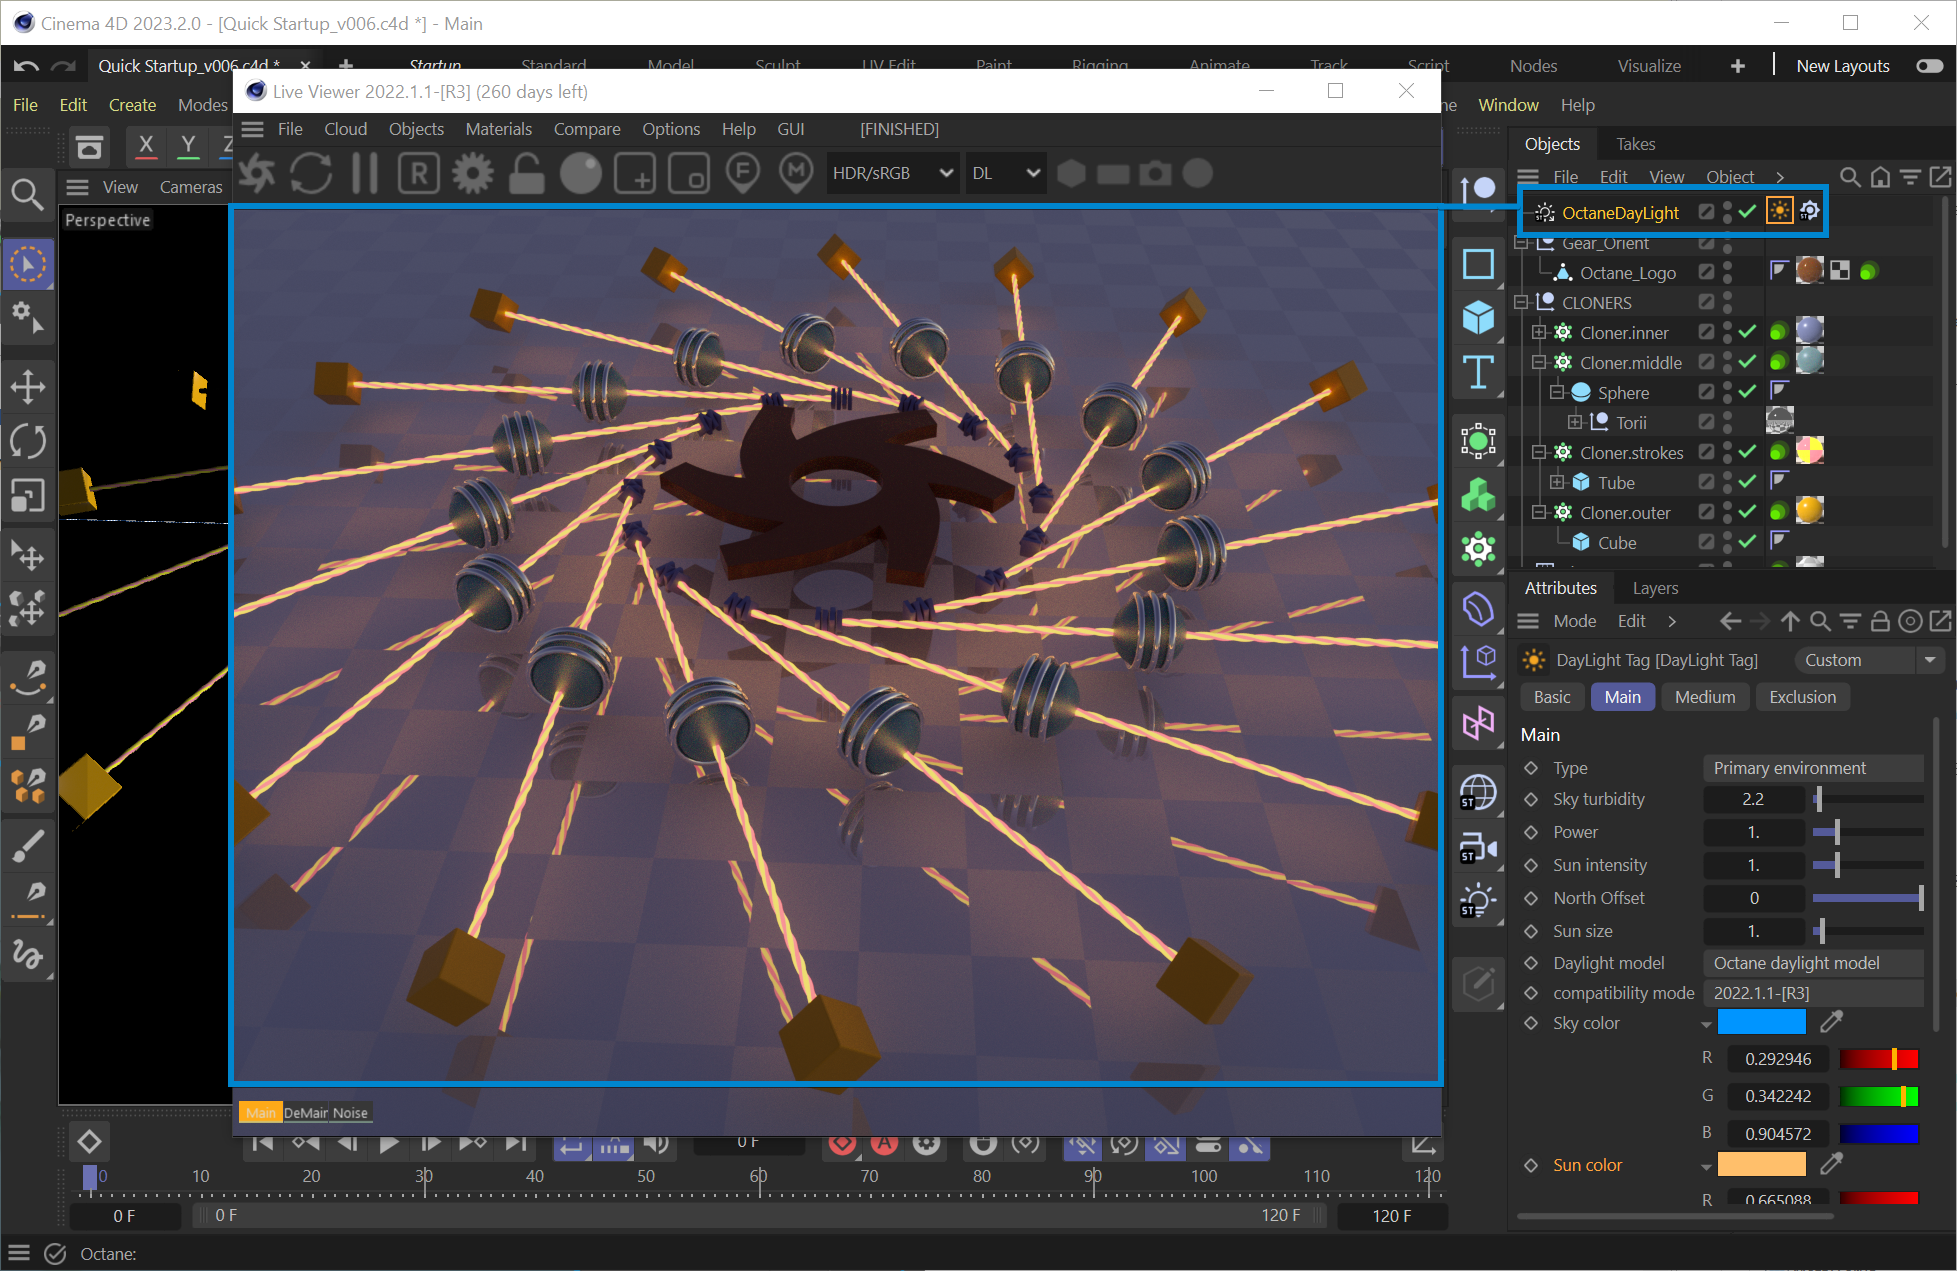
First, select Octane Daylight from Object Manager. In the Attributes Window, go to the Coord tab and change its rotation parameters as you see in the image below. Next, select the Daylight Tag and change the values you see in the image below. You can read more about Octane Daylight here.
|
|
Adjust the Octane Daylight settings
|

Step 14:
Now that we have edited the parameters of the light, the render in the Live Viewer window has changed dramatically. Notice how realistic the materials look now. We are starting to get some nice shadows from the sunlight as well.
|
|
Octane Daylight
|
Step 15:
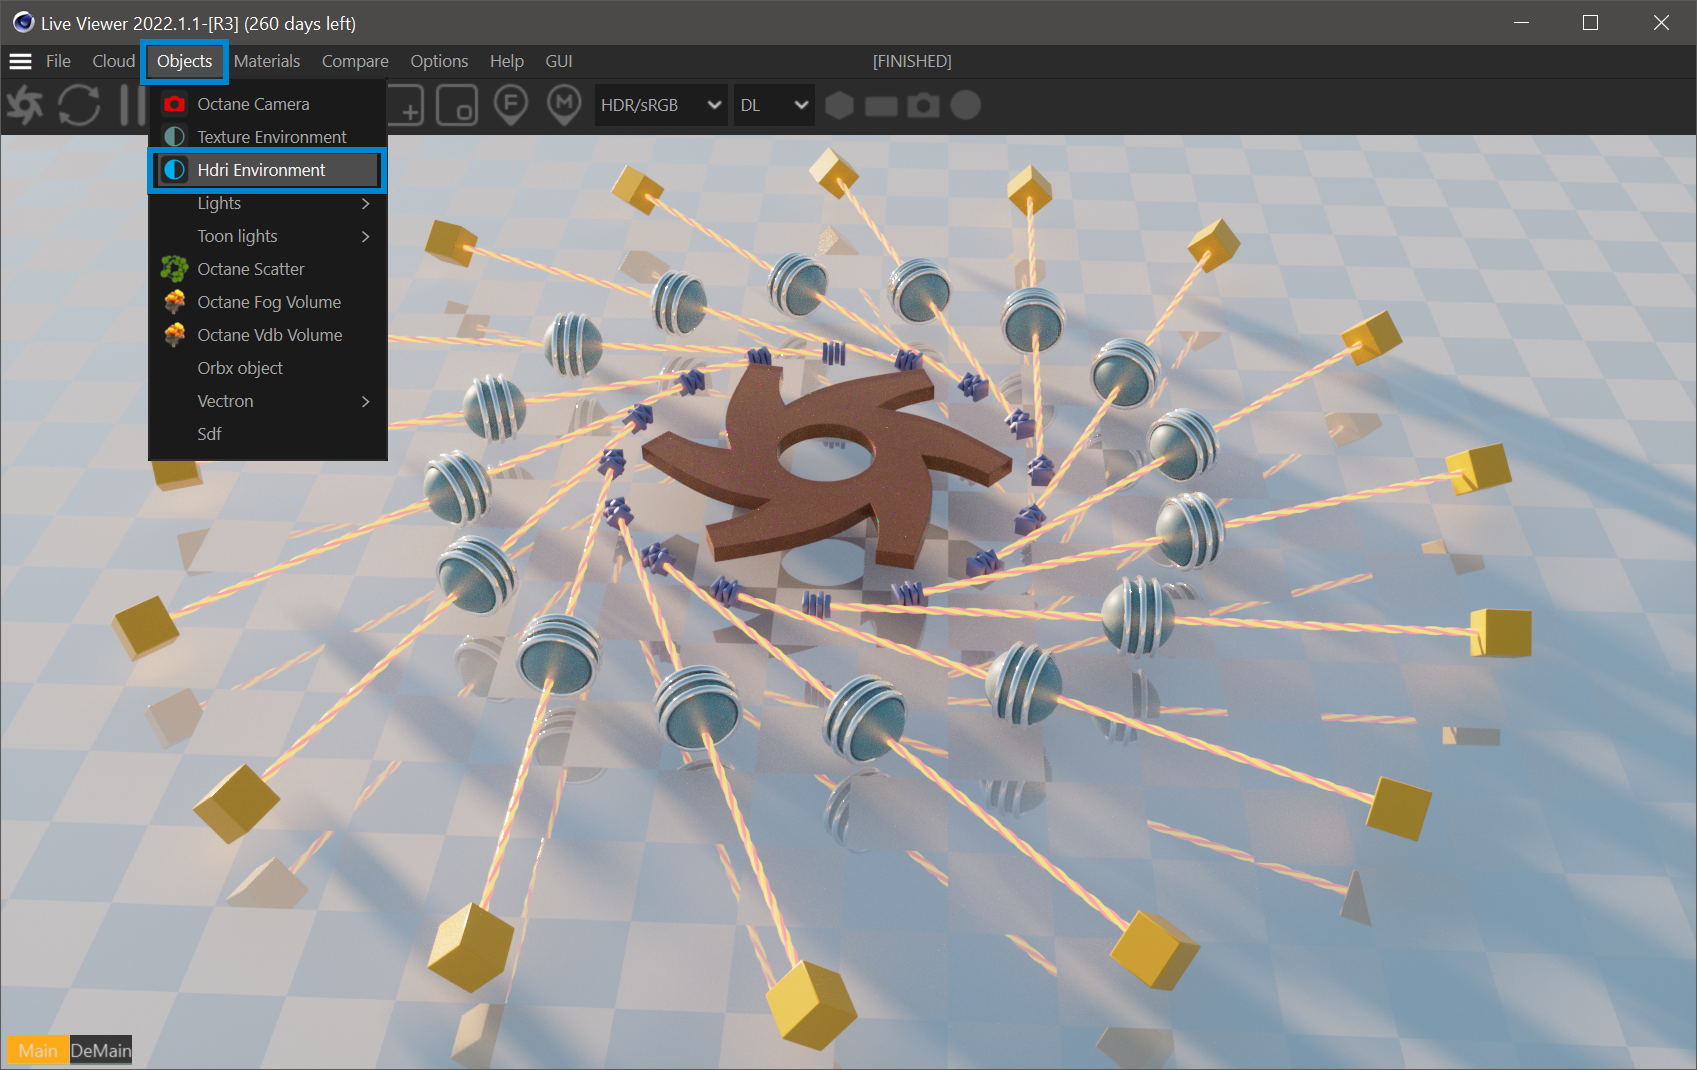
As we mentioned early on, we have environments in addition to a variety of different types of light. All these features can be mixed and matched to get the look we are after. Octane features an environment that can use HDRI images to light the scene as well (this is referred to as "image-based lighting"). Go to Objects > HDRI Environment, which will add an HDRI Environment Object into the scene.
|
|
add Octane hdri environment
|
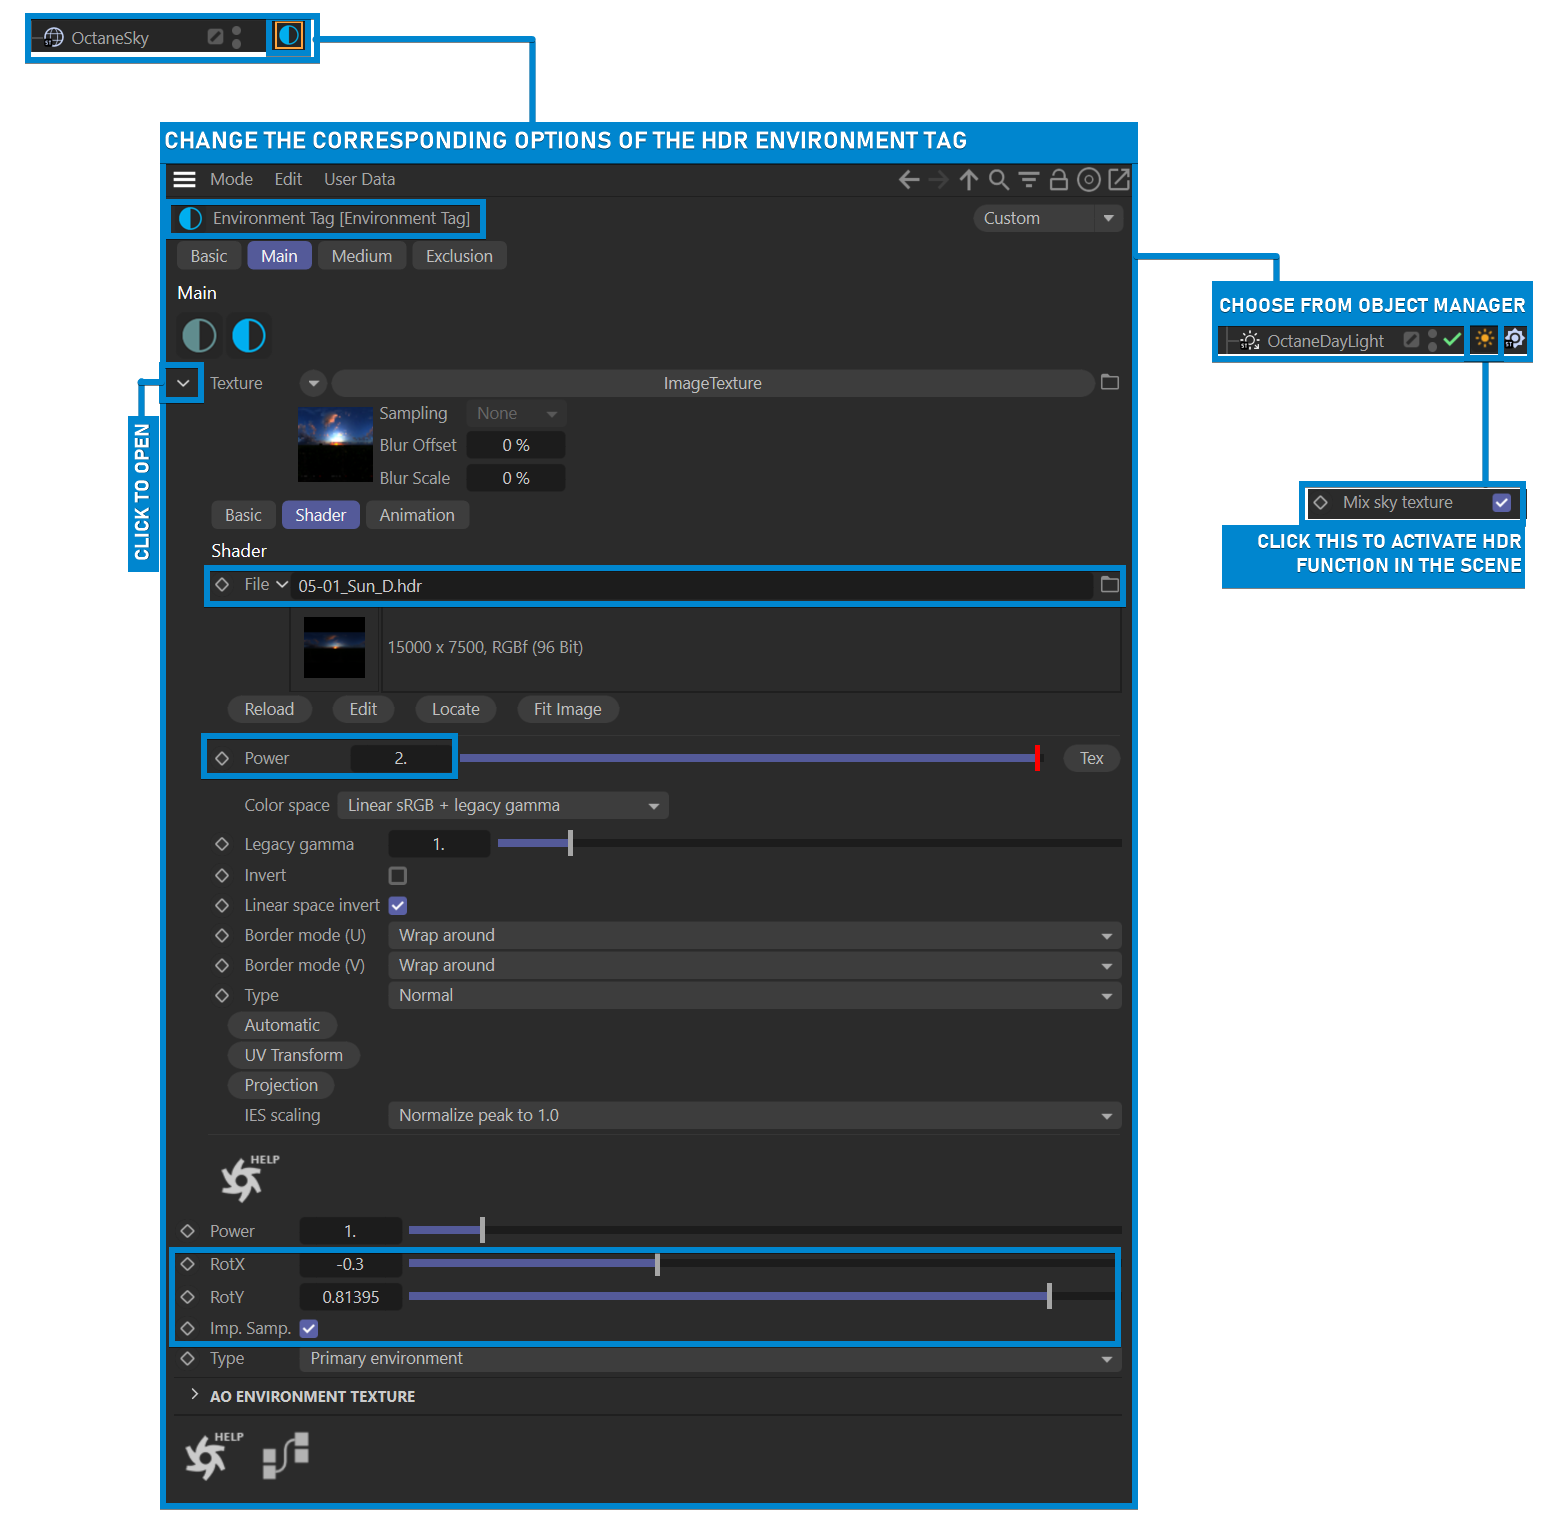
Step 16:
Now we have a new object named "Octane Sky" and "HDRI Environment Tag" in our scene. This lighting model requires an image in HDR format to work properly. Light values that are defined in these HDR images will add to the illumination in the scene. In this example, we used a HDR image downloaded from an Open-Source site, which can download from here or you can also use your own HDR image. Now enter the settings you see in the following images below.
|
NOTE To use the "OctaneDaylight" and "HDR Environment" together, you need to select the Octane Daylight Tag from Object Manager and enable the "Mix sky texture" option, discussed here. |
|
|
Octane Environment tag settings
|

|
|
Octane sky and daylight tag settings
|
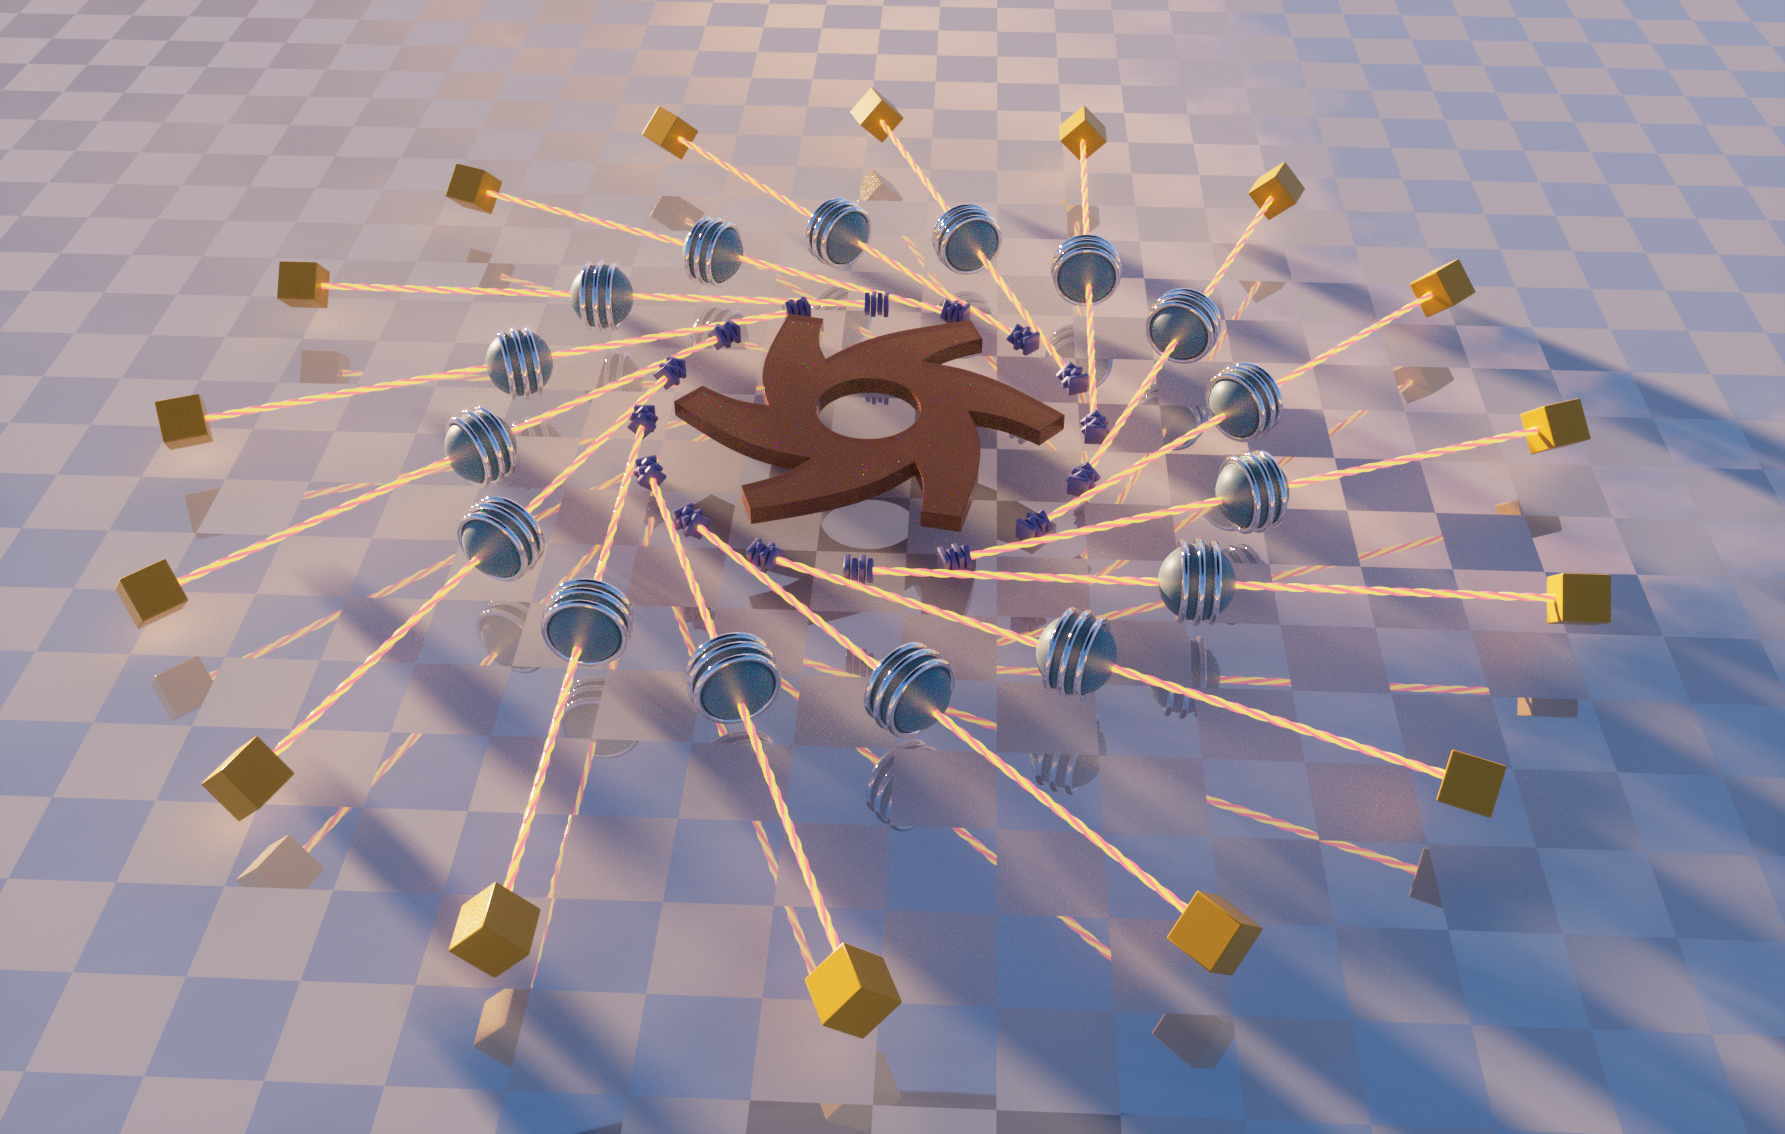
Step 17:
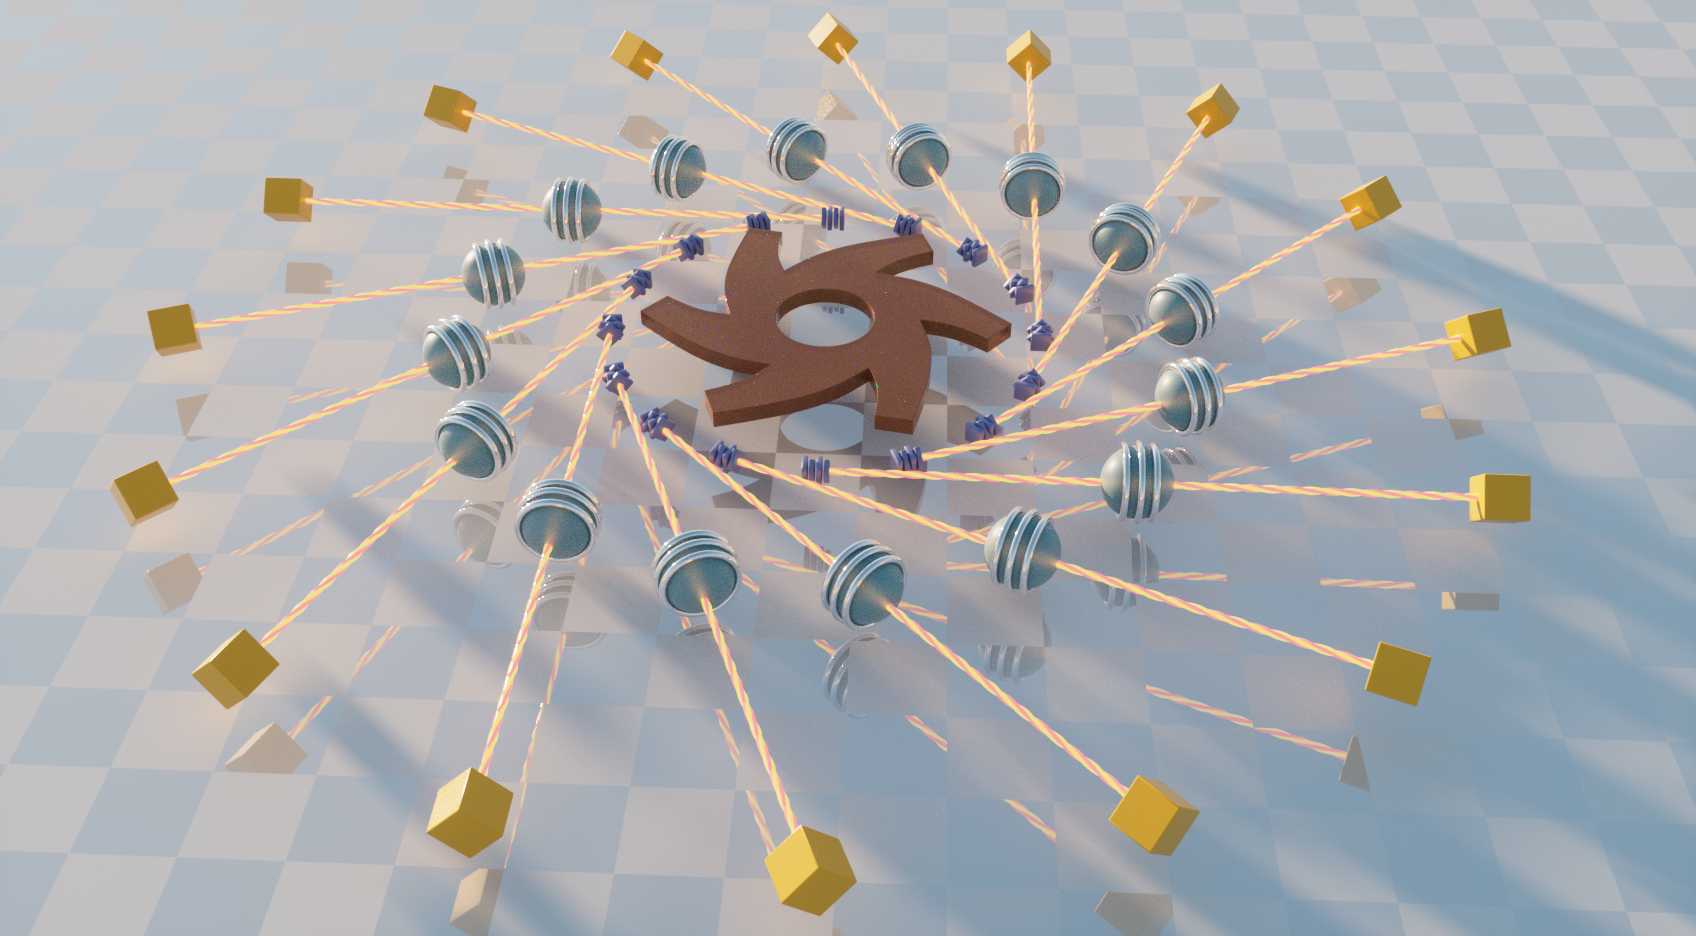
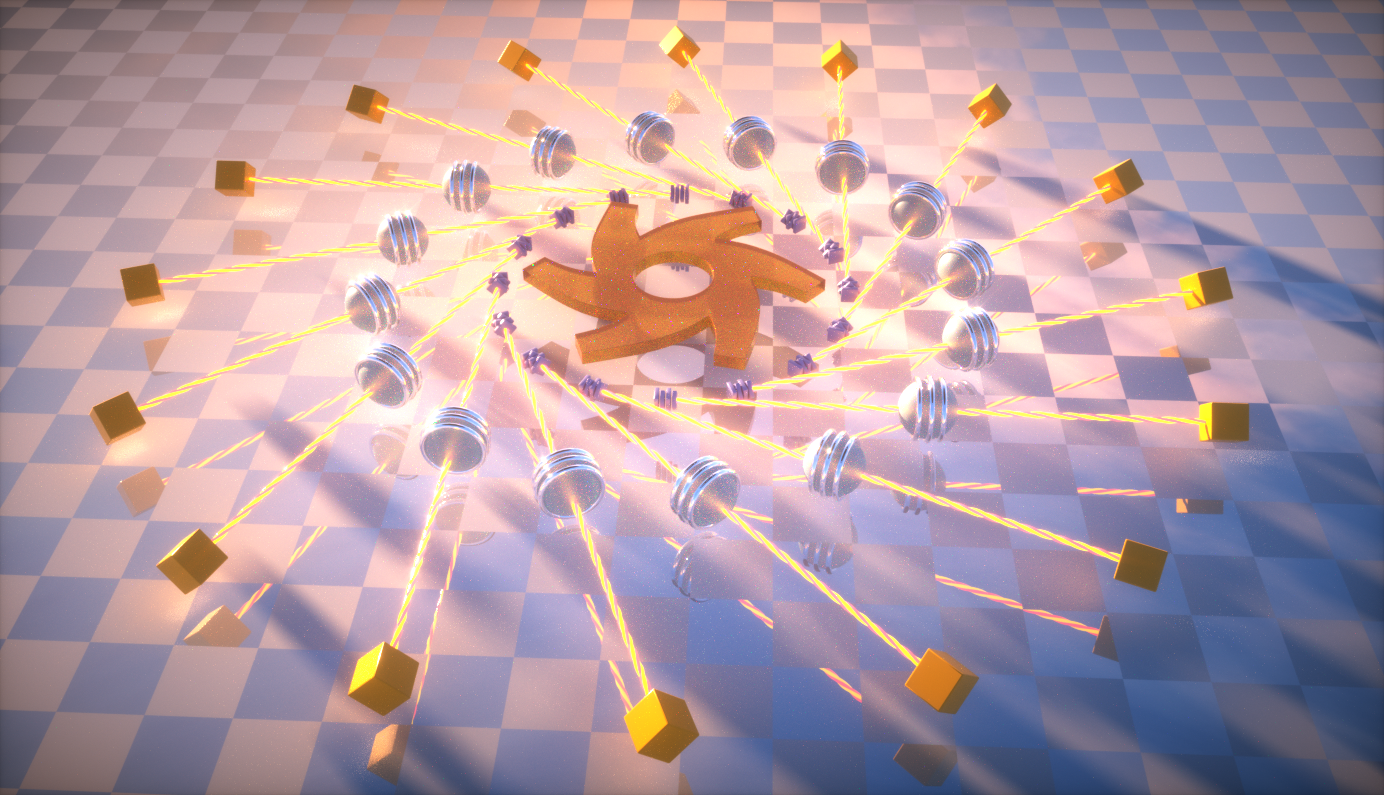
After adjusting the HDR values, we have added more warmth to the scene, taking the lighting cues from the HDR image in the Octane Sky object.
|
|
Octane hdri environment
|
SETTING UP an OCTANE CAMERA
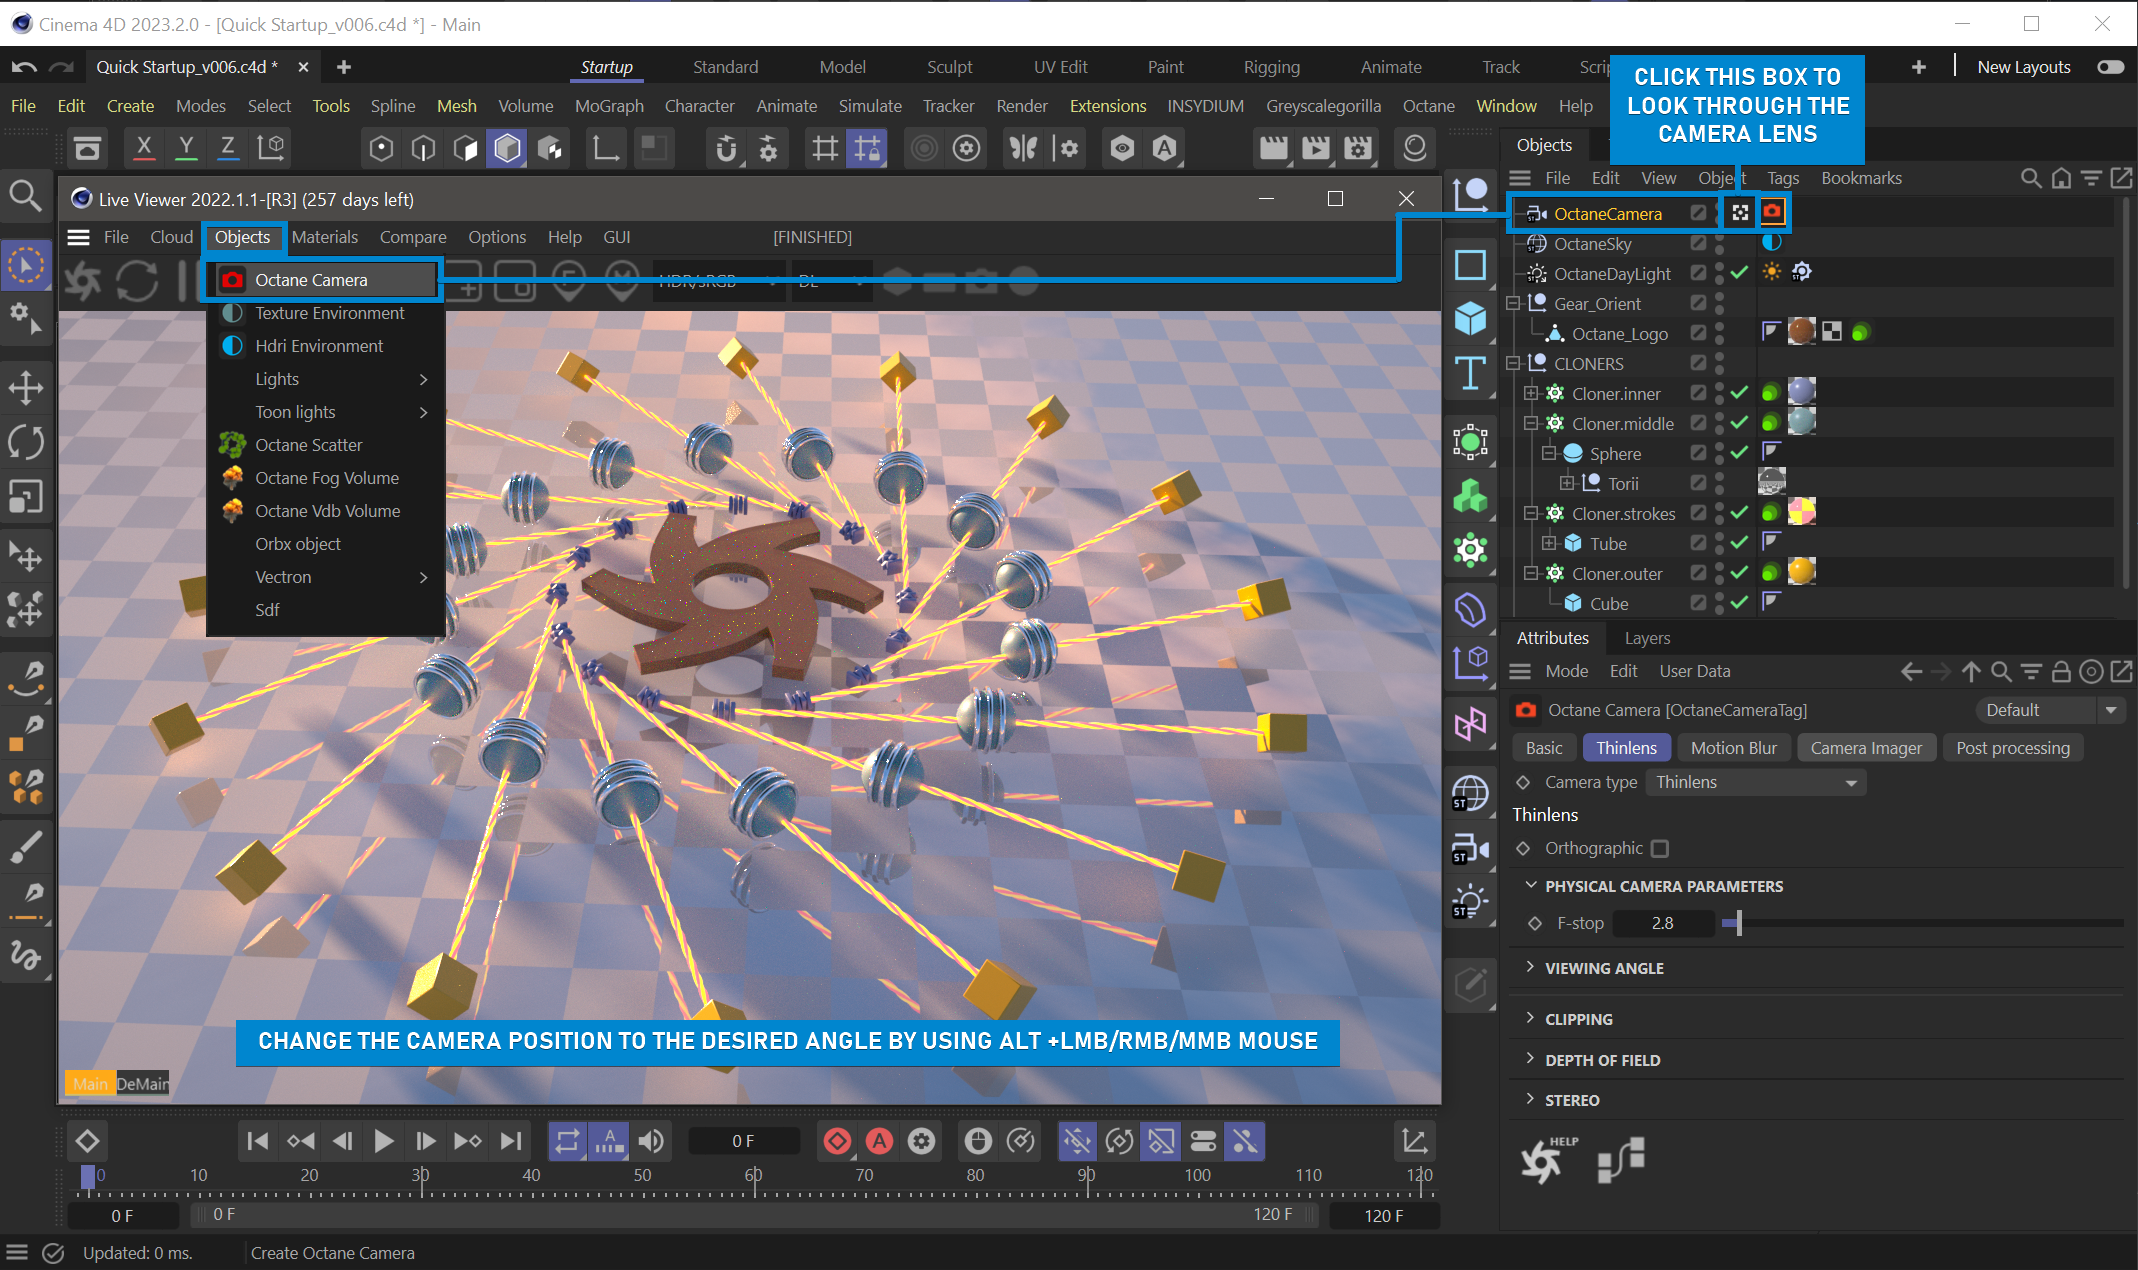
Step 18:
The opportunity for even more realism improves when we add an actual camera to the scene. Go to Objects > Octane Camera. Now there is Octane Camera and an Octane Camera tag loaded into the object manager in the scene. You can adjust the camera position using the ALT + LMB / RMB / MMB, either from the viewport or from the Live Viewer window, just as you would in the Cinema 4D 3D views, as noted previously. Note the immediate illumination feedback in Live Viewer — the scene is fully lit and shaded as you do so.
|
INFO To look through the camera lens, click on the small box next to Octane Camera in the Object Manager. |
|
|
Octane camera
|
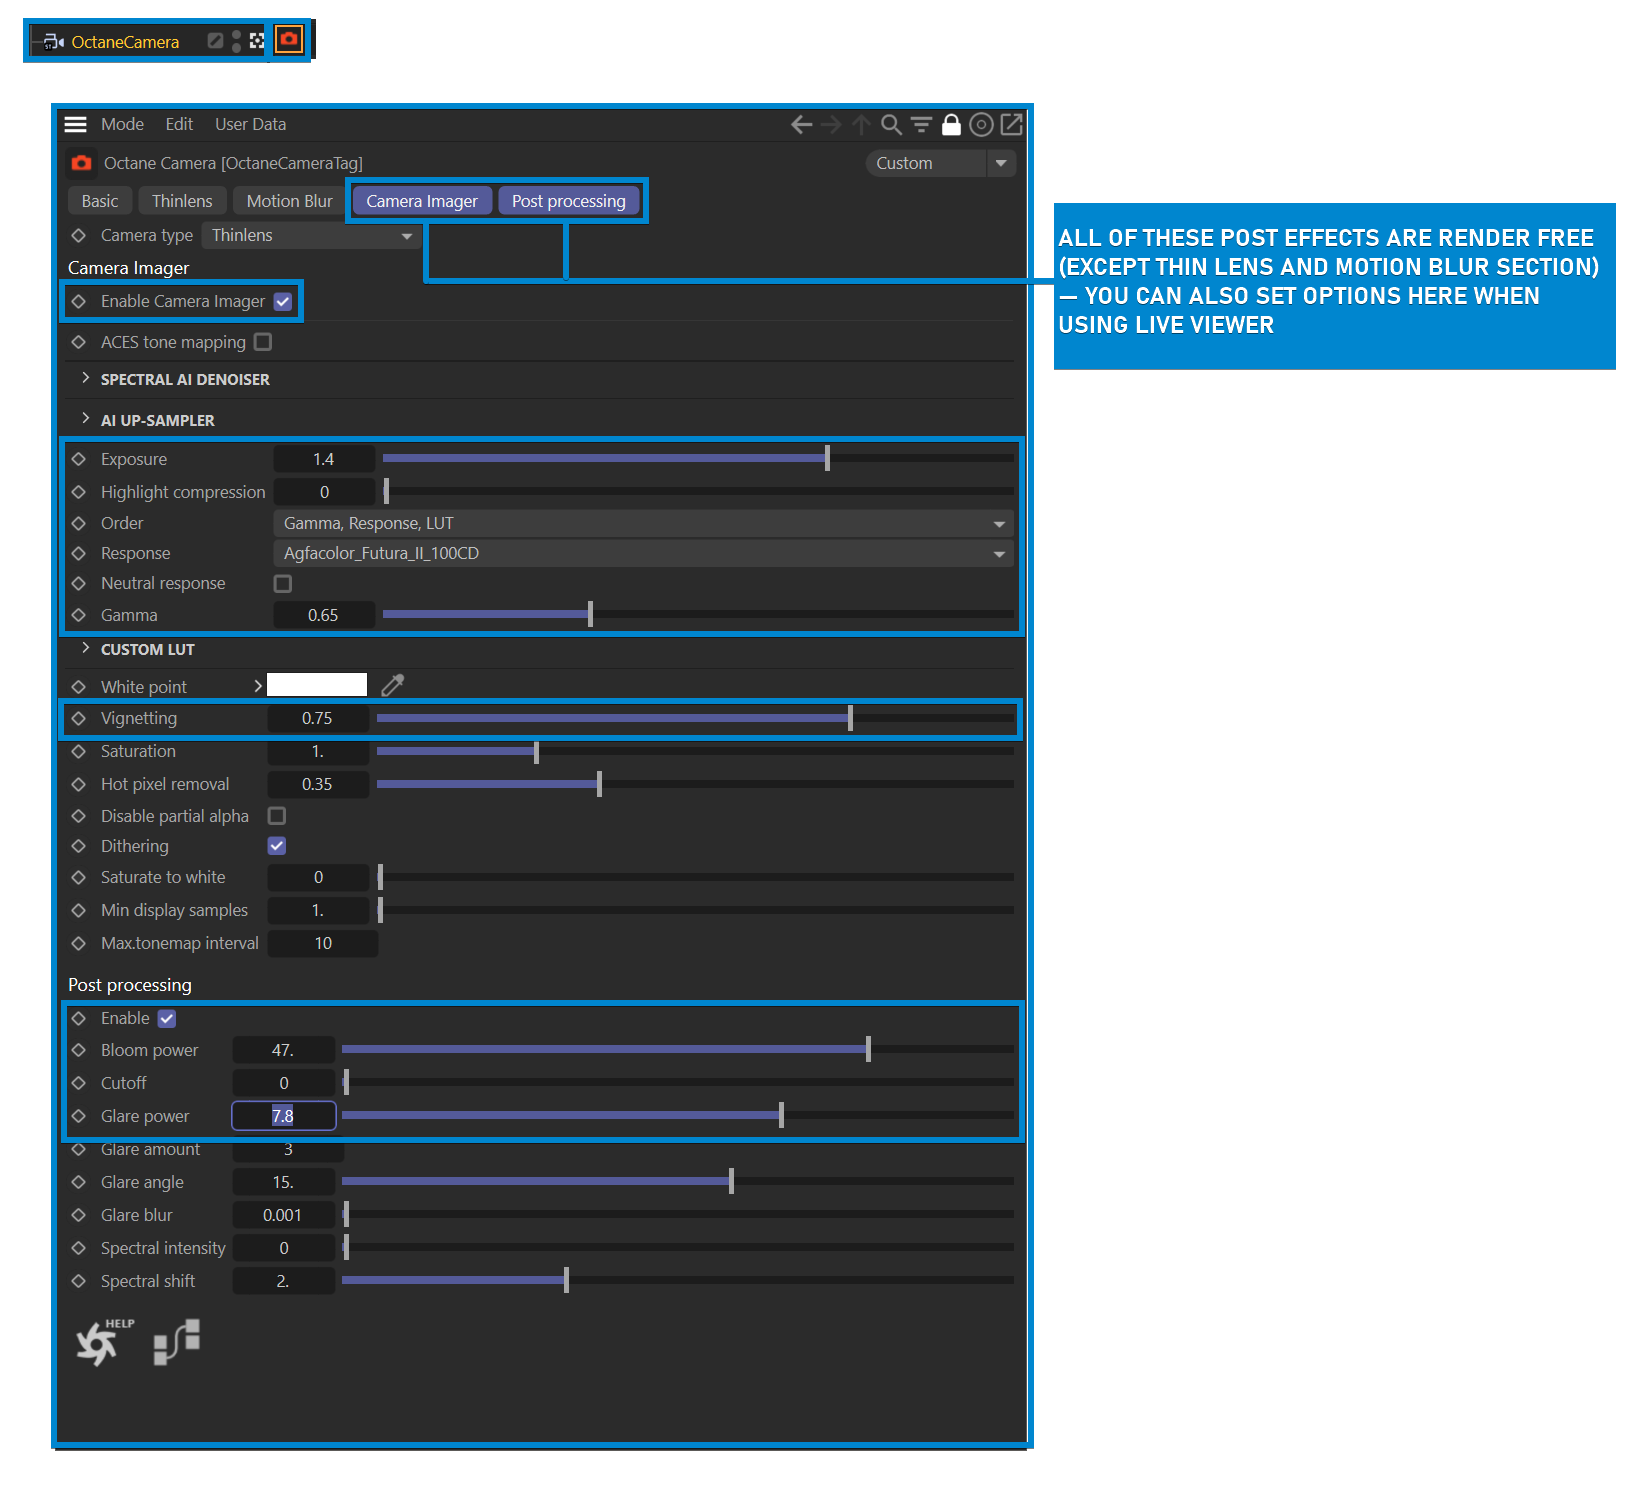
Step 19:
The Octane Camera is a standard Cinema 4D camera with an Octane Camera tag attached. Now we will change some settings of the Octane Camera tag. To do this, select the Octane Camera Tag from the Object manager and change the settings you see highlighted in the illustration below.
|
|
Octane camera imager & post settings
|
FINALIZE THE PICTURE IN LIVE VIEWER
Step 20:
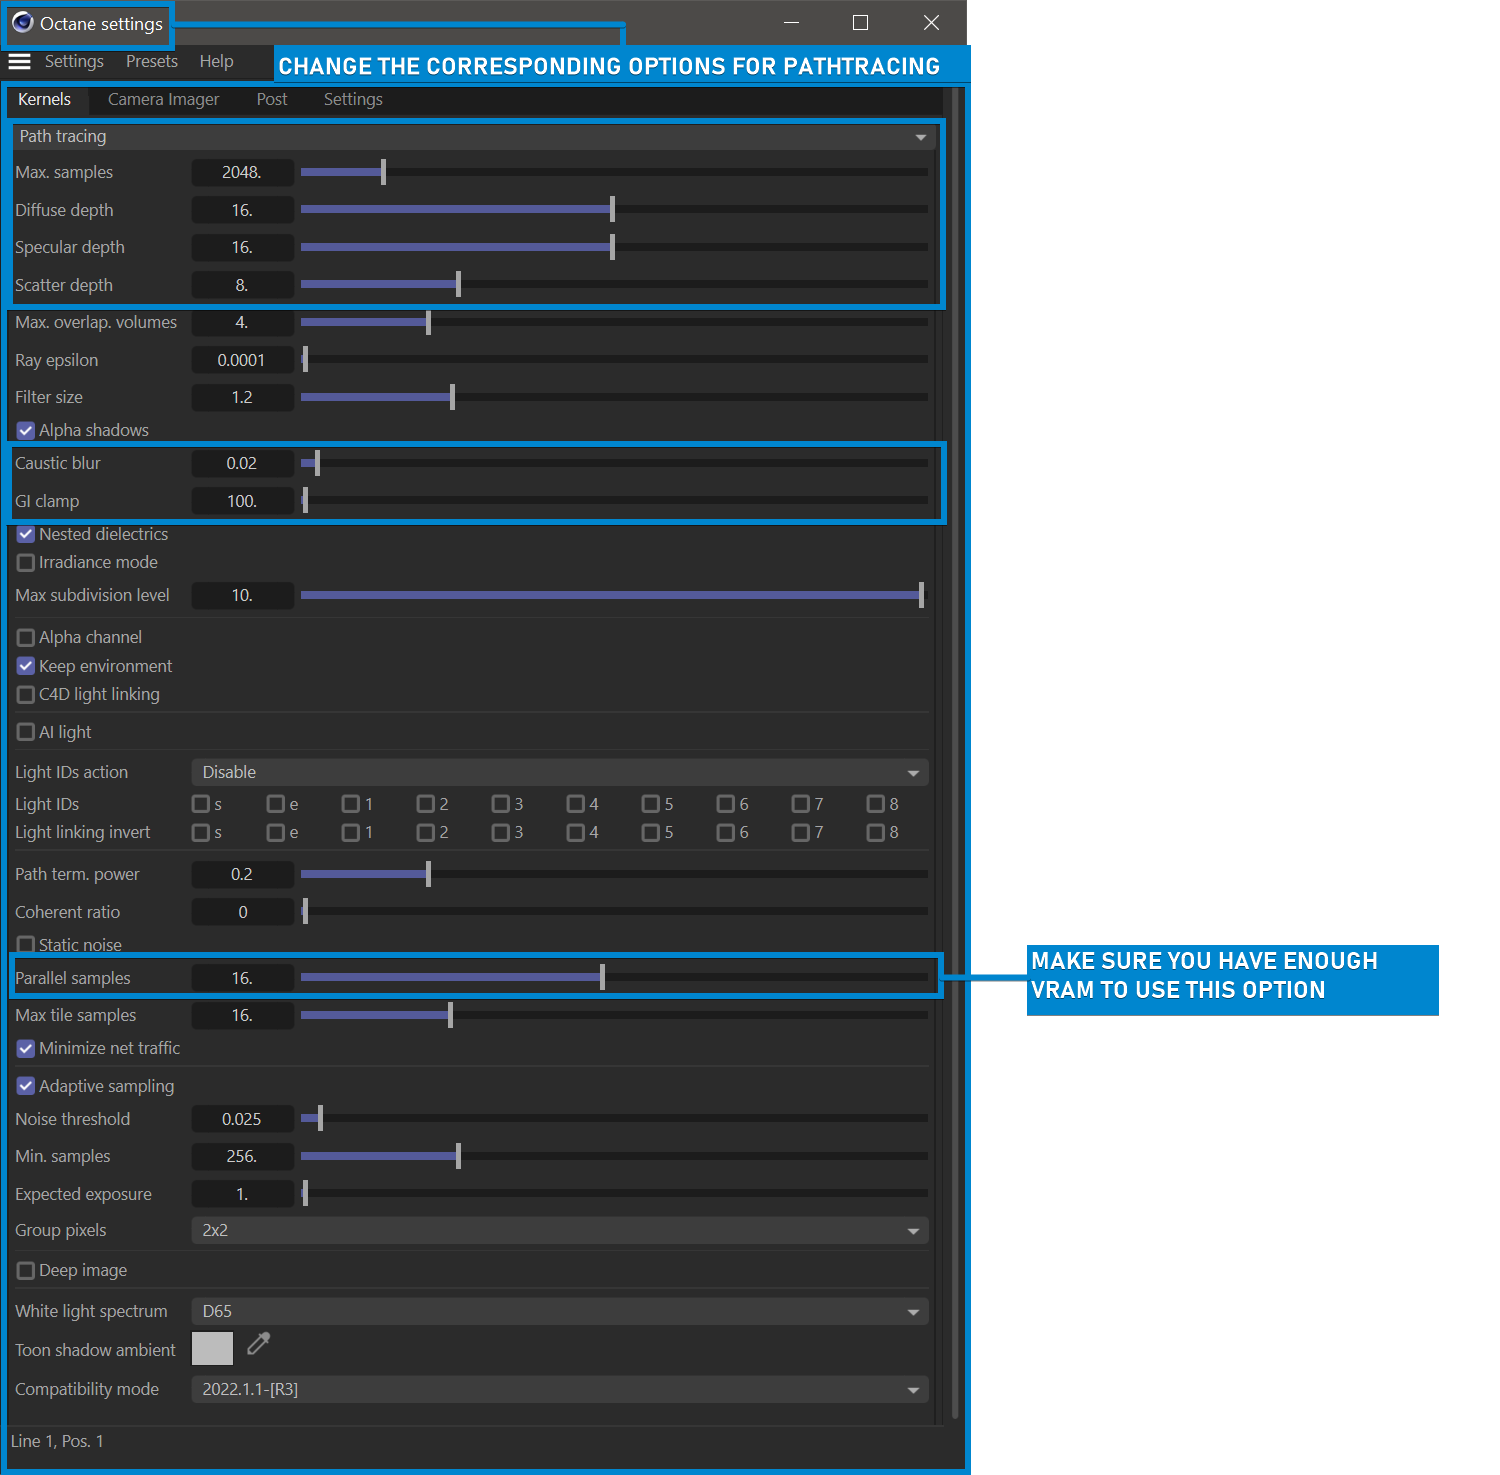
Notice the difference after we made some adjustments in the Octane Camera tag? The shadows shifted a little further, the brightness-to-darkness ratio of the scene differed. This is better than before, but we are not done yet. Let's get into a little Path Tracing for some higher qaulity results. Click to the Settings icon in Live Viewer (it resembles a gear) and make the following changes to the Kernels tab:
|
|
render — direct lighting mode
|
|
|
render — PATH TRACING SETTINGS
|
Step 21:
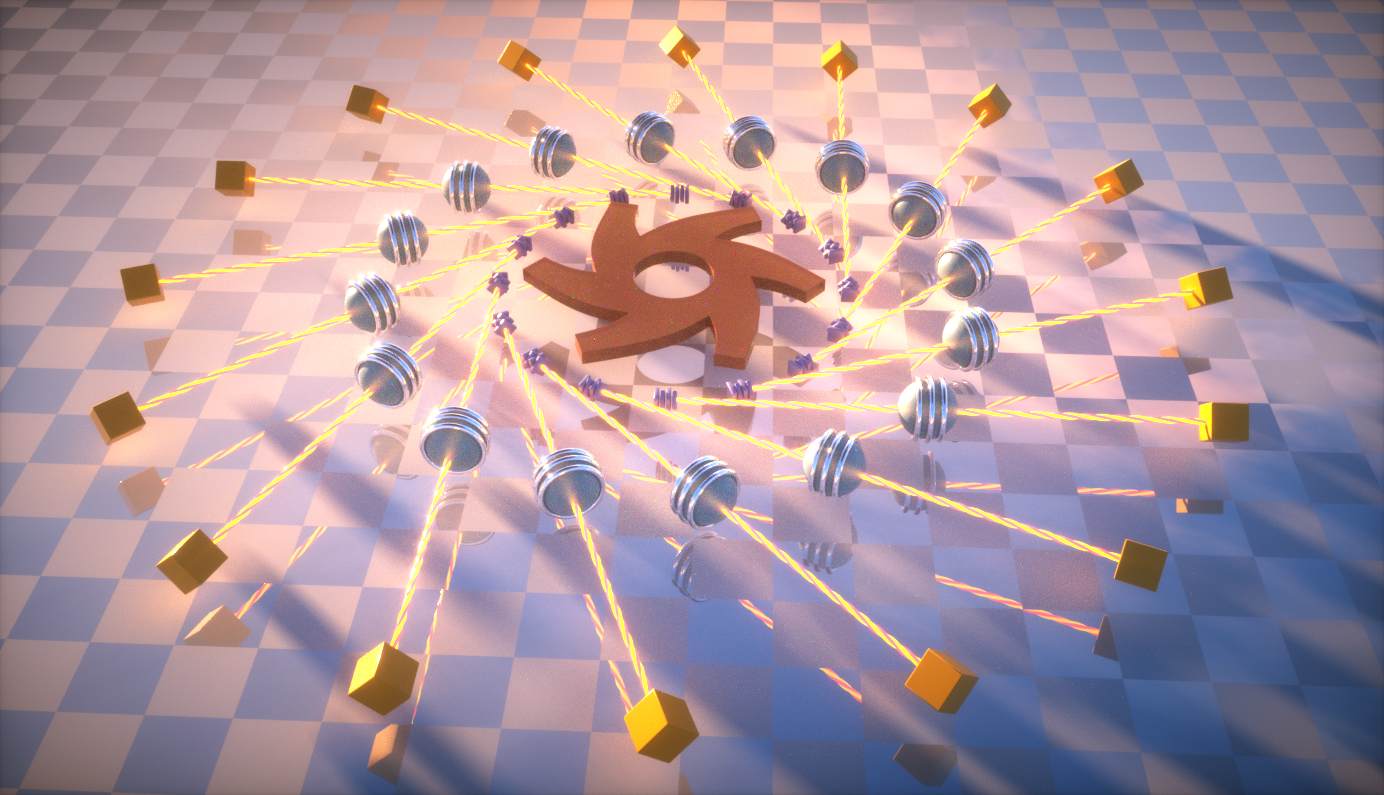
After adjusting the Path tracing settings, we now have reached a good stopping point. We can see some sophisticated light interplay that we did not see with the Direct Lighting Kernel, and the overall illumination and reflection quality is much better than before. The reason for this is that the Path Tracing kernel is much more accurate than the Direct Light kernel, though, as the Path Tracing Kernel does much more work it is slower. That said, most will find that the Path Tracing kernel is the kernel that gets the most use.
The Path Tracing, PMC and Photon Tracing kernel modes produce accurate and correct results by leveraging unbiased rendering in Octane, but these kernels do take time to clean the noise that results in the scene during the image sampling. Noise is an artifact of path tracing and unbiased rendering in general.
|
|
render — path tracing mode
|
SET UP A FINAL RENDER WITH OCTANE
Step 22:
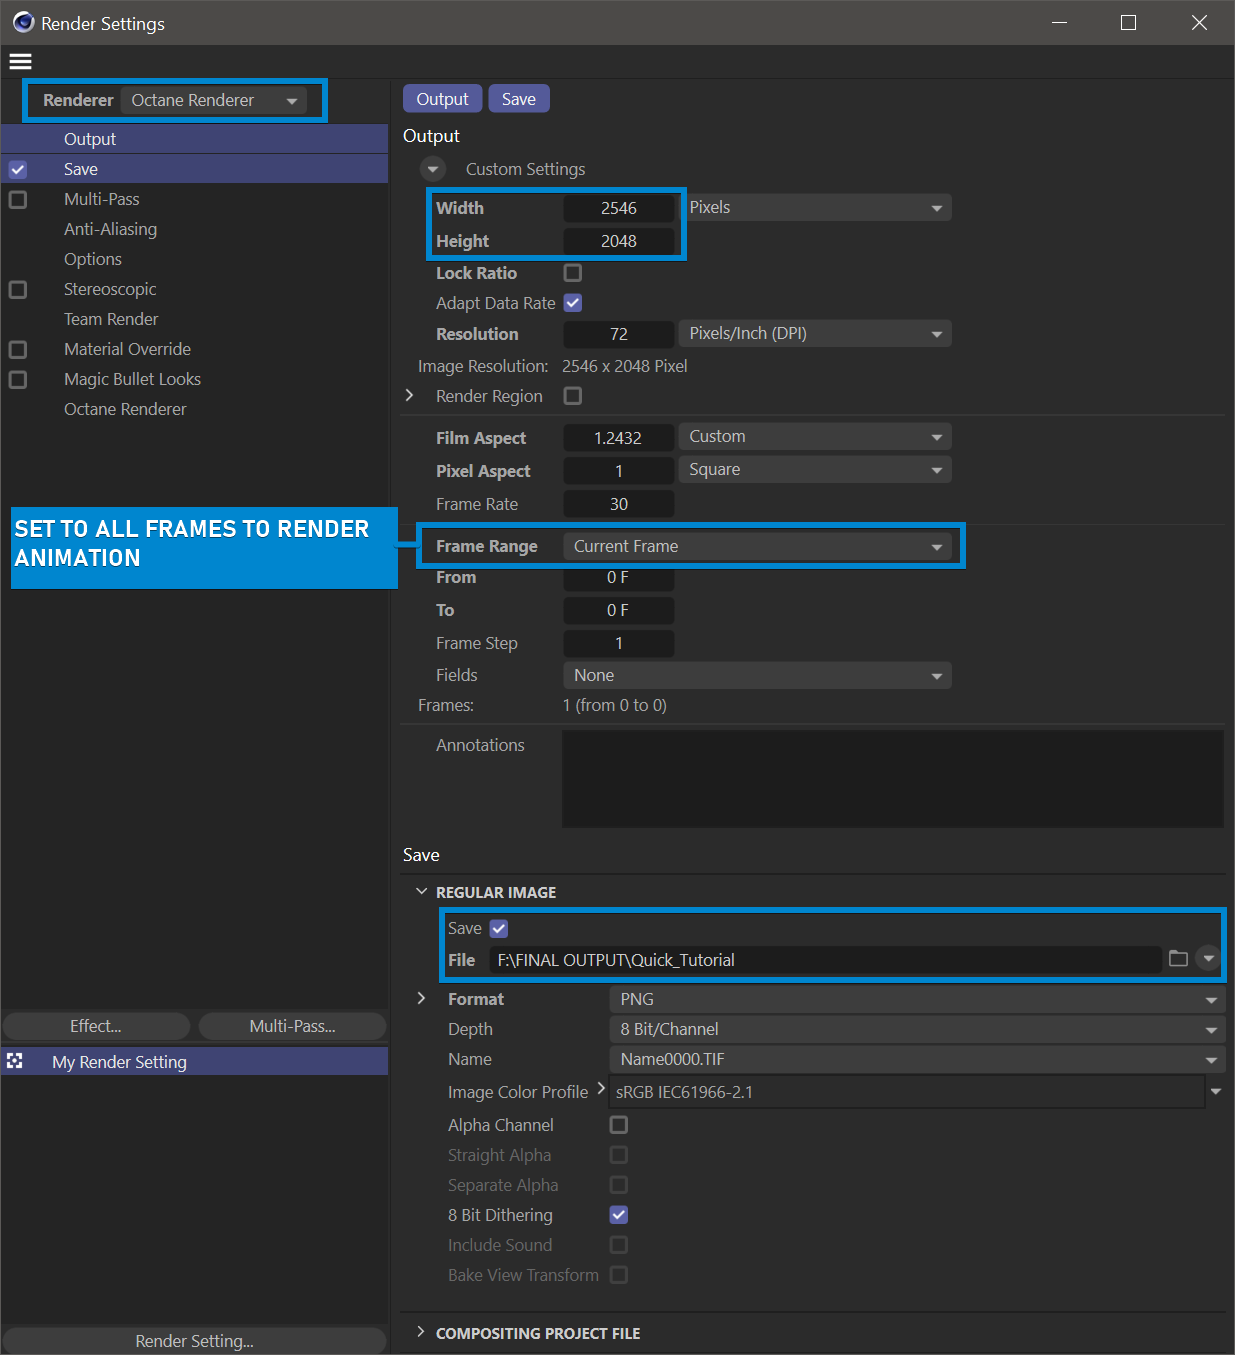
Now we will get the final output of the picture in Live Viewer. First, let's make some adjustments for the Final Render. Select Render > Edit Render Settings from the main Cinema 4D menu bar, or press CTRL + B. This will bring up the Render Settings window; change the settings as you see in the images below.
|
|
Final render — output & Save settings
|
|
|
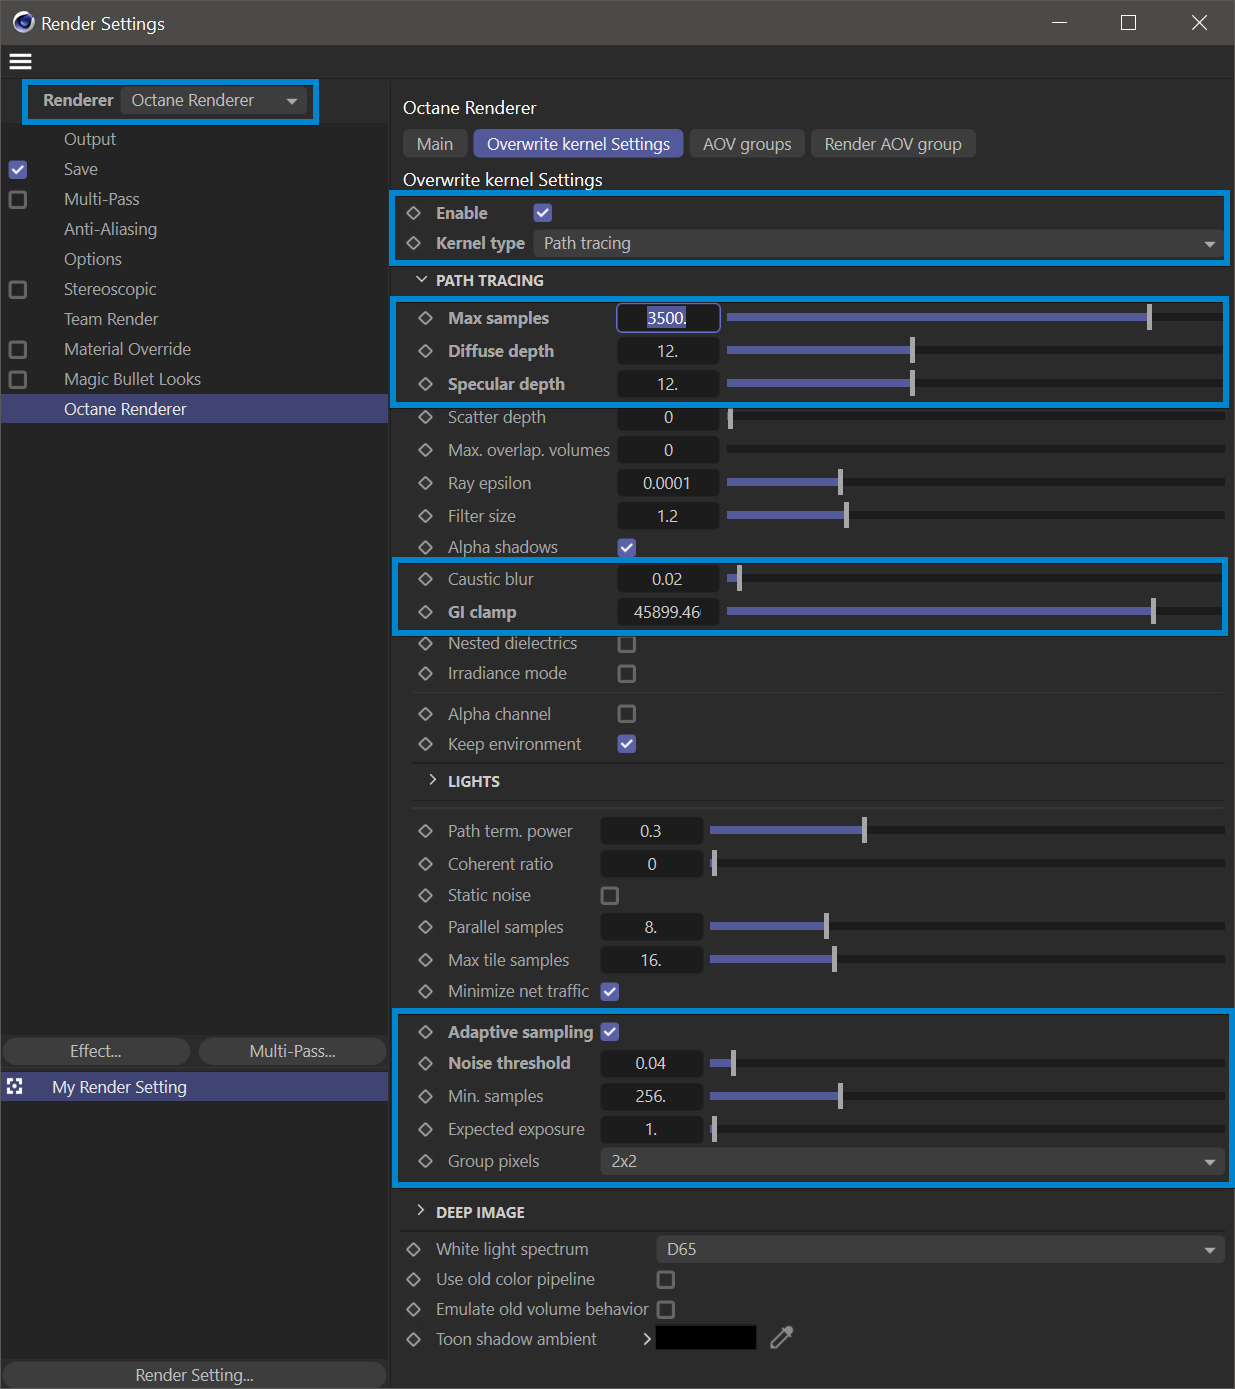
Final render — octane render settings
|
|
NOTE In the Final Render Process, the Overwrite Kernel Settings will replace the settings used in the Live Viewer for the final render. However, you can use the Live Viewer settings instead, if you prefer — just do not Enable the settings in this tab. As both settings are identical, it is more a matter of preferred workflow as to which method you choose. |
Once you have made these changes, select Render > Render to Picture Viewer from the Render menu of Cinema 4D, or press Shift + R. Doing so will tell Octane to render your work to the destination and quality settings that you have specified.
Wrapping it Up
Congratulations! you have successfully completed your first rendering with Octane. Octane is one of the easier rendering engines to use, especially given the near real time photo-realistic results in Live Viewer. That said, you still need to invest the time into getting to know both Octane and proper modeling and scene management techniques to effectively manage polygons, composition, and lighting.
The following sections of this guide will help to fill in many of the blanks for you. Octane is a comprehensive render engine, and it takes time and patience to learn. You will see a return on your investment each time you use it. It only gets better from here.