Octane Daylight Environment
The OctaneRender® Daylight incorporates accurate environmental illumination using sun and sky models and integrates well with the "HDR / Texture Environment" object. Create an Octane Daylight via Objects > Lights > Octane Daylight in Live Viewer. An "Octane Daylight" object and "Daylight tag" appear in Object Manager.
Transform Operations for the Daylight
|
Transform from the viewport or from the Cinema 4D Rotation Coordinates tab. |
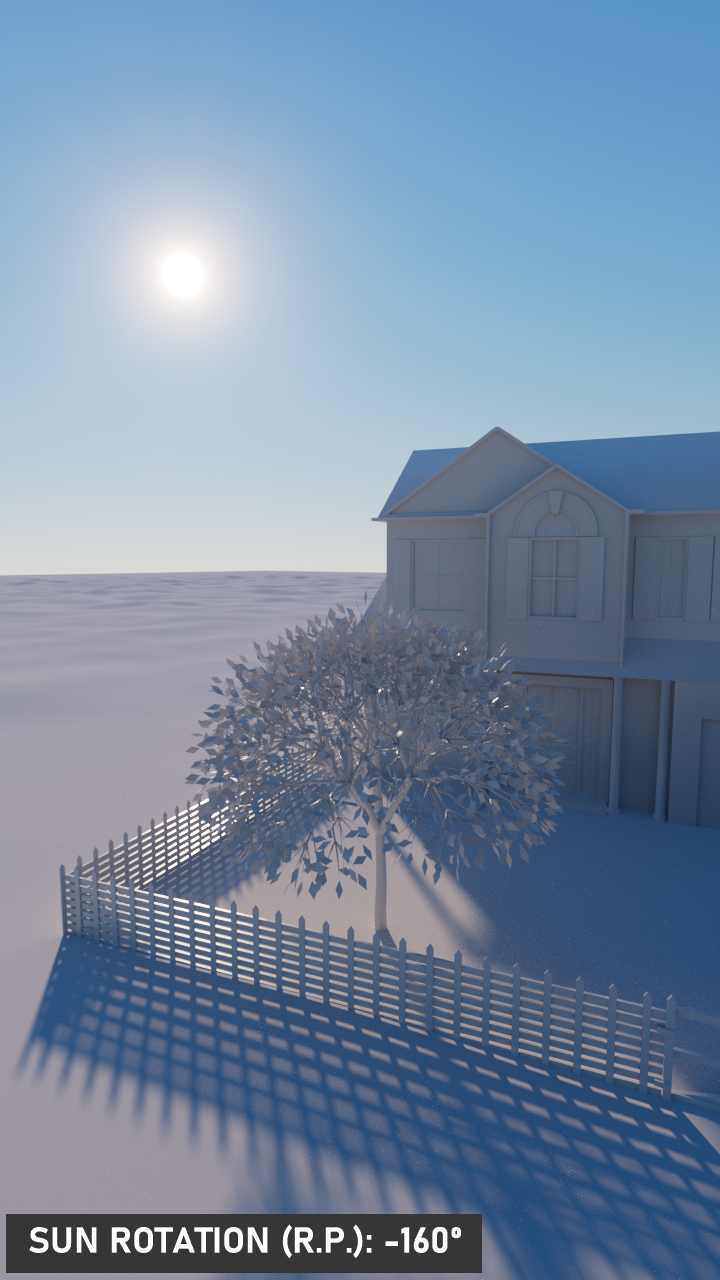
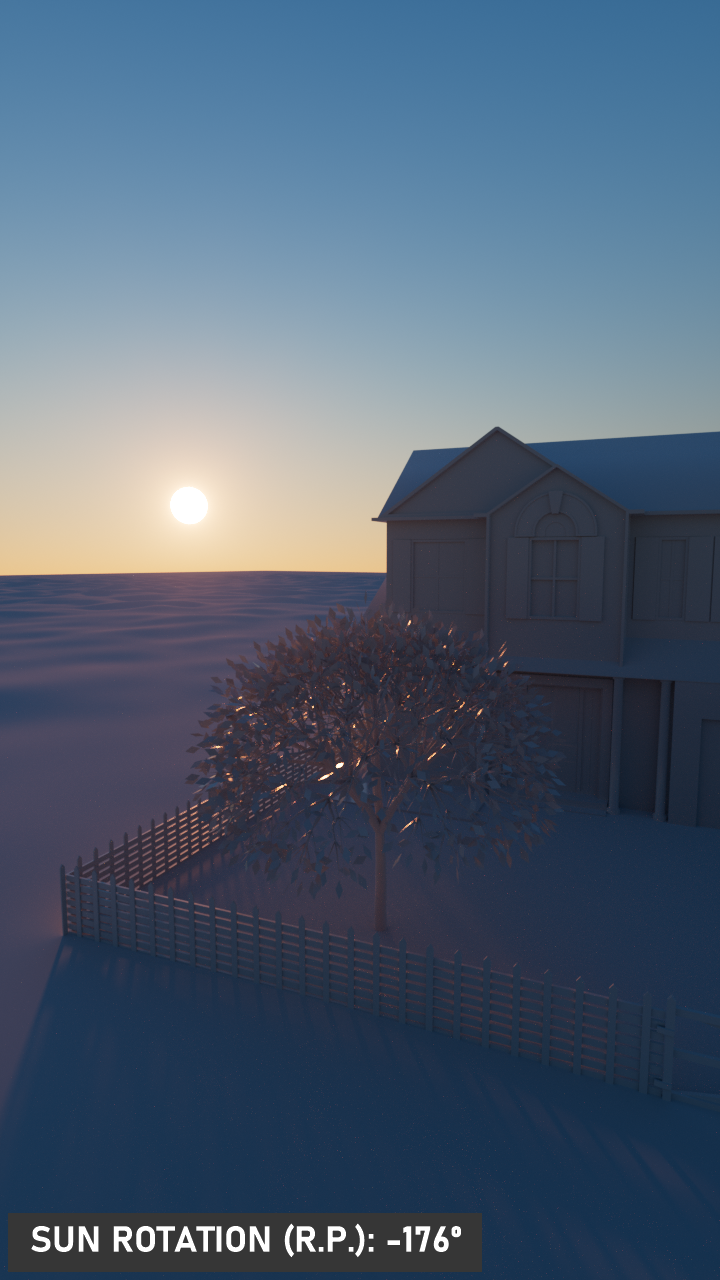
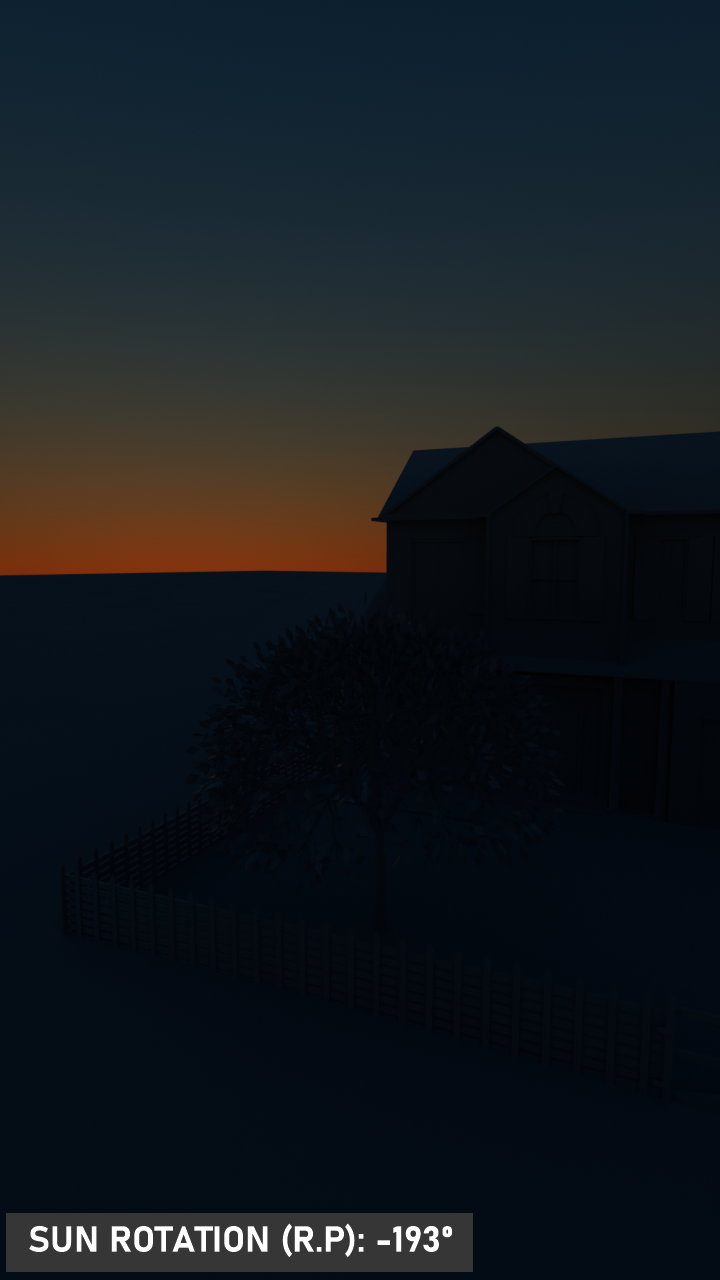
The Octane Daylight does not use the standard position and scale operations, as the Octane Daylight actually uses Cinema 4D's Infinite Light with a Daylight tag. The Octane Daylight can be rotated using the Cinema 4D rotate tool from the viewport or from the Coord. tab, though the B value is ignored. The North Offset is used for the location and direction of the sun, as explained in the Daylight Settings section.
|
|
sun rotation |
|
|
|
|
|

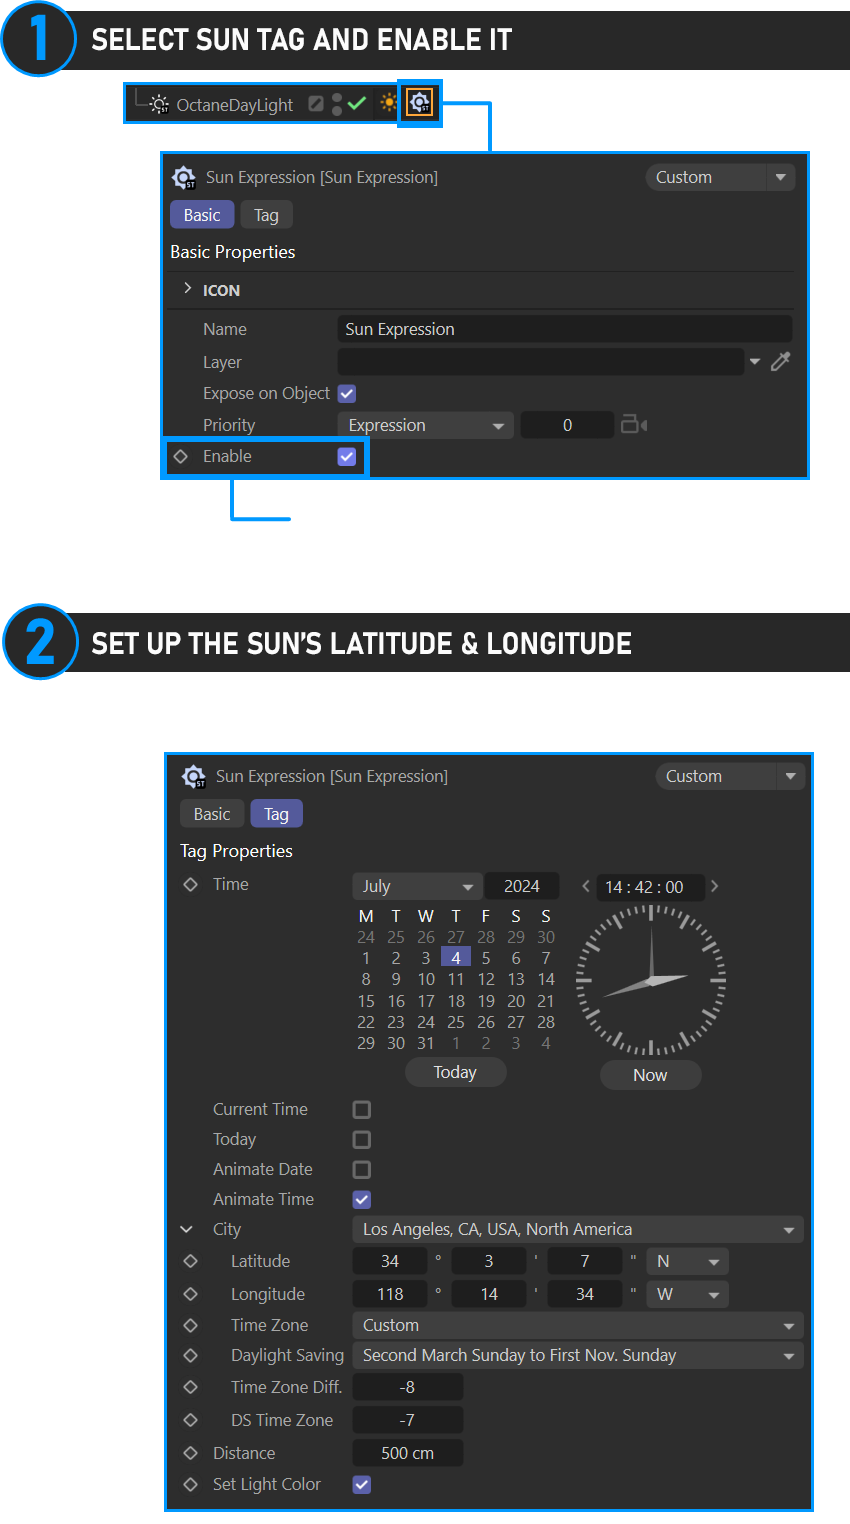
Set up Latitude & Longitude via Sun Tag
Daylight's location is managed via the Sun Tag. The Sun Tag is disabled when you first create Daylight, and thus it will be necessary to change this: go to the basic tab and check "Enable" and adjust the Latitude & Longitude settings from the Tag tab.
|
|
sun tag — latitude & longitude
|

Daylight & Environment Priorities
It is possible to mix the Daylight and Environments within the same scene, however, these objects are subject to priorities in the way they are processed, much like Cinema 4D's priority system. These priorities are listed in the chart below:
|
|
PRIORITIES
|

Octane Daylight Settings
The section below explains the Octane Daylight tag components:
|
|
octane daylight
|


Main Group
The Main group contains all of the options to model the daylight characteristics, as well as choose the daylight model.
Type
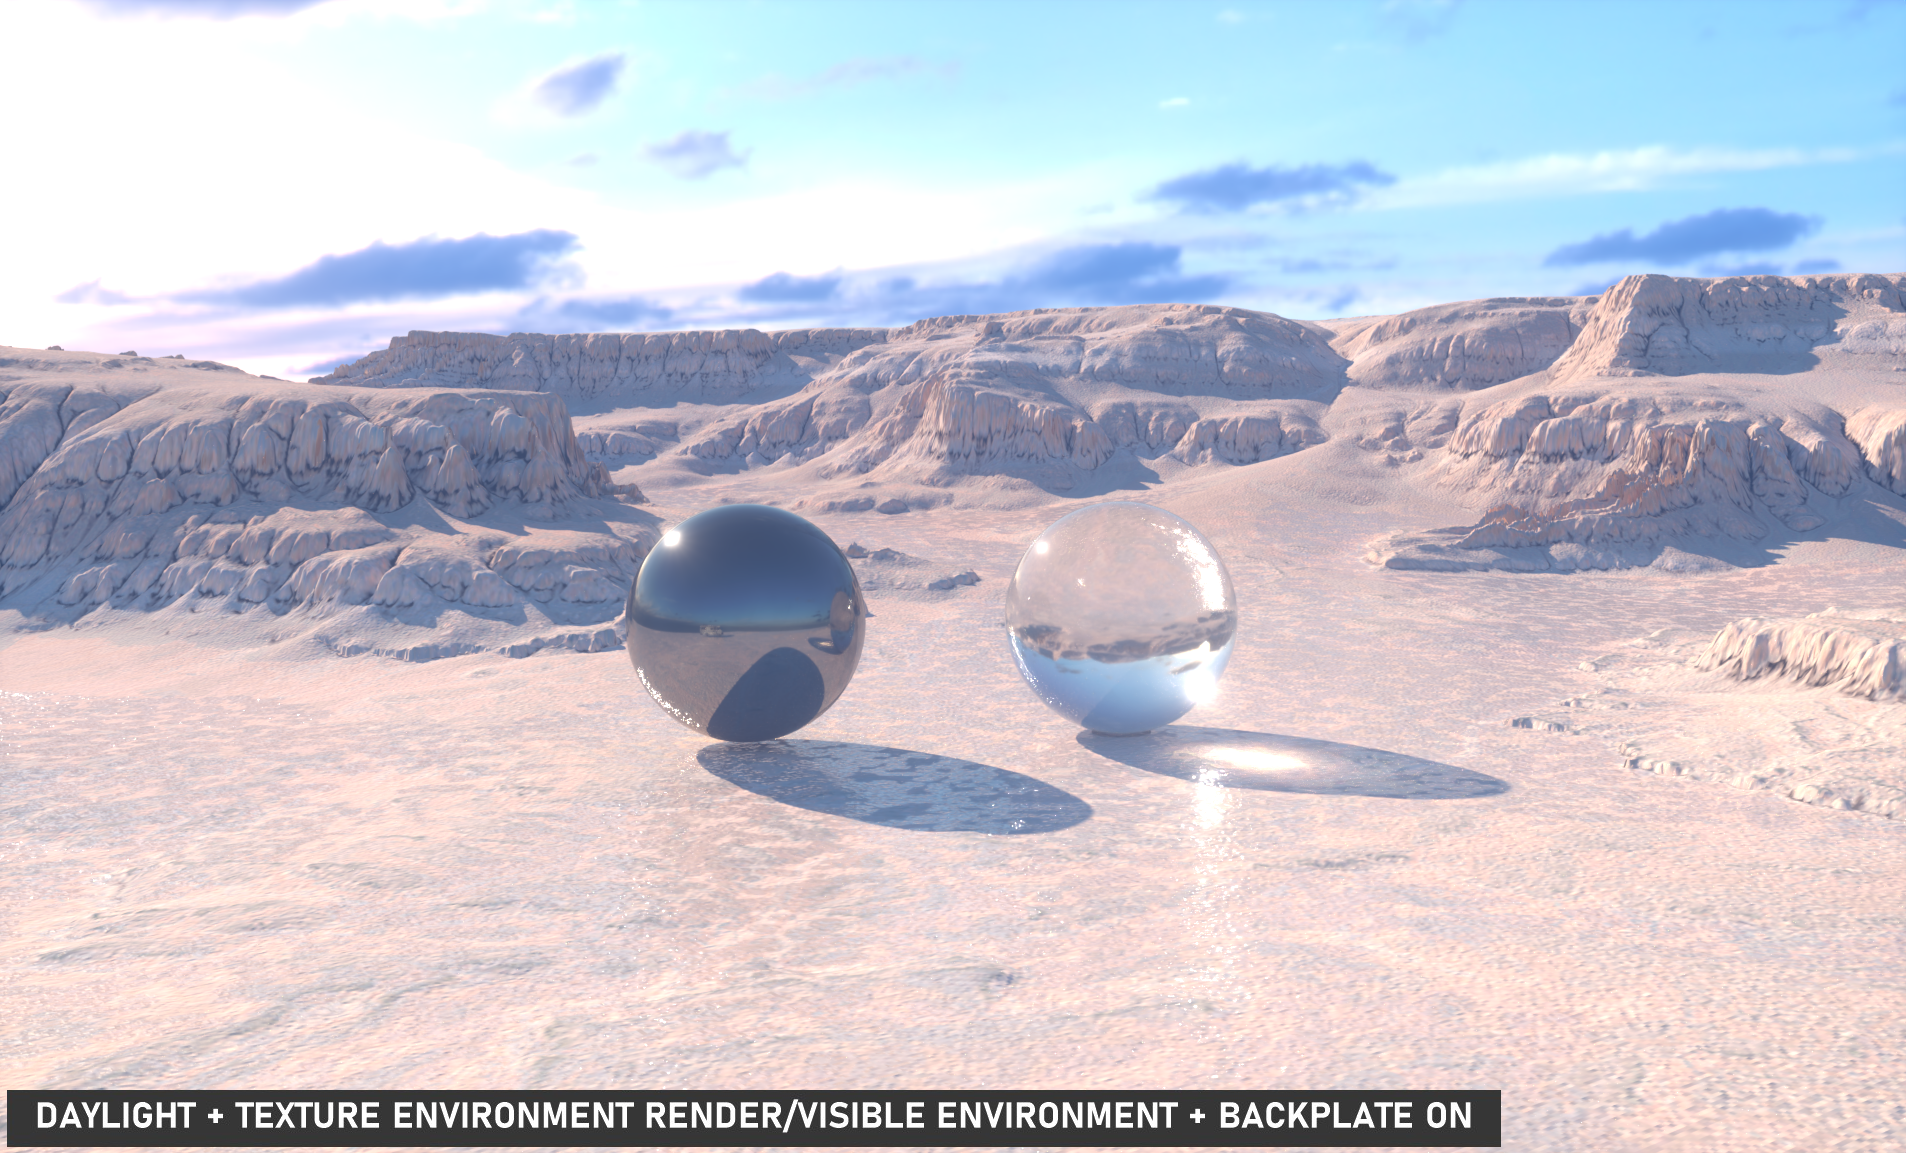
Refers to environment types, and determines how the scene is illuminated. Two are available: Primary Environment and Visible Environment. Primary Environment will appear in the backplate, reflections and refractions as well as for scene illumination. Visible Environment offers the ability to enable/disable these elements separately (as explained below).
Backplate
If the the Primary Environment is enabled, the backplate will be a gradient generated from the Sun, Sky and Ground colors (seen in the illustration here) and used for reflections and refractions. If the Visible Environment is enabled, the backplate, reflections and refraction effects from the environment can be enabled separately. If an HDR Environment or Texture Environment has been added to the scene, the daylight environment can be either mixed or replaced by the illumination from the HDR or Texture Environment object, as determined by the Mix Sky Texture option. HDR will offer the most realistic illumination over the two.
|
|
daylight and texture environment
|


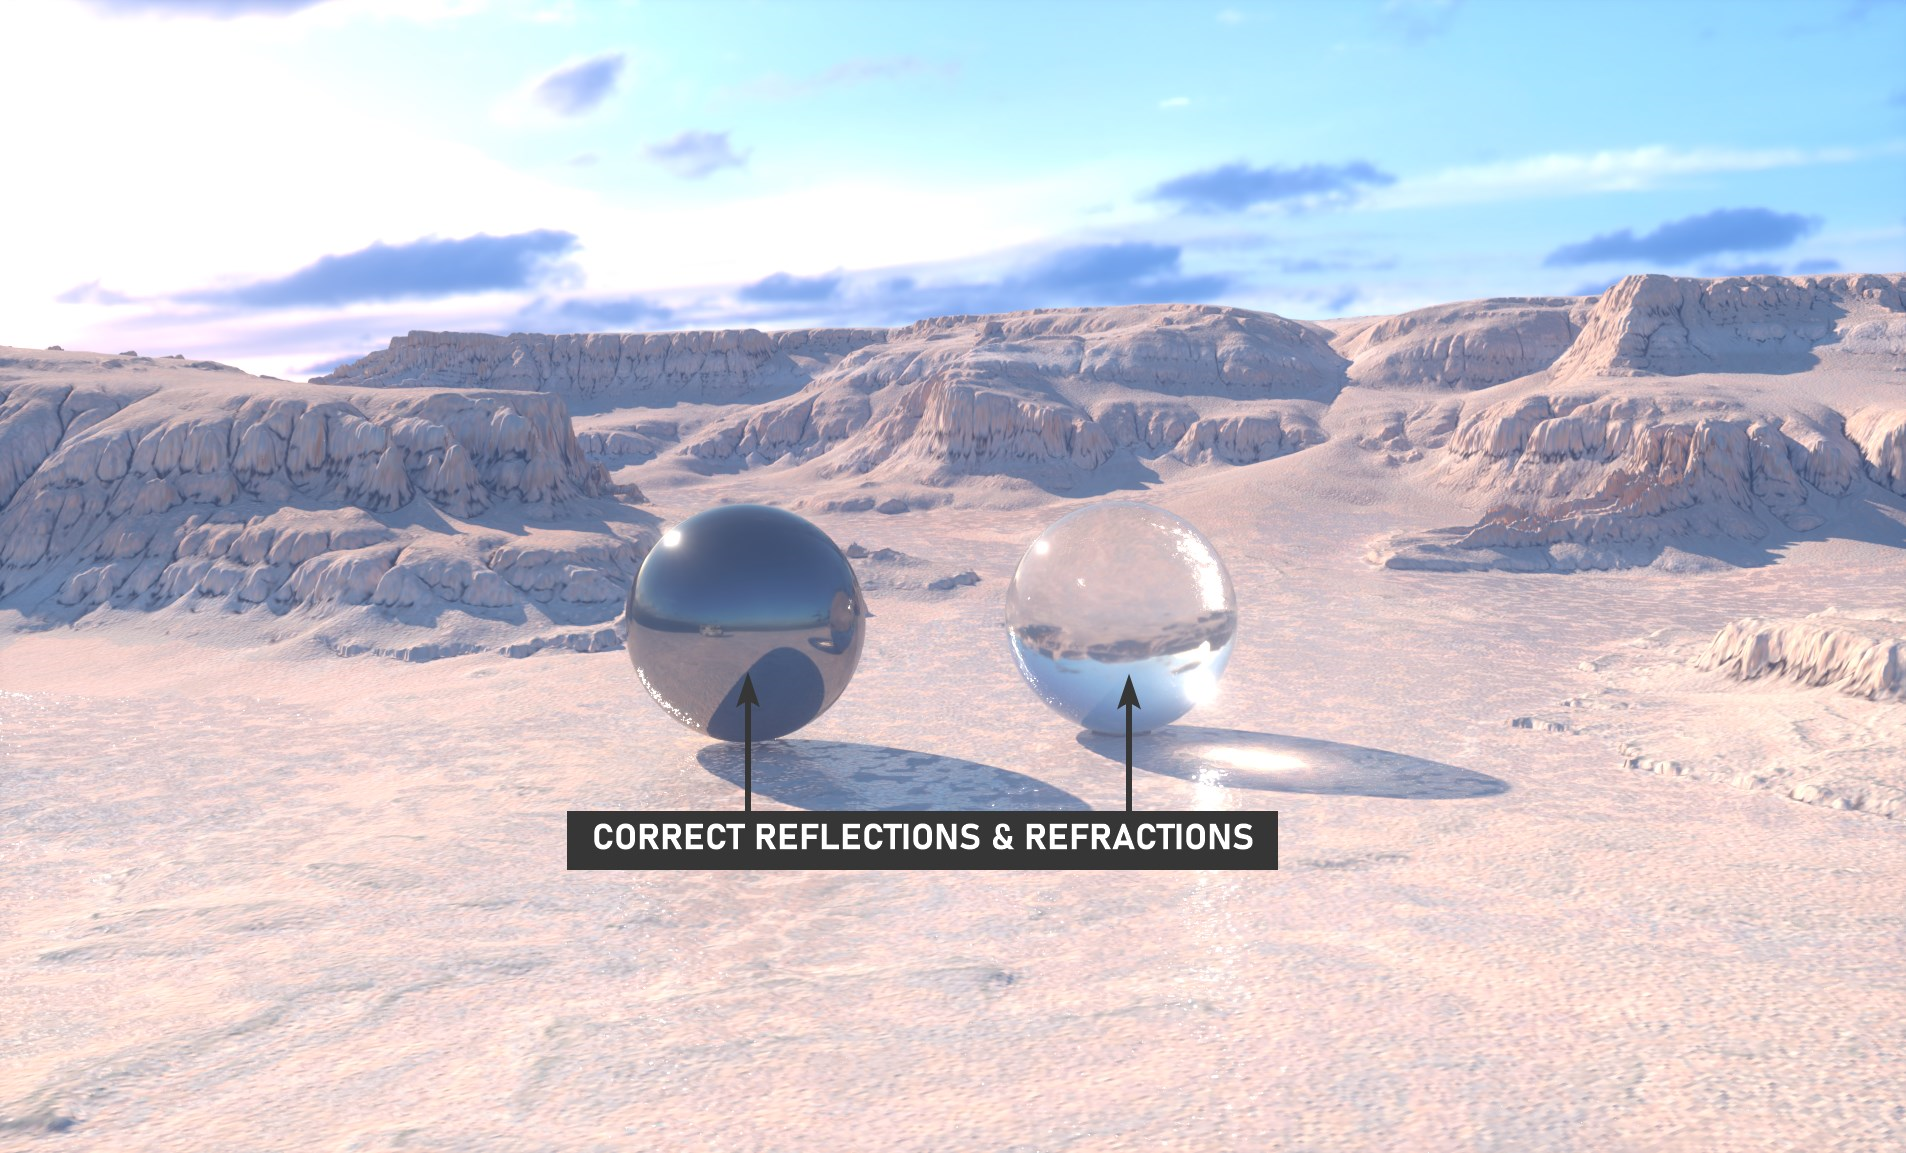
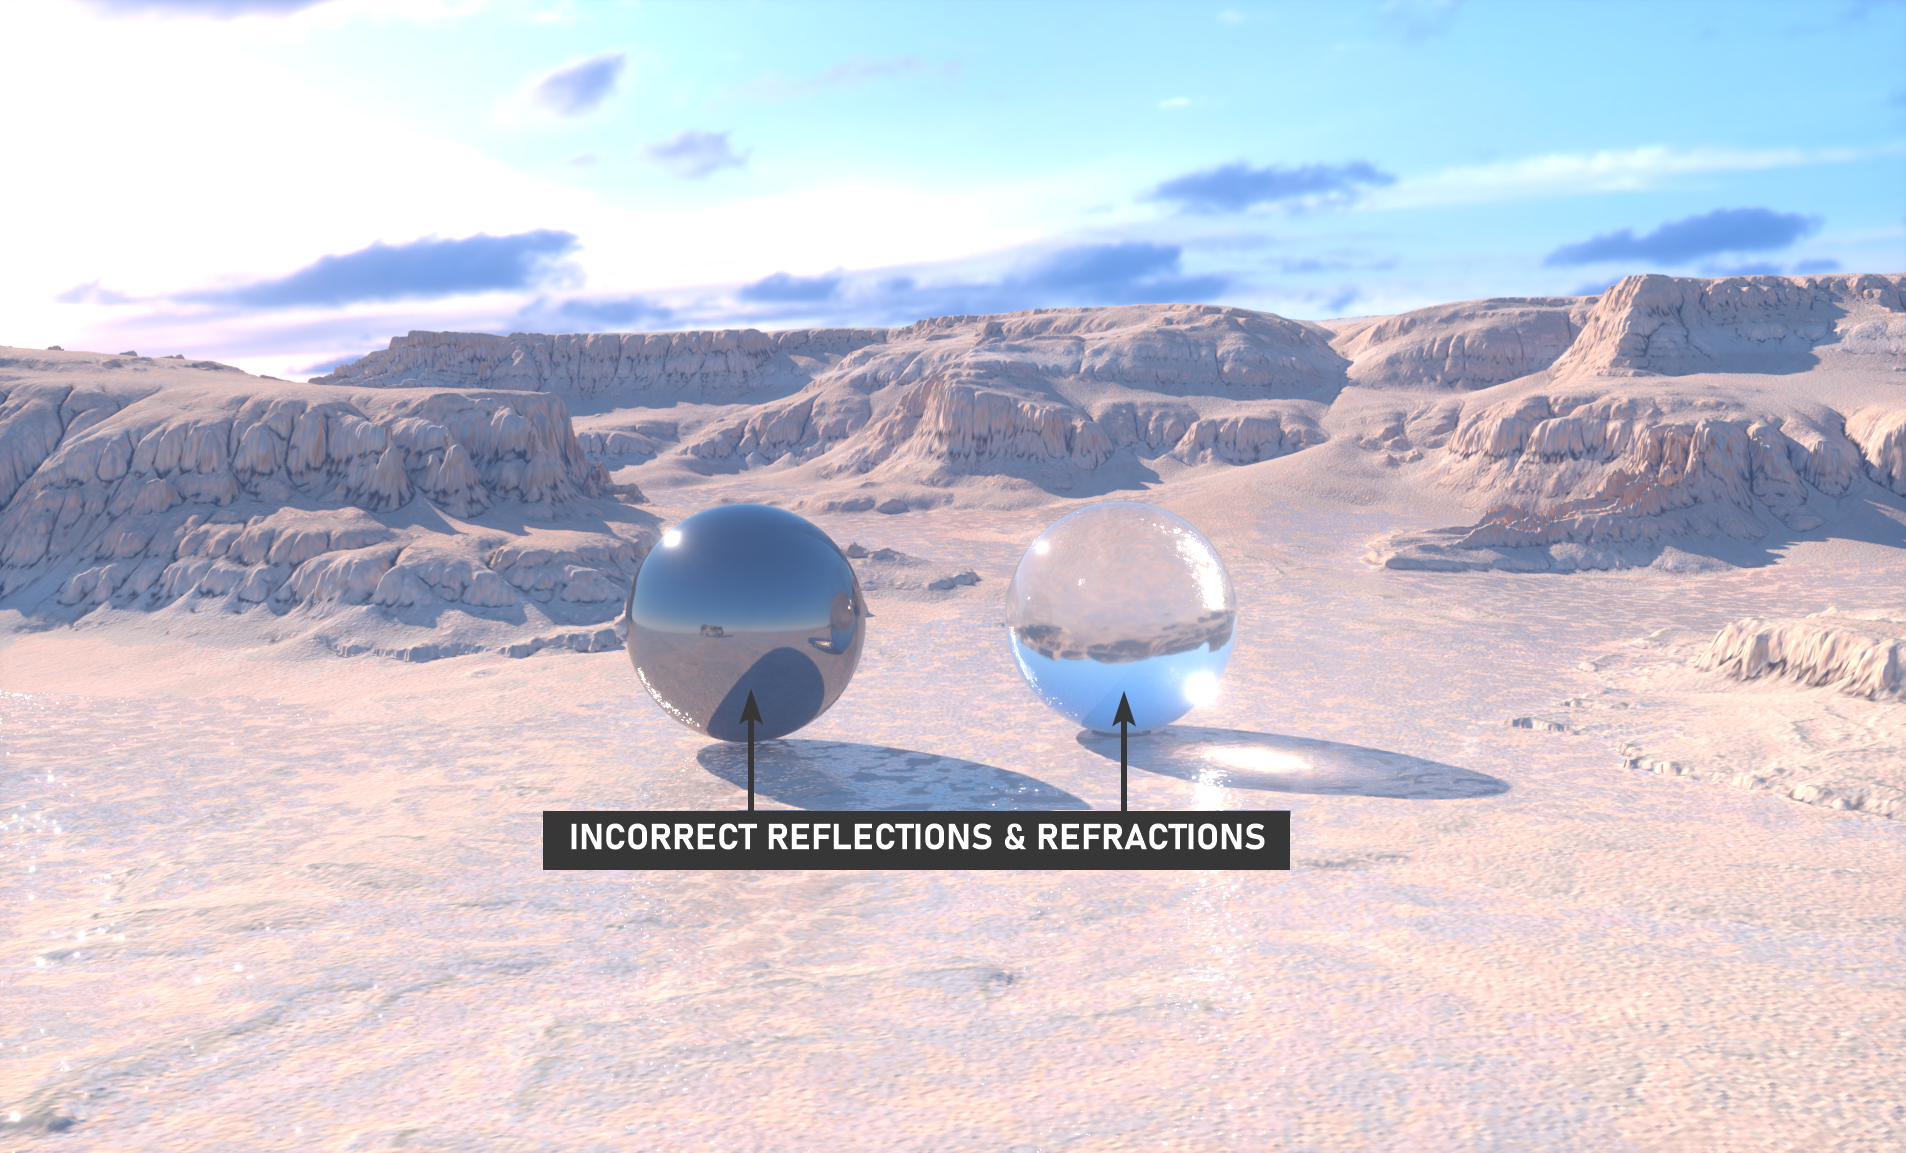
Reflections & Refractions
The Visible Environment by default will override the Daylight Environment when calculating reflections and refractions, as shown in the upper example of the following illustration. If you wish, you can disable the Visible Environment reflections and refractions separately, though is technically incorrect, as shown in the lower example.
|
|
visible environment reflections & refractions
|

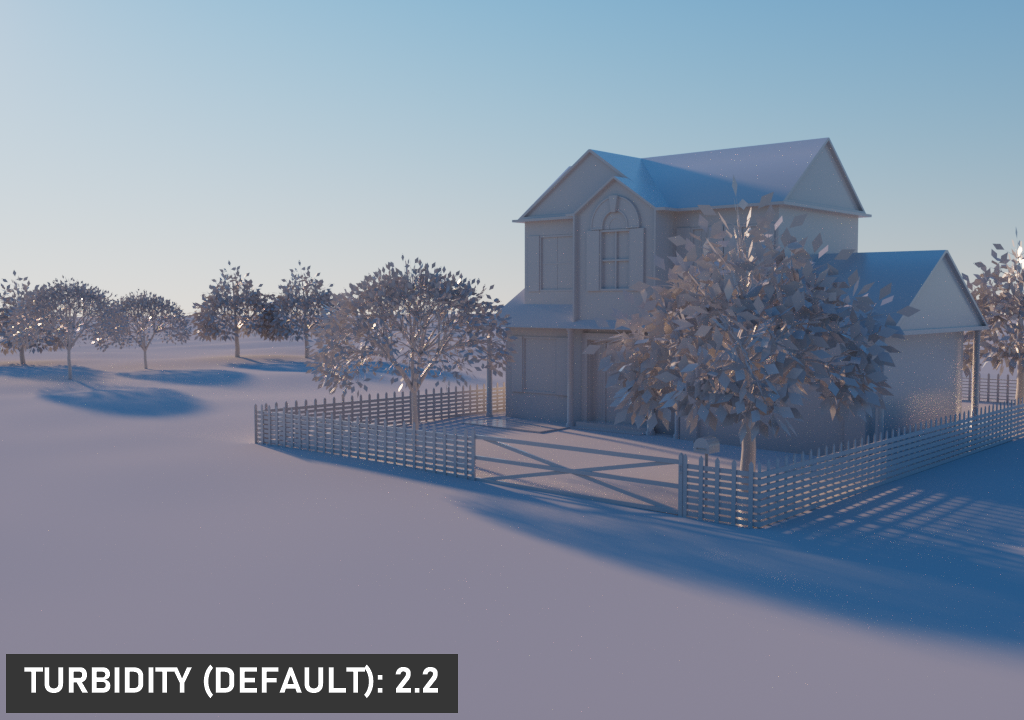
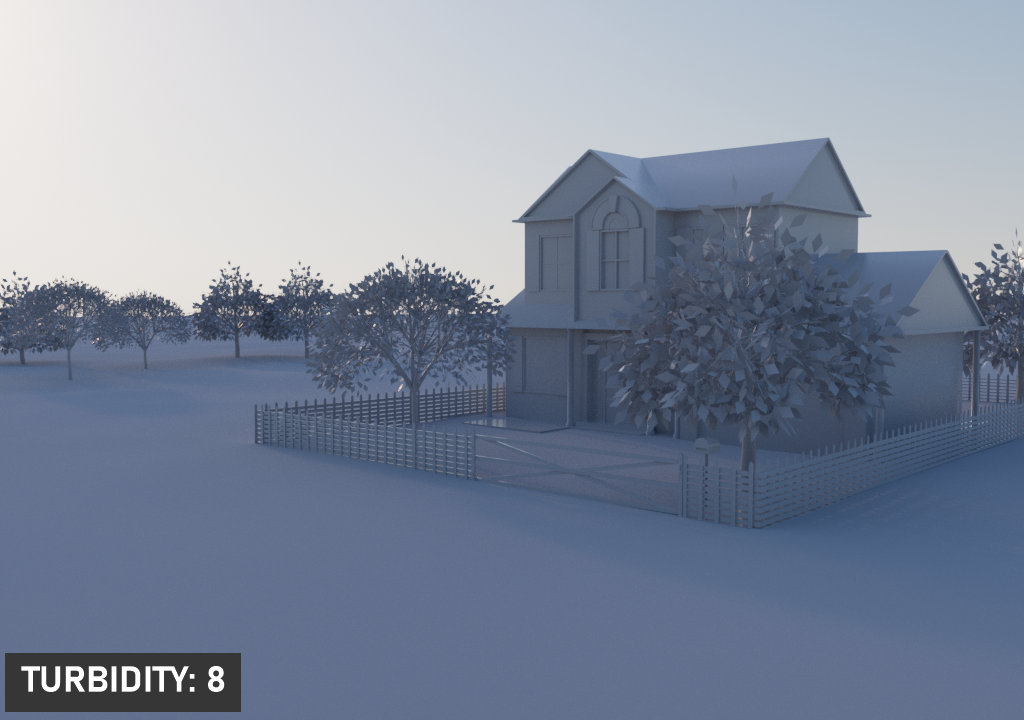
Turbidity
Actually, "Atmospheric Turbidity," an environmental term describing the appearance of the atmosphere as hazy (turbid), due to condensed micron-sized solid and liquid particles (aerosols) in the air of a particular area. In Octane, this value changes the distribution of sunlight and the sharpness of the shadows. A low value creates sharp shadows (like on a sunny day) and a higher value diffuses the shadows similarly to a cloudy day. You can also create a beautiful clear sky or a pessimistic atmosphere with this option. Turbidity differences shown in the image below.
|
|
turbidity |
|
|
|
|
|

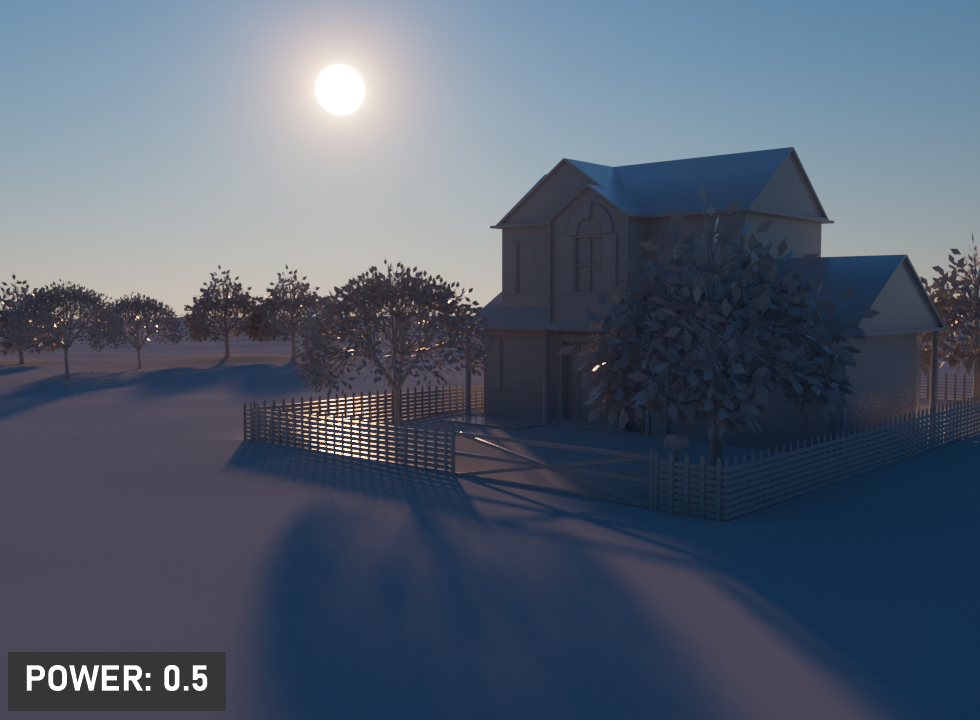
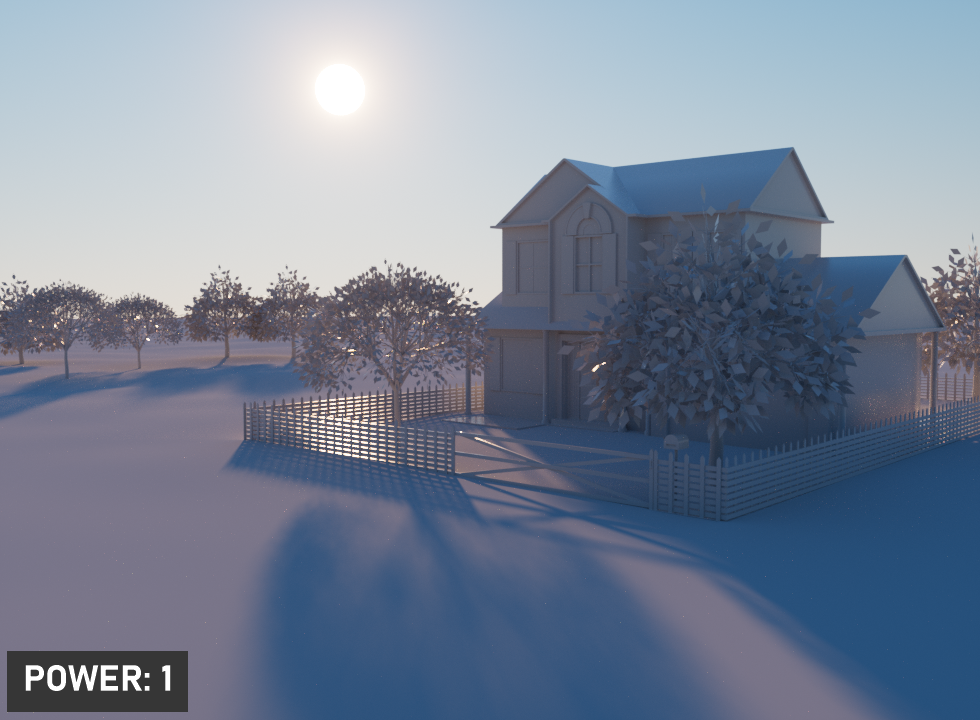
Power
The Power slider can be used to adjust the strength of the light. This can affect overall contrast and exposure level of the render.
|
|
POWER |
|
|
|
|
|


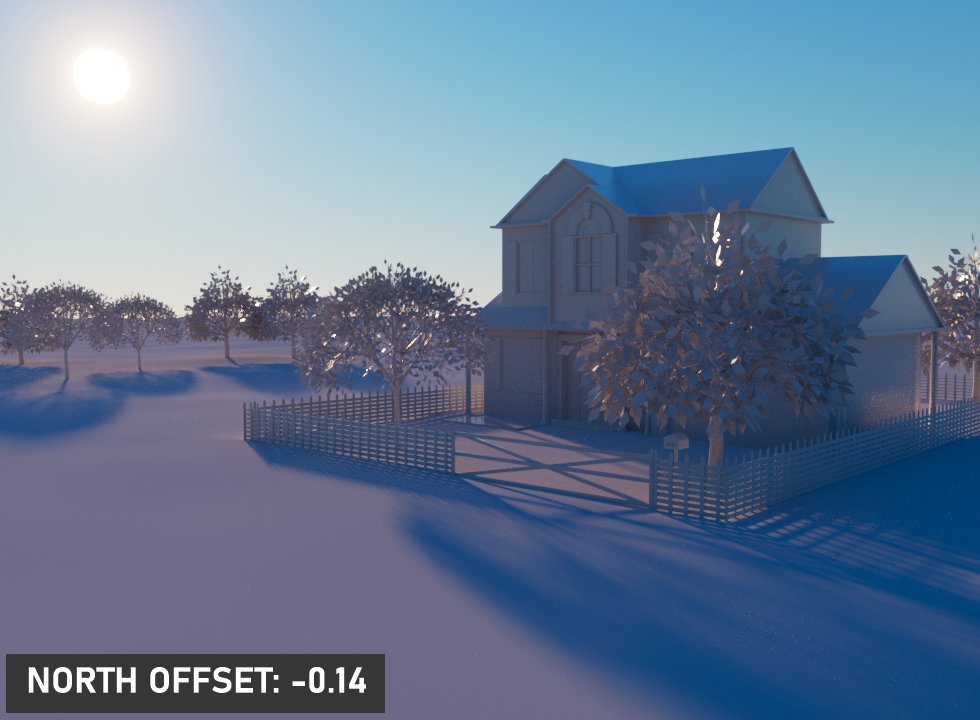
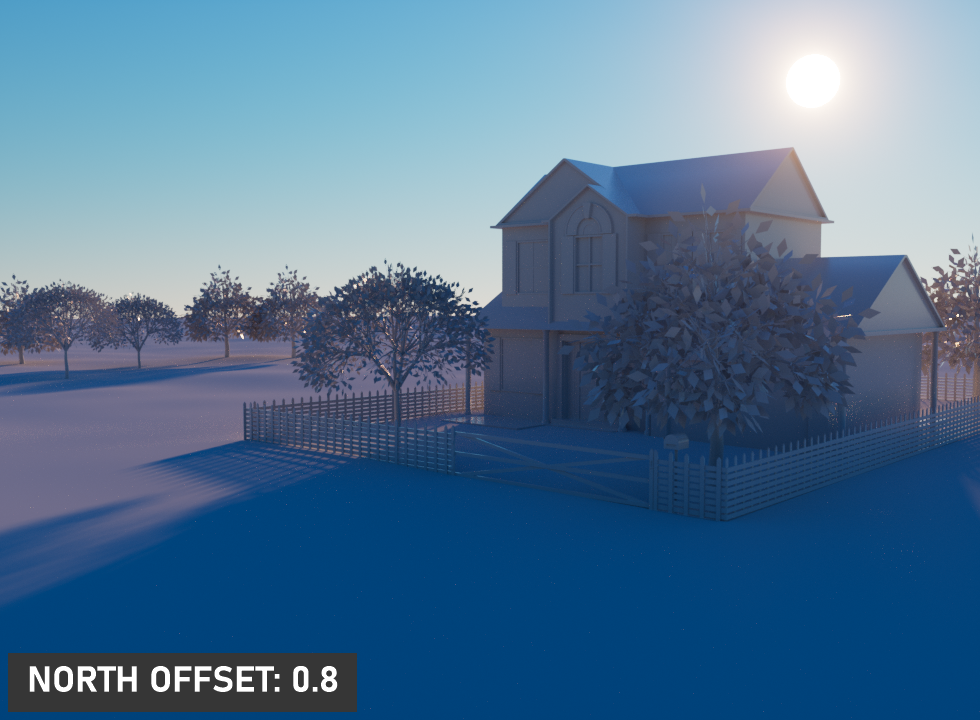
North Offset
The North offset can be used to adjust the actual North direction of the scene. This is useful for Architecture Visualization to ensure the direction of the sun is accurate to the scene. You can also change the North Offset by playing the "R.H" rotation of the light from the viewport.
|
|
north offset |
|
|
|
|
|

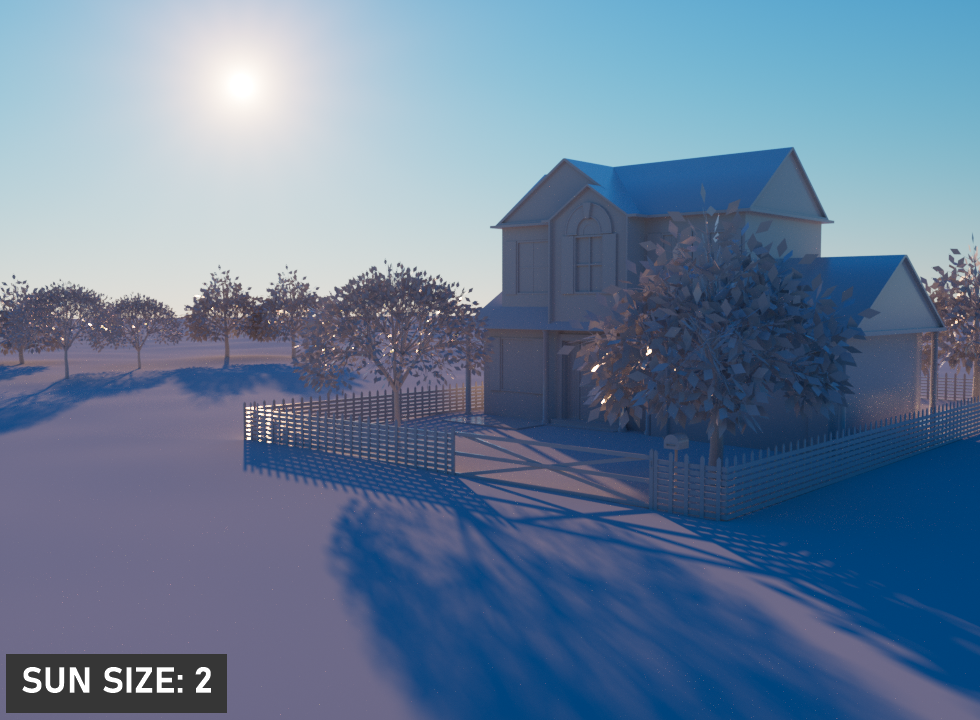
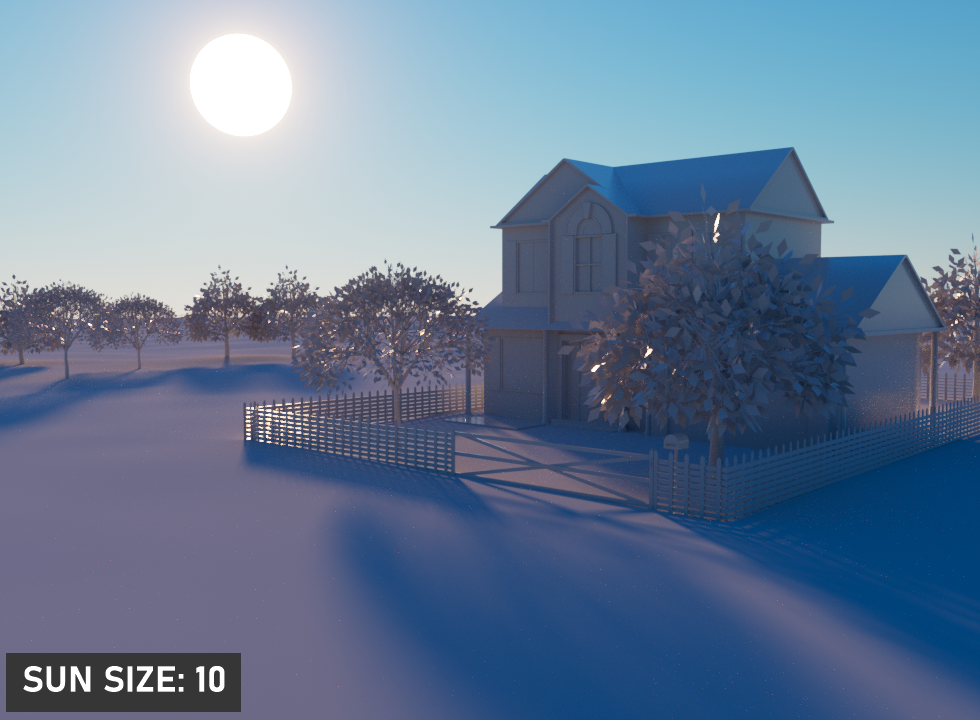
Sun Size
From here you can set the radius of the sun. If the radius is big, the shadows appear soft.
|
|
sun size |
|
|
|
|
|

Daylight Model
Spectral colors produced by daylight models, blackbody emitters and spectral OSL textures are interpreted relative to a standard D65 daylight white point in Octane 2021. This corrects a blue cast to spectral colors in previous versions of Octane, and can be disabled by selecting the legacy white light spectrum in kernel settings. The image below shows the sky as generated by the Hosek-Wilkie daylight model.

There are currently four daylight models to choose from:
- Octane Daylight
- Preetham
- Nishita
- Hosek Wilkie
The Octane daylight model simulates full spectrum daylight providing more sky color variation as the sun moves along and bearing shorter rays as the sun moves closer to the normal plane. The Preetham daylight model This is the old daylight model that lights a scene with basic spectral radiance as the sun moves over the horizon at a relative distance from the object. The Nishita Model implements atmospheric scattering based on the Nishita Sky Model and displays the variations of color which are optical effects caused by the particles in the atmosphere. As Nishita is physically based, it will not consider sky and sunset color The Hosek Wilkie daylight model produces more realistic and detailed results than the other implementations, especially in hazy conditions and near the horizon. The image below shows all models, each with the same settings.
|
|
daylight models
|


Sky & Sun Color
Here you can adjust the sky and sun colors.
|
The colors of the Nishita model cannot be adjusted, as it is a physically based model. |
Mix Sky Texture
The Octane Daylight illumination can be mixed with the OctaneSky illumination for a more realistic look, replacing the simple gradient Backdrop with the HDR/Texture (Backdrop), reflections and refractions of the OctaneSky object. To mix the HDR/Texture with the Daylight Sky, enable this option. Note that you need to account for the difference in illumination location of the HDR vs. the Octane Daylight (discussed below).
Mix Daylight Sky with HDR/Texture Environment
Create one HDR or Texture Environment. Define the image for HDR or Texture and adjust the settings as needed (you can review the next section for the HDR / Texture Environment information). Activate "Mix Sky Texture" from Main tab. As you can see in the image, the HDR environment integrates with the Daylight system when this option is enabled, but the shadow direction is incorrect.
|
|
mix sky texture
|

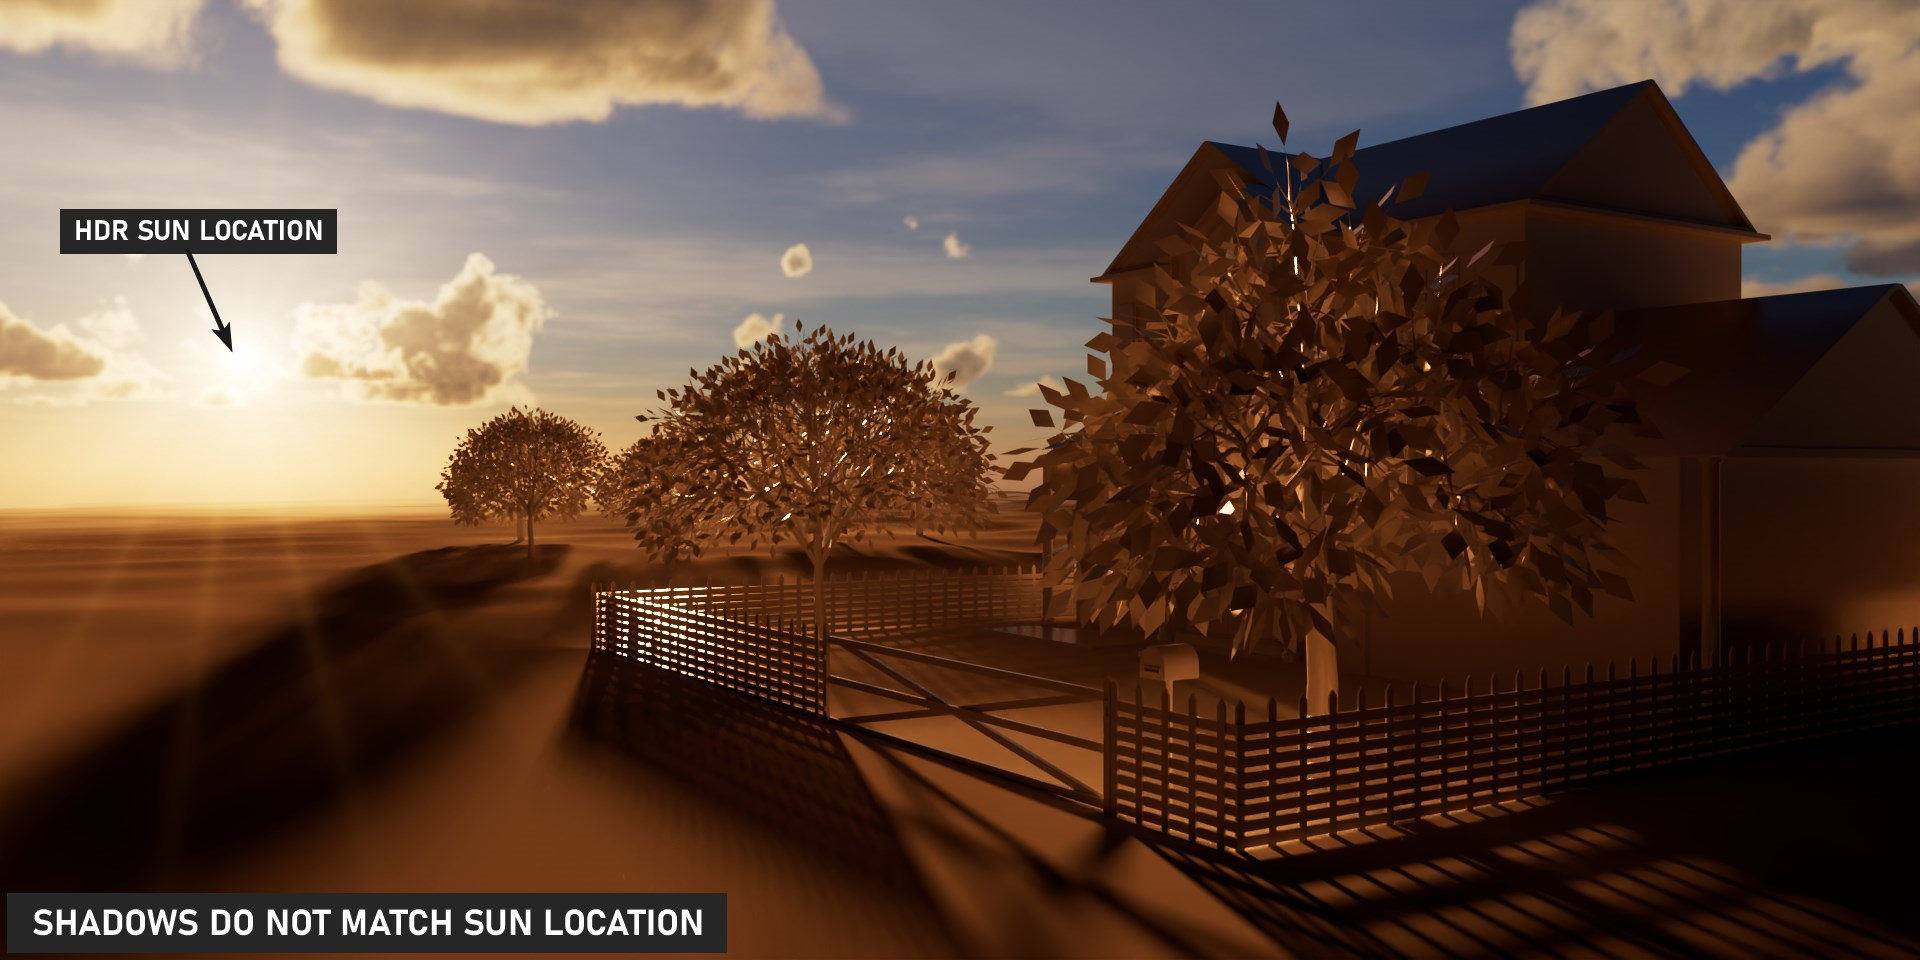
Fix & Match Daylight Sun to HDR Sun
Adjust the position of the Sun to match that of the HDR back plate, using the orientation tools discussed in this topic. Once complete,make the Daylight a child of the HDR environment. The Octane Daylight will now inherit the rotations of the Sky object.
|
|
sUN & hdr MATCH SETUP
mATCH THE OCTANE DAYLIGHT SUN LOCATION TO THE HDR, THEN MAKE THE OCTANE DAYLIGHT A CHILD OF THE SKY OBJECT |

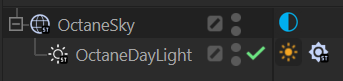
As you can see in the image below, the daylight sky sun is now matched with the HDR sun, unlike the previous image. Daylight Sun will follow in every rotation of the HDR sky. Adjust the illumination settings as needed to better match the HDR image used as the back plate.
|
|
mix sky texture
|

Importance Sampling
Importance sampling enables quicker convergence (noise reduction) for certain areas so the sample rays that resolve to the important areas more often than unimportant areas. This means the ray tracing is more efficient as it is not wasting time on rays that do not contribute much to the overall image quality. Due to the added complexity this will reduce the Ms/sec of rendering, but each Ms will be more effective, therefore resulting in a higher image quality in less time. Importance sampling is enabled by default.
Ground Group
The Ground group contains the settings to control the characteristics for the ground shading.
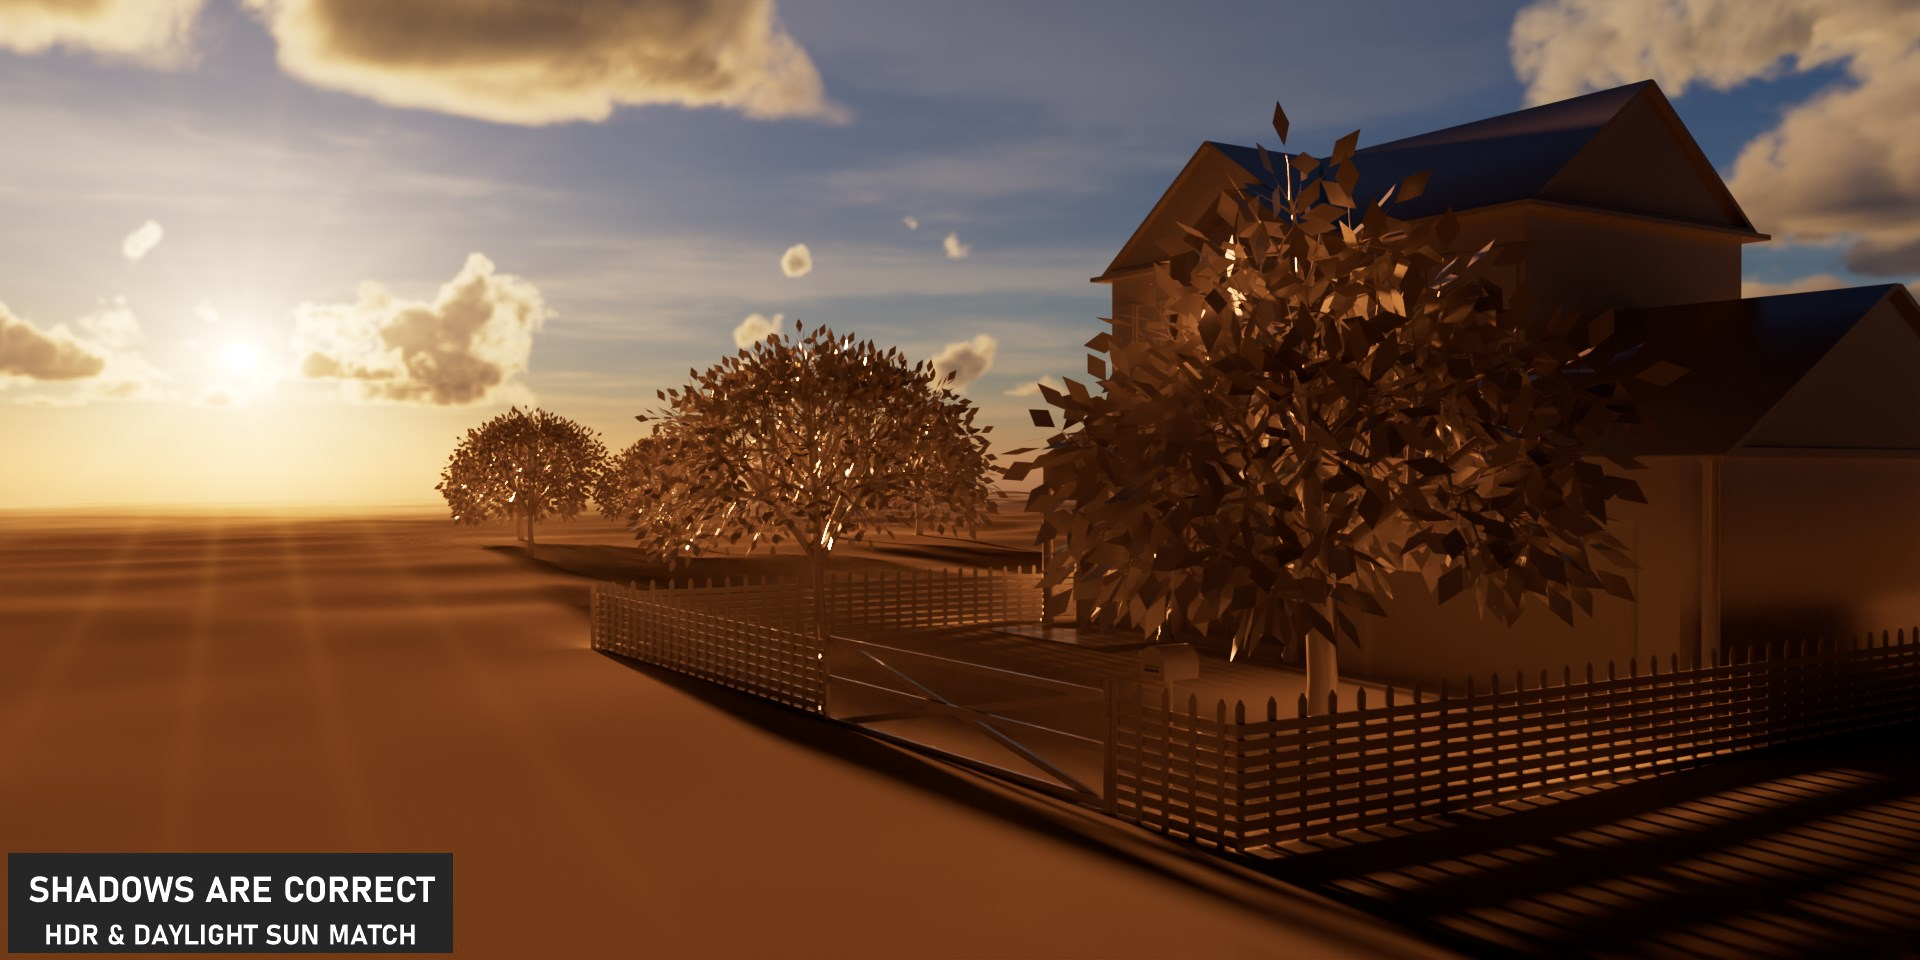
Ground Color, Ground Start Angle & Ground Blend Angle
When you first create daylight, the color of the ground is black. You can set the color of the ground as well. Ground Start indicates the angle where the ground will first be visible, separate from the sky. The Ground Blend Angle is used to control the mix of the sky with the ground.
|
|
ground
|

Medium Group
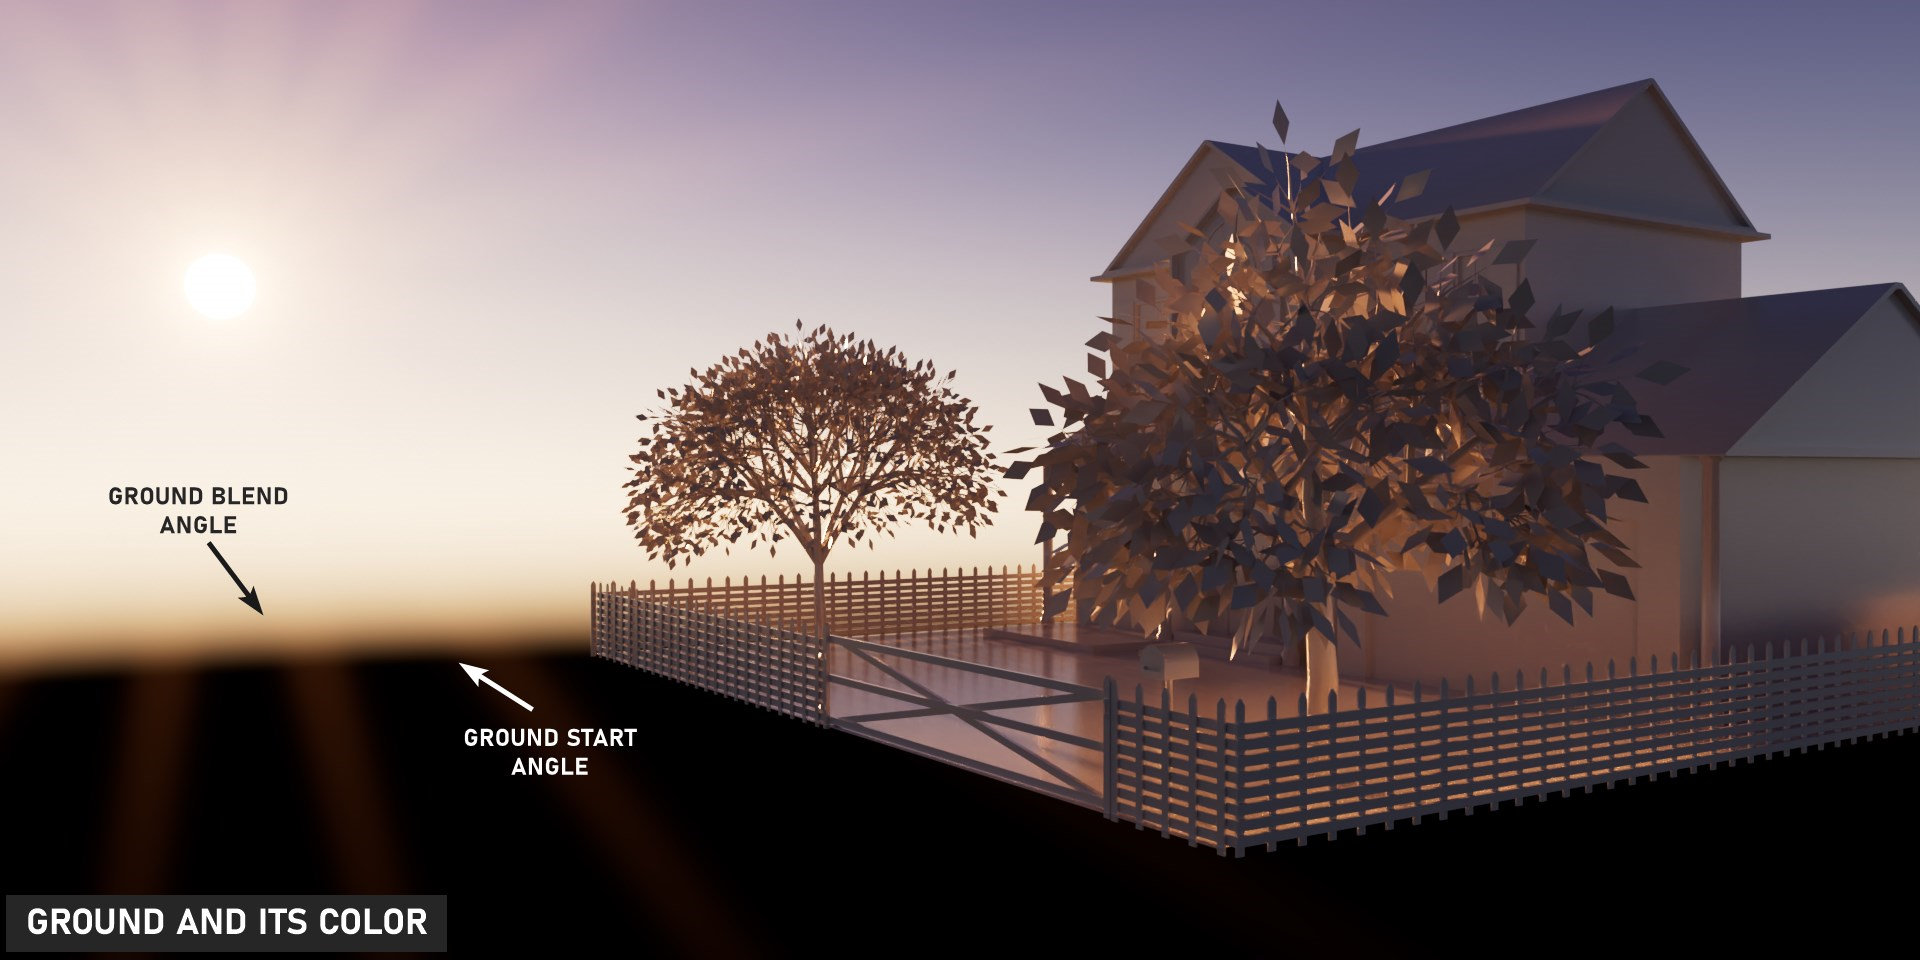
The Medium group offers control of a Medium used to give aerial density and fog to the daylight system. This is an actual Volume Medium effect, not a cheat. It interacts directly with any lighting in the scene. Mediums are explained in more detail in the "Volumetrics" section.
|
|
medium
|

Exclusion Group
This section enables scene items to be excluded from the illumination of the Octane Daylight.