Octane Gradient
The Gradient texture node produces a gradient blend between color values. It can accept a texture input to determine how the gradient is mapped to the surface, provided the projection for the texture input is defined. The Gradient node is not equivalent to the Cinema 4D gradient; for that, the Sinewave Node is a better choice. In the Octane Gradient node, any two color values will mix with each other if you do not use the input channel group (available in Complex mode, discussed below), as in the mix shader or cosine mix. The Octane Gradient node is used more often for color and value remapping. For more traditional Cinema 4D uses of the gradient, just use the Cinema 4D Gradient node.
To better understand how this node works, refer to the following examples.
|
|
OCTANE GRADIENT
|
How to Use (Simple Mode)
Gradient texture works in two modes, Simple and Complex.
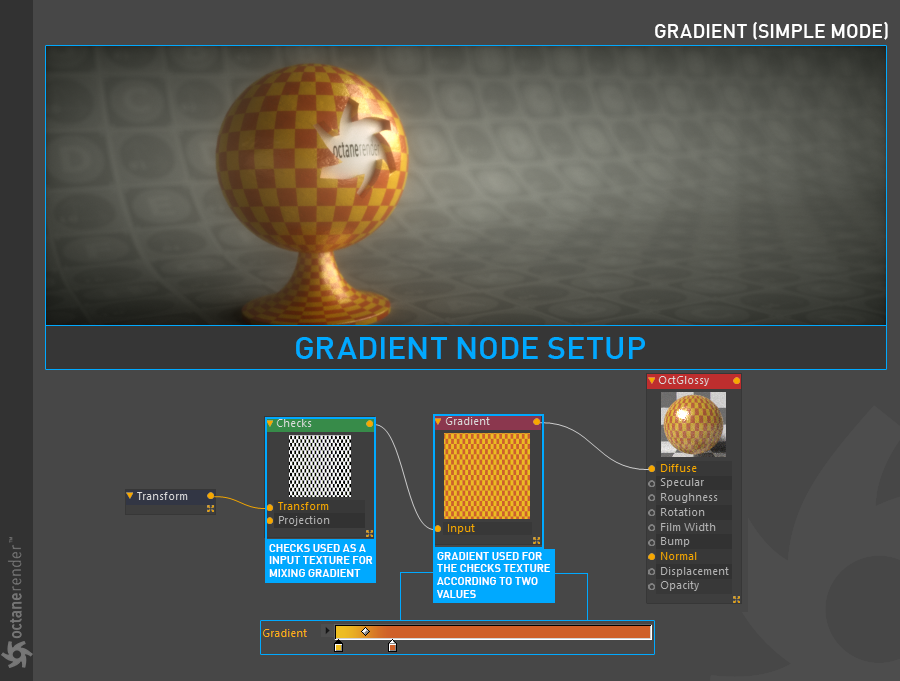
Color any Generator using a Gradient
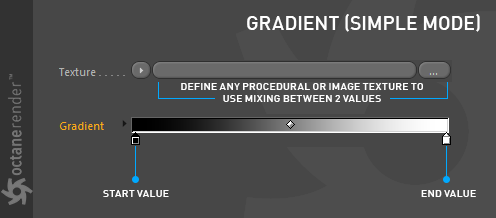
A "value" is each color you assign to the gradient. This value can be any color or image texture. In simple mode you can define a maximum of 2 values, and any color or image texture will be mixed according to the data you define in the input node.
As you can see in the node setup below, the grayscale checker is used as texture input and the colors are changed by entering two separate values (i.e., color) in the gradient.
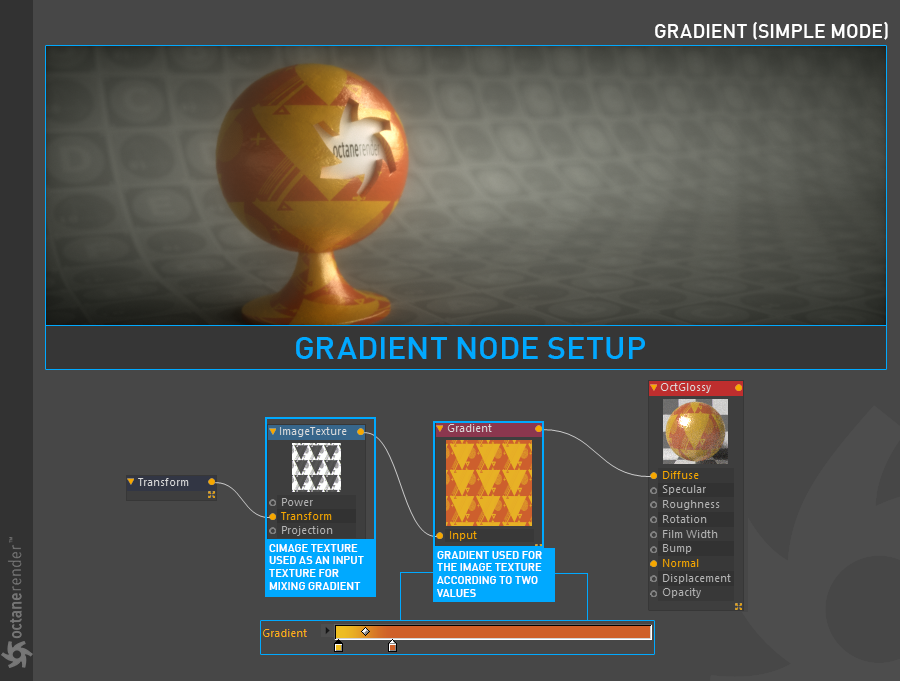
Re-Color any Image Texture using a Gradient
If you want to change the colors of the image texture you uploaded, you can also use a Gradient. The following setup shows this process.
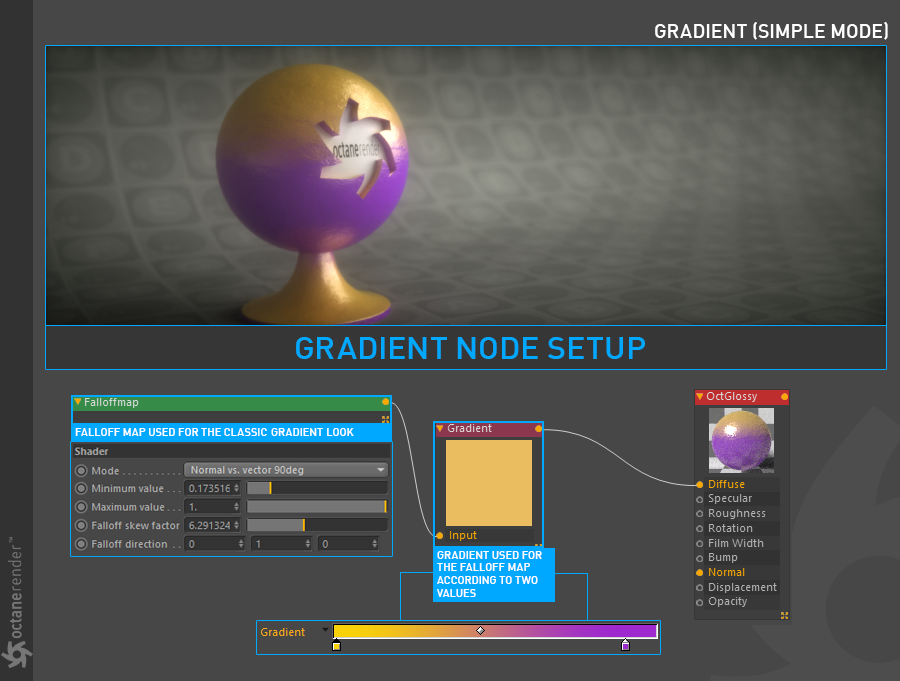
How to get a Classic Gradient Look
The default behavior of the Octane gradient does not create the expected "blend" between the two different color values. To get this blend, attach a Falloffmap node to the input of the Octane Gradient node. You can also use native Cinema 4D's "Gradient" for the classic gradient look.
Gradient as a Mask Function for Dirt/other Generators
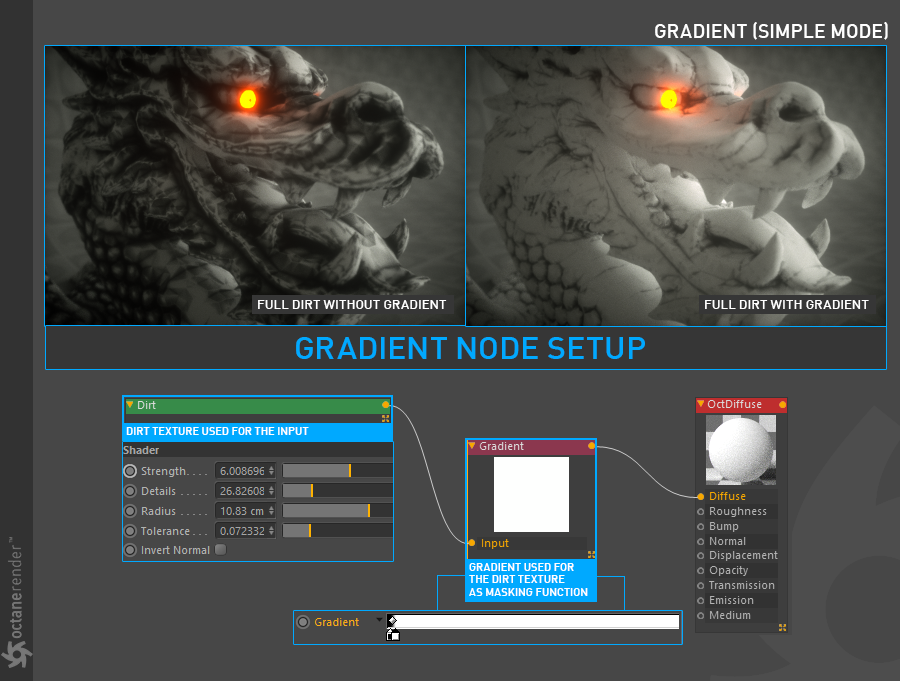
You can also use the Gradient Node as a mask. The default values, black and white (or float values which is 0 and 1), can use as a masking function. In the following setup the "Dirt Texture" is assigned to the Dragon Object and then using the gradient to make this dirt appear only in the crevices.
How to Use (Complex Mode)
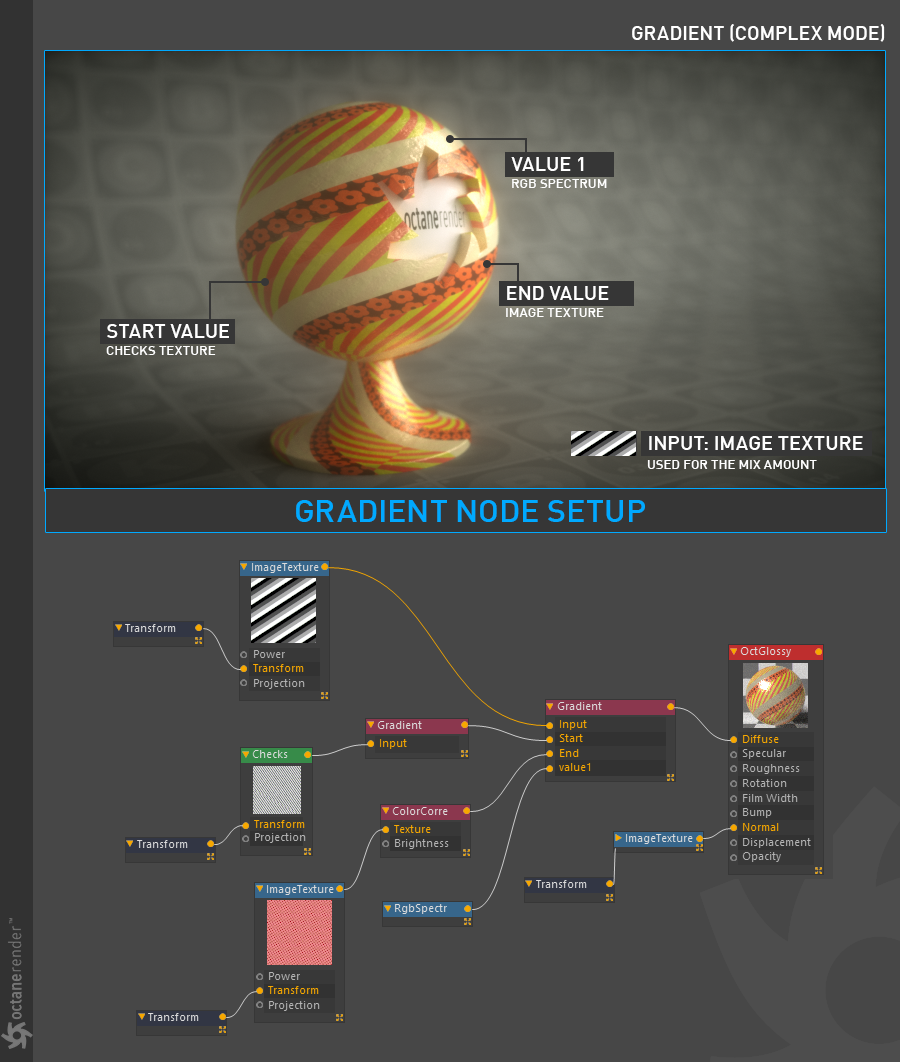
The Gradient texture really shows its power in complex mode. Instead of the two-value limit in Simple Mode, you can use many values (inputs) in Complex mode. It's possible to use any image or procedural texture for each of the values. To switch to complex mode, select "Mode / Complex" from the gradient option; this will reveal the gradient Inputs group. Now, every color you enter from the color section is a "value". In this case you can add "knots" to gradient colors according to the complexity of the material. The image below shows an example setup. Only one "value" is used except the "Start and End" values to get the texture in the image. Also, one image texture is used as a input texture and mix factor. Download the scene from this link
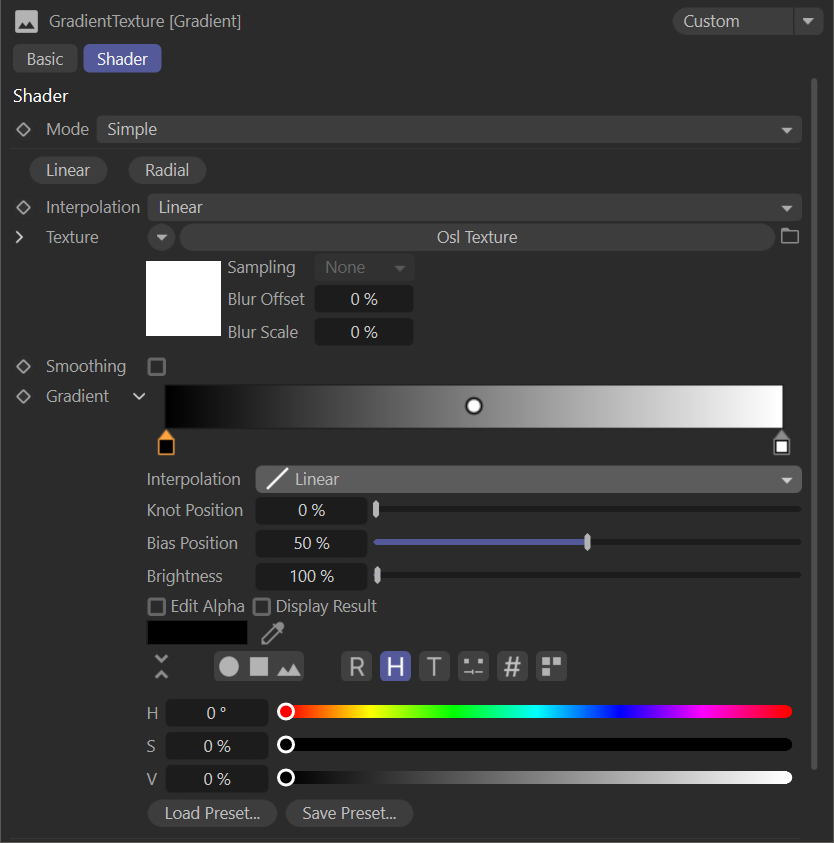
Gradient Settings
Mode
Select the gradient mode from this drop down menu. There are two modes: Simple and Complex, both of which are explained above.
Linear and Radial OptIons
You can select the gradient style from here.
Interpolation
Select from Constant, Linear or Cubic to determine the rate at which colors blend from one gradient knot to the next. Note that each color knot can have a separate interpolation value, so this setting will override those settings.
Texture (Input)
Input to determine the way the color is mapped to the surface. The importance of this option is explained in the examples above. For an accurate mix, you can define RGB / Alpha / grayscale procedural or image texture here.
Smoothing
This toggle smooths the mix if enabled.
Gradient Field
From here you can add "value" or knots to create the gradient.
