Fire
In this section we will produce a fire simulation and show how to create a realistic shader using the OctaneRender® volume medium. Download the scene from here
The following example uses the TurbulenceFD plugin to simulate fire. Other plugins such as X-Particles, or applications, such as Embergen or Houdini can export a VDB file to use in Octane. What matters most is the shading settings you'll make in Volume Medium. For fire and smoke, a good simulation is essential, and this is beyond simple noise shaders in the volume object. Fire and smoke involve some very complicated physics and you need the control that plugs like Turbulence or applications like Embergen have to offer for complete realism.
Making Fire with Turbulence FD
This tutorial will use Turbulence FD (jawset.com) to create a volumetric fire effect If you don't have this plugin, this section is still worth reading if you have a need for smoke or fire shading for VDB assets from other applications. First, install TurbulenceFD in your system before opening the scene. After installing the plugin, open the "fire_01" scene. No solved simulations are included, due to the size the cache file (124 GB) for the fire, so the cache file will need to be generated locally. The documentation for Turbulence covers this, and there are numerous video tutorials available online.
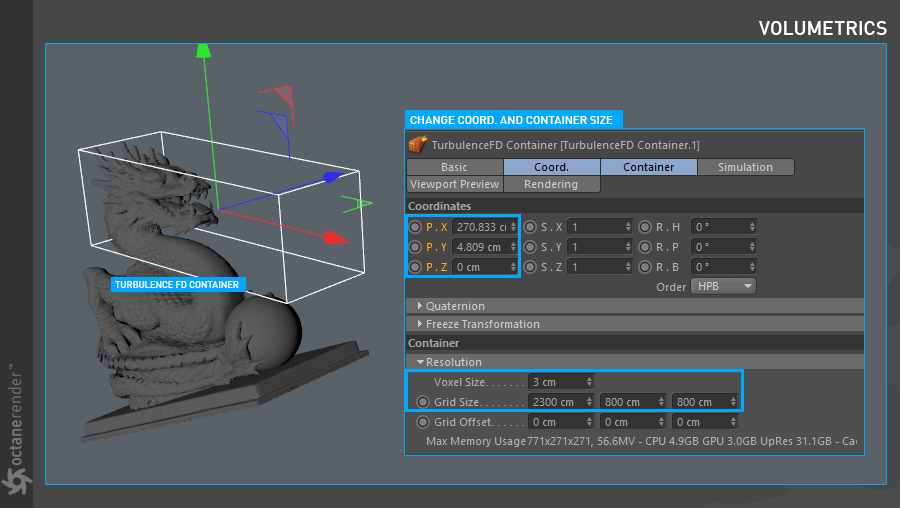
1- Open the "Fire_01" scene. Create a container from Plugins > Turbulence FD and change the location and size as shown in the image below. Set the size of the voxel grid and place it around the head of the dragon. Increase the Voxel size to 7-8 instead of 3, as this will make the TFD run faster for preview simulation until the final cache.
2- Now add an Emitter tag to the Emitter object, by using the Tag menu in the Object Manager and choosing "Turbulence FD Emitter" from the Turbulence FD menu. Change the parameters as you see in the image below.

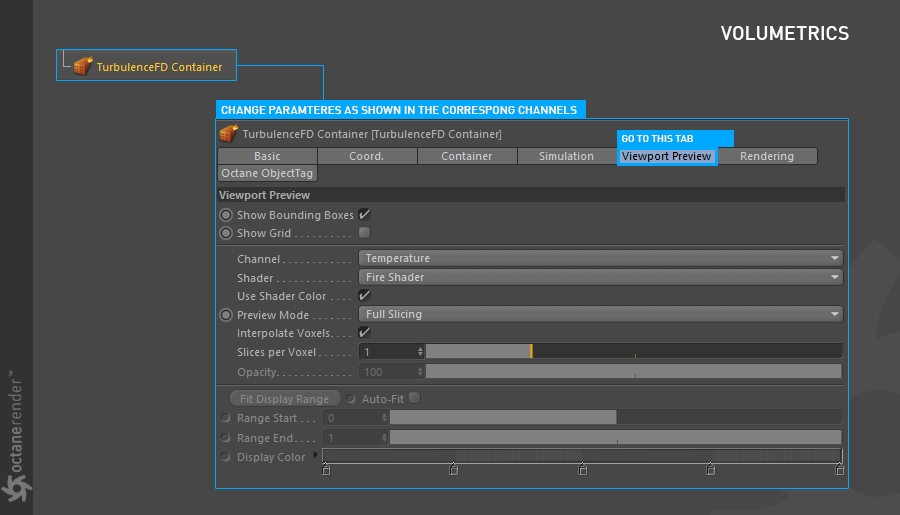
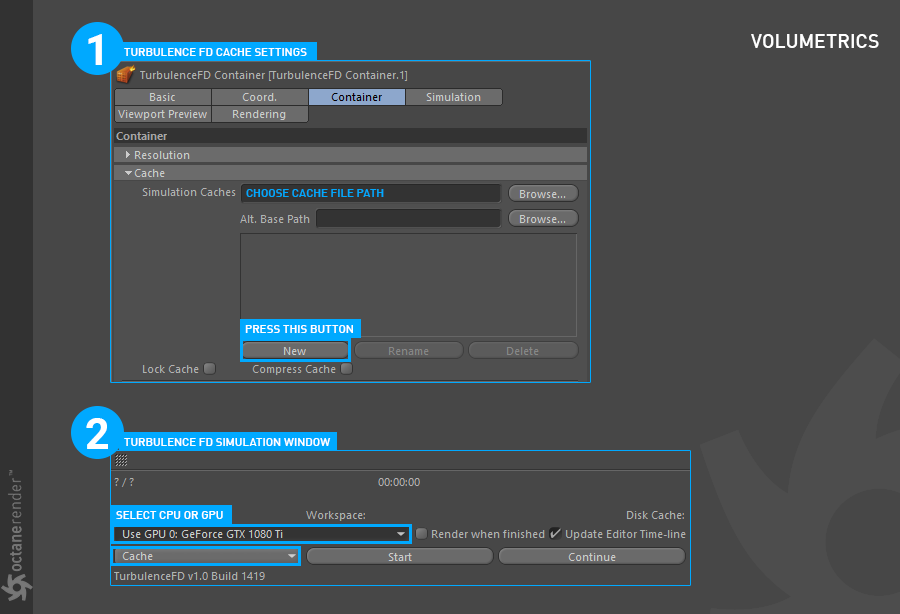
3- Set the Timeline duration to 300 frames and select "TurbulenceFD container" from the object manager. Change the parameters as you see in the images below.

4- The simulation results can be viewed in the viewport once the simulation has been processed. To do this, first select TurbulenceFD container from object manager and go to the cache tab from the container tab. From here, press "New" and select a fast hard drive (SSD if possible) to save the cache file. Then go to TurbulenceFD from the plugins menu and select "Simulation Window". Press "Start" and wait for it to finish.
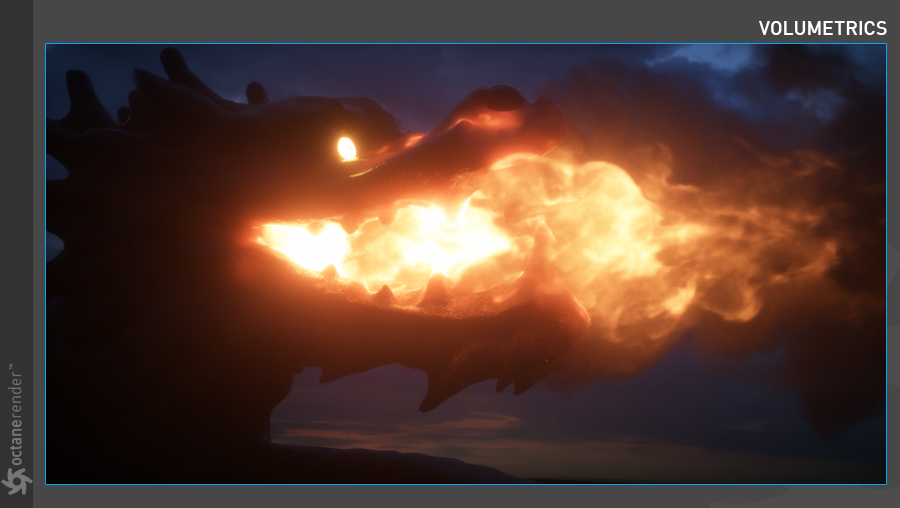
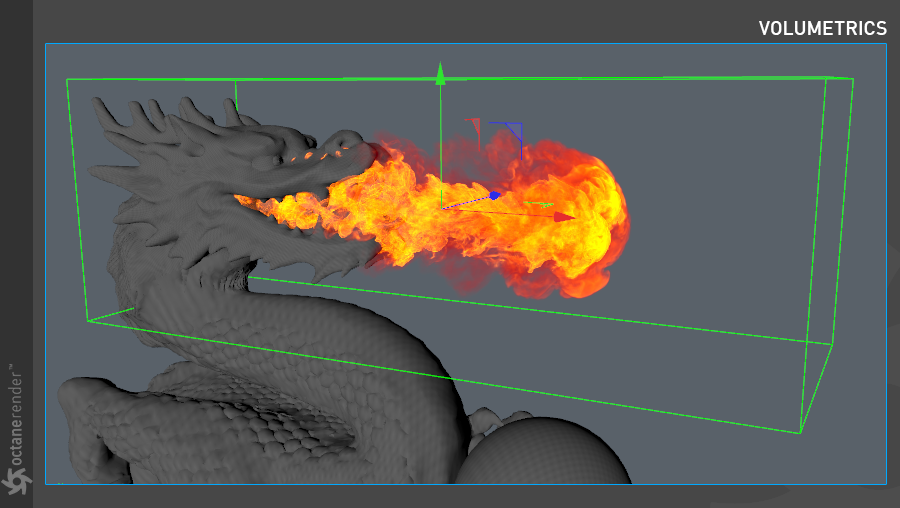
5- Once the simulation is finished, play it in the viewport. The result will look like the image below.
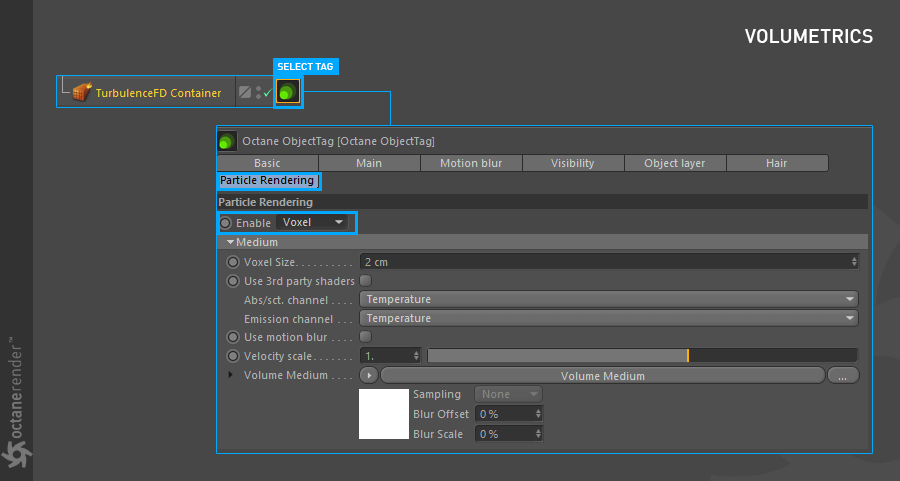
6- Go to the desired frame (e.g., 265) and select "TurbulenceFD Container" from the object manager. Right click and assign an Octane Object tag. Go to the Particle rendering tab in the Object tag settings. If it is not active, select "Voxel" from Enable. "Voxel size" sets the voxel resolution. "Abs / Sct." channel will be used in corresponding channels in the Volume medium, discussed below. "Use motion blur" is for simulating blur if velocity has been cached. "Velocity scale" increases motion blur effect.
Volume medium is how the fire is shaded when rendering. Set the Voxel size to 2, abs / sct and the emission channels to "temperature".
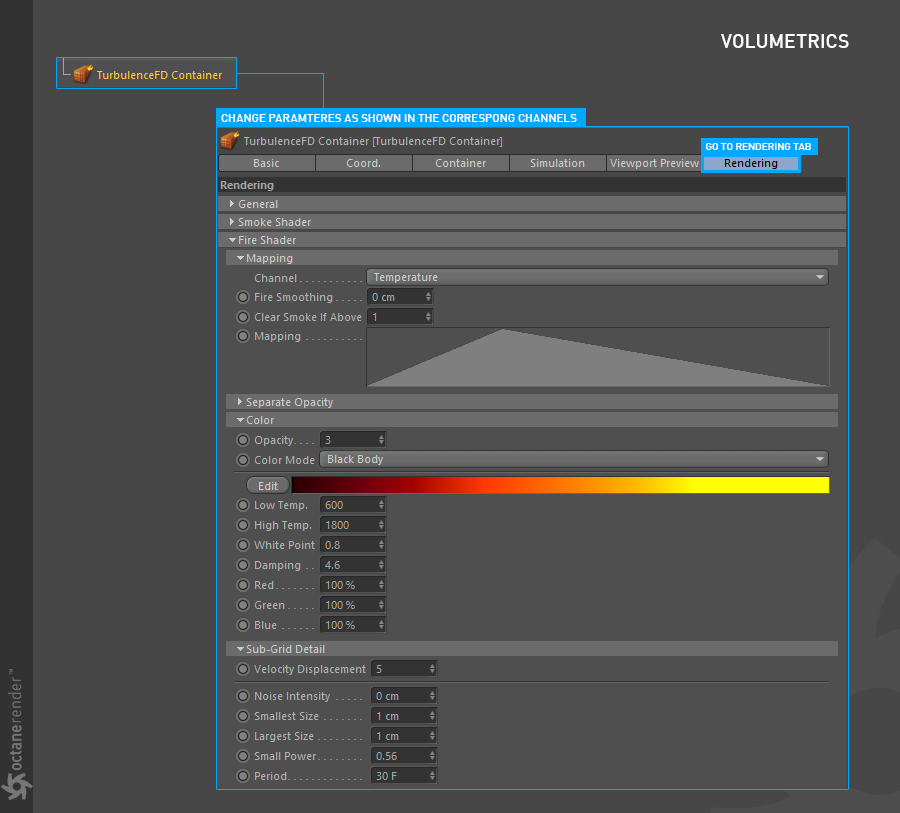
7- Click on Volume Medium and change the parameters as you see in the images below.


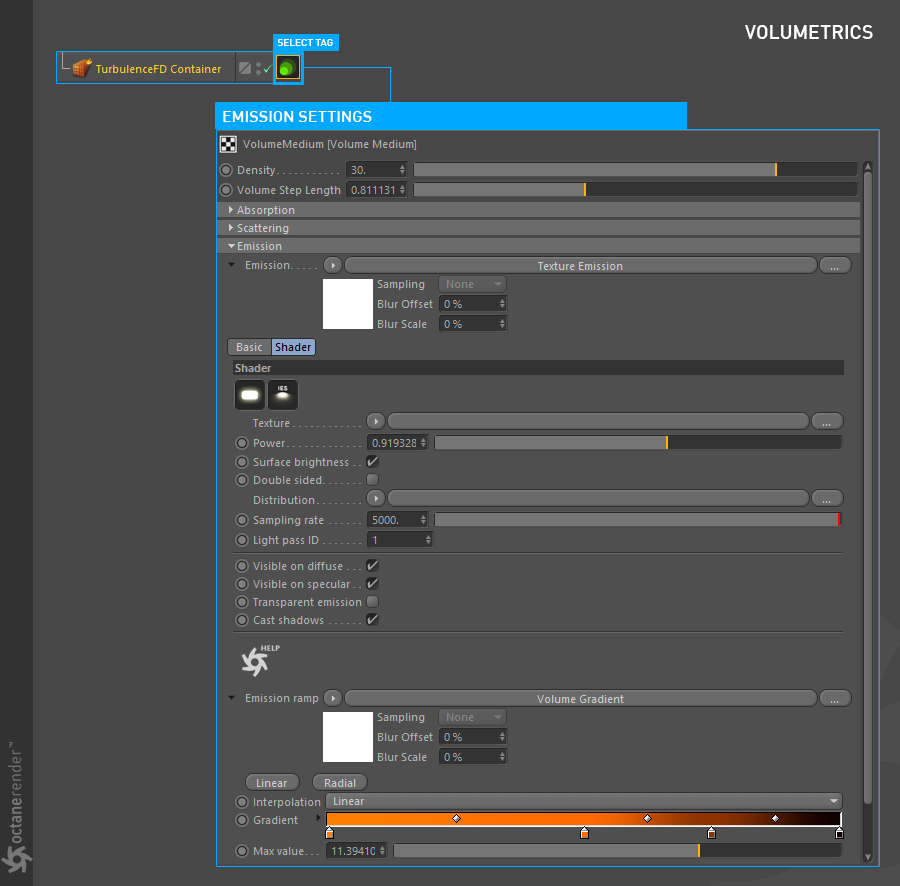
8- Now run Live Viewer. The results in Live Viewer should match the image below. The volume has been given a relatively low density to give the flames some transparency and detail and the Volume Step length set to make the smoke visible, but not overpowering. Decreasing the Volume Step Length will make the smoke more opaque. It might be necessary to adjust the Max value of the Emission volume gradient to control the brightness of the fire. Lower values will allow the fire to have greater detail before being over exposed. Combine that with the Emission Power to further control the brightness of the fire and balance the overall look.