DisplacementThe process of utilizing a 2D texture map to generate 3D surface relief. As opposed to bump and normal mapping, Displacement mapping does not only provide the illusion of depth but it effectively displaces the actual geometric position of points over the textured surface. mapping utilizes a 2D texture map to generate 3D surface relief. As opposed to Bump and Normal mapping, Displacement mapping provides the illusion of depth, and it displaces the actual geometric position of points over the textured surface. There are two types of displacement available with OctaneRender®: Texture Displacement, and Vertex Displacement.
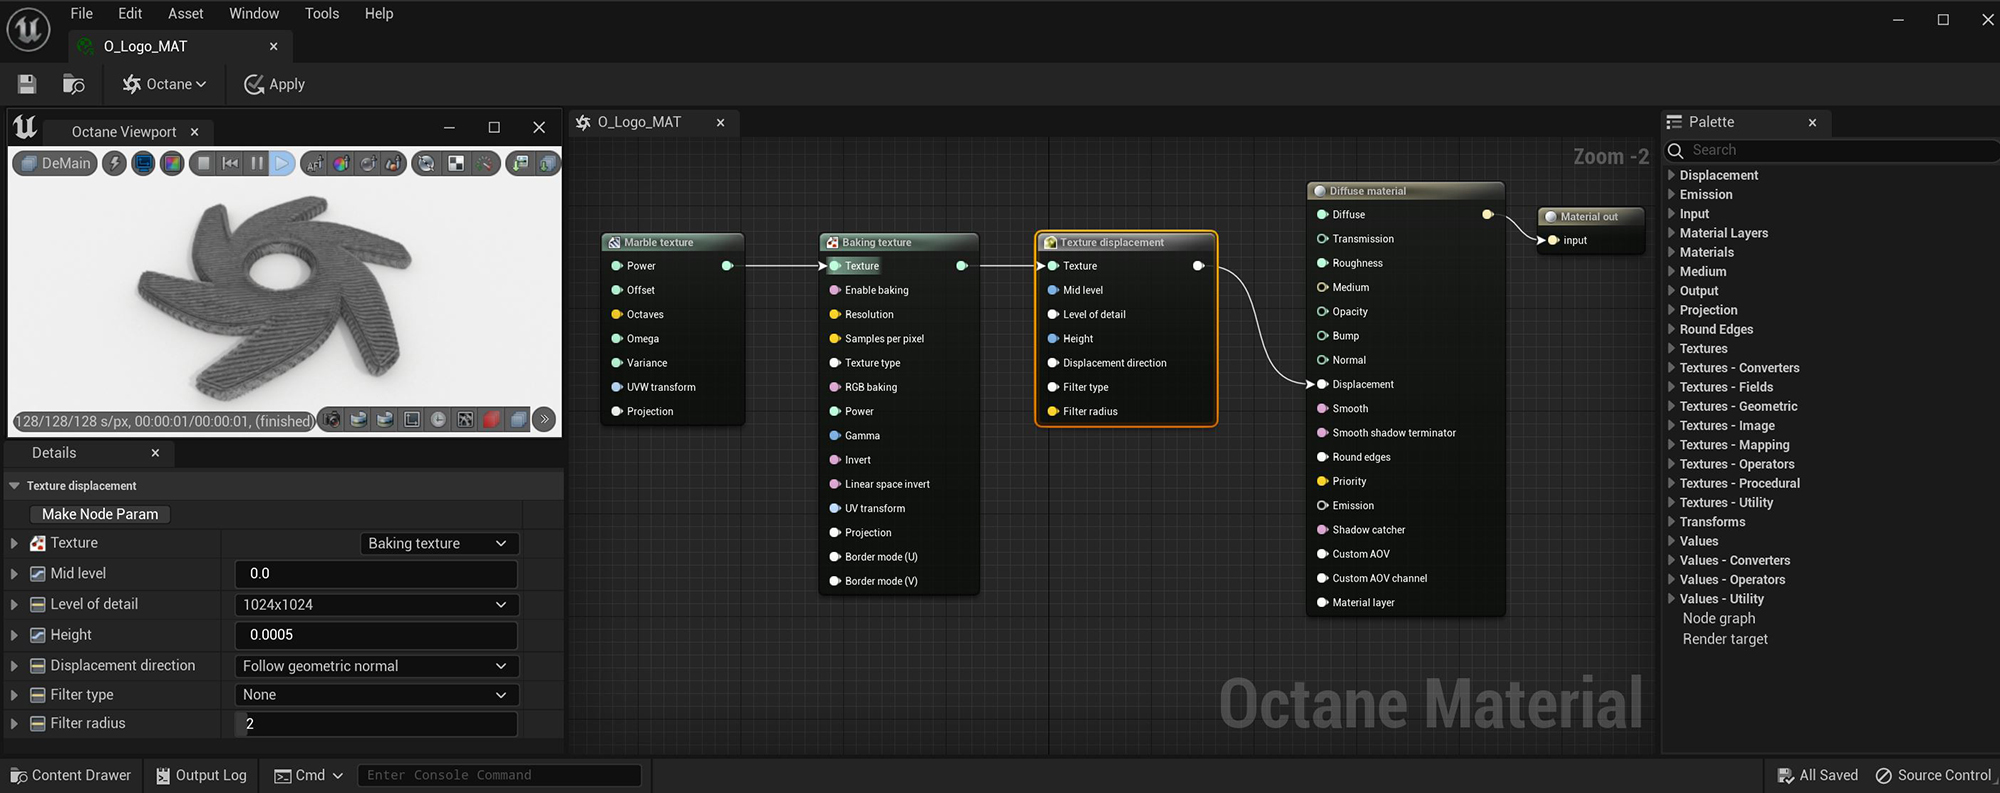
Texture Displacement is a shader effect that will use grayscale images or baked procedural textures to create new surface topology at render time (figure 1).
Figure 1: A baked Marble texture map used with the Texture Displacement node
Texture - Provides the Displacement map path. Displacement maps are Image textures generated in programs like ZBrush®, 3D Coat, Substance Designer, or Photoshop®.
Mid Level - Defines the Displacement shift in texture value range. Set this value to 0.5 for Image textures that use 50% to represent no displacement. For images (such as 32-bit EXRs) that use black to represent no displacement, set this value to 0. If you use a digital sculpting program like ZBrush® to generate Displacement, you can get the best results by setting Mid Level in the sculpting program to 0.5 when it generates displacement, and then set the Displacement node's Mid Level value to 0.5.
Level Of Detail - Adjusts map detail quality. Higher values reduce artifacts seen in shadows cast on the Displacement surface and brings out finer details, but it increases render time.
Height - Controls Displacement strength.
Displacement Direction - Provides options for Displacement vectors to use.
Filter Type - Determines the filter type to use on the displaced Texture map.
Filter Radius - Specifies the number of nearest pixels to use for the filtering. Higher values produce smoother displacement. This parameter is valid if you select a Filter Type.
Vertex level displacement uses Texture maps to move or displace an object's surface vertices (figure 2). The level of detail for this type of Displacement depends on the total number of vertices.
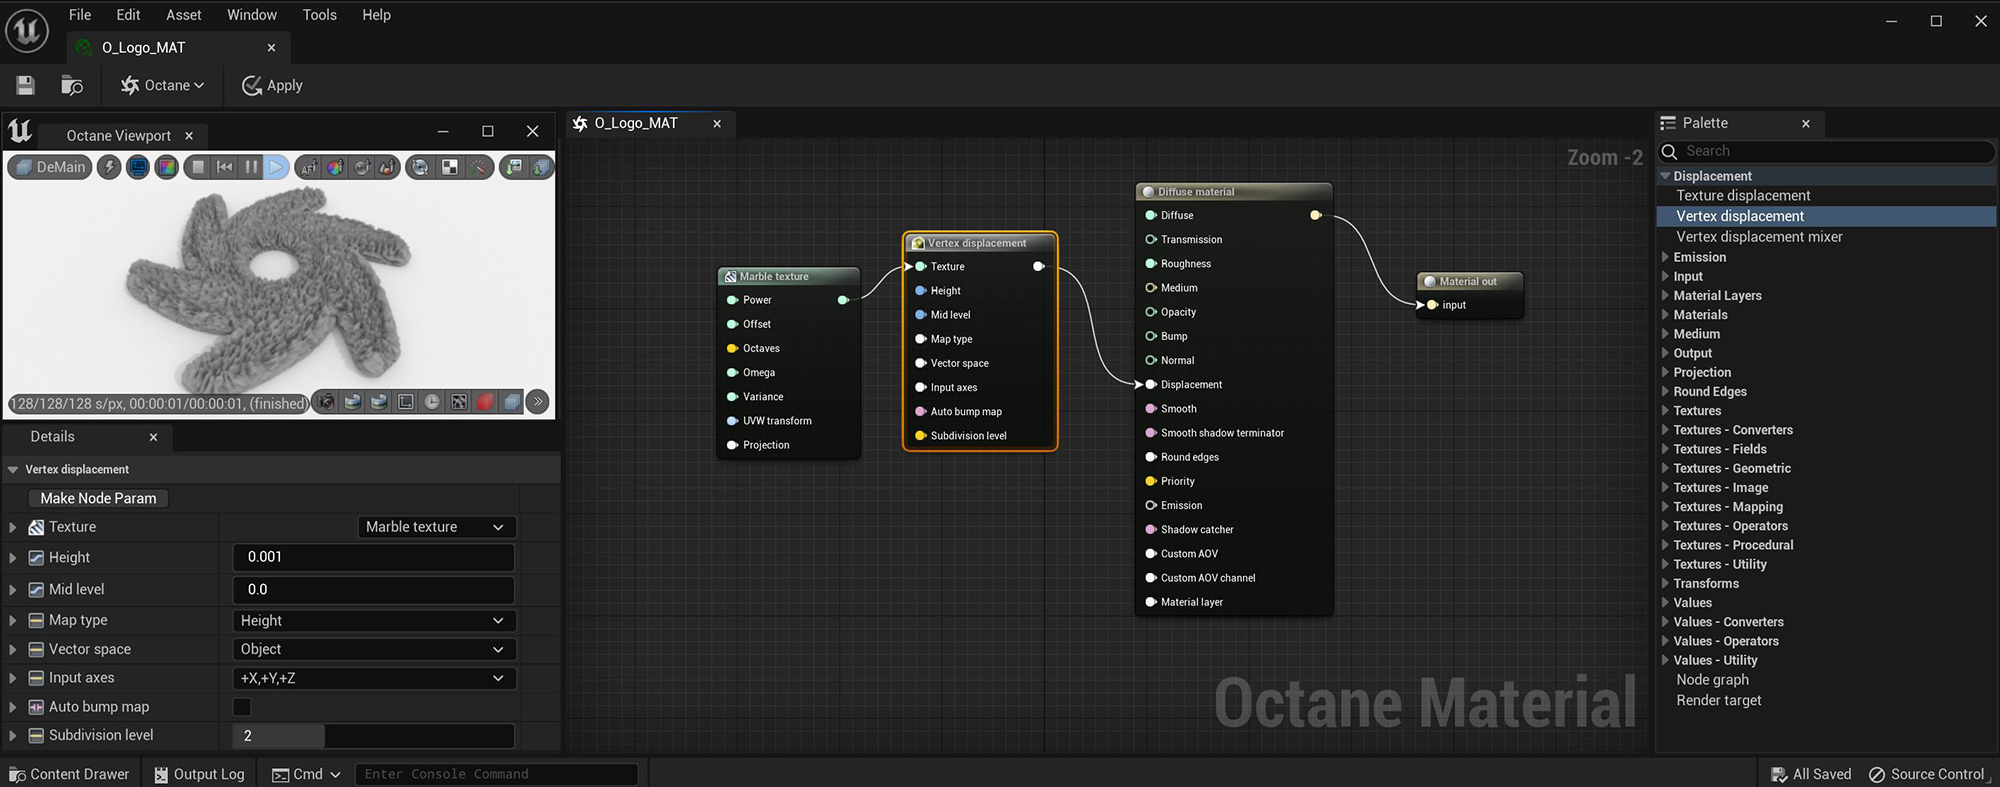
Figure 2: A Marble texture map used with the Vertex Displacement node
Texture - Provides the Displacement map path. Displacement maps are Image textures generated in programs like ZBrush, 3D Coat, Substance Designer, or Photoshop.
Height - Controls Displacement strength.
Mid Level - Defines the Displacement shift in the Texture's value range. Set this value to 0.5 for Image textures that use 50% to represent no displacement. For Images (such as 32-bit EXRs) that use black to represent no displacement, set this value to 0. If you use a digital sculpting program like ZBrush® to generate Displacement, you can get the best results by setting Mid Level in the sculpting program to 0.5 when it generates Displacement, and then set the Displacement node's Mid Level value to 0.5.
Map Type - The Displacement map input type.
Vector Space - The Vector displacement map space. This parameter is valid if Map Type is set to Vector.
Input Axis - Provides information regarding how to interpret RGB data, this setting is only valid with the Vector map type.
Auto Bump Map - Creates fine details with lower subdivision levels. This option works when the Map Type is set to Height.
Subdivision Level - Specifies the subdivision level to apply to geometry that uses this material.
The Vertex Displacement Mixer allows you to mix multiple Vertex Displacement nodes.
Add Input - Add a new Displacement input to the end of the node.
Remove Input - Removes the last Displacement input.
Displacement 1 - Connects a Vertex Displacement node.
Blend Weight 1 - Controls the mix amount of the connected Vertex Displacement node.