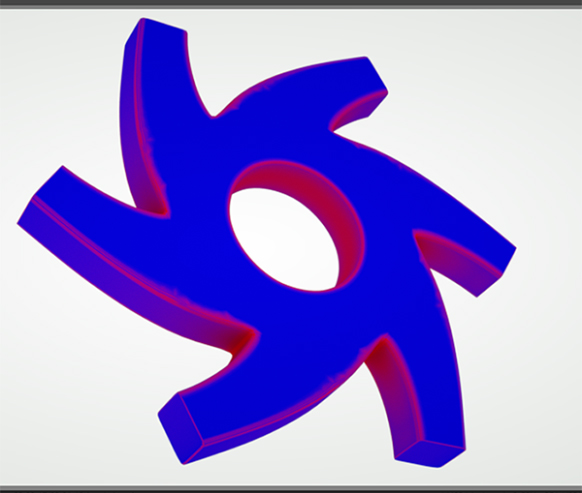
The Dirt texture creates different shading effects based on ambient occlusion calculations. This texture is useful for simulating dirt, dust, or wear and tear, as well as blending textures based on surface recesses (figure 1).
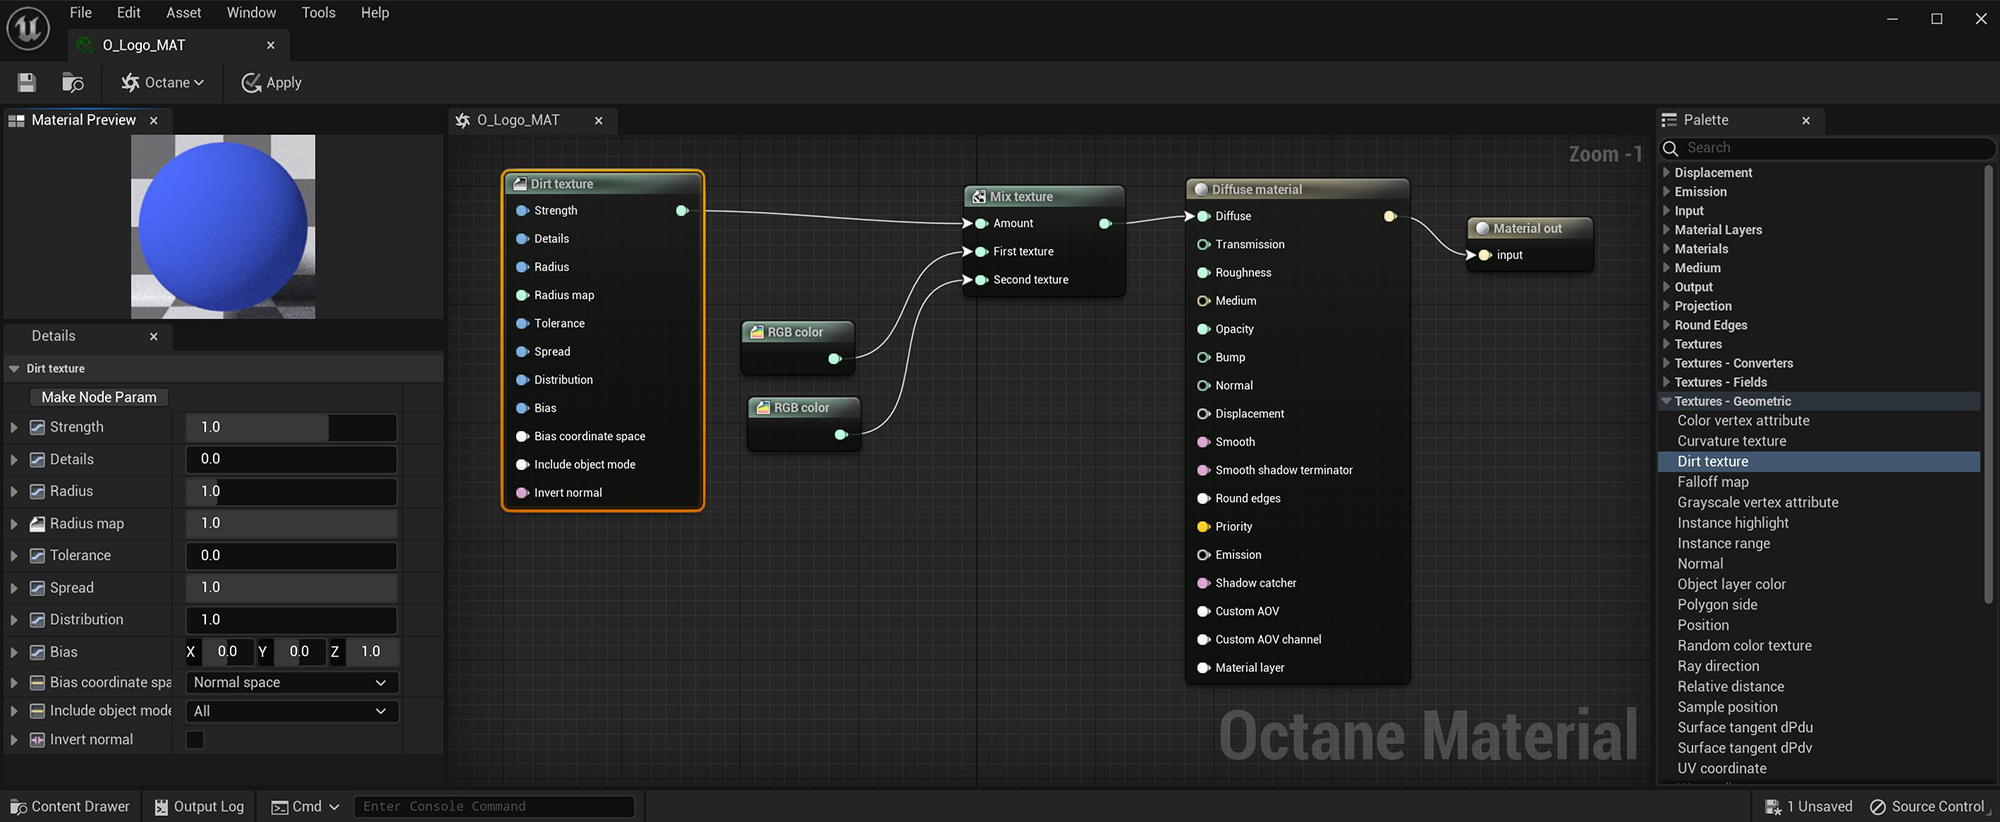
The Dirt texture is used often with the DiffuseAmount of diffusion, or the reflection of light photons at different angles from an uneven or granular surface. Used for dull, non-reflecting materials or mesh emitters., Bump, or TransmissionA surface characteristic that determines if light may pass through a surface volume. inputs on an OctaneRender® material (figure 2).

Figure 1: A Dirt texture used to mix two RGB Color nodes

Figure 2: The node layout for the illustration in Figure 1
Strength - Controls the Dirt intensity across the geometry surface.
Details - Controls the Details intensity.
Radius - Controls the dirt spread across the model's surface from the recessed parts towards the exposed parts.
Radius Map - Determines the proportion of the maximum area affected by the dirt texture.
Tolerance - Reduces black edges on rough tessellated meshes.
Spread - Controls the ray direction with respect to the normal of the surface. A value of 0 means the dirt direction is shot in the direction of the surface normal and a value of 1 shoots the dirt rays in all directions.
Distribution - Forces the rays to gather closer to the surface normal. A value of 1 is the equivalent to ambient occlusion on a diffuse surface. A value of 0 gathers the rays in the normal direction.
Bias - Any non-zero bias will be used as the shading normal to sample the dirt rays.
Bias Coordinate Space - Determines the coordinate space for the bias vector.
Include Object Mode - By default the mode is set to All, which considers all object intersections in the dirt calculation. If Self is selected, then only the ray-intersection with other objects is used for the dirt calculation.
Invert Normal - Reverses the Dirt texture effect based on the normal surface direction.