Open topic with navigation
Recorder
combines batch rendering and Play Mode to render animations in Play Mode and save the rendered images to disc (Figure 1). This works for animation built with the Unity® as well as animations triggered during gameplay. However, Recorder does not necessarily work in real-time because the scene needs compilation and rendering for OctaneRender®.
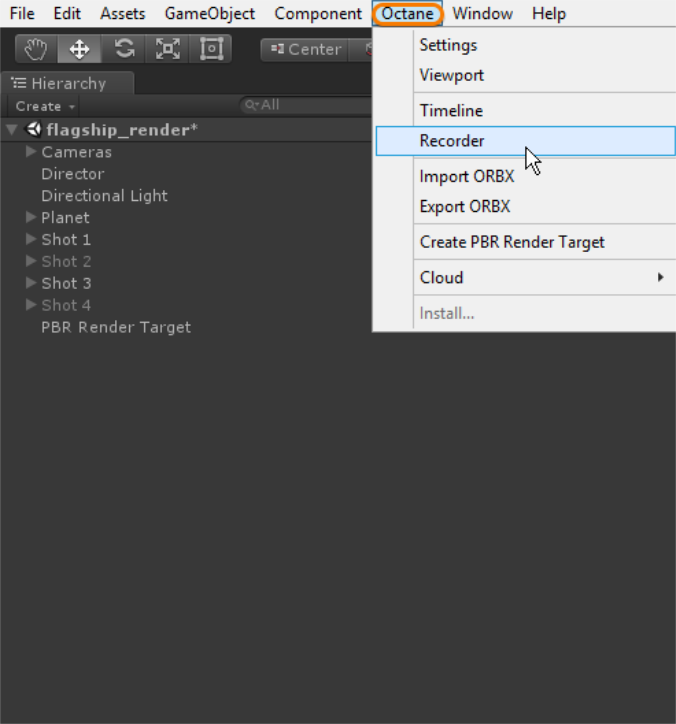
Figure 1: Accessing the Recorder from the Octane menu
To use Recorder with OctaneRender:
- Start with a scene that has animated elements. Make sure that OctaneRender is installed and loaded.
- Add a PBR Render Target and adjust the render settings accordingly.
- Open the Recorder window from the Octane menu.
- Set the appropriate preferences in the Recorder window.
- Press the Start button. The PBR viewport opens and OctaneRender compiles the scene. The scene then renders and updates once each render is complete, saving each frame to disc. If an animation is present, OctaneRender plays through the animation and the render similar to a batch render. If the game is playing, OctaneRender renders each frame of the game play. (Note: Real-time rendering may not be possible during game play mode.)
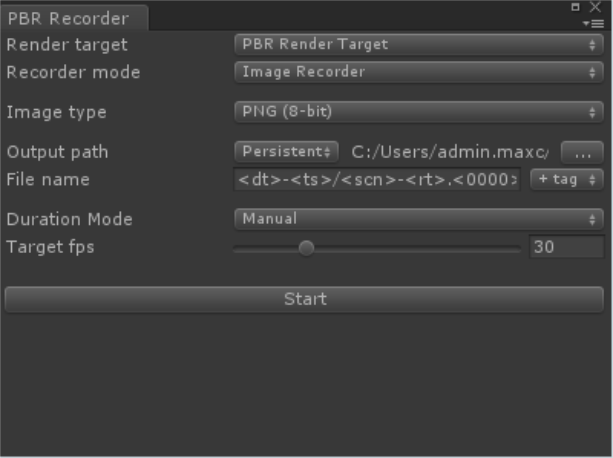
Figure 2: The Recorder window
Recorder Parameters
- Render Target - Choose from the available PBR Render Targets available in the Unity scene.
- Recorder Mode - Choose between Image and ® recording modes. The Image mode records an image sequence to typical image file formats, and the ORBX mode exports the scene for rendering in ORCTM or OctaneRender Standalone.
- Image Type - Determines the image format for the rendered sequence.
- Output Path - Specifies the location on disk to save the image sequence.
- File Name - Specifies the file name for each image in the rendered sequence.
- Duration Mode - Provides various options for rendering all frames or frame sequence intervals.
- Target FPS - Determines the frame rate that Recorder attempts to maintain during gameplay.
- Start - Executes the Recorder rendering process.
Open topic with navigation